oil change DODGE CHALLENGER 2023 Owners Manual
[x] Cancel search | Manufacturer: DODGE, Model Year: 2023, Model line: CHALLENGER, Model: DODGE CHALLENGER 2023Pages: 300, PDF Size: 12.82 MB
Page 5 of 300
3
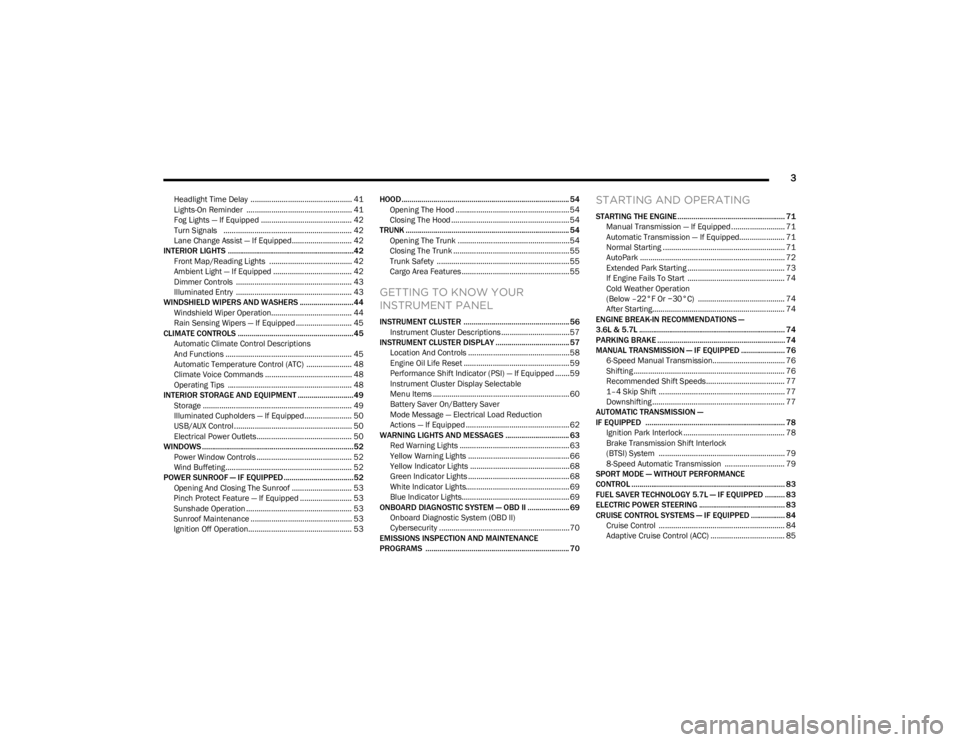
Headlight Time Delay ................................................. 41
Lights-On Reminder ................................................... 41
Fog Lights — If Equipped ............................................ 42
Turn Signals .............................................................. 42
Lane Change Assist — If Equipped............................. 42
INTERIOR LIGHTS ...............................................................42 Front Map/Reading Lights ........................................ 42
Ambient Light — If Equipped ...................................... 42
Dimmer Controls ........................................................ 43
Illuminated Entry ........................................................ 43
WINDSHIELD WIPERS AND WASHERS ........................... 44 Windshield Wiper Operation....................................... 44
Rain Sensing Wipers — If Equipped ........................... 45
CLIMATE CONTROLS ..........................................................45 Automatic Climate Control Descriptions
And Functions ............................................................. 45
Automatic Temperature Control (ATC) ...................... 48
Climate Voice Commands .......................................... 48
Operating Tips ............................................................ 48
INTERIOR STORAGE AND EQUIPMENT ............................49 Storage ........................................................................ 49
Illuminated Cupholders — If Equipped....................... 50
USB/AUX Control ......................................................... 50
Electrical Power Outlets.............................................. 50
WINDOWS ............................................................................52 Power Window Controls .............................................. 52
Wind Buffeting............................................................. 52
POWER SUNROOF — IF EQUIPPED ...................................52 Opening And Closing The Sunroof ............................. 53
Pinch Protect Feature — If Equipped ......................... 53
Sunshade Operation ................................................... 53
Sunroof Maintenance ................................................. 53
Ignition Off Operation.................................................. 53 HOOD.................................................................................... 54
Opening The Hood .......................................................54
Closing The Hood ......................................................... 54
TRUNK .................................................................................. 54 Opening The Trunk ......................................................54
Closing The Trunk ........................................................ 55
Trunk Safety ................................................................ 55
Cargo Area Features.................................................... 55
GETTING TO KNOW YOUR
INSTRUMENT PANEL
INSTRUMENT CLUSTER ..................................................... 56 Instrument Cluster Descriptions ................................. 57
INSTRUMENT CLUSTER DISPLAY ..................................... 57 Location And Controls ................................................. 58
Engine Oil Life Reset ................................................... 59
Performance Shift Indicator (PSI) — If Equipped ....... 59
Instrument Cluster Display Selectable
Menu Items .................................................................. 60
Battery Saver On/Battery Saver
Mode Message — Electrical Load Reduction
Actions — If Equipped .................................................. 62
WARNING LIGHTS AND MESSAGES ................................ 63 Red Warning Lights ..................................................... 63
Yellow Warning Lights ................................................. 66
Yellow Indicator Lights ................................................ 68
Green Indicator Lights ................................................. 68
White Indicator Lights.................................................. 69
Blue Indicator Lights.................................................... 69
ONBOARD DIAGNOSTIC SYSTEM — OBD II ..................... 69 Onboard Diagnostic System (OBD II)
Cybersecurity ...............................................................70
EMISSIONS INSPECTION AND MAINTENANCE
PROGRAMS ........................................................................ 70
STARTING AND OPERATING
STARTING THE ENGINE...................................................... 71 Manual Transmission — If Equipped .......................... 71
Automatic Transmission — If Equipped...................... 71
Normal Starting ........................................................... 71
AutoPark ...................................................................... 72
Extended Park Starting ............................................... 73
If Engine Fails To Start ............................................... 74
Cold Weather Operation
(Below –22°F Or −30°C) .......................................... 74
After Starting................................................................ 74
ENGINE BREAK-IN RECOMMENDATIONS —
3.6L & 5.7L ......................................................................... 74
PARKING BRAKE ................................................................ 74
MANUAL TRANSMISSION — IF EQUIPPED ...................... 76 6-Speed Manual Transmission................................... 76
Shifting ......................................................................... 76
Recommended Shift Speeds ...................................... 77
1–4 Skip Shift ............................................................. 77
Downshifting ................................................................ 77
AUTOMATIC TRANSMISSION —
IF EQUIPPED ...................................................................... 78 Ignition Park Interlock ................................................. 78
Brake Transmission Shift Interlock
(BTSI) System ............................................................. 79
8-Speed Automatic Transmission ............................. 79
SPORT MODE — WITHOUT PERFORMANCE
CONTROL ............................................................................. 83
FUEL SAVER TECHNOLOGY 5.7L — IF EQUIPPED .......... 83
ELECTRIC POWER STEERING ........................................... 83
CRUISE CONTROL SYSTEMS — IF EQUIPPED ................. 84 Cruise Control ............................................................. 84
Adaptive Cruise Control (ACC) .................................... 85
23_LA_OM_EN_USC_t.book Page 3
Page 61 of 300
GETTING TO KNOW YOUR INSTRUMENT PANEL59
For the Trip and Fuel Economy menus (and Performance
Timers) — If Equipped:
Information is reset by pushing and holding the OK
button.
ENGINE OIL LIFE RESET
Use this QR code to access your digital
experience .
Oil Change Required
Your vehicle is equipped with an
engine oil change indicator system.
The “Oil Change Required” message
will display in the instrument cluster
display for five seconds after a single
chime has sounded, to indicate the next scheduled oil
change interval. The engine oil change indicator system is
duty cycle based, which means the engine oil change
interval may fluctuate, dependent upon your personal
driving style.
Unless reset, this message will continue to display each
time you place the ignition in the ON/RUN position. To turn
off the message temporarily, push and release the OK or
arrow buttons. To reset the oil change indicator system
(after performing the scheduled maintenance), refer to
the following procedure. Vehicles Equipped With Keyless Enter ‘n Go™ — Ignition
Use the steering wheel instrument cluster display controls
for the following procedure(s):
1. Without pressing the brake pedal, push the ENGINE
START/STOP button and place the ignition in the
ON/RUN position (do not start the engine).
2. Push and release the down arrow button to scroll
downward through the main menu to “Vehicle Info.”
3. Push and release the right arrow button to access
the ”Oil Life” screen.
4. Push and hold the OK button to reset oil life. If
conditions are met, the gauge and numeric display
will update to show 100%. If conditions are not met a
pop-up message of "To reset oil life engine must be
off with ignition in run” will be displayed (for five
seconds), and the user will remain at the Oil Life
screen.
5. Push and release the up or down arrow button
to return to previous main menu.
NOTE:If the indicator message illuminates when you start the
vehicle, the oil change indicator system did not reset. If
necessary, repeat this procedure. Secondary Method Of Resetting Engine Oil Life
1. Without pressing the brake pedal, push the ENGINE
START/STOP button and place the ignition to the
ON/RUN position (do not start the engine).
2. Fully press the accelerator pedal, slowly, three times within ten seconds.
3. Without pushing the brake pedal, push the ENGINE START/STOP button once to return the ignition to the
OFF position.
NOTE:If the indicator message illuminates when you start the
vehicle, the oil change indicator system did not reset.
If necessary, repeat this procedure.
PERFORMANCE SHIFT INDICATOR
(PSI) — I
F EQUIPPED
The PSI is enabled on vehicles with manual transmission,
or when a vehicle with automatic transmission is in
manual shift mode. The PSI provides the driver with a
visual indication within the instrument cluster display
when the driver configured gear shift point has been
reached and the driver is still accelerating. This indication
notifies the driver to change gear corresponding to the
configured RPMs in the head unit.
3
23_LA_OM_EN_USC_t.book Page 59
Page 76 of 300

74STARTING AND OPERATING
IF ENGINE FAILS TO START
If the engine fails to start after you have followed the
“Normal Starting” and the vehicle has not experienced an
extended park condition as defined previously, it may be
flooded. Push the accelerator pedal all the way to the floor
and hold it there. Crank the engine for no more than
10 seconds. This should clear any excess fuel in case the
engine is flooded. Leave the ignition key in the ON/RUN
position, release the accelerator pedal and repeat the
“Normal Starting” procedure.
COLD WEATHER OPERATION
(BELOW –22°F OR −30°C)
To ensure reliable starting at these temperatures, use of
an externally powered electric engine block heater
(available from an authorized dealer) is recommended.
AFTER STARTING
The idle speed is controlled automatically, and it will
decrease as the engine warms up.
ENGINE BREAK-IN RECOMMENDATIONS —
3.6L & 5.7L
A long break-in period is not required for the drivetrain
(engine, transmission, clutch, and rear axle) in your new
vehicle.
Drive moderately during the first 300 miles (500 km).
After the initial 60 miles (100 km), speeds up to 50 or
55 mph (80 or 90 km/h) are desirable.
While cruising, brief full-throttle acceleration within the
limits of local traffic laws contributes to a good break-in.
However, wide-open throttle acceleration in low gear can
be detrimental and should be avoided. The engine oil, transmission fluid, and axle lubricant
installed at the factory are high-quality and
energy-conserving. Oil, fluid, and lubricant changes should
be consistent with anticipated climate and conditions
under which vehicle operations will occur. For the
recommended viscosity and quality grades
Úpage 278.
NOTE:A new engine may consume some oil during its first few
thousand miles (kilometers) of operation. This should be
considered a normal part of the break-in and not inter
-
preted as an indication of difficulty. Please check your oil
level with the engine oil indicator often during the break in
period. Add oil as required.
PARKING BRAKE
Before leaving the vehicle, make sure that the parking
brake is fully applied and place the gear selector in the
PARK or REVERSE (manual transmission only) position.
When the parking brake is applied and the ignition switch
is in the ON/RUN position, the Brake Warning Light in the
instrument cluster will illuminate.
WARNING!
Never pour fuel or other flammable liquid into the
throttle body air inlet opening in an attempt to start
the vehicle. This could result in flash fire causing
serious personal injury.
Do not attempt to push or tow your vehicle to get it
started. Vehicles equipped with an automatic trans -
mission cannot be started this way. Unburned fuel
could enter the catalytic converter and once the
engine has started, ignite and damage the converter
and vehicle.
If the vehicle has a discharged battery, booster
cables may be used to obtain a start from a booster
battery or the battery in another vehicle. This type of
start can be dangerous if done improperly
Úpage 216.
CAUTION!
To prevent damage to the starter, do not continuously
crank the engine for more than 10 seconds at a time.
Wait 10 to 15 seconds before trying again.
CAUTION!
Never use Non-Detergent Oil or Straight Mineral Oil in
the engine or damage may result.
23_LA_OM_EN_USC_t.book Page 74
Page 200 of 300

198SAFETY
PERIODIC SAFETY CHECKS YOU SHOULD
M
AKE OUTSIDE THE VEHICLE
Tires
Examine tires for excessive tread wear and uneven wear
patterns. Check for stones, nails, glass, or other objects
lodged in the tread or sidewall. Inspect the tread for cuts
and cracks. Inspect sidewalls for cuts, cracks, and bulges.
Check the lug nuts/bolt torque for tightness. Check the
tires (including spare) for proper cold inflation pressure.
Lights
Have someone observe the operation of brake lights and
exterior lights while you work the controls. Check turn
signal and high beam indicator lights on the instrument
panel.
Door Latches
Check for proper closing, latching, and locking.
Fluid Leaks
Check area under the vehicle after overnight parking for
fuel, coolant, oil, or other fluid leaks. Also, if gasoline
fumes are detected or if fuel or brake fluid leaks are
suspected, the cause should be located and corrected
immediately.
EXHAUST GAS
The best protection against carbon monoxide entry into
the vehicle body is a properly maintained engine exhaust
system. Whenever a change is noticed in the sound of the exhaust
system, when exhaust fumes can be detected inside the
vehicle, or when the underside or rear of the vehicle is
damaged, have an authorized dealer inspect the complete
exhaust system and adjacent body areas for broken,
damaged, deteriorated, or mispositioned parts. Open
seams or loose connections could permit exhaust fumes
to seep into the passenger compartment. In addition,
inspect the exhaust system each time the vehicle is raised
for lubrication or oil change. Replace as required.
CARBON MONOXIDE WARNINGS
WARNING!
Exhaust gases can injure or kill. They contain carbon
monoxide (CO), which is colorless and odorless.
Breathing it can make you unconscious and can
eventually poison you. To avoid breathing (CO), follow
these safety tips:
Do not run the engine in a closed garage or in
confined areas any longer than needed to move your
vehicle in or out of the area.
If you are required to drive with the trunk/liftgate/
rear doors open, make sure that all windows are
closed and the climate control BLOWER switch is set
at high speed. DO NOT use the recirculation mode.
If it is necessary to sit in a parked vehicle with the
engine running, adjust your heating or cooling
controls to force outside air into the vehicle. Set the
blower at high speed.
WARNING!
Carbon monoxide (CO) in exhaust gases is deadly.
Follow the precautions below to prevent carbon
monoxide poisoning:
Do not inhale exhaust gases. They contain carbon
monoxide, a colorless and odorless gas, which can
kill. Never run the engine in a closed area, such as a
garage, and never sit in a parked vehicle with the
engine running for an extended period. If the vehicle
is stopped in an open area with the engine running
for more than a short period, adjust the ventilation
system to force fresh, outside air into the vehicle.
Guard against carbon monoxide with proper mainte -
nance. Have the exhaust system inspected every
time the vehicle is raised. Have any abnormal condi -
tions repaired promptly. Until repaired, drive with all
side windows fully open.
23_LA_OM_EN_USC_t.book Page 198
Page 225 of 300
223
SERVICING AND MAINTENANCE
SCHEDULED SERVICING
3.6L AND 5.7L ENGINES
These engines are equipped with an automatic oil change
indicator system. The oil change indicator system will
remind you that it is time to take your vehicle in for
scheduled maintenance.Based on engine operation conditions, the oil change
indicator message will illuminate. This means that service
is required for the vehicle. Operating conditions such as
frequent short-trips, trailer tow, and extremely hot or cold
ambient temperatures will influence when the “Change
Oil” or “Oil Change Required” message is displayed. Have
your vehicle serviced as soon as possible, within the next
500 miles (805 km).
The “Oil Change Required” message will be displayed in
the instrument cluster and a single chime will sound,
indicating that an oil change is necessary.
An authorized dealer will reset the oil change indicator
message after completing the scheduled oil change.
NOTE:Under no circumstances should oil change intervals
exceed 10,000 miles (16,000 km), 12 months or
350 hours of engine run time, whichever comes first.
The 350 hours of engine run or idle time is generally only
a concern for fleet customers.Once A Month Or Before A Long Trip:
Check engine oil level.
Check windshield washer fluid level.
Check tire pressure and look for unusual wear or
damage. Rotate tires at the first sign of irregular wear,
even if it occurs before your next scheduled service.
Check the fluid levels of the coolant reservoir, brake
master cylinder, and power steering (if equipped) and
fill as needed.
Check function of all interior and exterior lights.
8
23_LA_OM_EN_USC_t.book Page 223
Page 226 of 300
224SERVICING AND MAINTENANCE
Maintenance Plan — 3.6L And 5.7L
Refer to the maintenance chart for the required
maintenance intervals.
At Every Oil Change Interval As Indicated By Oil Change Indicator System
Change oil and filter.
Rotate the tires at the first sign of irregular wear, even if it occurs before your next scheduled service.
Inspect battery and clean and tighten terminals as required.
Inspect the CV/Universal joints.
Inspect brake pads, shoes, rotors, drums, hoses and parking brake.
Inspect engine cooling system protection and hoses.
Inspect exhaust system.
Inspect engine air cleaner filter if using in dusty or off-road conditions, replace engine air cleaner filter if necessary.
23_LA_OM_EN_USC_t.book Page 224
Page 233 of 300
SERVICING AND MAINTENANCE231
MAINTENANCE-FREE BATTERY
Your vehicle is equipped with a maintenance-free battery.
Water will never have to be added, and periodic
maintenance is not required.
NOTE:The battery is stored under an access cover in the trunk.
Remote battery terminals are located in the engine
compartment for jump starting
Úpage 216.
PRESSURE WASHING
Cleaning the engine compartment with a high pressure
washer is not recommended.
VEHICLE MAINTENANCE
An authorized dealer has the qualified service personnel,
special tools, and equipment to perform all service
operations in an expert manner. Service Manuals are available which include detailed
service information for your vehicle. Refer to these Service
Manuals before attempting any procedure yourself.
NOTE:Intentional tampering with emissions control systems may
void your warranty and could result in civil penalties being
assessed against you.
ENGINE OIL
Engine Oil Selection
Use only the manufacturer's recommended fluids Úpage 278.
NOTE:Hemi engines at times can tick right after startup and then
quiet down after approximately 30 seconds. This is normal
and will not harm the engine. This characteristic can be
caused by short drive cycles: for example, if the vehicle is
started then shut off after driving a short distance. Upon
restarting, you may experience a ticking sound. Other
causes could be if the vehicle is unused for an extended
period of time, incorrect oil, extended oil changes or
extended idling. If the engine continues to tick or if the
Malfunction Indicator Light (MIL) comes on, see the
nearest authorized dealer.
WARNING!
Battery fluid is a corrosive acid solution and can burn
or even blind you. Do not allow battery fluid to
contact your eyes, skin, or clothing. Do not lean over
a battery when attaching clamps. If acid splashes in
eyes or on skin, flush the area immediately with large
amounts of water
Úpage 216.
Battery gas is flammable and explosive. Keep flame
or sparks away from the battery. Do not use a
booster battery or any other booster source with an
output greater than 12 Volts. Do not allow cable
clamps to touch each other.
Battery posts, terminals, and related accessories
contain lead and lead compounds. Wash hands after
handling.
The battery in this vehicle has a vent hose that
should not be disconnected and should only be
replaced with a battery of the same type (vented).
CAUTION!
It is essential when replacing the cables on the
battery that the positive cable is attached to the posi -
tive post and the negative cable is attached to the
negative post. Battery posts are marked positive (+)
and negative (-) and are identified on the battery
case. Cable clamps should be tight on the terminal
posts and free of corrosion.
If a “fast charger” is used while the battery is in the
vehicle, disconnect both vehicle battery cables
before connecting the charger to the battery. Do not
use a “fast charger” to provide starting voltage.
CAUTION!
Precautions have been taken to safeguard all parts and
connections however, the pressures generated by these
machines is such that complete protection against
water ingress cannot be guaranteed.
WARNING!
You can be badly injured working on or around a motor
vehicle. Only do service work for which you have the
knowledge and the proper equipment. If you have any
doubt about your ability to perform a service job, take
your vehicle to a competent mechanic.
8
23_LA_OM_EN_USC_t.book Page 231
Page 235 of 300
SERVICING AND MAINTENANCE233
3. Using water and mild detergent, clean the following
locations:
The water drain slot located at the front forward
edge of the Shaker assembly.
The seals attached to the scoop and air box.
Lower water drains located in the lower Shaker
assembly and air box as well as the hood interface
areas for the seals. Apply Mopar® Leather,
Rubber & Vinyl Protectant after cleaning the seals.
4. Reinstall Shaker assembly.
Materials Added To Engine Oil
The manufacturer strongly recommends against the
addition of any additives (other than leak detection dyes)
to the engine oil. Engine oil is an engineered product and
its performance may be impaired by supplemental
additives.
Disposing Of Used Engine Oil And Oil
Filters
Care should be taken in disposing of used engine oil and
oil filters from your vehicle. Used oil and oil filters,
indiscriminately discarded, can present a problem to the
environment. Contact an authorized dealer, service
station or governmental agency for advice on how and
where used oil and oil filters can be safely discarded in
your area.
ENGINE OIL FILTER
The engine oil filter should be replaced with a new filter at
every engine oil change.
Engine Oil Filter Selection
A full-flow type disposable oil filter should be used for
replacement. The quality of replacement filters varies
considerably. Only high quality Mopar® certified filters
should be used. If a Mopar® Engine Oil Filter is
unavailable, only use filters that meet or exceed
SAE/USCAR-36 Filter Performance Requirements.
ENGINE AIR CLEANER FILTER
For the proper maintenance intervals Úpage 224.
NOTE:Be sure to follow the “Severe Duty Conditions” mainte -
nance interval if applicable. Engine Air Cleaner Filter Selection
The quality of replacement filters varies considerably. Only
high quality Mopar® certified filters should be used.
T/A Air Filter Maintenance — If Equipped
Clean Engine Air Filter
T/A air filters are made of a unique, washable material.
Follow the recommended service interval as for non-T/A
air filters, substituting a cleaning for replacement.
Cleaning your engine air filter with the recommended
Mopar® Performance Air Filter Service Kit is not required
if you can still see any part of the wire screen on the entire
air filter regardless of how dirty it may appear. When any
part of the wire screen is no longer visible on the air filter,
that is an indication it is time to clean the air filter.
For cleaning instructions see steps 1-7 from the Shaker
Hood Air Filter Cleaning section
Úpage 232.
Unique for T/A, using the Mopar® Performance Air Filter
Service Kit, spray oil evenly along the crown of each filter
pleat holding the nozzle about 3 inches (76 mm) away
from the air filter. One spray per 2 square inches
(1,290 square mm) of air filter. With one complete coat of
oil, let it wick (saturate) for about 20 minutes, and if
required touch up any light areas on either side of the
filter.
WARNING!
The air induction system (air cleaner, hoses, etc.) can
provide a measure of protection in the case of engine
backfire. Do not remove the air induction system (air
cleaner, hoses, etc.) unless such removal is necessary
for repair or maintenance. Make sure that no one is
near the engine compartment before starting the
vehicle with the air induction system (air cleaner, hoses,
etc.) removed. Failure to do so can result in serious
personal injury.
8
23_LA_OM_EN_USC_t.book Page 233
Page 239 of 300
SERVICING AND MAINTENANCE237
EXHAUST SYSTEM
The best protection against carbon monoxide entry into
the vehicle body is a properly maintained engine exhaust
system.
If you notice a change in the sound of the exhaust system;
or if the exhaust fumes can be detected inside the vehicle;
or when the underside or rear of the vehicle is damaged;
have an authorized technician inspect the complete
exhaust system and adjacent body areas for broken,
damaged, deteriorated, or mispositioned parts. Open
seams or loose connections could permit exhaust fumes
to seep into the passenger compartment. In addition, have
the exhaust system inspected each time the vehicle is
raised for lubrication or oil change. Replace as required.
Under normal operating conditions, the catalytic converter
will not require maintenance. However, it is important to
keep the engine properly tuned to ensure proper catalyst
operation and prevent possible catalyst damage.
NOTE:Intentional tampering with emissions control systems can
result in civil penalties being assessed against you.
In unusual situations involving grossly malfunctioning
engine operation, a scorching odor may suggest severe
and abnormal catalyst overheating. If this occurs, stop the
vehicle, turn off the engine and allow it to cool. Service,
including a tune-up to manufacturer's specifications,
should be obtained immediately.To minimize the possibility of catalytic converter damage:
Do not shut off the engine or interrupt the ignition when
the transmission is in gear and the vehicle is in motion.
Do not try to start the engine by pushing or towing the
vehicle.
Do not idle the engine with any spark plug wires discon -
nected or removed, such as when diagnostic testing, or
for prolonged periods during very rough idle or malfunc -
tioning operating conditions.
NOTE:The vehicle exhaust system may be equipped with an Elec -
tronic Exhaust Valve (EEV) system, if the exhaust system is
replaced with aftermarket products a Malfunction Indi -
cator Lamp (MIL) will illuminate.
COOLING SYSTEM WARNING!
Exhaust gases can injure or kill. They contain carbon
monoxide (CO), which is colorless and odorless.
Breathing it can make you unconscious and can
eventually poison you. To avoid breathing CO,
Úpage 196.
A hot exhaust system can start a fire if you park over
materials that can burn. Such materials might be
grass or leaves coming into contact with your
exhaust system. Do not park or operate your vehicle
in areas where your exhaust system can contact
anything that can burn.
CAUTION!
The catalytic converter requires the use of unleaded
fuel only. Leaded gasoline will destroy the effective -
ness of the catalyst as an emissions control device
and may seriously reduce engine performance and
cause serious damage to the engine.
Damage to the catalytic converter can result if your
vehicle is not kept in proper operating condition. In
the event of engine malfunction, particularly
involving engine misfire or other apparent loss of
performance, have your vehicle serviced promptly.
Continued operation of your vehicle with a severe
malfunction could cause the converter to overheat,
resulting in possible damage to the converter and
vehicle.
WARNING!
You or others can be badly burned by hot engine
coolant (antifreeze) or steam from your radiator. If
you see or hear steam coming from under the hood,
do not open the hood until the radiator has had time
to cool. Never open a cooling system pressure cap
when the radiator or coolant bottle is hot.
Keep hands, tools, clothing, and jewelry away from
the radiator cooling fan when the hood is raised. The
fan starts automatically and may start at any time,
whether the engine is running or not.
When working near the radiator cooling fan, discon -
nect the fan motor lead or turn the ignition to the OFF
position. The fan is temperature controlled and can
start at any time the ignition is in the ON position.
8
23_LA_OM_EN_USC_t.book Page 237
Page 242 of 300
240SERVICING AND MAINTENANCE
BRAKE SYSTEM
In order to ensure brake system performance, all brake
system components should be inspected periodically
Úpage 224.
Fluid Level Check — Brake Master Cylinder
Check the fluid level in the master cylinder immediately if
the Brake System Warning Light indicates system failure.
Check the fluid level in the master cylinder when
performing underhood services.
Clean the top of the master cylinder area before removing
the cap. Add fluid to bring the level up to the top of the
“FULL” mark on the side of the master cylinder reservoir.
Overfilling of fluid is not recommended because it may
cause leaking in the system.
Add enough fluid to bring the level up to the requirements
described on the brake fluid reservoir. With disc brakes,
fluid level can be expected to fall as the brake pads wear.
However, low fluid level may be caused by a leak and a
checkup may be needed. Use only brake fluid that has been recommended by the
manufacturer, and has been kept in a tightly closed
container to avoid contamination from foreign matter or
moisture
Úpage 278.
CLUTCH HYDRAULIC SYSTEM — MANUAL
T
RANSMISSION (IF EQUIPPED)
The clutch hydraulic system is fed by a segregated volume
of fluid within the brake system master cylinder reservoir.
In the event of leakage or wear, use only the
manufacturer's recommended brake fluid
Úpage 278.
MANUAL TRANSMISSION — IF EQUIPPED
Fluid Level Check
Check the fluid level by removing the fill plug on the left
side of the transmission. The fluid level should be
1/4 inch (6.4mm) below the bottom of the fill hole.
Add fluid, if necessary, to maintain the proper level
Úpage 278.
Change Transmission Fluid
If contaminated with water, change the fluid immediately.
See an authorized dealer for service.
For the proper maintenance intervals
Úpage 224.
WARNING!
Riding the brakes can lead to brake failure and possibly
a collision. Driving with your foot resting or riding on the
brake pedal can result in abnormally high brake
temperatures, excessive lining wear, and possible brake
damage. You would not have your full braking capacity
in an emergency.
WARNING!
Use only manufacturer's recommended brake fluid Úpage 278. Using the wrong type of brake fluid can
severely damage your brake system and/or impair its
performance. The proper type of brake fluid for your
vehicle is also identified on the original factory
installed hydraulic master cylinder reservoir.
To avoid contamination from foreign matter or mois -
ture, use only new brake fluid or fluid that has been
in a tightly closed container. Keep the master
cylinder reservoir cap secured at all times. Brake
fluid in a open container absorbs moisture from the
air resulting in a lower boiling point. This may cause
it to boil unexpectedly during hard or prolonged
braking, resulting in sudden brake failure. This could
result in a collision.
Overfilling the brake fluid reservoir can result in
spilling brake fluid on hot engine parts, causing the
brake fluid to catch fire. Brake fluid can also damage
painted and vinyl surfaces, care should be taken to
avoid its contact with these surfaces.
Do not allow petroleum based fluid to contaminate
the brake fluid. Brake seal components could be
damaged, causing partial or complete brake failure.
This could result in a collision.
CAUTION!
Using a transmission fluid other than the
manufacturer's recommended fluid may cause
deterioration in transmission shift quality and/or
damage to the transmission
Úpage 278.
23_LA_OM_EN_USC_t.book Page 240