power DODGE CHALLENGER SRT 2018 User Guide
[x] Cancel search | Manufacturer: DODGE, Model Year: 2018, Model line: CHALLENGER SRT, Model: DODGE CHALLENGER SRT 2018Pages: 486, PDF Size: 4.56 MB
Page 36 of 486
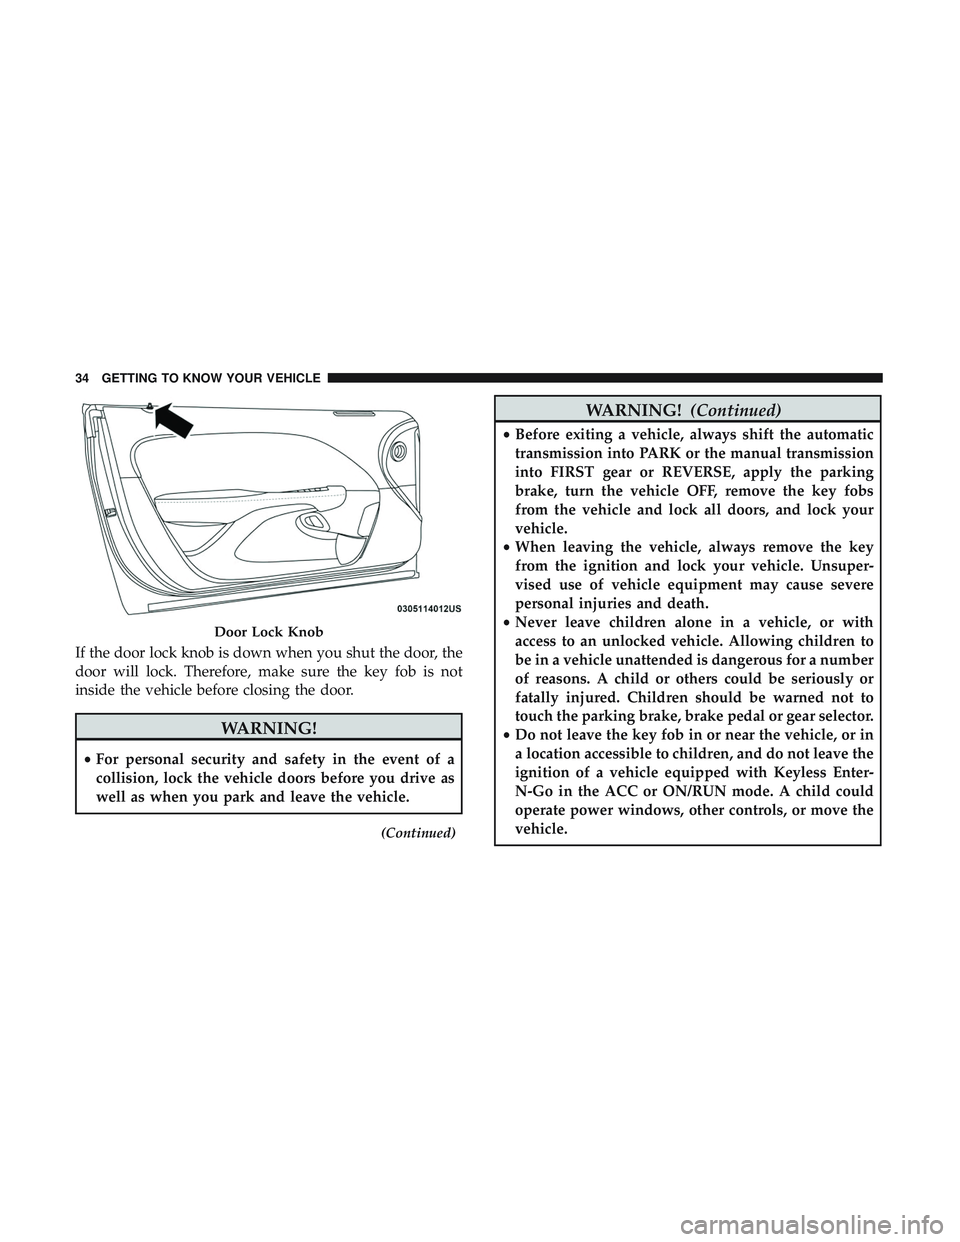
If the door lock knob is down when you shut the door, the
door will lock. Therefore, make sure the key fob is not
inside the vehicle before closing the door.
WARNING!
•For personal security and safety in the event of a
collision, lock the vehicle doors before you drive as
well as when you park and leave the vehicle.
(Continued)
WARNING! (Continued)
•Before exiting a vehicle, always shift the automatic
transmission into PARK or the manual transmission
into FIRST gear or REVERSE, apply the parking
brake, turn the vehicle OFF, remove the key fobs
from the vehicle and lock all doors, and lock your
vehicle.
• When leaving the vehicle, always remove the key
from the ignition and lock your vehicle. Unsuper-
vised use of vehicle equipment may cause severe
personal injuries and death.
• Never leave children alone in a vehicle, or with
access to an unlocked vehicle. Allowing children to
be in a vehicle unattended is dangerous for a number
of reasons. A child or others could be seriously or
fatally injured. Children should be warned not to
touch the parking brake, brake pedal or gear selector.
• Do not leave the key fob in or near the vehicle, or in
a location accessible to children, and do not leave the
ignition of a vehicle equipped with Keyless Enter-
N-Go in the ACC or ON/RUN mode. A child could
operate power windows, other controls, or move the
vehicle.
Door Lock Knob
34 GETTING TO KNOW YOUR VEHICLE
Page 37 of 486
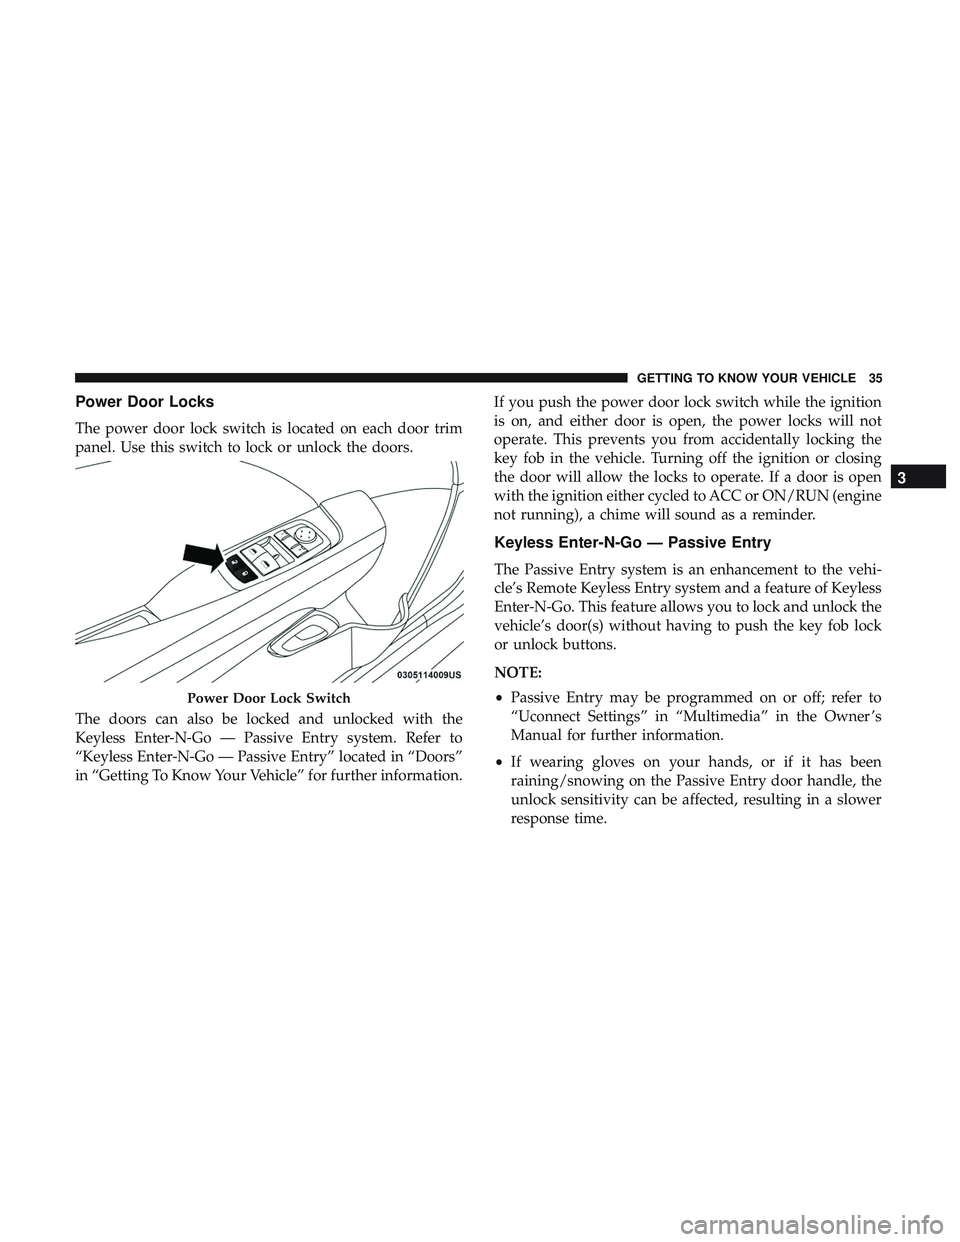
Power Door Locks
The power door lock switch is located on each door trim
panel. Use this switch to lock or unlock the doors.
The doors can also be locked and unlocked with the
Keyless Enter-N-Go — Passive Entry system. Refer to
“Keyless Enter-N-Go — Passive Entry” located in “Doors”
in “Getting To Know Your Vehicle” for further information.If you push the power door lock switch while the ignition
is on, and either door is open, the power locks will not
operate. This prevents you from accidentally locking the
key fob in the vehicle. Turning off the ignition or closing
the door will allow the locks to operate. If a door is open
with the ignition either cycled to ACC or ON/RUN (engine
not running), a chime will sound as a reminder.
Keyless Enter-N-Go — Passive Entry
The Passive Entry system is an enhancement to the vehi-
cle’s Remote Keyless Entry system and a feature of Keyless
Enter-N-Go. This feature allows you to lock and unlock the
vehicle’s door(s) without having to push the key fob lock
or unlock buttons.
NOTE:
•
Passive Entry may be programmed on or off; refer to
“Uconnect Settings” in “Multimedia” in the Owner ’s
Manual for further information.
• If wearing gloves on your hands, or if it has been
raining/snowing on the Passive Entry door handle, the
unlock sensitivity can be affected, resulting in a slower
response time.
Power Door Lock Switch
3
GETTING TO KNOW YOUR VEHICLE 35
Page 41 of 486
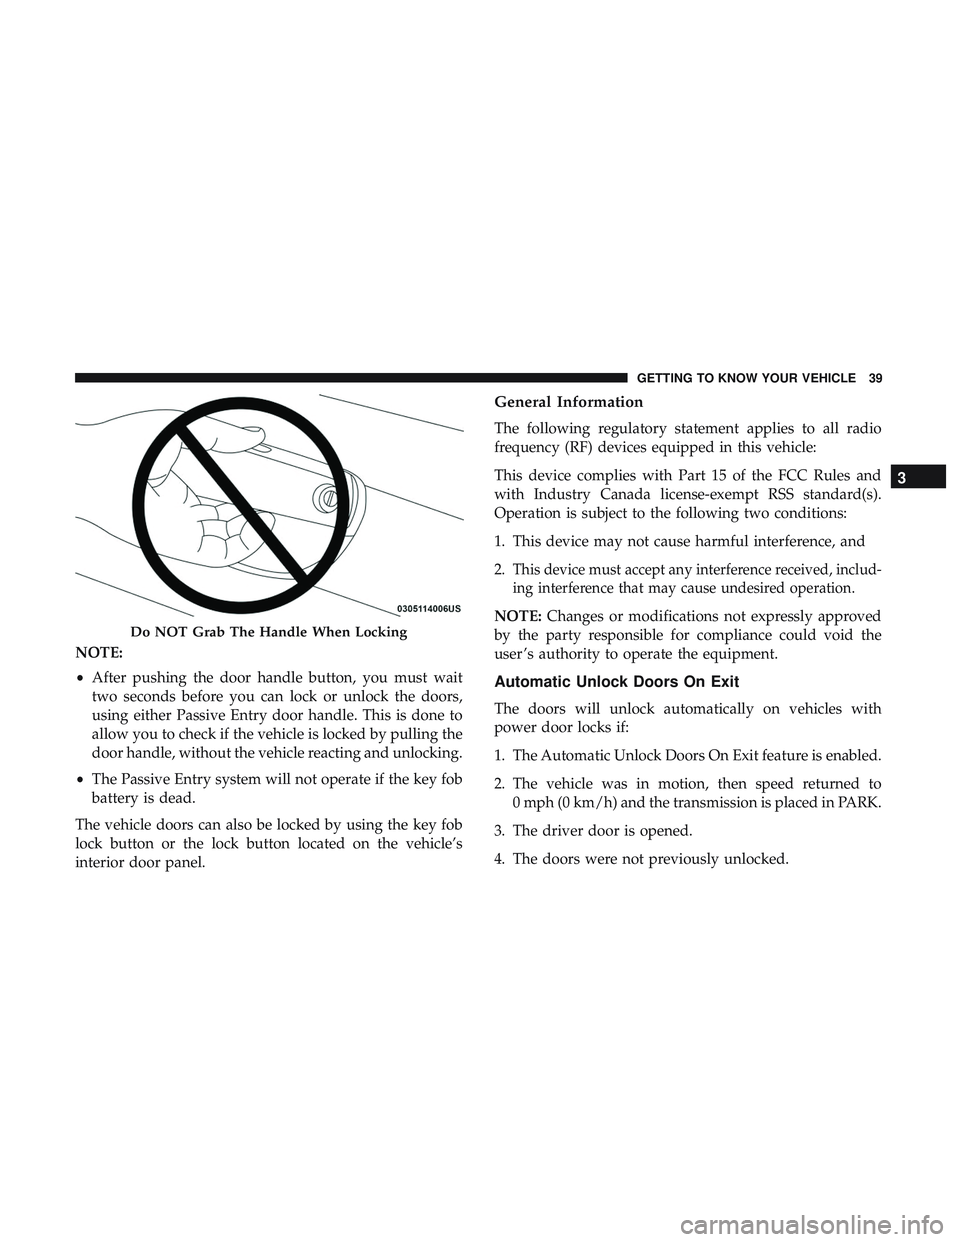
NOTE:
•After pushing the door handle button, you must wait
two seconds before you can lock or unlock the doors,
using either Passive Entry door handle. This is done to
allow you to check if the vehicle is locked by pulling the
door handle, without the vehicle reacting and unlocking.
• The Passive Entry system will not operate if the key fob
battery is dead.
The vehicle doors can also be locked by using the key fob
lock button or the lock button located on the vehicle’s
interior door panel.
General Information
The following regulatory statement applies to all radio
frequency (RF) devices equipped in this vehicle:
This device complies with Part 15 of the FCC Rules and
with Industry Canada license-exempt RSS standard(s).
Operation is subject to the following two conditions:
1. This device may not cause harmful interference, and
2.
This device must accept any interference received, includ-
ing interference that may cause undesired operation.
NOTE: Changes or modifications not expressly approved
by the party responsible for compliance could void the
user ’s authority to operate the equipment.
Automatic Unlock Doors On Exit
The doors will unlock automatically on vehicles with
power door locks if:
1. The Automatic Unlock Doors On Exit feature is enabled.
2. The vehicle was in motion, then speed returned to 0 mph (0 km/h) and the transmission is placed in PARK.
3. The driver door is opened.
4. The doors were not previously unlocked.
Do NOT Grab The Handle When Locking
3
GETTING TO KNOW YOUR VEHICLE 39
Page 44 of 486
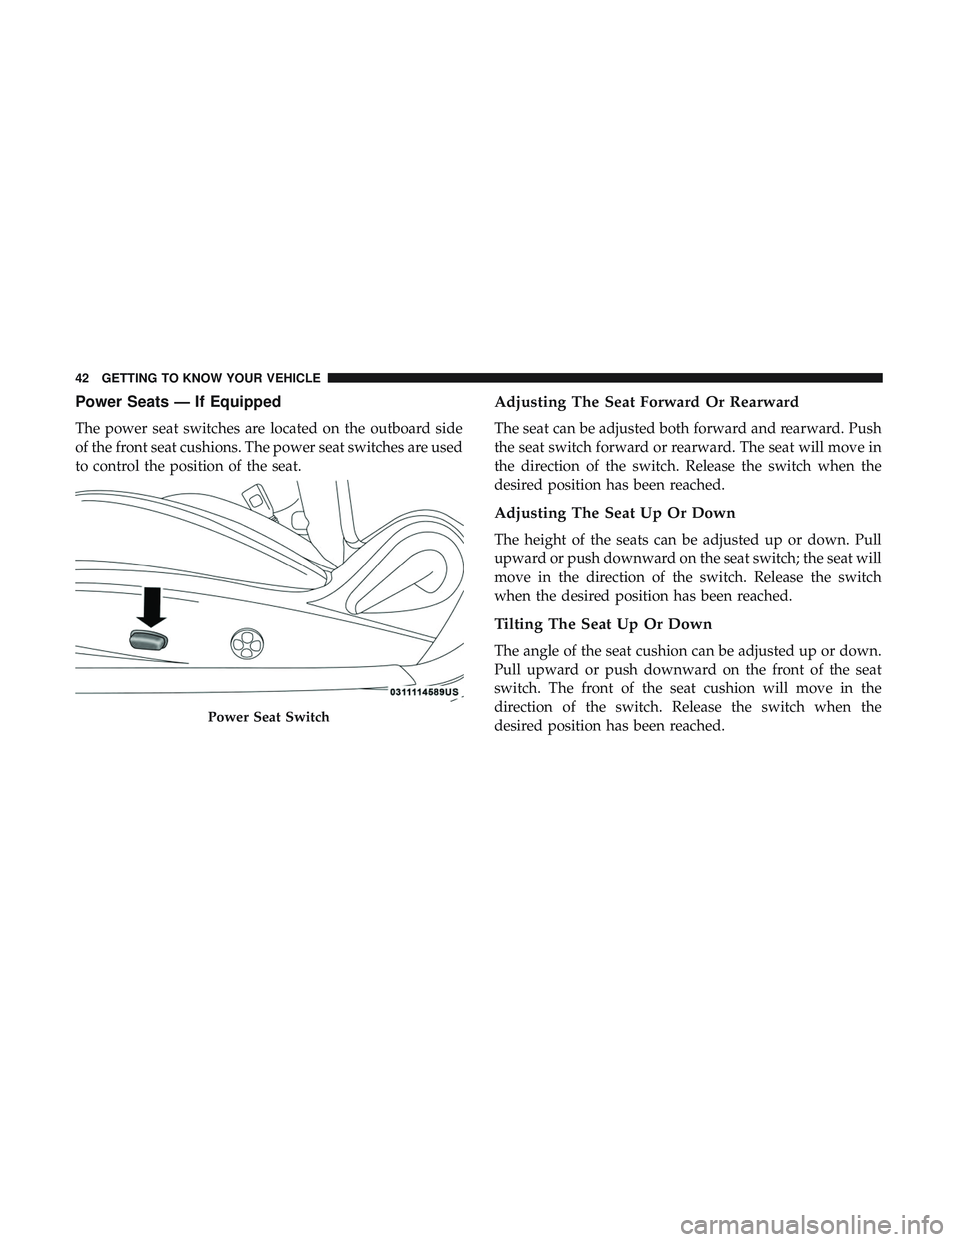
Power Seats — If Equipped
The power seat switches are located on the outboard side
of the front seat cushions. The power seat switches are used
to control the position of the seat.
Adjusting The Seat Forward Or Rearward
The seat can be adjusted both forward and rearward. Push
the seat switch forward or rearward. The seat will move in
the direction of the switch. Release the switch when the
desired position has been reached.
Adjusting The Seat Up Or Down
The height of the seats can be adjusted up or down. Pull
upward or push downward on the seat switch; the seat will
move in the direction of the switch. Release the switch
when the desired position has been reached.
Tilting The Seat Up Or Down
The angle of the seat cushion can be adjusted up or down.
Pull upward or push downward on the front of the seat
switch. The front of the seat cushion will move in the
direction of the switch. Release the switch when the
desired position has been reached.
Power Seat Switch
42 GETTING TO KNOW YOUR VEHICLE
Page 45 of 486
Power Lumbar — If Equipped
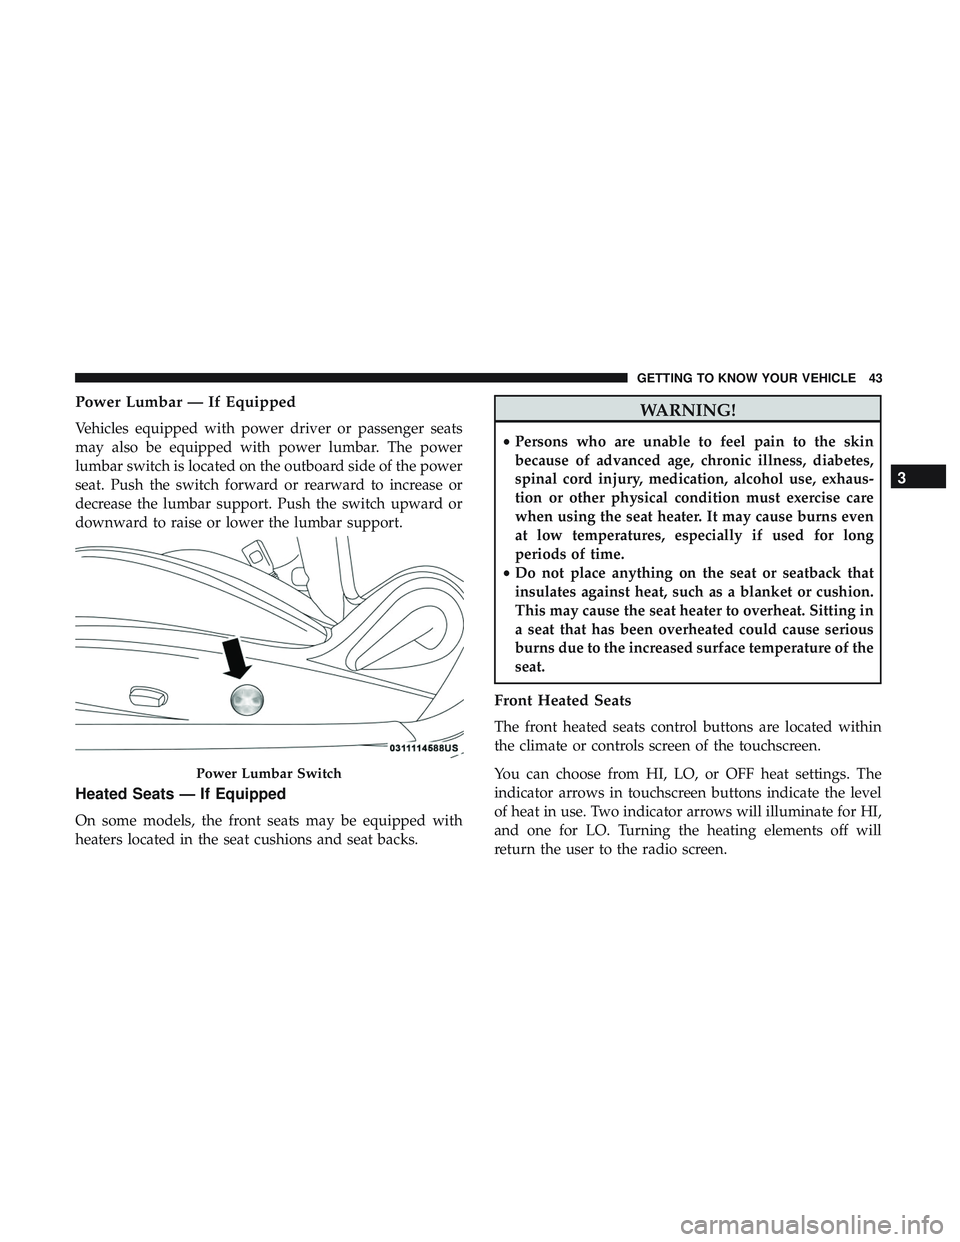
Vehicles equipped with power driver or passenger seats
may also be equipped with power lumbar. The power
lumbar switch is located on the outboard side of the power
seat. Push the switch forward or rearward to increase or
decrease the lumbar support. Push the switch upward or
downward to raise or lower the lumbar support.
Heated Seats — If Equipped
On some models, the front seats may be equipped with
heaters located in the seat cushions and seat backs.
WARNING!
•Persons who are unable to feel pain to the skin
because of advanced age, chronic illness, diabetes,
spinal cord injury, medication, alcohol use, exhaus-
tion or other physical condition must exercise care
when using the seat heater. It may cause burns even
at low temperatures, especially if used for long
periods of time.
• Do not place anything on the seat or seatback that
insulates against heat, such as a blanket or cushion.
This may cause the seat heater to overheat. Sitting in
a seat that has been overheated could cause serious
burns due to the increased surface temperature of the
seat.
Front Heated Seats
The front heated seats control buttons are located within
the climate or controls screen of the touchscreen.
You can choose from HI, LO, or OFF heat settings. The
indicator arrows in touchscreen buttons indicate the level
of heat in use. Two indicator arrows will illuminate for HI,
and one for LO. Turning the heating elements off will
return the user to the radio screen.
Power Lumbar Switch
3
GETTING TO KNOW YOUR VEHICLE 43
Page 54 of 486
STEERING WHEEL
Manual Tilt/Telescoping Steering Column
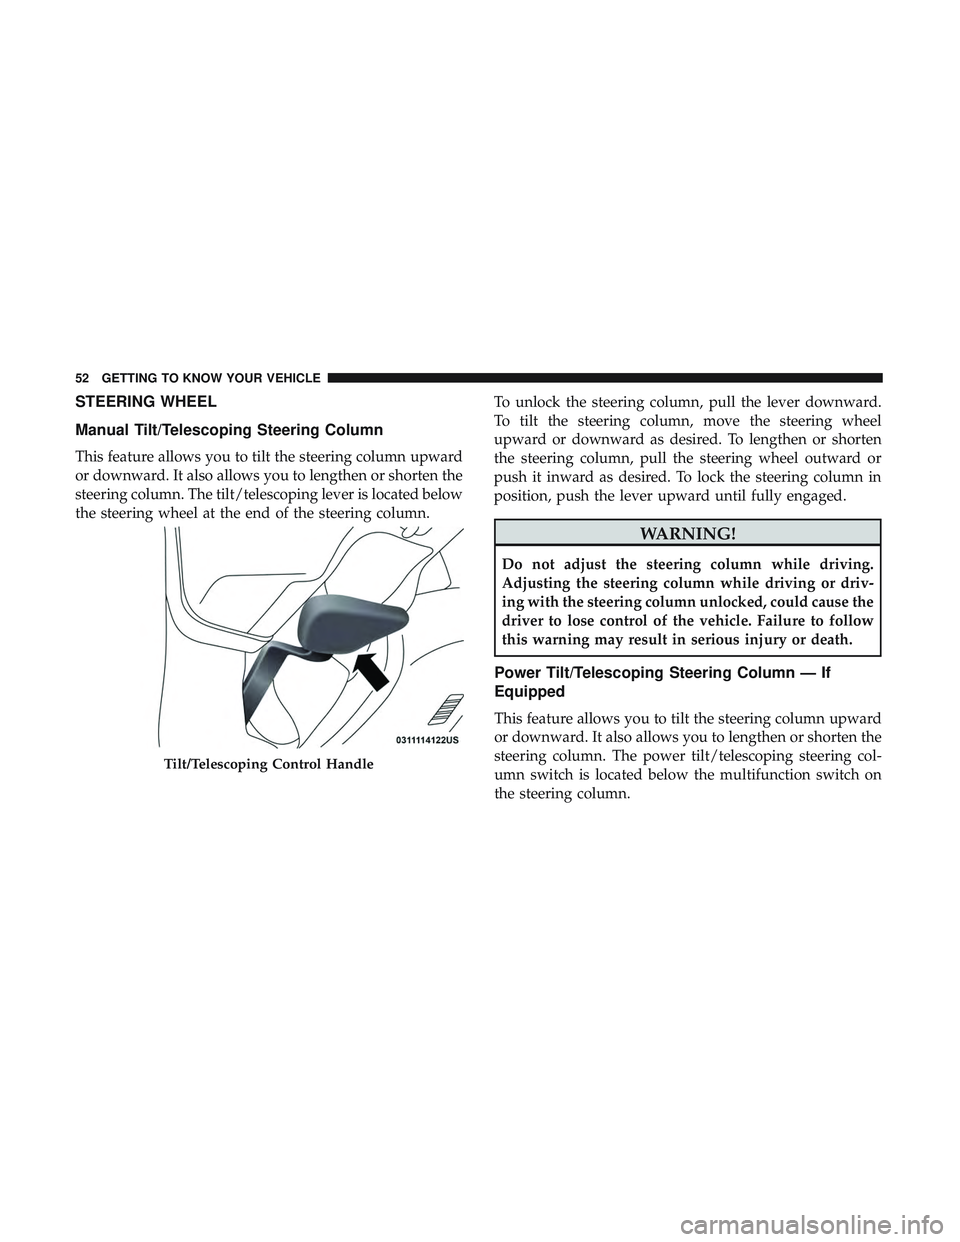
This feature allows you to tilt the steering column upward
or downward. It also allows you to lengthen or shorten the
steering column. The tilt/telescoping lever is located below
the steering wheel at the end of the steering column.To unlock the steering column, pull the lever downward.
To tilt the steering column, move the steering wheel
upward or downward as desired. To lengthen or shorten
the steering column, pull the steering wheel outward or
push it inward as desired. To lock the steering column in
position, push the lever upward until fully engaged.
WARNING!
Do not adjust the steering column while driving.
Adjusting the steering column while driving or driv-
ing with the steering column unlocked, could cause the
driver to lose control of the vehicle. Failure to follow
this warning may result in serious injury or death.
Power Tilt/Telescoping Steering Column — If
Equipped
This feature allows you to tilt the steering column upward
or downward. It also allows you to lengthen or shorten the
steering column. The power tilt/telescoping steering col-
umn switch is located below the multifunction switch on
the steering column.
Tilt/Telescoping Control Handle
52 GETTING TO KNOW YOUR VEHICLE
Page 55 of 486
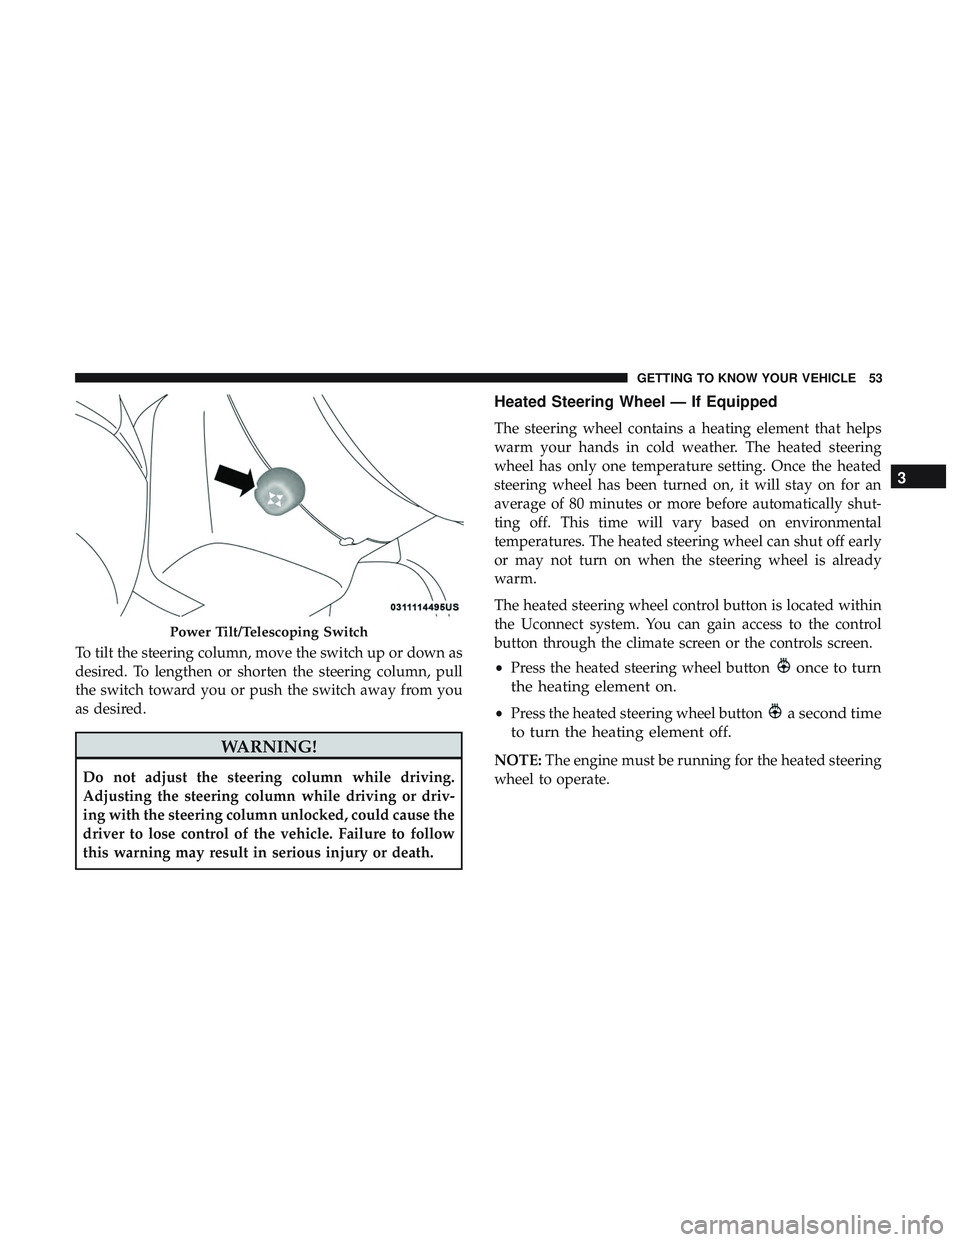
To tilt the steering column, move the switch up or down as
desired. To lengthen or shorten the steering column, pull
the switch toward you or push the switch away from you
as desired.
WARNING!
Do not adjust the steering column while driving.
Adjusting the steering column while driving or driv-
ing with the steering column unlocked, could cause the
driver to lose control of the vehicle. Failure to follow
this warning may result in serious injury or death.
Heated Steering Wheel — If Equipped
The steering wheel contains a heating element that helps
warm your hands in cold weather. The heated steering
wheel has only one temperature setting. Once the heated
steering wheel has been turned on, it will stay on for an
average of 80 minutes or more before automatically shut-
ting off. This time will vary based on environmental
temperatures. The heated steering wheel can shut off early
or may not turn on when the steering wheel is already
warm.
The heated steering wheel control button is located within
the Uconnect system. You can gain access to the control
button through the climate screen or the controls screen.
•Press the heated steering wheel button
once to turn
the heating element on.
• Press the heated steering wheel buttona second time
to turn the heating element off.
NOTE: The engine must be running for the heated steering
wheel to operate.
Power Tilt/Telescoping Switch
3
GETTING TO KNOW YOUR VEHICLE 53
Page 58 of 486
Power Mirrors
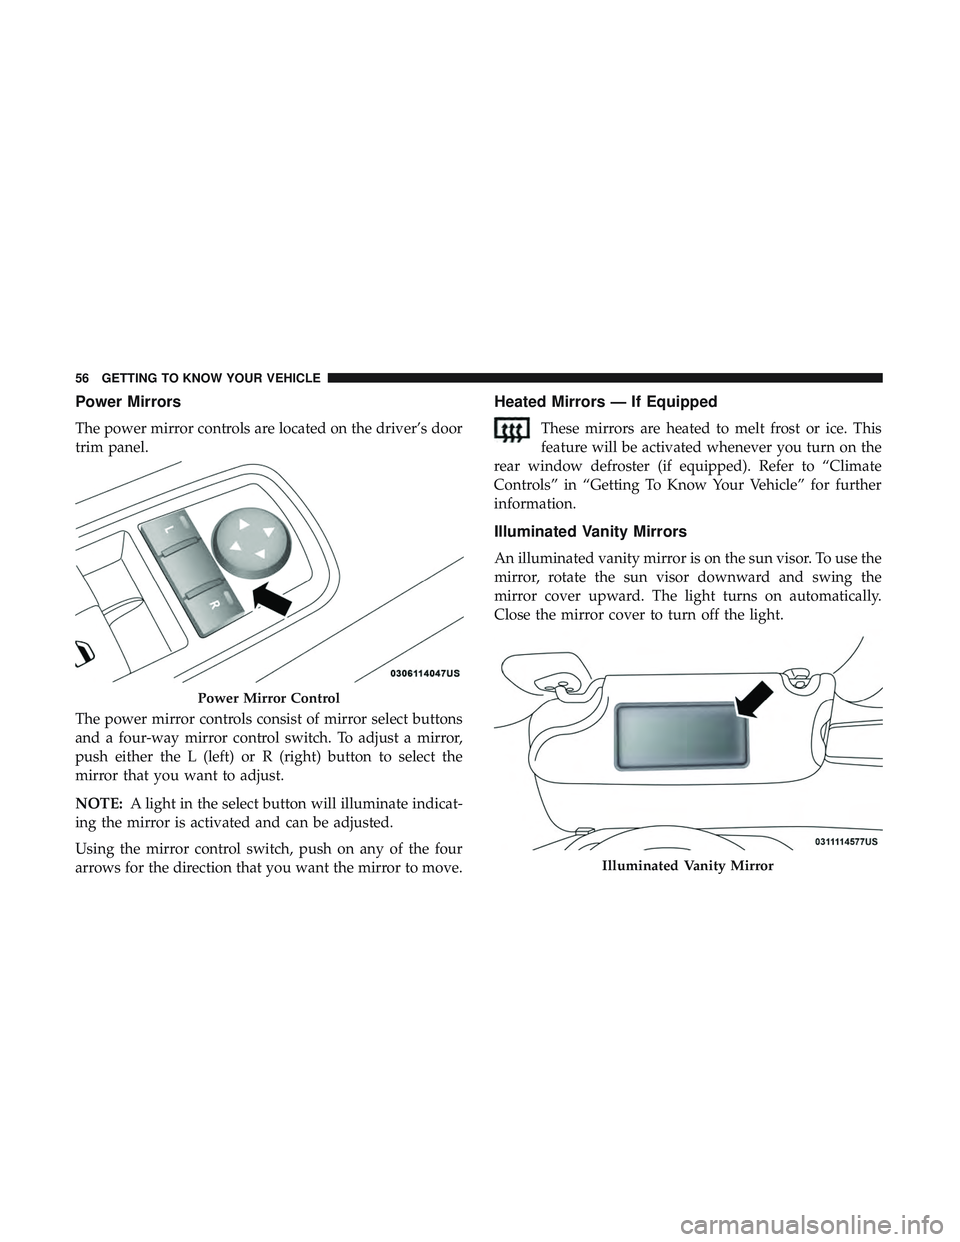
The power mirror controls are located on the driver’s door
trim panel.
The power mirror controls consist of mirror select buttons
and a four-way mirror control switch. To adjust a mirror,
push either the L (left) or R (right) button to select the
mirror that you want to adjust.
NOTE:A light in the select button will illuminate indicat-
ing the mirror is activated and can be adjusted.
Using the mirror control switch, push on any of the four
arrows for the direction that you want the mirror to move.
Heated Mirrors — If Equipped
These mirrors are heated to melt frost or ice. This
feature will be activated whenever you turn on the
rear window defroster (if equipped). Refer to “Climate
Controls” in “Getting To Know Your Vehicle” for further
information.
Illuminated Vanity Mirrors
An illuminated vanity mirror is on the sun visor. To use the
mirror, rotate the sun visor downward and swing the
mirror cover upward. The light turns on automatically.
Close the mirror cover to turn off the light.
Power Mirror Control
Illuminated Vanity Mirror
56 GETTING TO KNOW YOUR VEHICLE
Page 77 of 486
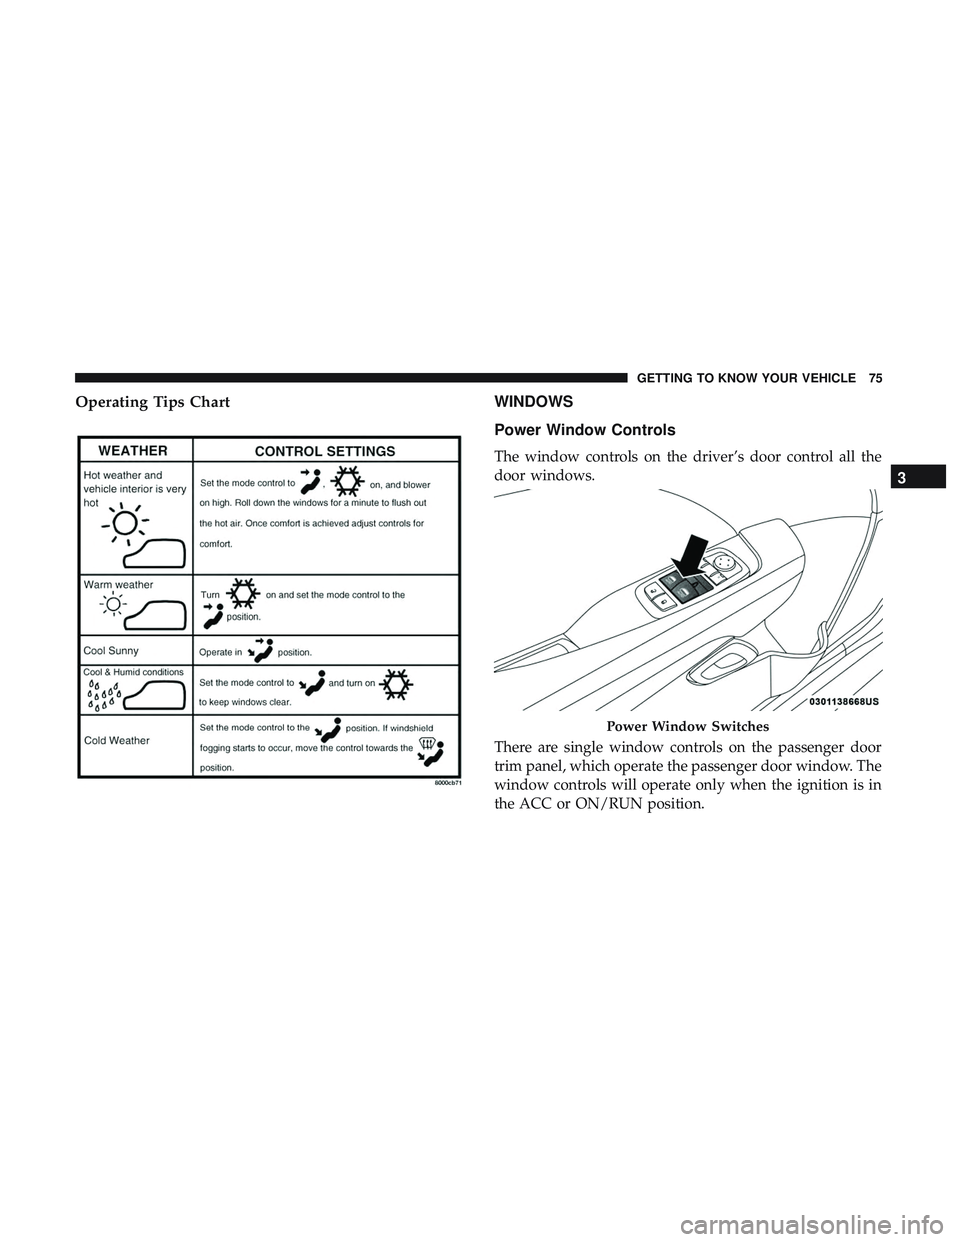
Operating Tips ChartWINDOWS
Power Window Controls
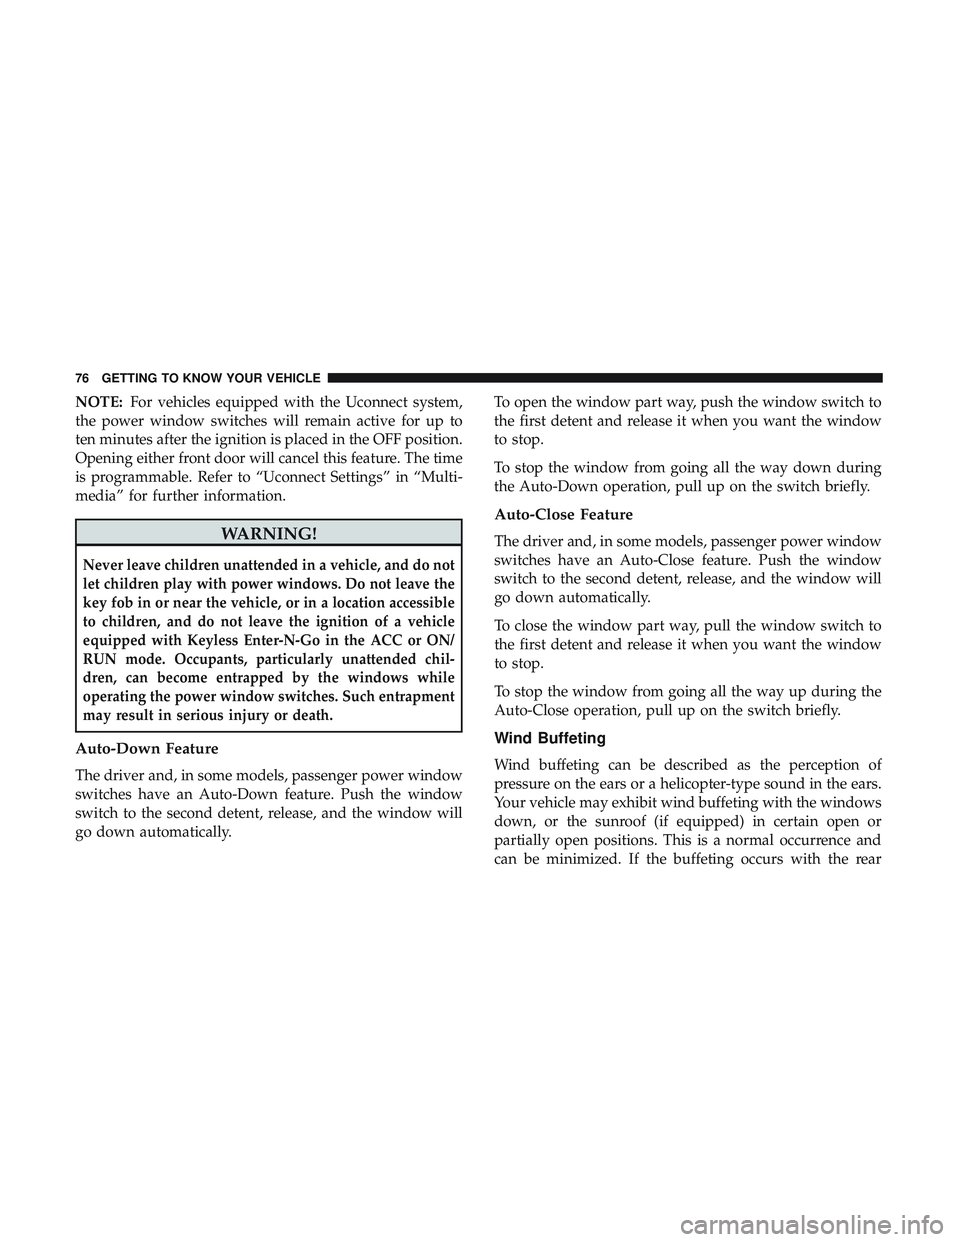
The window controls on the driver’s door control all the
door windows.
There are single window controls on the passenger door
trim panel, which operate the passenger door window. The
window controls will operate only when the ignition is in
the ACC or ON/RUN position.
Power Window Switches
3
GETTING TO KNOW YOUR VEHICLE 75
Page 78 of 486
NOTE:For vehicles equipped with the Uconnect system,
the power window switches will remain active for up to
ten minutes after the ignition is placed in the OFF position.
Opening either front door will cancel this feature. The time
is programmable. Refer to “Uconnect Settings” in “Multi-
media” for further information.
WARNING!
Never leave children unattended in a vehicle, and do not
let children play with power windows. Do not leave the
key fob in or near the vehicle, or in a location accessible
to children, and do not leave the ignition of a vehicle
equipped with Keyless Enter-N-Go in the ACC or ON/
RUN mode. Occupants, particularly unattended chil-
dren, can become entrapped by the windows while
operating the power window switches. Such entrapment
may result in serious injury or death.
Auto-Down Feature
The driver and, in some models, passenger power window
switches have an Auto-Down feature. Push the window
switch to the second detent, release, and the window will
go down automatically. To open the window part way, push the window switch to
the first detent and release it when you want the window
to stop.
To stop the window from going all the way down during
the Auto-Down operation, pull up on the switch briefly.
Auto-Close Feature
The driver and, in some models, passenger power window
switches have an Auto-Close feature. Push the window
switch to the second detent, release, and the window will
go down automatically.
To close the window part way, pull the window switch to
the first detent and release it when you want the window
to stop.
To stop the window from going all the way up during the
Auto-Close operation, pull up on the switch briefly.
Wind Buffeting
Wind buffeting can be described as the perception of
pressure on the ears or a helicopter-type sound in the ears.
Your vehicle may exhibit wind buffeting with the windows
down, or the sunroof (if equipped) in certain open or
partially open positions. This is a normal occurrence and
can be minimized. If the buffeting occurs with the rear
76 GETTING TO KNOW YOUR VEHICLE