warning lights DODGE CHARGER 2012 7.G Owners Manual
[x] Cancel search | Manufacturer: DODGE, Model Year: 2012, Model line: CHARGER, Model: DODGE CHARGER 2012 7.GPages: 594, PDF Size: 4.48 MB
Page 59 of 594
WARNING!
•No objects should be placed over or near the air
bag on the instrument panel, because any such
objects could cause harm if the vehicle is in a
collision severe enough to cause the air bag to
inflate.
•Do not put anything on or around the air bag
covers or attempt to open them manually. You may
damage the air bags and you could be injured
because the air bags may no longer be functional.
The protective covers for the air bag cushions are
designed to open only when the air bags are
inflating.
•Do not drill, cut or tamper with the knee bolster in
any way.
•Do not mount any accessories to the knee bolster
such as alarm lights, stereos, citizen band radios,
etc.
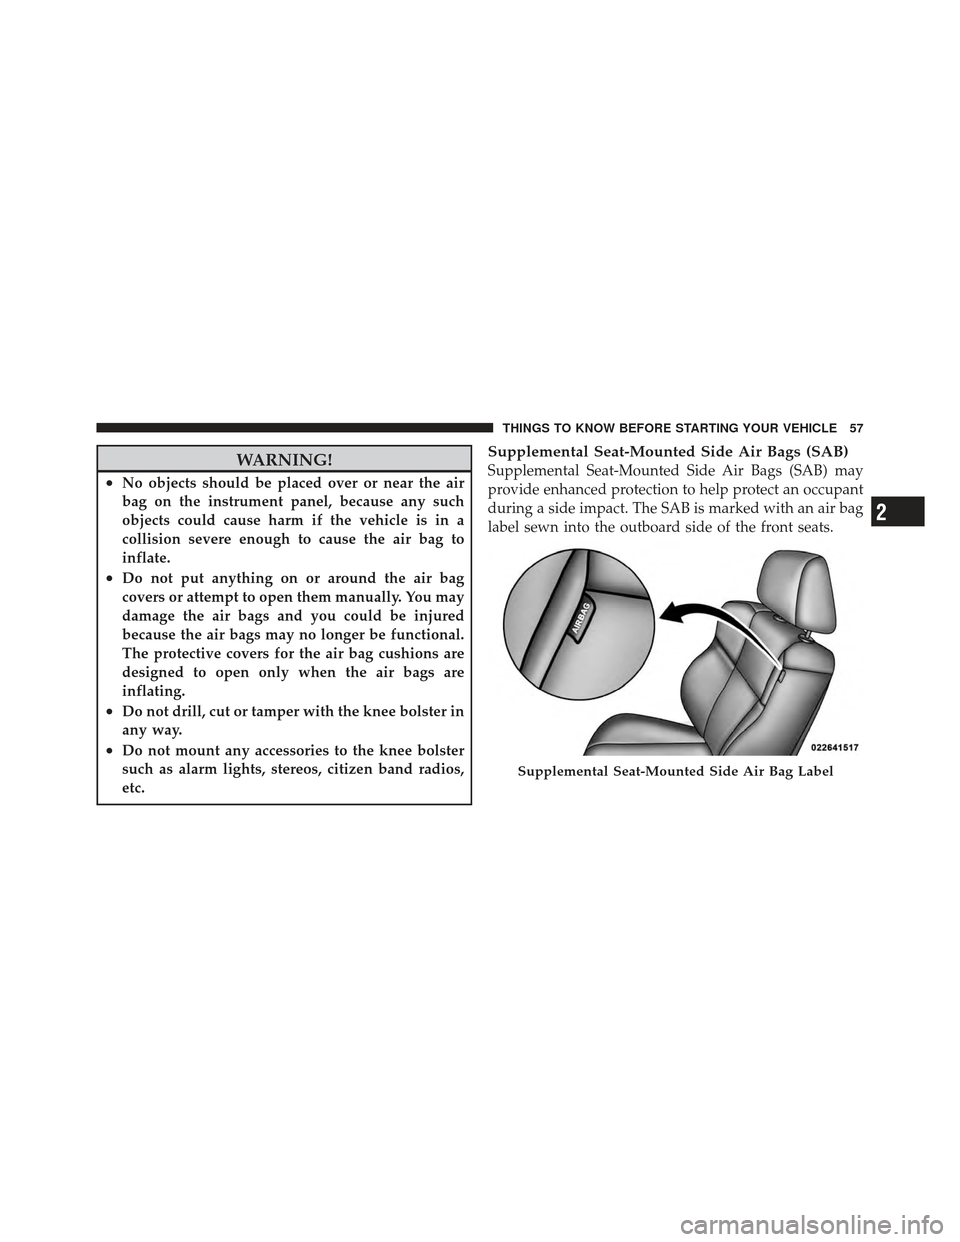
Supplemental Seat-Mounted Side Air Bags (SAB)
Supplemental Seat-Mounted Side Air Bags (SAB) may
provide enhanced protection to help protect an occupant
during a side impact. The SAB is marked with an air bag
label sewn into the outboard side of the front seats.
Supplemental Seat-Mounted Side Air Bag Label
2
THINGS TO KNOW BEFORE STARTING YOUR VEHICLE 57
Page 87 of 594
WARNING! (Continued)
•Always make sure that objects cannot fall into the
driver footwell while the vehicle is moving. Ob-
jects can become trapped under the brake pedal
and accelerator pedal causing a loss of vehicle
control.
•If required, mounting posts must be properly
installed, if not equipped from the factory.
Failure to properly follow floor mat installation or
mounting can cause interference with the brake
pedal and accelerator pedal operation causing loss
of control of the vehicle.
Periodic Safety Checks You Should Make Outside
The Vehicle
Tires
Examine tires for excessive tread wear and uneven wear
patterns. Check for stones, nails, glass, or other objectslodged in the tread or sidewall. Inspect the tread for cuts
and cracks. Inspect sidewalls for cuts, cracks and bulges.
Check the wheel nuts for tightness. Check the tires
(including spare) for proper cold inflation pressure.
Lights
Have someone observe the operation of exterior lights
while you work the controls. Check turn signal and high
beam indicator lights on the instrument panel.
Door Latches
Check for positive closing, latching, and locking.
Fluid Leaks
Check area under vehicle after overnight parking for fuel,
engine coolant, oil, or other fluid leaks. Also, if gasoline
fumes are detected or if fuel, power steering fluid, or
brake fluid leaks are suspected, the cause should be
located and corrected immediately.
2
THINGS TO KNOW BEFORE STARTING YOUR VEHICLE 85
Page 108 of 594
NOTE:In a parking lot situation, oncoming vehicles can
be obscured by vehicles parked on either side. If the
sensors are blocked by other structures or vehicles, the
system will not be able to alert the driver.
When RCP is on and the vehicle is in REVERSE, the
driver is alerted using both the visual and audible
alarms, including reducing the radio volume.
WARNING!
RCP is not a Back Up Aid system. It is intended to be
used to help a driver detect an oncoming vehicle in a
parking lot situation. Drivers must be careful when
backing up, even when using RCP. Always check
carefully behind your vehicle, look behind you, and
be sure to check for pedestrians, animals, other
vehicles, obstructions, and blind spots before back-
ing up. Failure to do so can result in serious injury or
death.
Modes Of Operation
Three selectable modes of operation are available in the
Uconnect Touch™ System. Refer to “Uconnect Touch™
Settings” in “Understanding Your Instrument Panel” for
further information.
Blind Spot Alert
When operating in Blind Spot Alert mode, the BSM
system will provide a visual alert in the appropriate side
view mirror based on a detected object. However, when
the system is operating in RCP, the system will respond
with both visual and audible alerts when a detected
object is present. Whenever an audible alert is requested,
the radio volume is reduced.
Blind Spot Alert Lights/Chime
When operating in Blind Spot Alert Lights/Chime mode,
the BSM system will provide a visual alert in the appro-
priate side view mirror based on a detected object. If the
turn signal is then activated, and it corresponds to an
106 UNDERSTANDING THE FEATURES OF YOUR VEHICLE
Page 201 of 594
CAUTION!
To prevent possible damage, do not slam the hood to
close it. Lower the hood, until it is open approxi-
mately 6 in (15 cm), and then drop it. This should
secure both latches. Never drive your vehicle unless
the hood is fully closed, with both latches engaged.
WARNING!
Be sure the hood is fully latched before driving your
vehicle. If the hood is not fully latched, it could open
when the vehicle is in motion and block your vision.
Failure to follow this warning could result in serious
injury or death.
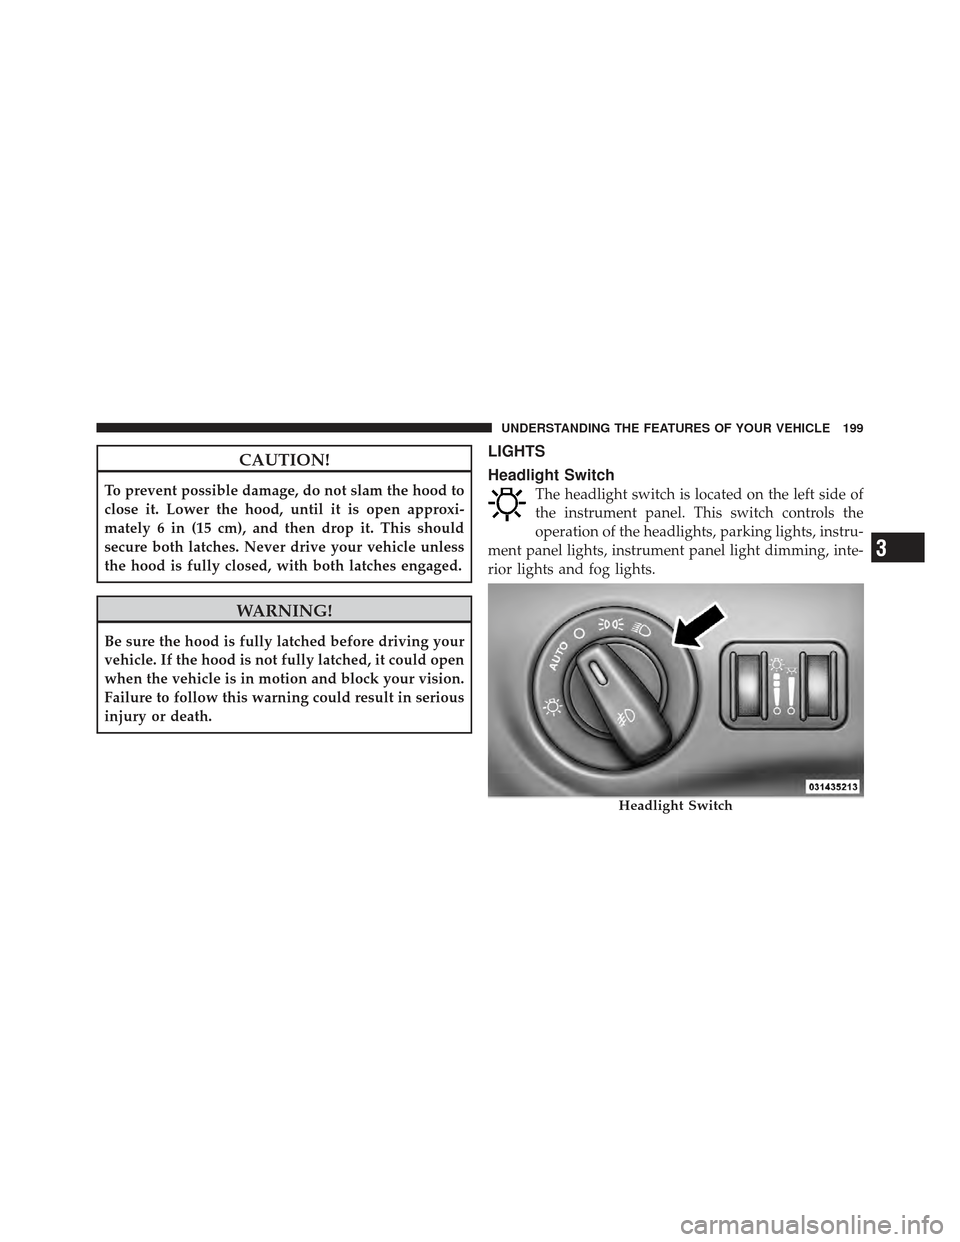
LIGHTS
Headlight Switch
The headlight switch is located on the left side of
the instrument panel. This switch controls the
operation of the headlights, parking lights, instru-
ment panel lights, instrument panel light dimming, inte-
rior lights and fog lights.
Headlight Switch
3
UNDERSTANDING THE FEATURES OF YOUR VEHICLE 199
Page 213 of 594
WARNING!
Sudden loss of visibility through the windshield
could lead to a collision. You might not see other
vehicles or other obstacles. To avoid sudden icing of
the windshield during freezing weather, warm the
windshield with the defroster before and during
windshield washer use.
Mist Feature
Rotate the end of the lever downward to the Mist
position to activate a single wipe cycle to clear off road
mist or spray from a passing vehicle. The wipers will
continue to operate until you release the multifunction
lever.
NOTE:The mist feature does not activate the washer
pump; therefore, no washer fluid will be sprayed on the
windshield. The wash function must be used in order to
spray the windshield with washer fluid.
Headlights On With Wipers
(Available With Automatic Headlights Only)
When this feature is active, the headlights will turn on
approximately 10 seconds after the wipers are turned on
if the headlight switch is placed in the AUTO position. In
addition, the headlights will turn off when the wipers are
turned off if they were turned on by this feature.
NOTE: The Headlights On with Wipers feature can be
turned on and off using the Uconnect Touch™ System,
refer to “Uconnect Touch™ Settings” in “Understanding
Your Instrument Panel” for further information.
Rain Sensing Wipers — If Equipped
This feature senses moisture on the windshield and
automatically activates the wipers for the driver. The
feature is especially useful for road splash or overspray
from the windshield washers of the vehicle ahead. Rotate
the end of the multifunction lever to one of four settings
to activate this feature.
3
UNDERSTANDING THE FEATURES OF YOUR VEHICLE 211
Page 234 of 594
If there is no vehicle ahead, the vehicle will maintain the
set speed. If a slower moving vehicle is detected in the
same lane, the EVIC displays the “Sensed Vehicle Indi-
cator” icon, and the system adjusts vehicle speed auto-
matically to maintain the distance setting, regardless of
the set speed.
The vehicle will then maintain the set distance until:
•The vehicle ahead accelerates to a speed above the set
speed.
•The vehicle ahead moves out of your lane or view of
the sensor.
•The vehicle ahead slows to a speed below 15 mph
(24 km/h) and the system automatically disengages
itself.
•The distance setting is changed.
•The system disengages. (Refer to the information on
ACC Activation).
The maximum braking applied by ACC is limited; how-
ever, the driver can always apply the brakes manually, if
necessary.
NOTE: The brake lights will illuminate whenever the
ACC system applies the brakes.
A Proximity Warning will alert the driver if ACC predicts
that its maximum braking level is not sufficient to
maintain the set distance. If this occurs, a visual alert
“BRAKE” will flash in the EVIC and a chime will sound
while ACC continues to apply its maximum braking
capacity. When this occurs, you should immediately
apply the brakes as needed to maintain a safe distance
from the vehicle ahead.
232 UNDERSTANDING THE FEATURES OF YOUR VEHICLE
Page 306 of 594
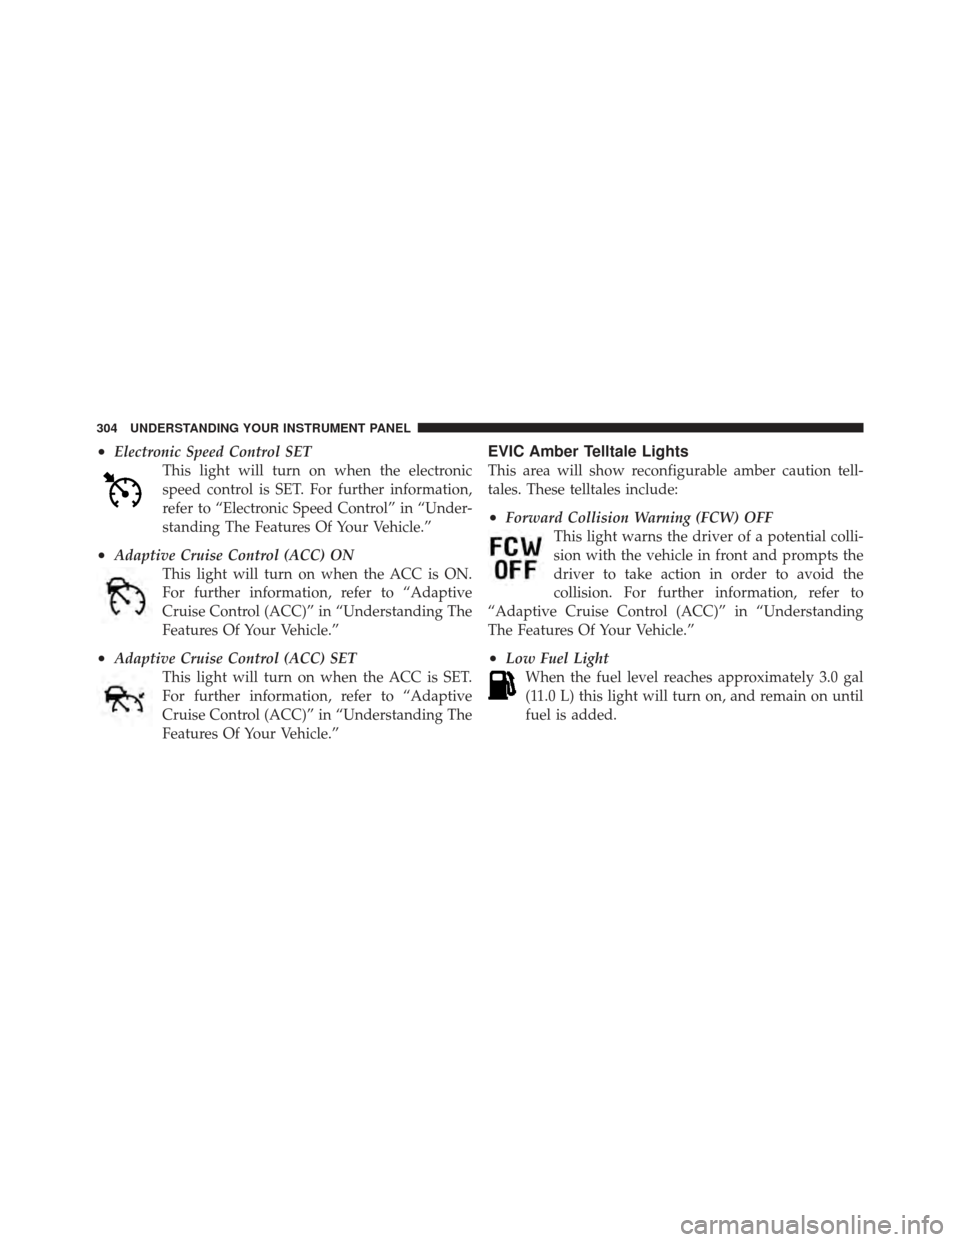
•Electronic Speed Control SETThis light will turn on when the electronic
speed control is SET. For further information,
refer to “Electronic Speed Control” in “Under-
standing The Features Of Your Vehicle.”
•Adaptive Cruise Control (ACC) ONThis light will turn on when the ACC is ON.
For further information, refer to “Adaptive
Cruise Control (ACC)” in “Understanding The
Features Of Your Vehicle.”
•Adaptive Cruise Control (ACC) SETThis light will turn on when the ACC is SET.
For further information, refer to “Adaptive
Cruise Control (ACC)” in “Understanding The
Features Of Your Vehicle.”
EVIC Amber Telltale Lights
This area will show reconfigurable amber caution tell-
tales. These telltales include:
•Forward Collision Warning (FCW) OFFThis light warns the driver of a potential colli-
sion with the vehicle in front and prompts the
driver to take action in order to avoid the
collision. For further information, refer to
“Adaptive Cruise Control (ACC)” in “Understanding
The Features Of Your Vehicle.”
•Low Fuel Light When the fuel level reaches approximately 3.0 gal
(11.0 L) this light will turn on, and remain on until
fuel is added.
304 UNDERSTANDING YOUR INSTRUMENT PANEL
Page 307 of 594
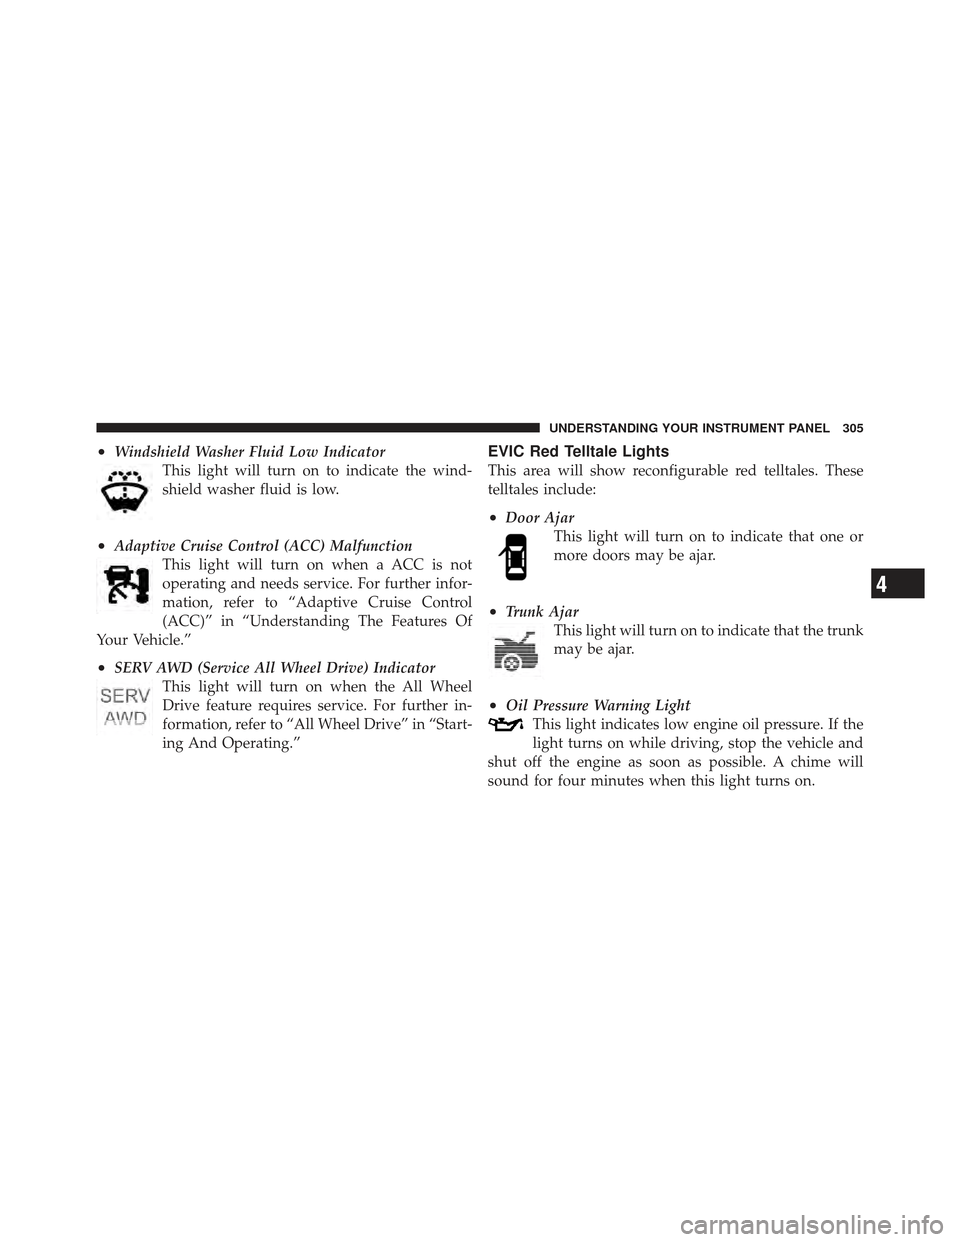
•Windshield Washer Fluid Low IndicatorThis light will turn on to indicate the wind-
shield washer fluid is low.
•Adaptive Cruise Control (ACC) MalfunctionThis light will turn on when a ACC is not
operating and needs service. For further infor-
mation, refer to “Adaptive Cruise Control
(ACC)” in “Understanding The Features Of
Your Vehicle.”
•SERV AWD (Service All Wheel Drive) Indicator This light will turn on when the All Wheel
Drive feature requires service. For further in-
formation, refer to “All Wheel Drive” in “Start-
ing And Operating.”
EVIC Red Telltale Lights
This area will show reconfigurable red telltales. These
telltales include:
•Door AjarThis light will turn on to indicate that one or
more doors may be ajar.
•Trunk AjarThis light will turn on to indicate that the trunk
may be ajar.
•Oil Pressure Warning LightThis light indicates low engine oil pressure. If the
light turns on while driving, stop the vehicle and
shut off the engine as soon as possible. A chime will
sound for four minutes when this light turns on.
4
UNDERSTANDING YOUR INSTRUMENT PANEL 305
Page 460 of 594
CAUTION!
If the trailer weighs more than 1,000 lbs (454 kg)
loaded, it should have its own brakes, and they
should be of adequate capacity. Failure to do this
could lead to accelerated brake lining wear, higher
brake pedal effort, and longer stopping distances.
WARNING!
•Do not connect trailer brakes to your vehicle’s
hydraulic brake lines. It can overload your brake
system and cause it to fail. You might not have
brakes when you need them and could have an
collision.(Continued)
WARNING! (Continued)
•Towing any trailer will increase your stopping
distance. When towing, you should allow for ad-
ditional space between your vehicle and the ve-
hicle in front of you. Failure to do so could result
in a collision.
Towing Requirements – Trailer Lights And Wiring
Whenever you pull a trailer, regardless of the trailer size,
stoplights and turn signals on the trailer are required for
motoring safety.
The Trailer Tow Package may include a four and seven-
pin wiring harness. Use a factory approved trailer har-
ness and connector.
NOTE:Do not cut or splice wiring into the vehicles
wiring harness.
458 STARTING AND OPERATING
Page 537 of 594
CAUTION!
Do not touch the new bulb with your fingers. Oil
contamination will severely shorten bulb life. If the
bulb comes in contact with an oily surface, clean the
bulb with rubbing alcohol.
3. Disconnect the bulb from the socket assembly and
install the replacement bulb.
4. Reinstall the bulb and socket assembly into the head-
lamp assembly, and then turn it clockwise.
Front Low Beam Headlamp And Park/Turn Lamp
— Models With High Intensity Discharge
Headlamps (HID)
HID Headlamps
The headlamps are a type of high voltage discharge tube.
High voltage can remain in the circuit even with the
headlamp switch off and the key removed. Because ofthis, you should not attempt to service a headlamp bulb
yourself. If a headlamp bulb fails, take your vehicle to
an authorized dealer for service.
WARNING!
A transient high voltage occurs at the bulb sockets of
HID headlamps when the headlight switch is turned
ON. It may cause serious electrical shock or electro-
cution if not serviced properly. See your authorized
dealer for service.
NOTE: On vehicles equipped with HID headlamps,
when the headlamps are turned on, there is a blue hue to
the lights. This diminishes and becomes more white after
approximately 10 seconds, as the system charges.
7
MAINTAINING YOUR VEHICLE 535