display DODGE CHARGER 2014 7.G User Guide
[x] Cancel search | Manufacturer: DODGE, Model Year: 2014, Model line: CHARGER, Model: DODGE CHARGER 2014 7.GPages: 148, PDF Size: 3.77 MB
Page 6 of 148
DRIVER COCKPIT
1. Memory Seat pg. 21
2. Headlight Switch pg. 31
3. Turn Signal/Wiper/Washer/High Beams Lever (behind steering wheel) pg. 30
4. Instrument Cluster pg. 6
5. Electronic Vehicle Information Center (EVIC) Display
6. Engine Start/Stop Button pg. 12
7. Your Vehicle's Sound System pg. 44
8. Switch Panel• Hazard Lights
• Electronic Stability Control (ESC) OFF Indicator Light pg. 86
9. Climate Controls pg. 40
CONTROLS AT A GLANCE
4
Page 8 of 148
INSTRUMENT CLUSTER
1. Engine Coolant Temperature Gauge
2. Tachometer
3. Electronic Vehicle Information Center (EVIC) Display
Warning Lights
- Low Fuel Warning Light
- Charging System Light
- Oil Pressure Warning Light
- Anti-Lock Brake (ABS) Light
- Air Bag Warning Light
- Electronic Throttle Control (ETC)Light
- Tire Pressure MonitoringSystem (TPMS) Light
- Engine Temperature WarningLight
- Seat Belt Reminder Light
BRAKE- Brake Warning Light
- Malfunction IndicatorLight (MIL)
- Electronic Stability Control(ESC) Activation/Malfunction
Indicator Light
(See page 84 for more information.)
CONTROLS AT A GLANCE
6
Page 16 of 148
TRUNK LOCK AND RELEASE
• The trunk lid can be released from inside the vehicle by pressing the TRUNK RELEASEbutton located on the instrument panel to the left of the steering wheel.
NOTE:
The transmission must be in PARK before the button will operate.
• The trunk lid can be released from outside the vehicle by pressing the TRUNK button on the Remote Keyless Entry (RKE) transmitter twice within five seconds.
• With the ignition in the ON/RUN position, the Trunk Open symbol will display in the instrument cluster indicating that the trunk is open. The odometer display will reappear
once the trunk is closed.
• With the ignition in the OFF position or the key removed from the ignition switch, the Trunk Open symbol will display until the trunk is closed.
• Refer to your Owner's Manual on the DVD for further information on trunk operation with the Passive Entry feature.
Trunk Emergency Release
• As a security measure, a Trunk Internal Emergency Release lever is built into the trunklatching mechanism. In the event of an individual being locked inside the trunk, the trunk
can be simply opened by pulling on the glow-in-the-dark handle attached to the trunk
latching mechanism.
WARNING!
Do not allow children to have access to the trunk, either by climbing into the trunk from
outside, or through the inside of the vehicle. Always close the trunk lid when your vehicle
is unattended. Once in the trunk, young children may not be able to escape, even if they
entered through the rear seat. If trapped in the trunk, children can die from suffocation or
heat stroke.
VEHICLE SECURITY ALARM
To Arm:
• Press the Keyless Enter-N-Go™ START/STOP button until the Electronic Vehicle Informa-tion Center (EVIC) indicates that the vehicle ignition is “OFF”. Press the power door lock
switch while the door is open, press the Key Fob LOCK button, or with one of the Key Fobs
located outside the vehicle and within 5 ft (1.5 m) of the driver's and passenger front door
handles, press the Keyless Enter-N-Go™ LOCK button located on the door handle.
NOTE:
After pressing the Keyless Enter-N-Go™ LOCK button, you must wait two seconds before
you can lock or unlock the vehicle via the door handle.
GETTING STARTED
14
Page 26 of 148
HEATED/VENTILATED SEATS
Front Ventilated Seats
Located in the seat cushion and seatback are small fans that draw the air from the
passenger compartment and pull air through fine perforations in the seat cover to help keep
the driver and front passenger cooler in higher ambient temperatures.
There are two ventilated seat control buttons located in the touchscreen that allow the
driver and passenger to operate the seats independently.
The ventilated seat buttons are used to control the speed of the fans located in the seat.
To operate the system, press the “Controls” button on touchscreen located on the bottom
of the Uconnect® display.
• Press the ventilated seat button
once to choose HIGH.
• Press the ventilated seat button
a second time to choose LOW.
• Press the ventilated seat button
a third time to turn the ventilated seat OFF.
NOTE:
Vehicle Equipped With Remote Start
On models that are equipped with remote start, this feature can be programmed to come on
during a remote start through the Uconnect® system. Refer to “Uconnect® Settings” in
“Understanding Your Instrument Panel” in the Owner's Manual on the DVD.
Front Heated Seats
• There are two heated seat control buttons located in the touchscreen that allow the driver and passenger to operate the seats independently.
• Press the heated seat button
once to turn the High setting On. Press the heated seat
button a second time to turn the Low setting On. Press the heated seat button a third time
to turn the heating elements Off.
• If the High-level setting is selected, the system will automatically switch to Low-level after approximately 60 minutes. The Low-level setting will turn Off automatically after
approximately 45 minutes.
NOTE:
Vehicle Equipped With Remote Start
On models that are equipped with remote start, this feature can be programmed to come on
during a remote start through the Uconnect® system. Refer to “Uconnect® Settings” in
“Understanding Your Instrument Panel” in the Owner's Manual on the DVD.
GETTING STARTED
24
Page 36 of 148
WARNING!
Leaving the Electronic Speed Control system on when not in use is dangerous. You could
accidentally set the system or cause it to go faster than you want. You could lose control
and have an accident. Always leave the system OFF when you are not using it.
Adaptive Cruise Control (ACC)
If your vehicle is equipped with Adaptive Cruise Control the controls operate exactly the
same as the standard cruise control with one difference. You can set a specified distance
you would like to maintain between you and the vehicle in front of you.
If the ACC sensor detects a vehicle ahead, ACC will apply limited braking or acceleration
automatically to maintain a preset following distance, while matching the speed of the
vehicle ahead.
If the sensor does not detect a vehicle directly ahead of you, it functions like a standard
cruise control system, maintaining the speed you set.
Distance Setting (ACC Only)
The specified following distance for ACC can be set by varying the distance setting between
3 (long), 2 (medium), and 1 (short). Using this distance setting and the vehicle speed, ACC
calculates and sets the distance to the vehicle ahead. This distance setting displays in the
Electronic Vehicle Information Center (EVIC).
• To set or change the distance setting, press the Distance button and release. Each timethe button is pressed, the distance setting adjusts between long (3), medium (2), and
short (1). The distance setting will default to the last set mode the next time the vehicle is
restarted and the ACC system is turned on.
Mode (ACC Only)
If desired, the Adaptive Cruise Control mode can be turned off and the system can be
operated as a standard (fixed speed) Cruise Control. When in the standard (fixed speed)
Cruise Control mode the distance setting feature will be disabled and the system will
maintain the speed you set.
• To change modes, press the MODE button when the system is in either the OFF, READY, orSET position. “Cruise Ready” will be displayed if the system was in ACC READY or ACC
SET position. “Cruise Off” will be displayed if the system was in the ACC OFF position. To
switch back to Adaptive Cruise Control mode, press the MODE button a second time.
Refer to your Owner's Manual on the DVD for further information.
Forward Collision Warning
The Forward Collision Warning (FCW) system provides the driver with audible and visual
warnings (within the EVIC) when it detects a potential frontal collision. The warnings are
intended to provide the driver with enough time to react and avoid the potential collision.
OPERATING YOUR VEHICLE
34
Page 37 of 148
Changing FCW Status
The FCW feature has three settings and can be changed within the Uconnect® System:
•Far
• Near
• Off
NOTE:
The FCW settings can only be changed when the vehicle is in PARK.
Far
The default status of FCW is the “Far” setting.
The far setting provides warnings for potential collisions more distant in front of the vehicle,
allowing the driver to have the most reaction time to avoid a collision.
This setting is designed to provide early warnings per NHTSA (National Highway Traffic
Safety Administration) recommendations.
More cautious drivers that do not mind frequent warnings may prefer this setting.
NOTE:
This setting gives you the most reaction time.
Near
Changing the FCW status to the “Near” setting, allows the system to warn you of a potential
frontal collision when you are much closer.
This setting provides less reaction time than the “Far” setting, which allows for a more
dynamic driving experience.
More dynamic or aggressive drivers that want to avoid frequent warnings may prefer this
setting.
Off
Changing the FCW status to “Off” prevents the system from warning you of a potential
frontal collision.
NOTE:
• If FCW is set to “Off”, “FCW OFF” will be displayed in the EVIC.
• Refer to the Owner's Manual on the DVD for further details.
OPERATING YOUR VEHICLE
35
Page 41 of 148
Autostick® (3.6L 8–Speed Transmission, If Equipped)
•Autostick® is only available on vehicles
equipped with SPORT mode.
• When the transmission is in DRIVE, it will operate automatically, shifting between
the eight available gears. While in SPORT
mode, the transmission will only shift be-
tween seven of the eight available gears.
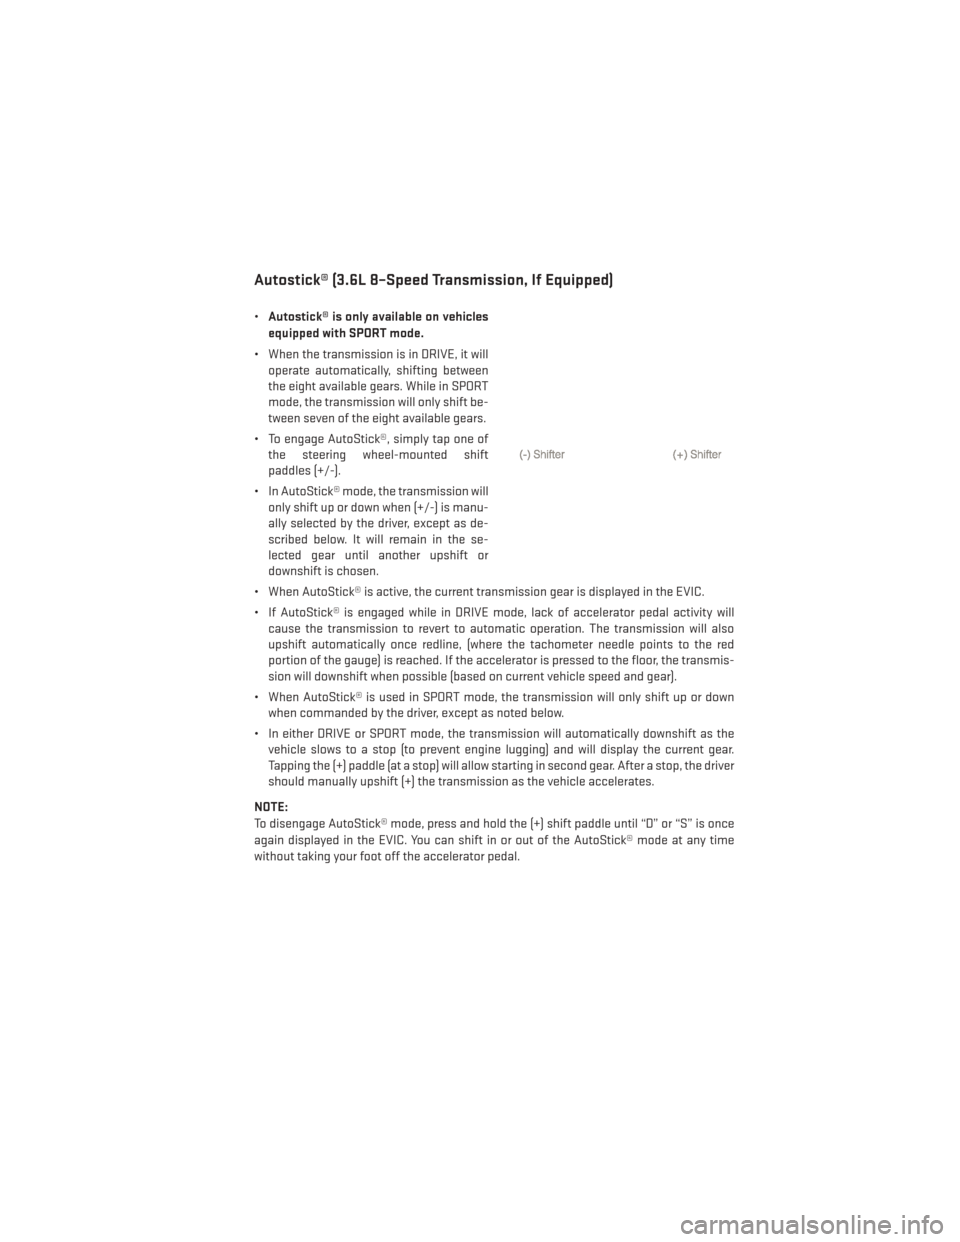
• To engage AutoStick®, simply tap one of the steering wheel-mounted shift
paddles (+/-).
• In AutoStick® mode, the transmission will only shift up or down when (+/-) is manu-
ally selected by the driver, except as de-
scribed below. It will remain in the se-
lected gear until another upshift or
downshift is chosen.
• When AutoStick® is active, the current transmission gear is displayed in the EVIC.
• If AutoStick® is engaged while in DRIVE mode, lack of accelerator pedal activity will cause the transmission to revert to automatic operation. The transmission will also
upshift automatically once redline, (where the tachometer needle points to the red
portion of the gauge) is reached. If the accelerator is pressed to the floor, the transmis-
sion will downshift when possible (based on current vehicle speed and gear).
• When AutoStick® is used in SPORT mode, the transmission will only shift up or down when commanded by the driver, except as noted below.
• In either DRIVE or SPORT mode, the transmission will automatically downshift as the vehicle slows to a stop (to prevent engine lugging) and will display the current gear.
Tapping the (+) paddle (at a stop) will allow starting in second gear. After a stop, the driver
should manually upshift (+) the transmission as the vehicle accelerates.
NOTE:
To disengage AutoStick® mode, press and hold the (+) shift paddle until “D” or “S” is once
again displayed in the EVIC. You can shift in or out of the AutoStick® mode at any time
without taking your foot off the accelerator pedal.
OPERATING YOUR VEHICLE
39
Page 49 of 148
Uconnect® 4.3 & 4.3S AT A GLANCE
Displaying The Time
• If the time is not currently displayed at the top of the screen when in Radio mode, pressthe SETTINGS button, then touch “Clock.” Select “Show Time,” then touch “On.”
Setting The Time
• Press the SETTINGS hard-key, then touch the “Clock” soft-key.
• Touch the “Time” soft-key.
• Touch the “Up or Down” soft-keys to adjust the hours, minutes or AM/PM.
NOTE:
12hr format and 24hr format can also be set.
• Once the time is set press the “Done” soft-key to exit the time screen.
Audio Settings
• Press the SETTINGS hard-key on the right side of the unit.
• Then scroll down and press the “Audio” soft-key to get to the Audio menu.
• The Audio Menu shows the following options for you to customize your audio settings. • Equalizer
• Balance/Fade
• Speed Adjust Volume
• Touch the “Exit” soft-key to exit from the Audio Menu.
ELECTRONICS
47
Page 50 of 148
Equalizer
• Touch the “Equalizer” soft-key to adjust the Bass, Mid and Treble. Use the “+” or “–”soft-key to adjust the equalizer to your desired settings. Press the “Done” soft-key when
done.
Balance/Fade
• Touch the “Balance/Fade” soft-key to adjust the sound from the speakers. Use the “arrow” soft-key to adjust the sound level from the front and rear or right and left side
speakers. Touch the center “C” soft-key to reset the balance and fade to the factory
setting. Press the “Done” soft-key when done.
Speed Adjust Volume
• Touch the “Speed Adjust Volume” soft-key to select between OFF, 1, 2 or 3. This will decrease the radio volume relative to a decrease in vehicle speed. Press the “Done”
soft-key when done.
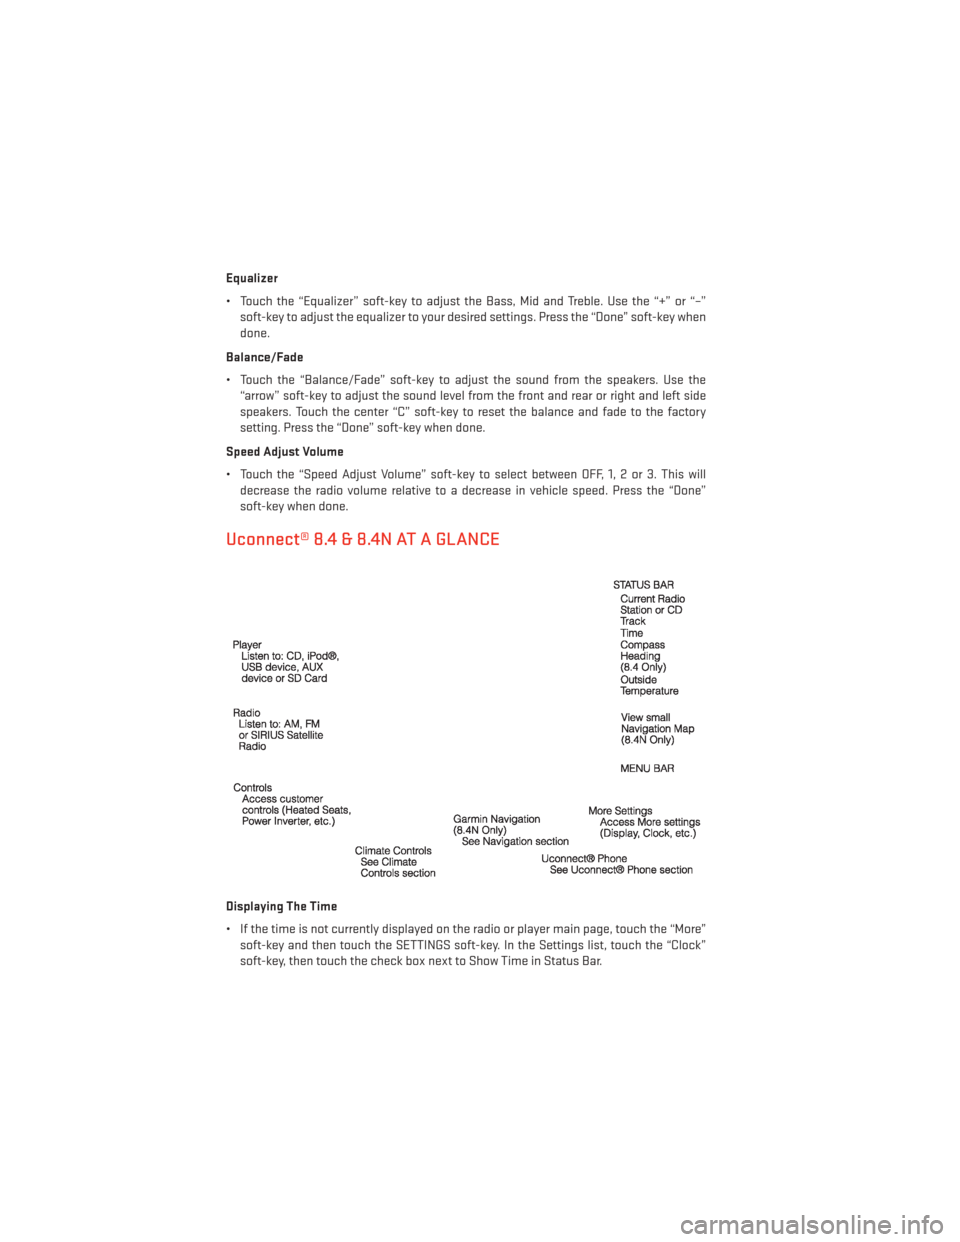
Uconnect® 8.4 & 8.4N AT A GLANCE
Displaying The Time
• If the time is not currently displayed on the radio or player main page, touch the “More”soft-key and then touch the SETTINGS soft-key. In the Settings list, touch the “Clock”
soft-key, then touch the check box next to Show Time in Status Bar.
ELECTRONICS
48
Page 51 of 148
Setting The Time
• Model 8.4N synchronizes time automatically via GPS, so should not require any timeadjustment. If you do need to set the time manually, follow the instructions below for
Model 8.4.
• For Model 8.4, turn the unit on, then touch the “Time Display” at the top of the screen. Touch “Yes”.
• If the time is not displayed at the top of the screen, touch “More” soft-key and then “Settings” soft-key. In the Settings screen, touch the “Clock” soft-key, then check or
uncheck this option.
• Touch “+” or “–” next to Set Time Hours and Set Time Minutes to adjust the time.
• If these features are not available, uncheck the “Sync” with GPS box.
• Touch “X” to save your settings and exit out of the Clock Setting screen.
Audio Settings
• Touch the “Audio” soft-key to activate the Audio settings screen to adjust Balance\Fade, Equalizer and Speed Adjusted Volume.
• You can return to the Radio screen by touching the “X” located at the top right.
Balance/Fade
• Touch the “Balance/Fade” soft-key to Balance audio between the front speakers or fade the audio between the rear and front speakers.
• Touching the “Front,” “Rear,” ”Left” or “Right” soft-keys or touch and drag the red Speaker Icon to adjust the Balance/Fade.
Equalizer
• Touch the “Equalizer” soft-key to activate the Equalizer screen.
• Touch the “+” or “ –” soft-keys, or by touching and dragging over the level bar for each of the equalizer bands. The level value, which spans between ±9, is displayed at the bottom
of each of the Bands.
Speed Adjusted Volume
• Touch the “Speed Adjusted Volume” soft-key to activate the Speed Adjusted Volume screen. The Speed Adjusted Volume is adjusted by touching the “+” and “–” buttons or by
touching and dragging over the level bar. This alters the automatic adjustment of the
audio volume with variation to vehicle speed.
ELECTRONICS
49