manual transmission DODGE CHARGER 2015 7.G Owners Manual
[x] Cancel search | Manufacturer: DODGE, Model Year: 2015, Model line: CHARGER, Model: DODGE CHARGER 2015 7.GPages: 638, PDF Size: 16.56 MB
Page 283 of 638
on while driving, have the system inspected at an autho-
rized dealer as soon as possible. Refer to “Occupant
Restraints” in “Things To Know Before Starting Your
Vehicle” for further information.
•Speed Limit Warning Light
Push and release the UP or DOWN arrow
button until the Speed Limit Warning Menu
icon/title is highlighted in the DID. Push and
release OK to enter speed warning. Use UP or
DOWN arrow to select a desired speed, then push and
release OK to set the speed. The Manual Speed Assist
(MSA) Speed Warning telltale will display in the DID,
and a chime will sound with a pop up warning message
when the set speed is exceeded.
•Transmission Temperature Warning Light
This light indicates that there is excessive trans-
mission fluid temperature that might occur
with severe usage such as trailer towing. It may
also occur when operating the vehicle in a high torque
converter slip condition. If this light comes on, stop the
vehicle and run the engine at idle or faster with the
transmission in NEUTRAL until the light goes off.
CAUTION!
Continuous driving with the Transmission Tempera-
ture Warning Light illuminated will eventually cause
severe transmission damage or transmission failure.
WARNING!
If you continue operating the vehicle when the
Transmission Temperature Warning Light is illumi-
nated you could cause the fluid to boil over, come in
contact with hot engine or exhaust components and
cause a fire.
4
UNDERSTANDING YOUR INSTRUMENT PANEL 281
Page 293 of 638
Performance Shift Indicator (PSI) – If Equipped
The Performance Shift Indicator (PSI) is enabled on
vehicles with manual transmission, or when a vehicle
with automatic transmission is in manual shift mode. The
PSI provides the driver with a visual indication within
the DID display when the driver configured gear shift
point has been reached and the driver is still accelerating.
This indication notifies the driver to change gear corre-
sponding to the configured RPMs in the head unit. When
the shift up indicator is shown on the display, the PSI is
advising the driver to engage a higher gear.
The PSI indicator in the DID display remains illuminated
until the driver changes gear, or the driving conditions
return to a situation where changing gear is not required,
corresponding to the configured RPMs in the head unit.
Uconnect® SETTINGS
The Uconnect® system uses a combination of buttons on
the touchscreen and buttons on the faceplate located on
the center of the instrument panel that allows you to
access and change the customer programmable features.
CAUTION!
Do NOT attach any object to the touchscreen, doing
so can result in damage to the touchscreen.
4
UNDERSTANDING YOUR INSTRUMENT PANEL 291
Page 344 of 638
on the touchscreen, the driver can configure their indi-
vidual drive modes and see how those configurations
affect the performance of the vehicle.
NOTE:Not all of the options listed in this manual are
available on every vehicle, below is a chart with all
available Drive Mode vehicle configurations.
Available Mode Configurations
TransmissionAuto
EngineN/A
Engine/TransX
SteeringX
Paddle ShiftersX
Traction ControlX
Refer to the Sport and Default modes for their detailed
operation.
NOTE:These settings will remain in effect when using
the Launch Control feature.
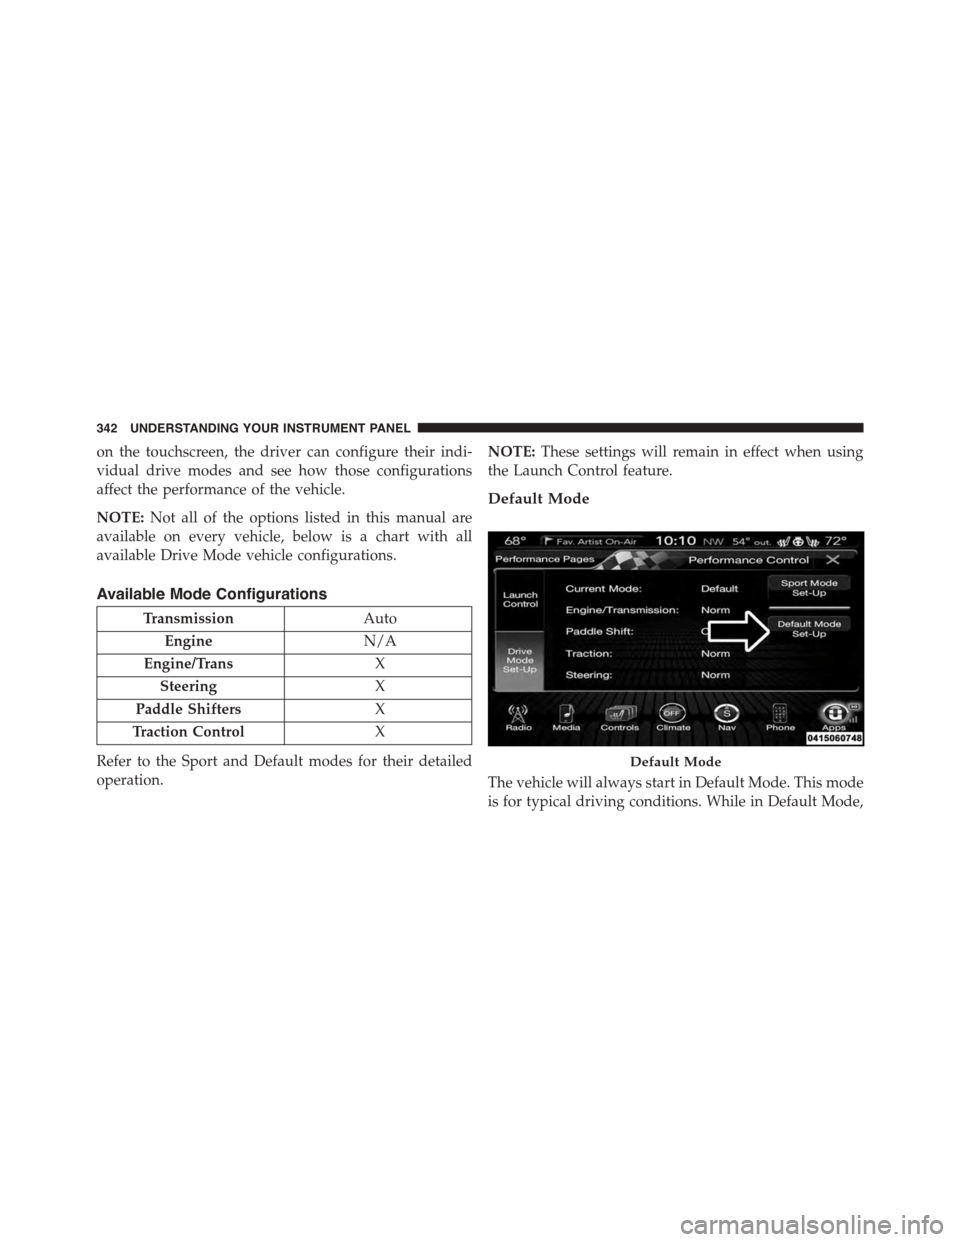
Default Mode
The vehicle will always start in Default Mode. This mode
is for typical driving conditions. While in Default Mode,
Default Mode
342 UNDERSTANDING YOUR INSTRUMENT PANEL
Page 404 of 638
Only shift from DRIVE to PARK or REVERSE when the
accelerator pedal is released and the vehicle is stopped.
Be sure to keep your foot on the brake pedal when
shifting between these gears.
The transmission shift lever has PARK, REVERSE, NEU-
TRAL, DRIVE, and MANUAL (Autostick) shift positions.
Manual shifts can be made using the Autostick shift
control (refer to “AutoStick” in this section for further
information). Toggling the shift lever forward (-) or
rearward (+) while in the MANUAL (AutoStick) position
(beside the DRIVE position) will manually select the
transmission gear, and will display the current gear in the
instrument cluster as M1, M2, M3, etc.
NOTE:If the shift lever cannot be moved to the PARK,
REVERSE, or NEUTRAL position (when pushed for-
ward) it is probably in the MANUAL (AutoStick, +/-)
position (beside the DRIVE position). In MANUAL
(AutoStick) mode, the transmission gear is displayed in
the instrument cluster (as M1, M2, M3, etc.). Move the
shift lever to the right (into the DRIVE [D] position) for
access to PARK, REVERSE, and NEUTRAL.
Gear Ranges
DO NOT race the engine when shifting from PARK or
NEUTRAL into another gear range.
NOTE:After selecting any gear range, wait a moment to
allow the selected gear to engage before accelerating.
This is especially important when the engine is cold.
PARK (P)
This range supplements the parking brake by locking the
transmission. The engine can be started in this range.
402 STARTING AND OPERATING
Page 409 of 638
vehicle speed. Normal operation will resume once the
transmission temperature has risen to a suitable level.
MANUAL (M)
The MANUAL (M, +/-) position (beside the DRIVE
position) enables full manual control of transmission
shifting (also known as AutoStick mode; refer to
“AutoStick” in this section for further information). Tog-
gling the shift lever forward (-) or rearward (+) while in
the MANUAL (AutoStick) position will manually select
the transmission gear, and will display the current gear in
the instrument cluster as M1, M2, M3, etc.
Transmission Limp Home Mode
Transmission function is monitored electronically for
abnormal conditions. If a condition is detected that could
result in transmission damage, Transmission Limp Home
Mode is activated. In this mode, the transmission may
operate only in certain gears, or may not shift at all.
Vehicle performance may be severely degraded and the
engine may stall. In some situations, the transmission
may not re-engage if the engine is turned off and
restarted. The Malfunction Indicator Light (MIL) may be
illuminated. A message in the instrument cluster will
inform the driver of the more serious conditions, and
indicate what actions may be necessary.
In the event of a momentary problem, the transmission
can be reset to regain all forward gears by performing the
following steps.
NOTE:In cases where the instrument cluster message
indicates the transmission may not re-engage after en-
gine shutdown, perform this procedure only in a desired
location (preferably, at your authorized dealer).
1. Stop the vehicle.
2. Shift the transmission into PARK, if possible. If not,
shift the transmission to NEUTRAL.
5
STARTING AND OPERATING 407
Page 410 of 638
3. Press and hold the ignition switch until the engine
turns OFF.
4. Wait approximately 30 seconds.
5. Restart the engine.
6. Shift into the desired gear range. If the problem is no
longer detected, the transmission will return to normal
operation.
NOTE:Even if the transmission can be reset, we recom-
mend that you visit your authorized dealer at your
earliest possible convenience. Your authorized dealer has
diagnostic equipment to determine if the problem could
recur.
If the transmission cannot be reset, authorized dealer
service is required.
AUTOSTICK
AutoStick is a driver-interactive transmission feature
providing manual shift control, giving you more control
of the vehicle. AutoStick allows you to maximize engine
braking, eliminate undesirable upshifts and downshifts,
and improve overall vehicle performance. This system
can also provide you with more control during passing,
city driving, cold slippery conditions, mountain driving,
trailer towing, and many other situations.
Operation
When the shift lever is in the DRIVE (D) position, the
transmission will operate automatically, shifting between
the eight available gears. To activate AutoStick, move the
shift lever into the MANUAL (M) position (beside the
DRIVE position). The current transmission gear will be
displayed in the instrument cluster, along with a high-
lighted#M#(Manual) indication. When the shift lever is
in the MANUAL (M) position, tap the shift lever forward
408 STARTING AND OPERATING
Page 411 of 638
(-) (or tap the (-) shift paddle on the steering wheel, if
equipped) to downshift the transmission to the next
lower gear, or tap the lever rearward (+) (or tap the (+)
shift paddle, if equipped) to command an upshift.
NOTE:Tapping one of the steering wheel-mounted shift
paddles (+/-), if equipped, while the shift lever is in
DRIVE, will activate a temporary AutoStick mode. Tap-
ping (-) to enter AutoStick mode will downshift the
transmission to the next lower gear, while using (+) to
enter AutoStick mode will retain the current gear. The
current gear will be displayed in the instrument cluster,
but the#M#will not be highlighted. The transmission will
revert back to normal operation (if the shift lever remains
in DRIVE) after a period of time, depending on accelera-
tor pedal activity.
In AutoStick mode, the transmission will shift up or
down when (+/-) is manually selected by the driver
(using the shift lever, or the shift paddles [if equipped]),
unless an engine lugging or overspeed condition would
result. It will remain in the selected gear until another
upshift or downshift is chosen, except as described
below.
•In temporary AutoStick mode (shift lever in DRIVE), the
transmission will automatically shift up when maxi-
mum engine speed is reached. If the accelerator is fully
depressed, the transmission will downshift when pos-
sible (based on current vehicle speed and gear, except
6.4L models). Lack of accelerator pedal activity will
cause the transmission to revert to automatic operation.
•If normal AutoStick mode is engaged (shift lever in
MANUAL position), manual gear selection will be
maintained until the shift lever is returned to DRIVE,
or as described below. The transmission will not
upshift automatically at redline in this mode, nor will
downshifts be obtained if the accelerator pedal is
pressed to the floor.
5
STARTING AND OPERATING 409
Page 412 of 638
•The transmission will automatically downshift as the
vehicle slows (to prevent engine lugging) and will
display the current gear.
•The transmission will automatically downshift to first
gear when coming to a stop. After a stop, the driver
should manually upshift (+) the transmission as the
vehicle is accelerated.
•You can start out, from a stop, in first or second gear.
Tapping (+) (at a stop) will allow starting in second
gear. Starting out in second gear can be helpful in
snowy or icy conditions.
•If a requested downshift would cause the engine to
over-speed, that shift will not occur.
•The system will ignore attempts to upshift at too low
of a vehicle speed.
•Holding the (-) paddle depressed (if equipped), or
holding the shift lever in the (-) position, will down-
shift the transmission to the lowest gear possible at the
current speed.
•Transmission shifting will be more noticeable when
AutoStick is engaged.
•The system may revert to automatic shift mode if a
fault or overheat condition is detected.
To disengage AutoStick mode, return the shift lever to the
DRIVE position, or press and hold the (+) shift paddle (if
equipped, and the shift lever is already in DRIVE) until
“D” is once again indicated in the instrument cluster. You
can shift in or out of the AutoStick mode at any time
without taking your foot off the accelerator pedal.
410 STARTING AND OPERATING
Page 496 of 638
!MANUAL PARK RELEASE — 8 SPEED
TRANSMISSION.......................523
!TOWING A DISABLED VEHICLE...........526
▫All Wheel Drive (AWD) Models...........528
▫Rear-Wheel Drive (RWD) Models..........529
▫Without The Key Fob...................529
494 WHAT TO DO IN EMERGENCIES
Page 503 of 638
2. Turn on the Hazard Warning flasher.
3. Set the parking brake.
4. Place the shift lever/gear selector into PARK.
5. Turn OFF the ignition.
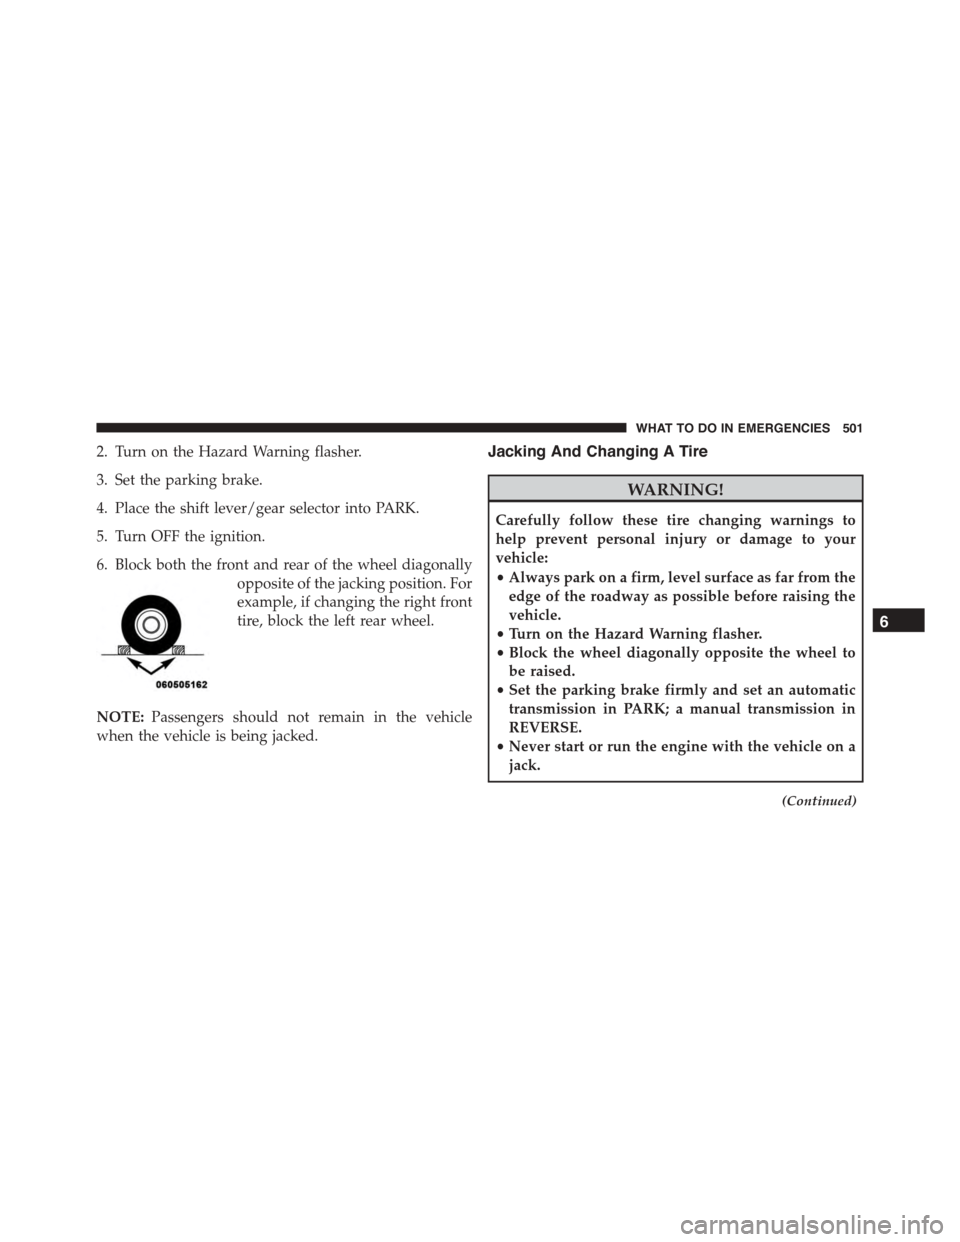
6. Block both the front and rear of the wheel diagonally
opposite of the jacking position. For
example, if changing the right front
tire, block the left rear wheel.
NOTE:Passengers should not remain in the vehicle
when the vehicle is being jacked.
Jacking And Changing A Tire
WARNING!
Carefully follow these tire changing warnings to
help prevent personal injury or damage to your
vehicle:
•Always park on a firm, level surface as far from the
edge of the roadway as possible before raising the
vehicle.
•Turn on the Hazard Warning flasher.
•Block the wheel diagonally opposite the wheel to
be raised.
•Set the parking brake firmly and set an automatic
transmission in PARK; a manual transmission in
REVERSE.
•Never start or run the engine with the vehicle on a
jack.
(Continued)
6
WHAT TO DO IN EMERGENCIES 501