spare wheel DODGE CHARGER 2015 7.G Owners Manual
[x] Cancel search | Manufacturer: DODGE, Model Year: 2015, Model line: CHARGER, Model: DODGE CHARGER 2015 7.GPages: 638, PDF Size: 16.56 MB
Page 104 of 638

Periodic Safety Checks You Should Make Outside
The Vehicle
Tires
Examine tires for excessive tread wear and uneven wear
patterns. Check for stones, nails, glass, or other objects
lodged in the tread or sidewall. Inspect the tread for cuts
and cracks. Inspect sidewalls for cuts, cracks, and bulges.
Check the wheel nuts for tightness. Check the tires
(including spare) for proper cold inflation pressure.
Lights
Have someone observe the operation of brake lights and
exterior lights while you work the controls. Check turn
signal and high beam indicator lights on the instrument
panel.
Door Latches
Check for proper closing, latching, and locking.
Fluid Leaks
Check area under vehicle after overnight parking for fuel,
engine coolant, oil, or other fluid leaks. Also, if gasoline
fumes are detected or if fuel, power steering fluid (if
equipped), or brake fluid leaks are suspected, the cause
should be located and corrected immediately.
102 THINGS TO KNOW BEFORE STARTING YOUR VEHICLE
Page 452 of 638
While studded tires improve performance on ice, skid
and traction capability on wet or dry surfaces may be
poorer than that of non-studded tires. Some states pro-
hibit studded tires; therefore, local laws should be
checked before using these tire types.
Run Flat Tires — If Equipped
Run Flat tires allow you the capability to drive 50 miles
(80 km) at 50 mph (80 km/h) after a rapid loss of inflation
pressure. This rapid loss of inflation is referred to as the
Run Flat mode. A Run Flat mode occurs when the tire
inflation pressure is of/or below 14 psi (96 kPa). Once a
Run Flat tire reaches the run flat mode it has limited
driving capabilities and needs to be replaced immedi-
ately. A Run Flat tire is not repairable.
It is not recommended driving a vehicle loaded at full
capacity or to tow a trailer while a tire is in the run flat
mode.
See the tire pressure monitoring section for more infor-
mation.
Spare Tires — If Equipped
NOTE:For vehicles equipped with Tire Service Kit
instead of a spare tire, please refer to “Tire Service Kit” in
“What To Do In Emergencies” for further information.
CAUTION!
Because of the reduced ground clearance, do not take
your vehicle through an automatic car wash with a
compact or limited-use temporary spare installed.
Damage to the vehicle may result.
Spare Tire Matching Original Equipped Tire And
Wheel — If Equipped
Your vehicle may be equipped with a spare tire and
wheel equivalent in look and function to the original
450 STARTING AND OPERATING
Page 453 of 638
equipment tire and wheel found on the front or rear axle
of your vehicle. This spare tire may be used in the tire
rotation for your vehicle. If your vehicle has this option,
refer to an authorized tire dealer for the recommended
tire rotation pattern.
Compact Spare Tire — If Equipped
The compact spare is for temporary emergency use only.
You can identify if your vehicle is equipped with a
compact spare by looking at the spare tire description on
the Tire and Loading Information Placard located on the
driver ’s side door opening or on the sidewall of the tire.
Compact spare tire descriptions begin with the letter “T”
or “S” preceding the size designation. Example: T145/
80D18 103M.
T, S = Temporary Spare Tire
Since this tire has limited tread life, the original equip-
ment tire should be repaired (or replaced) and reinstalled
on your vehicle at the first opportunity.
Do not install a wheel cover or attempt to mount a
conventional tire on the compact spare wheel, since the
wheel is designed specifically for the compact spare tire.
Do not install more than one compact spare tire and
wheel on the vehicle at any given time.
WARNING!
Compact spares are for temporary emergency use
only. With these spares, do not drive more than
50 mph (80 km/h). Temporary use spares have limited
tread life. When the tread is worn to the tread wear
indicators, the temporary use spare tire needs to be
replaced. Be sure to follow the warnings, which
apply to your spare. Failure to do so could result in
spare tire failure and loss of vehicle control.
5
STARTING AND OPERATING 451
Page 454 of 638
Full Size Spare — If Equipped
The full size spare is for temporary emergency use only.
This tire may look like the originally equipped tire on the
front or rear axle of your vehicle, but it is not. This spare
tire may have limited tread life. When the tread is worn
to the tread wear indicators, the temporary use full size
spare tire needs to be replaced. Since it is not the same as
your original equipment tire, replace (or repair) the
original equipment tire and reinstall on the vehicle at the
first opportunity.
Limited-Use Spare — If Equipped
The limited-use spare tire is for temporary emergency
use only. This tire is identified by a label located on the
limited-use spare wheel. This label contains the driving
limitations for this spare. This tire may look like the
original equipped tire on the front or rear axle of your
vehicle, but it is not. Installation of this limited-use spare
tire affects vehicle handling. Since it is not the same as
your original equipment tire, replace (or repair) the
original equipment tire and reinstall on the vehicle at the
first opportunity.
WARNING!
Limited-use spares are for emergency use only. In-
stallation of this limited-use spare tire affects vehicle
handling. With this tire, do not drive more than the
speed listed on the limit-use spare wheel. Keep
inflated to the cold tire inflation pressures listed on
your Tire and Loading Information Placard located
on the driver ’s side B-Pillar or the rear edge of the
driver ’s side door. Replace (or repair) the original
equipment tire at the first opportunity and reinstall it
on your vehicle. Failure to do so could result in loss
of vehicle control.
452 STARTING AND OPERATING
Page 495 of 638
WHAT TO DO IN EMERGENCIES
CONTENTS
!HAZARD WARNING FLASHERS...........495
!IF YOUR ENGINE OVERHEATS............495
!WHEEL AND TIRE TORQUE
SPECIFICATIONS......................496
▫Torque Specifications...................496
!JACKING AND TIRE CHANGING..........498
▫Jack Location/Spare Tire Stowage.........498
▫Preparations For Jacking................500
▫Jacking And Changing A Tire.............501
▫Road Tire Installation...................506
!TIRE SERVICE KIT — IF EQUIPPED.........507
▫Tire Service Kit Storage.................507
▫Tire Service Kit Components And Operation . .508
▫Tire Service Kit Usage Precautions..........509
▫Sealing A Tire With Tire Service Kit.........511
!JUMP-STARTING PROCEDURES...........517
▫Preparations For Jump-Start..............518
▫Jump-Starting Procedure................519
!FREEING A STUCK VEHICLE.............521
6
Page 500 of 638
JACKING AND TIRE CHANGING
WARNING!
•Do not attempt to change a tire on the side of the
vehicle close to moving traffic. Pull far enough off
the road to avoid the danger of being hit when
operating the jack or changing the wheel.
•Being under a jacked-up vehicle is dangerous. The
vehicle could slip off the jack and fall on you. You
could be crushed. Never put any part of your body
under a vehicle that is on a jack. If you need to get
under a raised vehicle, take it to a service center
where it can be raised on a lift.
•Never start or run the engine while the vehicle is
on a jack.
(Continued)
WARNING!(Continued)
•The jack is designed to be used as a tool for
changing tires only. The jack should not be used to
lift the vehicle for service purposes. The vehicle
should be jacked on a firm level surface only.
Avoid ice or slippery areas.
Jack Location/Spare Tire Stowage
The jack and spare tire are both stowed under an access
cover in the trunk. Follow these steps to access the jack
and spare tire.
NOTE:The spare tire must be removed in order to
access the jack.
1. Open the trunk.
2. Lift the access cover using the pull strap.
498 WHAT TO DO IN EMERGENCIES
Page 502 of 638
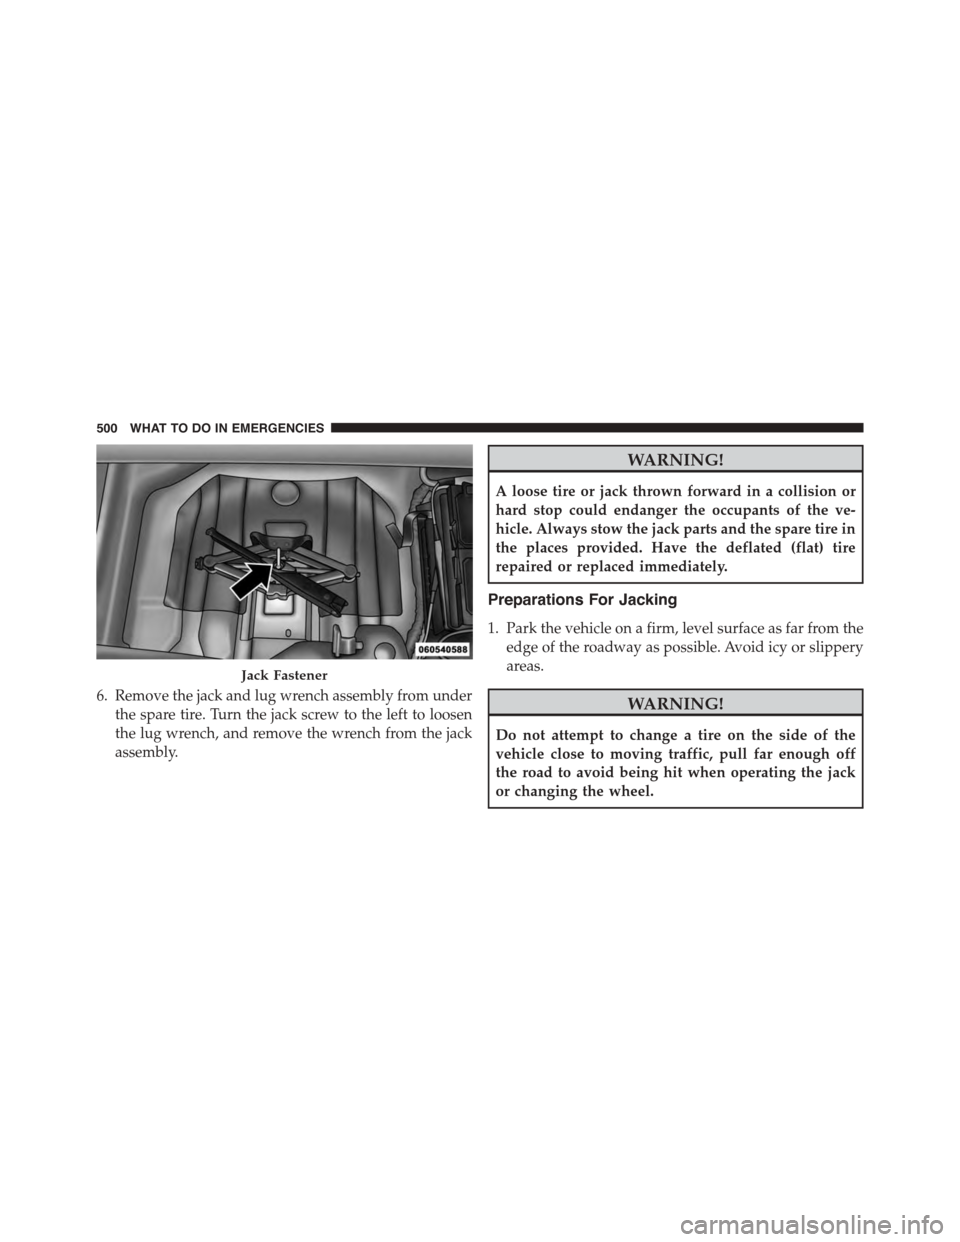
6. Remove the jack and lug wrench assembly from under
the spare tire. Turn the jack screw to the left to loosen
the lug wrench, and remove the wrench from the jack
assembly.
WARNING!
A loose tire or jack thrown forward in a collision or
hard stop could endanger the occupants of the ve-
hicle. Always stow the jack parts and the spare tire in
the places provided. Have the deflated (flat) tire
repaired or replaced immediately.
Preparations For Jacking
1. Park the vehicle on a firm, level surface as far from the
edge of the roadway as possible. Avoid icy or slippery
areas.
WARNING!
Do not attempt to change a tire on the side of the
vehicle close to moving traffic, pull far enough off
the road to avoid being hit when operating the jack
or changing the wheel.
Jack Fastener
500 WHAT TO DO IN EMERGENCIES
Page 504 of 638
WARNING!(Continued)
•Do not let anyone sit in the vehicle when it is on a
jack.
•Do not get under the vehicle when it is on a jack. If
you need to get under a raised vehicle, take it to a
service center where it can be raised on a lift.
•Only use the jack in the positions indicated and for
lifting this vehicle during a tire change.
•If working on or near a roadway, be extremely
careful of motor traffic.
CAUTION!
Do not attempt to raise the vehicle by jacking on
locations other than those indicated in the Jacking
Instructions for this vehicle.
1. Remove the spare tire, jack, and lug wrench.
2. If equipped with aluminum wheels where the center
cap covers the lug nuts, use the lug wrench to pry the
center cap off carefully before raising the vehicle.
3. Before raising the vehicle, use the lug wrench to
loosen, but not remove, the lug nuts on the wheel with
the flat tire. Turn the lug nuts counterclockwise one
turn while the wheel is still on the ground.
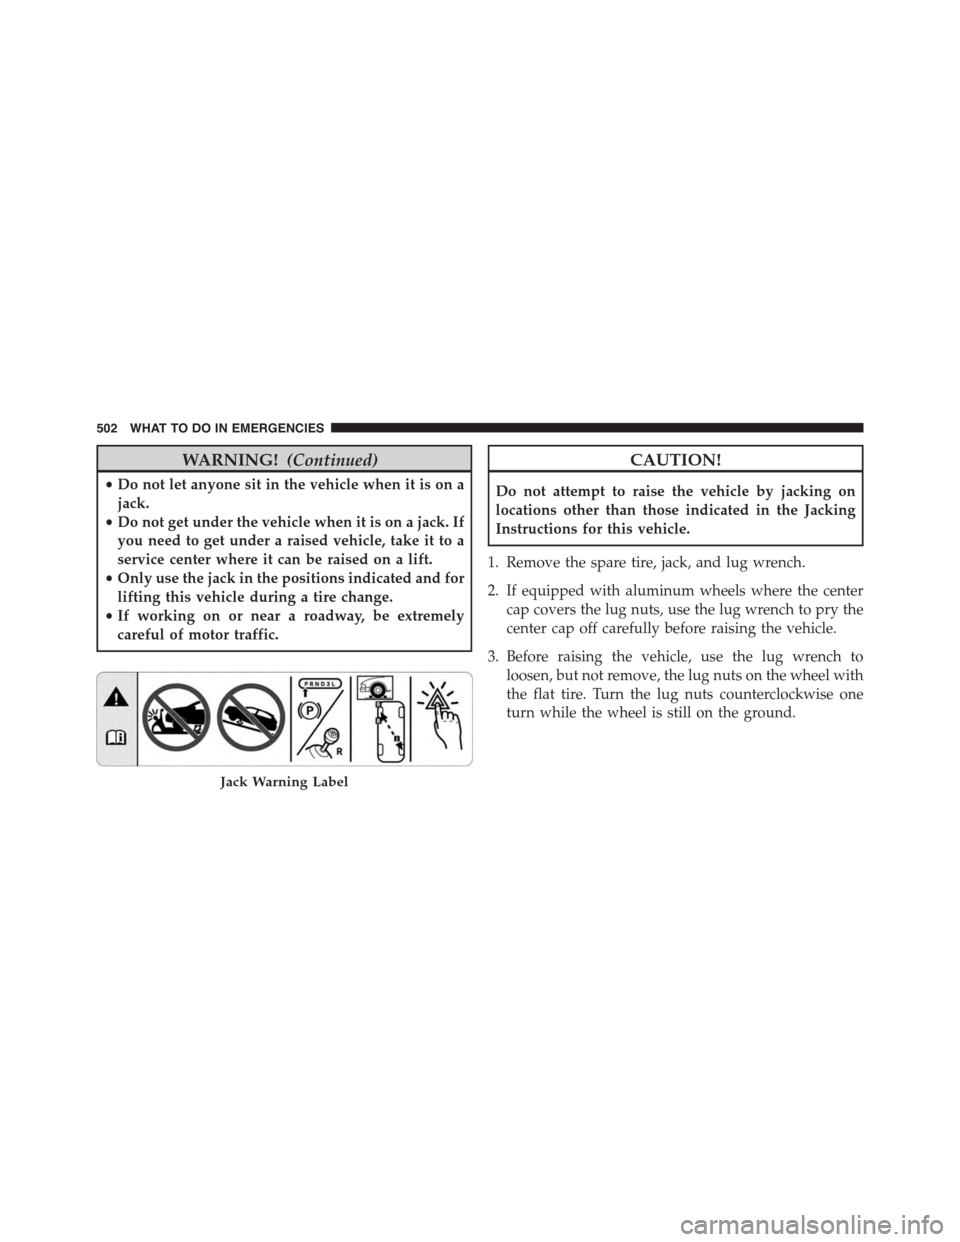
Jack Warning Label
502 WHAT TO DO IN EMERGENCIES
Page 507 of 638
NOTE:
•For vehicles so equipped, do not attempt to install a
center cap or wheel cover on the compact spare.
•Refer to “Compact Spare Tire” and to “Limited-Use
Spare” under “Tires—General Information” in
“Starting and Operating” for additional warnings,
cautions, and information about the spare tire, its
use, and operation.
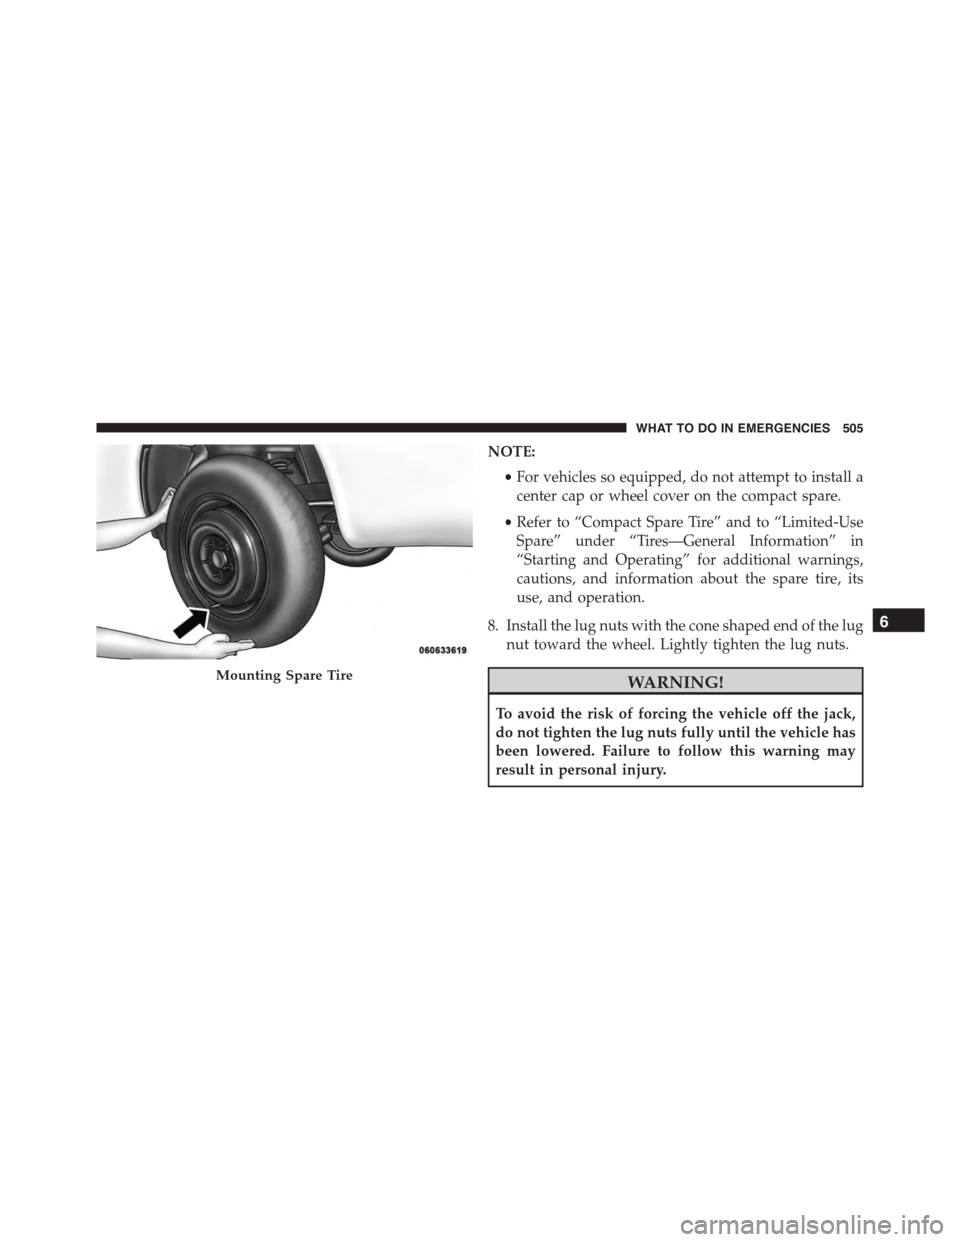
8. Install the lug nuts with the cone shaped end of the lug
nut toward the wheel. Lightly tighten the lug nuts.
WARNING!
To avoid the risk of forcing the vehicle off the jack,
do not tighten the lug nuts fully until the vehicle has
been lowered. Failure to follow this warning may
result in personal injury.
Mounting Spare Tire
6
WHAT TO DO IN EMERGENCIES 505
Page 508 of 638
9. Lower the vehicle to the ground by turning the jack
handle counterclockwise.
10. Refer to Torque Specifications for proper lug nut
torque.
11. Stow the jack, tools and flat tire. Make sure the base
of the jack faces the front of the vehicle before
tightening down the fastener.
WARNING!
A loose tire or jack thrown forward in a collision or
hard stop could endanger the occupants of the ve-
hicle. Always stow the jack parts and the spare tire in
the places provided. Have the deflated (flat) tire
repaired or replaced immediately.
Road Tire Installation
1. Mount the road tire on the axle.
2. Install the remaining lug nuts with the cone shaped
end of the nut toward the wheel. Lightly tighten the
lug nuts.
WARNING!
To avoid the risk of forcing the vehicle off the jack,
do not tighten the lug nuts fully until the vehicle has
been lowered. Failure to follow this warning may
result in personal injury.
3. Lower the vehicle to the ground by turning the jack
handle counterclockwise.
4. Refer to Torque Table for proper lug nut torque.
506 WHAT TO DO IN EMERGENCIES