engine overheat DODGE CHARGER 2015 7.G User Guide
[x] Cancel search | Manufacturer: DODGE, Model Year: 2015, Model line: CHARGER, Model: DODGE CHARGER 2015 7.GPages: 236, PDF Size: 35.67 MB
Page 3 of 236
INTRODUCTION/WELCOME
WELCOME FROM FCA US LLC.......3
CONTROLS AT A GLANCE
DRIVER COCKPIT...............6INSTRUMENT CLUSTER...........8
GETTING STARTED
KEY FOB . . . . . . . . . . . . . . . . . . . 10REMOTE START . . . . . . . . . . . . . . . 13KEYLESS ENTER-N-GO™.........14TRUNK LOCK AND RELEASE.......17VEHICLE SECURITY ALARM........18SEAT BELT SYSTEMS............19SUPPLEMENTAL RESTRAINT SYSTEM(SRS) — AIR BAGS.............20CHILD RESTRAINTS............23HEAD RESTRAINTS.............27FRONT SEATS................28REAR SEATS.................31HEATED/VENTILATED SEATS........32HEATED STEERING WHEEL........34ADJUSTABLE PEDALS...........35TILT/TELESCOPING STEERINGCOLUMN...................36
OPERATING YOUR VEHICLE
ENGINE BREAK-INRECOMMENDATIONS............38TURN SIGNAL/WIPER/WASHER/HIGHBEAM LEVER.................40HEADLIGHT SWITCH............42ELECTRONIC SPEED CONTROL......43ADAPTIVE CRUISE CONTROL (ACC)....45LANESENSE.................51PA R K V I E W®REAR BACK-UP CAMERA . . 52BLIND SPOT MONITORING.........52EIGHT-SPEED AUTOMATICTRANSMISSION...............53AUTOSTICK/STEERING WHEEL MOUNTEDPA D D L E S H I F T E R S..............54SPORT MODE — WITHOUT PERFORMANCECONTROL....................55MANUAL CLIMATE CONTROLS.......56AUTOMATIC TEMPERATURE CONTROLS(ATC) . . . . . . . . . . . . . . . . . . . . . . 58POWER SUNROOF..............60WIND BUFFETING..............61
ELECTRONICS
YOUR VEHICLE'S SOUND SYSTEM....62IDENTIFYING YOUR RADIO.........64Uconnect®ACCESS.............65Uconnect®5.0 . . . . . . . . . . . . . . . . 81Uconnect®8.4A...............91Uconnect®8.4AN.............118
Uconnect®PHONE.............132STEERING WHEEL AUDIO CONTROLS..142DRIVER INFORMATION DISPLAY (DID)..142PROGRAMMABLE FEATURES.......147UNIVERSAL GARAGE DOOR OPENER . . 148POWER OUTLET..............151
UTILITY
TRAILER TOWING WEIGHTS(MAXIMUM TRAILER WEIGHTRATINGS)..................152RECREATIONAL TOWING(BEHIND MOTORHOME, ETC.)......152
SRT
AUTOSTICK.................153DRIVE MODES................155SRT PERFORMANCE FEATURES.....155SUMMER/THREE-SEASON TIRES....158
WHAT TO DO IN EMERGENCIES
ROADSIDE ASSISTANCE..........159INSTRUMENT CLUSTER WARNINGLIGHTS...................159INSTRUMENT CLUSTER INDICATORLIGHTS...................163IF YOUR ENGINE OVERHEATS......165JACKING AND TIRE CHANGING.....166TIRE SERVICE KIT.............172BATTERY LOCATION............178JUMP-STARTING..............178MANUAL PARK RELEASE —8SPEEDTRANSMISSION.........180TOWING A DISABLED VEHICLE.....182FREEING A STUCK VEHICLE.......183EVENT DATA RECORDER (EDR).....184
MAINTAINING YOUR VEHICLE
OPENING THE HOOD...........185ENGINE COMPARTMENT.........186FLUID CAPACITIES — NON-SRT.....194FLUID CAPACITIES — SRT........194FLUIDS, LUBRICANTS AND GENUINEPA RT S — N O N - S RT............195FLUIDS, LUBRICANTS AND GENUINEPA RT S — S RT . . . . . . . . . . . . . . . 1 9 6MAINTENANCE PROCEDURES......198MAINTENANCE SCHEDULE —NON-SRT...................198MAINTENANCE SCHEDULE — SRT . . . 203FUSES....................208TIRE PRESSURES.............213SPARE TIRES — IF EQUIPPED......214FUEL DOOR RELEASE..........215WHEEL AND WHEEL TRIM CARE....217REPLACEMENT BULBS..........217
TABLE OF CONTENTS
Page 34 of 236
HEATED/VENTILATED SEATS
Heated Seats
On some models, the front and rear seats may be equipped with heaters in both the seat
cushions and seatbacks.
The front driver and passenger heated seats are operated using the Uconnect®System.
WARNING!
•Personswhoareunabletofeelpaintotheskinbecauseofadvancedage,chronic
illness, diabetes, spinal cord injury, medication, alcohol use, exhaustion or other
physical condition must exercise care when using the seat heater. It may cause
burns even at low temperatures, especially if used for long periods of time.
•Donotplaceanythingontheseatorseatbackthatinsulatesagainstheat,suchas
ablanketorcushion.Thismaycausetheseatheatertooverheat.Sittinginaseat
that has been overheated could cause serious burns due to the increased surface
temperature of the seat.
Front Heated Seats
The front heated seats control buttons are located within the climate or controls screen of
the touchscreen.
Yo u c a n c h o o s e f r o m H I , L O o r O F F h e a t s e t t i n g s . T h e i n d i c a t o r l i g h t s i n e a c h s w i t c h
indicate the level of heat in use. Two indicator lights will illuminate for HI, one for LO and
none for OFF.
•Presstheheatedseatbuttononce to turn the HI setting ON.
•PresstheheatedseatbuttonasecondtimetoturntheLOsettingON.
•PresstheheatedseatbuttonathirdtimetoturntheheatingelementsOFF.
If the HI-level setting is selected, the system will automatically switch to LO-level after
approximately 60 minutes of continuous operation. At that time, the display will change
from HI to LO, indicating the change. The LO-level setting will turn OFF automatically
after approximately 45 minutes.
NOTE:
•Onceaheatsettingisselected,heatwillbefeltwithintwotofiveminutes.
•Theenginemustberunningfortheheatedseatstooperate.
Vehicles Equipped With Remote Start
On models that are equipped with remote start, the heated seats can be programed to come
on during a remote start.
This feature can be programmed through the Uconnect®system. Refer to “Uconnect®
Settings” in “Understanding Your Instrument Panel” in the Owner's Manual on the DVD.
GETTING STARTED
32
Page 48 of 236
Metric Speed (km/h)
•PushingtheSET+button once will result in a 1 km/h increase in set speed. Each
subsequent tap of the button results in an increase of 1 km/h.
•If the button is continually pushed, the set speed will continue to increase in 10 km/h
increments until the button is released. The increase in set speed is reflected in the DID.
To Decrease Speed
While ACC is set, the set speed can be decreased by pushing the SET-button.
The drivers preferred units can be selected through the instrument panel settings if
equipped. Refer to “Understanding Your Instrument Panel” in the Owner’s Manual on
the DVD for more information. The speed increment shown is dependant on the speed of
U.S. (mph) or Metric (km/h) units:
U.S. Speed (mph)
•PushingtheSET-button once will result in a 1 mph decrease in set speed. Each
subsequent tap of the button results in a decrease of 1 mph.
•If the button is continually pushed, the set speed will continue to decrease in 5 mph
decrements until the button is released. The decrease in set speed is reflected in the DID.
Metric Speed (km/h)
•PushingtheSET-button once will result in a 1 km/h decrease in set speed. Each
subsequent tap of the button results in a decrease of 1 km/h.
•If the button is continually pushed, the set speed will continue to decrease in 10 km/h
decrements until the button is released. The decrease in set speed is reflected in the DID.
NOTE:
•WhenyouoverrideandpushtheSET+button or SET-buttons, the new Set Speed will
be the current speed of the vehicle.
•WhenyouusetheSET-button to decelerate, if the engine’s braking power does not
slow the vehicle sufficiently to reach the set speed, the brake system will automatically
slow the vehicle.
•TheACCsystemappliesthebrakedowntoafullstopwhenfollowingatargetvehicle.
If an ACC host vehicle follows a target vehicle to a standstill, the host vehicle will release
the vehicle brakes two seconds after coming to a full stop.
•TheACCsystemmaintainssetspeedwhendrivinguphillanddownhill.However,a
slight speed change on moderate hills is normal. In addition, downshifting may occur
while climbing uphill or descending downhill. This is normal operation and necessary
to maintain set speed. When driving up hill and down hill, the ACC system will cancel
if the braking temperature exceeds normal range (overheated).
OPERATING YOUR VEHICLE
46
Page 57 of 236
•Thetransmissionwillautomaticallydownshiftasthevehicleslows(topreventengine
lugging) and will display the current gear.
•Thetransmissionwillautomaticallydownshifttofirstgearwhencomingtoastop.After
astop,thedrivershouldmanuallyupshift(+)thetransmissionasthevehicleis
accelerated.
•Youcanstartout,fromastop,infirstorsecondgear.Tapping(+)(atastop)willallow
starting in second gear. Starting out in second gear can be helpful in snowy or icy
conditions.
•Ifarequesteddownshiftwouldcausetheenginetoover-speed,thatshiftwillnotoccur.
•Thesystemwillignoreattemptstoupshiftattoolowofavehiclespeed.
•Holdingthe(-)paddledepressed(ifequipped),orholdingtheshiftleverinthe(-)
position, will downshift the transmission to the lowest gear possible at the current
speed.
•TransmissionshiftingwillbemorenoticeablewhenAutoStickisengaged.
•Thesystemmayreverttoautomaticshiftmodeifafaultoroverheatconditionis
detected.
To d i s e n g a g e A u t o S t i c k m o d e , r e t u r n t h e s h i f t l e v e r t o t h e D R I V E p o s i t i o n , o r p r e s s a n d
hold the (+) shift paddle (if equipped, and the shift lever is already in DRIVE) until “D” is
once again indicated in the instrument cluster. You can shift in or out of the AutoStick
mode at any time without taking your foot off the accelerator pedal.
WARNING!
Do not downshift for additional engine braking on a slippery surface. The drive wheels
could lose their grip and the vehicle could skid, causing a collision or personal injury.
SPORT MODE — WITHOUT PERFORMANCE CONTROL
Yo u r v e h i c l e i s e q u i p p e d w i t h a S p o r t M o d e f e a t u r e . T h i s m o d e i s a c o n f i g u r a t i o n s e t u p
for typical enthusiast driving. The engine, transmission (when equipped with automatic
transmission), and steering systems are all set to their SPORT settings. Sport Mode will
provide improved throttle response and modified shifting for an enhanced driving
experience, as well the greatest amount of steering feel. This mode may be activated and
deactivated by pressing the Sport button on the instrument panel switch bank.
For vehicles equipped with Drive Modes, refer to “Performance Control — If Equipped”
within “Uconnect Settings” in “Understanding Your Instrument Panel” chapter on your
DVD or in the “Drive Mode Supplement” within your Owners information kit for further
information.
OPERATING YOUR VEHICLE
55
Page 156 of 236
![DODGE CHARGER 2015 7.G User Guide In AutoStick mode, the transmission will shift up or down when (+/-) is manually selected
by the driver (using the shift lever, or the shift paddles [if equipped]), unless an engine
lugging or overspe DODGE CHARGER 2015 7.G User Guide In AutoStick mode, the transmission will shift up or down when (+/-) is manually selected
by the driver (using the shift lever, or the shift paddles [if equipped]), unless an engine
lugging or overspe](/img/12/5581/w960_5581-155.png)
In AutoStick mode, the transmission will shift up or down when (+/-) is manually selected
by the driver (using the shift lever, or the shift paddles [if equipped]), unless an engine
lugging or overspeed condition would result. It will remain in the selected gear until
another upshift or downshift is chosen, except as described below.
•IntemporaryAutoStickmode(shiftleverinDRIVE),thetransmissionwillautomatically
shift up when maximum engine speed is reached. If the accelerator is fully depressed,
the transmission will downshift when possible (based on current vehicle speed and
gear, except 6.4L models). Lack of accelerator pedal activity will cause the transmis-
sion to revert to automatic operation.
•IfnormalAutoStickmodeisengaged(shiftleverinMANUALposition),manualgear
selection will be maintained until the shift lever is returned to DRIVE, or as described
below. The transmission will not upshift automatically at redline in this mode, nor will
downshifts be obtained if the accelerator pedal is pressed to the floor.
•Thetransmissionwillautomaticallydownshiftasthevehicleslows(topreventengine
lugging) and will display the current gear.
•Thetransmissionwillautomaticallydownshifttofirstgearwhencomingtoastop.After
astop,thedrivershouldmanuallyupshift(+)thetransmissionasthevehicleis
accelerated.
•Youcanstartout,fromastop,infirstorsecondgear.Tapping(+)(atastop)willallow
starting in second gear. Starting out in second gear can be helpful in snowy or icy
conditions.
•Ifarequesteddownshiftwouldcausetheenginetoover-speed,thatshiftwillnotoccur.
•Thesystemwillignoreattemptstoupshiftattoolowofavehiclespeed.
•Holdingthe(-)paddledepressed(ifequipped),orholdingtheshiftleverinthe(-)
position, will downshift the transmission to the lowest gear possible at the current
speed.
•TransmissionshiftingwillbemorenoticeablewhenAutoStickisengaged.
•Thesystemmayreverttoautomaticshiftmodeifafaultoroverheatconditionis
detected.
To d i s e n g a g e A u t o S t i c k m o d e , r e t u r n t h e s h i f t l e v e r t o t h e D R I V E p o s i t i o n , o r p r e s s a n d
hold the (+) shift paddle (if equipped, and the shift lever is already in DRIVE) until “D” is
once again indicated in the instrument cluster. You can shift in or out of the AutoStick
mode at any time without taking your foot off the accelerator pedal.
WARNING!
Do not downshift for additional engine braking on a slippery surface. The drive wheels
could lose their grip and the vehicle could skid, causing a collision or personal injury.
SRT
154
Page 162 of 236
Electronic Throttle Control (ETC) Indicator Light
This light informs you of a problem with the system.
If a problem is detected, the light will come on while the engine is running. Cycle the
ignition when the vehicle has completely stopped and the shift lever is placed in the PARK
position; the light should turn off.
If the light remains lit with the engine running, your vehicle will usually be drivable.
However, see an authorized dealer immediately. If the light is flashing when the engine is
running, immediate service is required, and you may experience reduced performance, an
elevated/rough idle or engine stall, and your vehicle may require towing.
Tire Pressure Monitoring System (TPMS) Light
Each tire, including the spare (if provided), should be checked monthly when cold and
inflated to the inflation pressure recommended by the vehicle manufacturer on the
vehicle placard or tire inflation pressure label. (If your vehicle has tires of a different size
than the size indicated on the vehicle placard or tire inflation pressure label, you should
determine the proper tire inflation pressure for those tires).
As an added safety feature, your vehicle has been equipped with a tire pressure
monitoring system (TPMS) that illuminates a low tire pressure telltale when one or more
of your tires is significantly under-inflated. Accordingly, when the low tire pressure telltale
illuminates, you should stop and check your tires as soon as possible and inflate them to
the proper pressure. Driving on a significantly under-inflated tire causes the tire to
overheat and can lead to tire failure. Under-inflation also reduces fuel efficiency and tire
tread life and may affect the vehicle’s handling and stopping ability.
IF THE LIGHT STARTS FLASHING INDICATING A LOW TIRE PRESSURE, ADJUST THE AIR
PRESSURE IN THE LOW TIRE TO THE AIR PRESSURE SHOWN ON THE VEHICLE PLACARD OR
TIRE INFLATION PRESSURE LABEL LOCATED ON THE DRIVER'S DOOR.
NOTE:
AFTER INFLATION, THE VEHICLE MAY NEED TO BE DRIVEN FOR 20 MINUTES
BEFORE THE FLASHING LIGHT WILL TURN OFF.
Please note that the TPMS is not a substitute for proper tire maintenance, and it is the
driver’s responsibility to maintain correct tire pressure, even if under-inflation has not
reached the level to trigger illumination of the TPMS low tire pressure telltale.
Yo u r v e h i c l e h a s a l s o b e e n e q u i p p e d w i t h a T P M S m a l f u n c t i o n i n d i c a t o r t o i n d i c a t e w h e n
the system is not operating properly. The TPMS malfunction indicator is combined with
the low tire pressure telltale.
WHAT TO DO IN EMERGENCIES
160
Page 163 of 236
When the system detects a malfunction, the telltale will flash for approximately one
minute and then remain continuously illuminated. This sequence will continue upon
subsequent vehicle start-ups as long as the malfunction exists. When the malfunction
indicator is illuminated, the system may not be able to detect or signal low tire pressure
as intended. TPMS malfunctions may occur for a variety of reasons, including the
installation of replacement or alternate tires or wheels on the vehicle that prevent the
TPMS from functioning properly. Always check the TPMS malfunction telltale after
replacing one or more tires or wheels on your vehicle to ensure that the replacement or
alternate tires and wheels allow the TPMS to continue to function properly.
NOTE:
Ti r e p r e s s u r e s c h a n g e b y a p p r o x i m a t e l y 1 p s i ( 7 k P a ) p e r 1 2 ° F ( 7 ° C ) o f a i r t e m p e r a t u r e
change. Keep this in mind when checking tire pressure inside a garage, especially in the
Winter. Example: If garage temperature is 68°F (20°C), and the outside temperature is
32°F (0°C), then the cold tire inflation pressure should be increased by 3 psi (21 kPa),
which equals 1 psi (7 kPa) for every 12°F (7°C) for this outside temperature condition.
CAUTION!
The TPMS has been optimized for the original equipment tires and wheels. TPMS
pressures and warning have been established for the tire size equipped on your vehicle.
Undesirable system operation or sensor damage may result when using replacement
equipment that is not of the same size, type, and/or style. Aftermarket wheels can
cause sensor damage. Do not use tire sealant from a can, or balance beads if your
vehicle is equipped with a TPMS, as damage to the sensors may result.
-EngineTemperatureWarningLight
This light warns of an overheated engine condition.
If the light turns on or flashes continuously while driving, safely pull over and stop the
vehicle. If the A/C system is on, turn it off. Also, shift the transmission into NEUTRAL and
idle the vehicle. If the temperature reading does not return to normal, turn the engine off
immediately.
We recommend that you do not operate the vehicle or engine damage will occur. Have the
vehicle serviced immediately.
WARNING!
Ahotenginecoolingsystemisdangerous.Youorotherscouldbebadlyburnedby
steam or boiling coolant.
WHAT TO DO IN EMERGENCIES
161
Page 167 of 236
NOTE:
If the indicator message illuminates when you start the vehicle, the oil change indicator
system did not reset. If necessary, repeat this procedure.
NOTE:
Resetting the oil life can also be done within the "Oil Life" menu under “Vehicle Info.”
IF YOUR ENGINE OVERHEATS
In any of the following situations, you can reduce the potential for overheating by taking
the appropriate action:
•Onthehighways—slowdown.
•Incitytraffic—whilestopped,shiftthetransmissiontoNEUTRAL,butdonotincrease
engine idle speed.
NOTE:
There are steps that you can take to slow down an impending overheat condition:
•Ifyourairconditioner(A/C)ison,turnitoff.TheA/Csystemaddsheattotheengine
cooling system and turning the A/C off can help remove this heat.
•Youcanalsoturnthetemperaturecontroltomaximumheat,themodecontroltofloor
and the blower control to high. This allows the heater core to act as a supplement to the
radiator and aids in removing heat from the engine cooling system.
CAUTION!
Driving with a hot cooling system could damage your vehicle. If the temperature gauge
reads HOT (H), pull over and stop the vehicle. Idle the vehicle with the air conditioner
turned off until the pointer drops back into the normal range. If the pointer remains on
HOT (H), and you hear continuous chimes, turn the engine off immediately, and call for
service.
WARNING!
Yo u o r o t h e r s c a n b e b a d l y b u r n e d b y h o t e n g i n e c o o l a n t ( a n t i f r e e z e ) o r s t e a m f r o m y o u r
radiator. If you see or hear steam coming from under the hood, do not open the hood
until the radiator has had time to cool. Never try to open a cooling system pressure cap
when the radiator or coolant bottle is hot.
WHAT TO DO IN EMERGENCIES
165
Page 185 of 236
FREEING A STUCK VEHICLE
If your vehicle becomes stuck in mud, sand or snow, it can often be moved using a rocking
motion. Turn the steering wheel right and left to clear the area around the front wheels.
Push and hold the lock button on the shift lever. Then, shift back and forth between
REVERSE and DRIVE, while gently pushing the accelerator. Use the least amount of
accelerator pedal pressure that will maintain the rocking motion, without spinning the
wheels or racing the engine.
NOTE:
•ShiftsbetweenDRIVEandREVERSEcanonlybeachievedatwheelspeedsof5mph
(8 km/h) or less. Whenever the transmission remains in NEUTRAL for more than
2seconds,youmustpushthebrakepedaltoengageDRIVEorREVERSE.
•Pushthe“ESCOff”switch,toplacetheElectronicStabilityControl(ESC)systemin
“Partial Off” mode, before rocking the vehicle. Once the vehicle has been freed, push
the “ESC Off” switch again to restore "ESC On" mode.
CAUTION!
•When“rocking”astuckvehiclebyshiftingbetweenREVERSEandDRIVE,donot
spin the wheels faster than 15 mph (24 km/h), or drivetrain damage may result.
•Revvingtheengineorspinningthewheelstoofastmayleadtotransmission
overheating and failure. It can also damage the tires. Do not spin the wheels above
30 mph (48 km/h) while in gear (no transmission shifting occurring).
WARNING!
Fast spinning tires can be dangerous. Forces generated by excessive wheel speeds may
cause tire damage or failure. A tire could explode and injure someone. Do not spin your
vehicle's wheels faster than 30 mph (48 km/h) when you are stuck. Do not let anyone
near a spinning wheel, no matter what the speed.
WHAT TO DO IN EMERGENCIES
183
Page 225 of 236
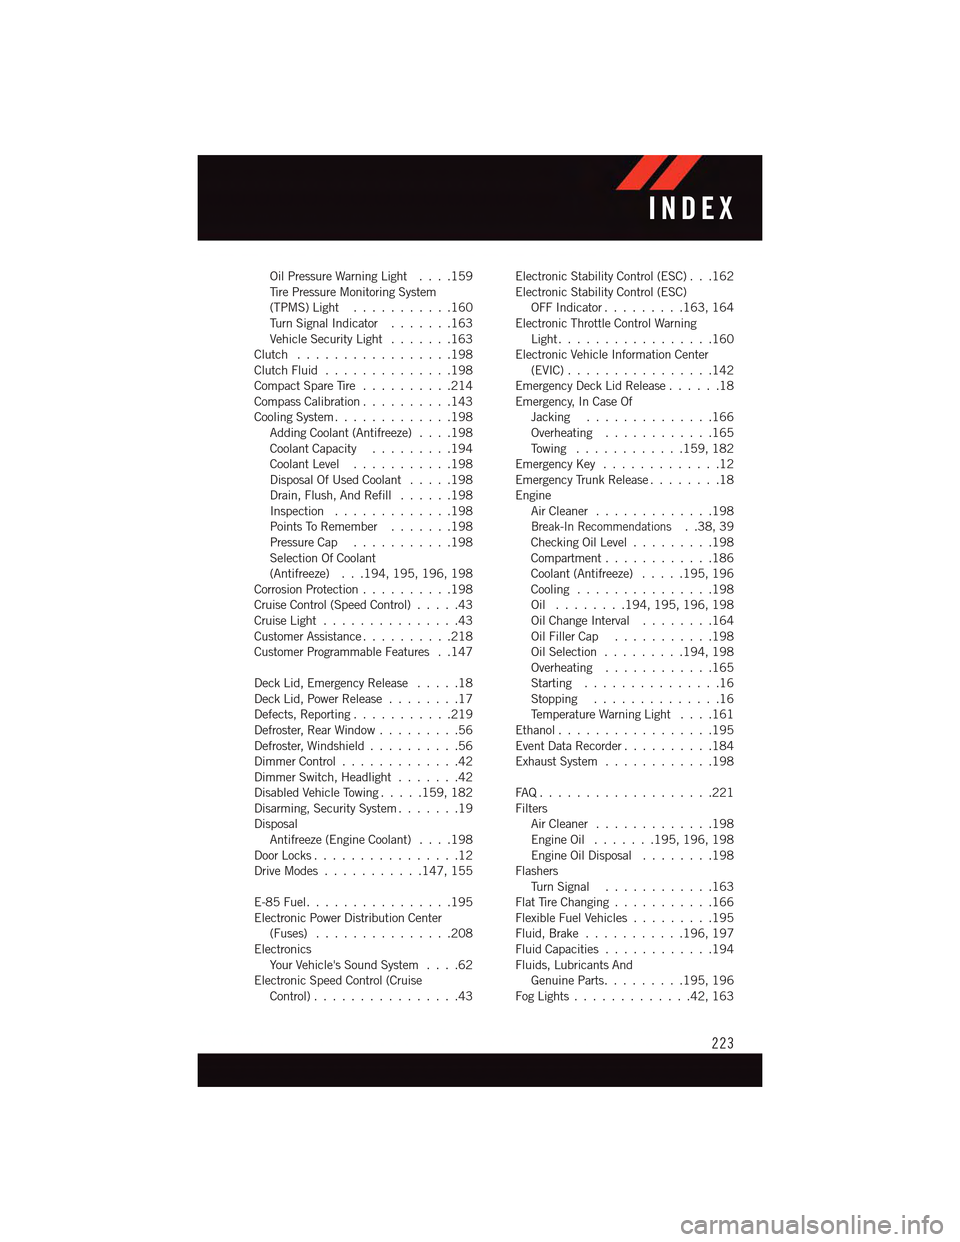
Oil Pressure Warning Light . . . .159Ti r e P r e s s u r e M o n i t o r i n g S y s t e m(TPMS) Light...........160Tu r n S i g n a l I n d i c a t o r.......163Vehicle Security Light.......163Clutch . . . . . . . . . . . . . . . . .198Clutch Fluid . . . . . . . . . . . . . .198Compact Spare Tire..........214Compass Calibration..........143Cooling System.............198Adding Coolant (Antifreeze)....198Coolant Capacity.........194Coolant Level...........198Disposal Of Used Coolant.....198Drain, Flush, And Refill......198Inspection . . . . . . . . . . . . .198Points To Remember.......198Pressure Cap . . . . . . . . . . .198Selection Of Coolant(Antifreeze) . . .194, 195, 196, 198Corrosion Protection..........198Cruise Control (Speed Control).....43Cruise Light . . . . . . . . . . . . . . .43Customer Assistance..........218Customer Programmable Features . .147
Deck Lid, Emergency Release.....18Deck Lid, Power Release........17Defects, Reporting...........219Defroster, Rear Window.........56Defroster, Windshield . . . . . . . . . .56Dimmer Control.............42Dimmer Switch, Headlight.......42Disabled Vehicle Towing . . . . .159, 182Disarming, Security System.......19DisposalAntifreeze (Engine Coolant)....198Door Locks................12Drive Modes...........147, 155
E-85 Fuel................195Electronic Power Distribution Center(Fuses) . . . . . . . . . . . . . . .208ElectronicsYo u r Ve h i c l e ' s S o u n d S y s t e m....62Electronic Speed Control (CruiseControl) . . . . . . . . . . . . . . . .43
Electronic Stability Control (ESC) . . .162Electronic Stability Control (ESC)OFF Indicator . . . . . . . . .163, 164Electronic Throttle Control WarningLight . . . . . . . . . . . . . . . . .160Electronic Vehicle Information Center(EVIC) . . . . . . . . . . . . . . . .142Emergency Deck Lid Release......18Emergency, In Case OfJacking..............166Overheating............165To w i n g . . . . . . . . . . . .159, 182Emergency Key.............12Emergency Trunk Release........18EngineAir Cleaner . . . . . . . . . . . . .198Break-In Recommendations..38,39Checking Oil Level.........198Compartment............186Coolant (Antifreeze).....195, 196Cooling . . . . . . . . . . . . . . .198Oil . . . . . . . .194, 195, 196, 198Oil Change Interval........164Oil Filler Cap...........198Oil Selection . . . . . . . . .194, 198Overheating............165Starting...............16Stopping..............16Te m p e r a t u r e W a r n i n g L i g h t....161Ethanol.................195Event Data Recorder..........184Exhaust System............198
FA Q . . . . . . . . . . . . . . . . . . . 2 2 1FiltersAir Cleaner . . . . . . . . . . . . .198Engine Oil.......195, 196, 198Engine Oil Disposal........198FlashersTu r n S i g n a l............163Flat Tire Changing...........166Flexible Fuel Vehicles.........195Fluid, Brake . . . . . . . . . . .196, 197Fluid Capacities............194Fluids, Lubricants AndGenuine Parts.........195, 196Fog Lights . . . . . . . . . . . . .42, 163
INDEX
223