remote control DODGE CHARGER 2018 Owners Manual
[x] Cancel search | Manufacturer: DODGE, Model Year: 2018, Model line: CHARGER, Model: DODGE CHARGER 2018Pages: 553, PDF Size: 5.3 MB
Page 26 of 553
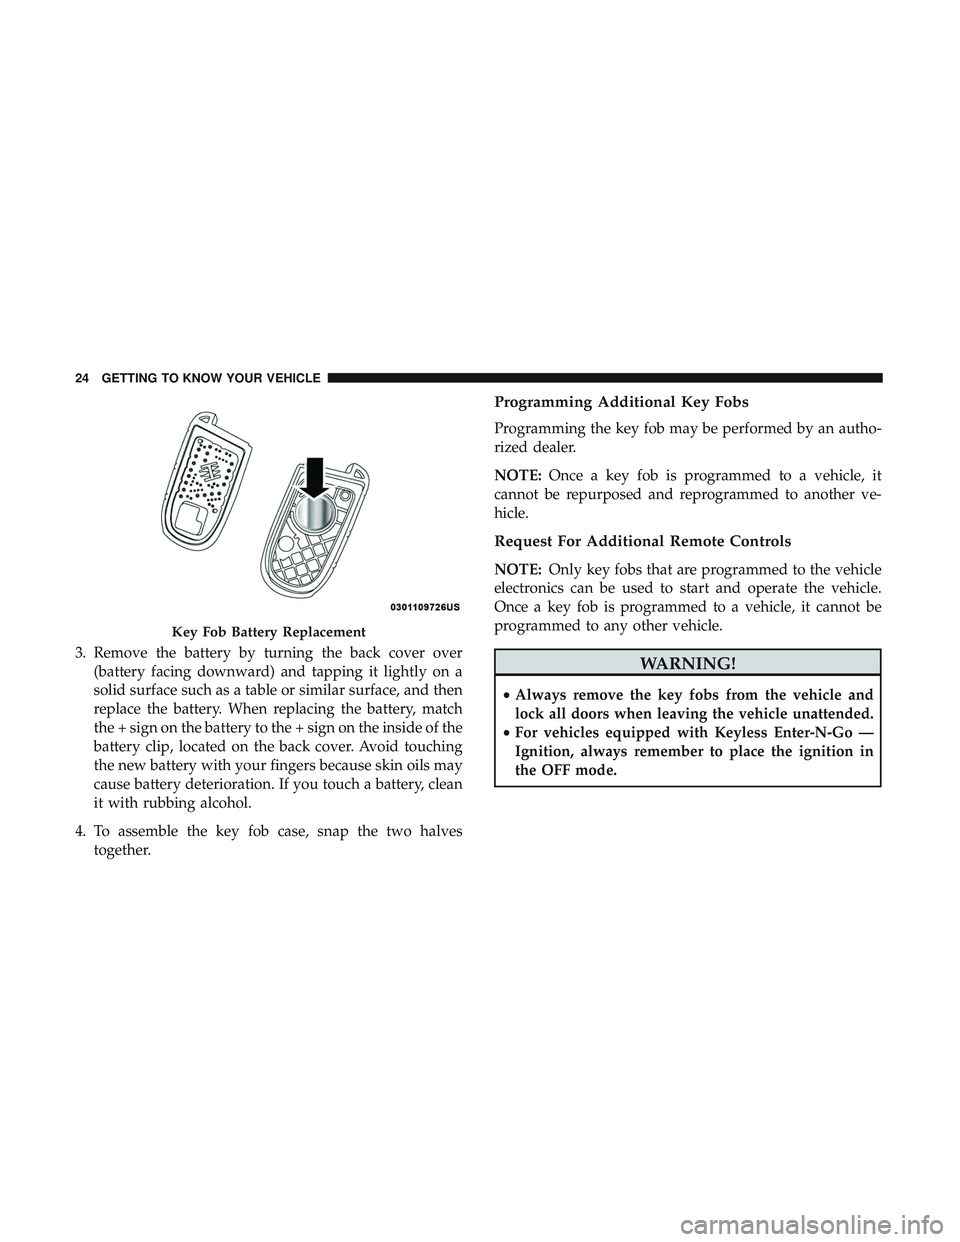
3. Remove the battery by turning the back cover over(battery facing downward) and tapping it lightly on a
solid surface such as a table or similar surface, and then
replace the battery. When replacing the battery, match
the + sign on the battery to the + sign on the inside of the
battery clip, located on the back cover. Avoid touching
the new battery with your fingers because skin oils may
cause battery deterioration. If you touch a battery, clean
it with rubbing alcohol.
4. To assemble the key fob case, snap the two halves together.
Programming Additional Key Fobs
Programming the key fob may be performed by an autho-
rized dealer.
NOTE: Once a key fob is programmed to a vehicle, it
cannot be repurposed and reprogrammed to another ve-
hicle.
Request For Additional Remote Controls
NOTE: Only key fobs that are programmed to the vehicle
electronics can be used to start and operate the vehicle.
Once a key fob is programmed to a vehicle, it cannot be
programmed to any other vehicle.
WARNING!
• Always remove the key fobs from the vehicle and
lock all doors when leaving the vehicle unattended.
• For vehicles equipped with Keyless Enter-N-Go —
Ignition, always remember to place the ignition in
the OFF mode.
Key Fob Battery Replacement
24 GETTING TO KNOW YOUR VEHICLE
Page 30 of 553
WARNING!(Continued)
•Do not leave the key fob in or near the vehicle, or in
a location accessible to children, and do not leave the
ignition of a vehicle equipped with Keyless Enter-
N-Go in the ON/RUN mode. A child could operate
power windows, other controls, or move the vehicle.
• Do not leave children or animals inside parked
vehicles in hot weather. Interior heat build-up may
cause serious injury or death.
CAUTION!
An unlocked vehicle is an invitation for thieves. Al-
ways remove key fob from the vehicle and lock all
doors when leaving the vehicle unattended.
REMOTE START — IF EQUIPPED
How To Use Remote Start — If Equipped
Push remote start button on the key fob twice
within five seconds. Pushing the remote start
button a third time shuts the engine off. To drive the vehicle, push the unlock button, and push the
ignition to the ON/RUN position.
NOTE:
•
With remote start, the engine will only run for 15
minutes (timeout) unless the ignition is placed in the
ON/RUN position.
• The vehicle must be started with the key after two
consecutive timeouts.
All of the following conditions must be met before the
engine will remote start:
• Gear selector in PARK
• Doors closed
• Hood closed
• Trunk closed
• Hazard switch off
• Brake switch inactive (brake pedal not pushed)
• Battery at an acceptable charge level
28 GETTING TO KNOW YOUR VEHICLE
Page 31 of 553
•Check engine light shall not be present
• PANIC button not pushed
• System not disabled from previous remote start event
• Vehicle alarm system indicator flashing
• Ignition in STOP/OFF position
• Fuel level meets minimum requirement
• Vehicle Security Alarm is not signaling an intrusion
WARNING!
•Do not start or run an engine in a closed garage or
confined area. Exhaust gas contains Carbon Monox-
ide (CO) which is odorless and colorless. Carbon
Monoxide is poisonous and can cause serious injury
or death when inhaled.
• Keep key fobs away from children. Operation of the
Remote Start System, windows, door locks or other
controls could cause serious injury or death.
Remote Start Abort Message On The Instrument
Cluster Display — If Equipped
The following messages will display in the instrument
cluster display if the vehicle fails to remote start or exits
remote start prematurely:
• Remote Start Aborted — Door Open
• Remote Start Aborted — Hood Open
• Remote Start Aborted — Fuel Low
• Remote Start Aborted — Trunk Open
• Remote Start Disabled — Start Vehicle To Reset
The message will stay active until the ignition is turned to
the ON/RUN position.
To Enter Remote Start Mode
Push and release the remote start button on the key fob
twice within five seconds. The vehicle doors will lock, the
parking lights will flash, and the horn will chirp twice (if
programmed). Then, the engine will start, and the vehicle
will remain in the Remote Start mode for a 15-minute cycle.
3
GETTING TO KNOW YOUR VEHICLE 29
Page 53 of 553
Front Heated Seats
The front heated seat control buttons are located within the
climate or controls screen of the touchscreen.
You can choose from HI, LO, or OFF heat settings. The
indicator arrows in touchscreen buttons indicate the level
of heat in use. Two indicator arrows will illuminate for HI,
and one for LO. Turning the heating elements off will
return the user to the radio screen.
•Press the heated seat button
once to turn the HI
setting on.
• Press the heated seat buttona second time to turn
the LO setting on.
• Press the heated seat buttona third time to turn the
heating elements off.
If the HI-level setting is selected, the system will automati-
cally switch to LO-level after approximately 60 minutes of
continuous operation. At that time, the display will change
from HI to LO, indicating the change. The LO-level setting
will turn off automatically after approximately 45 minutes. NOTE:
•
Once a heat setting is selected, heat will be felt within
two to five minutes.
• The engine must be running for the heated seats to
operate.
Vehicles Equipped With Remote Start
On models that are equipped with remote start, the heated
seats can be programmed to come on during a remote start.
This feature can be programmed through the Uconnect
system. Refer to “Uconnect Settings” in “Multimedia” for
further information.
WARNING!
• Persons who are unable to feel pain to the skin
because of advanced age, chronic illness, diabetes,
spinal cord injury, medication, alcohol use, exhaus-
tion or other physical condition must exercise care
when using the seat heater. It may cause burns even
at low temperatures, especially if used for long
periods of time.
(Continued)
3
GETTING TO KNOW YOUR VEHICLE 51
Page 55 of 553
The front ventilated seats control buttons are located
within the Uconnect system. You can gain access to the
control buttons through the climate screen or the controls
screen.
•Press the ventilated seat button
once to choose HI.
•Press the ventilated seat buttona second time to
choose LO.
• Press the ventilated seat buttona third time to turn
the ventilated seat off.
NOTE: The engine must be running for the ventilated seats
to operate.
Vehicles Equipped With Remote Start
On models that are equipped with remote start, the venti-
lated seats can be programmed to come on during a remote
start.
This feature can be programmed through the Uconnect
system. Refer to “Uconnect Settings” in “Multimedia” for
further information.
Folding Rear Seat
The rear seatbacks can be folded forward to provide an
additional storage area. To fold the rear seatback, pull on
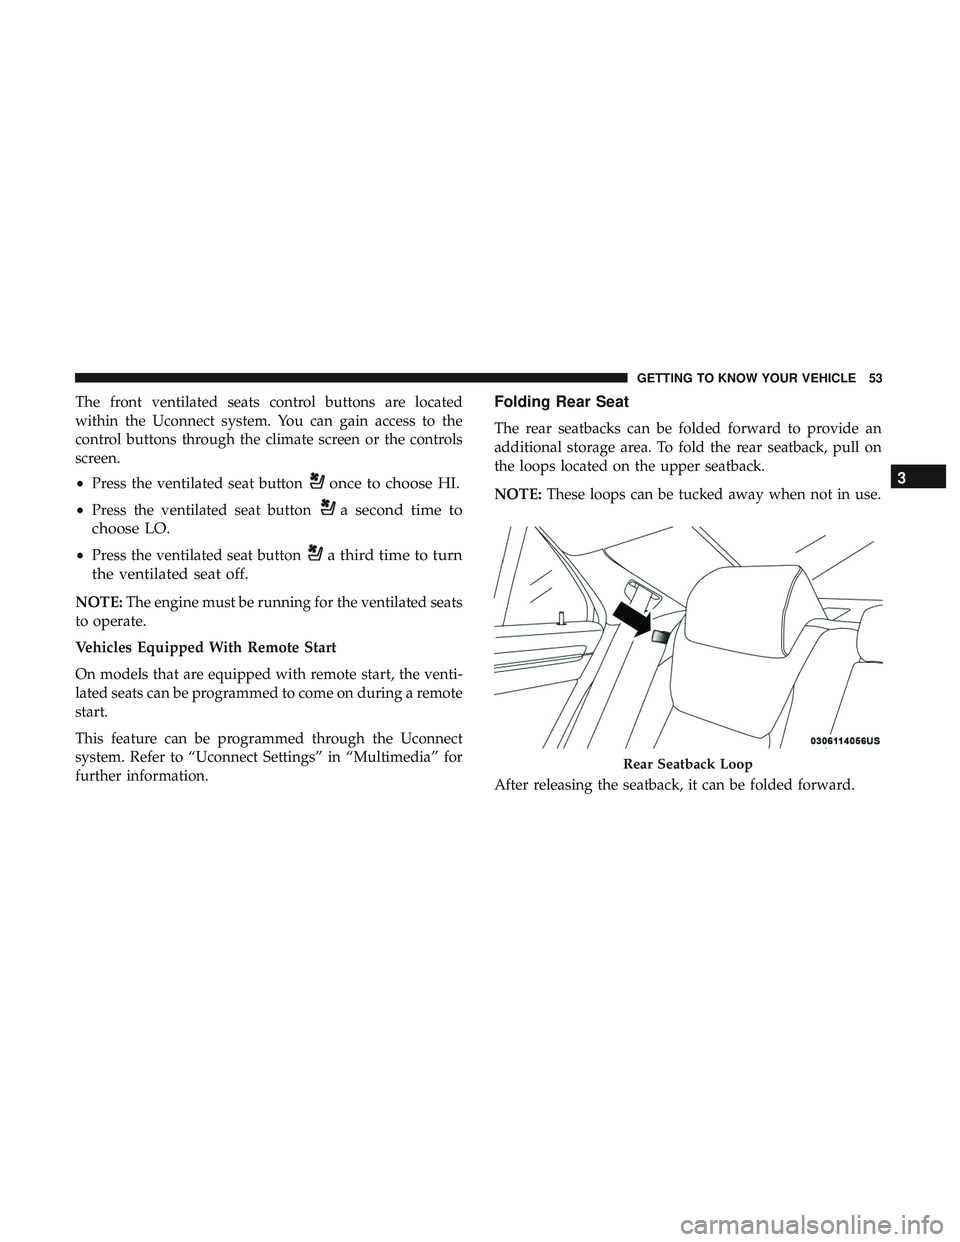
the loops located on the upper seatback.
NOTE: These loops can be tucked away when not in use.
After releasing the seatback, it can be folded forward.
Rear Seatback Loop
3
GETTING TO KNOW YOUR VEHICLE 53
Page 61 of 553
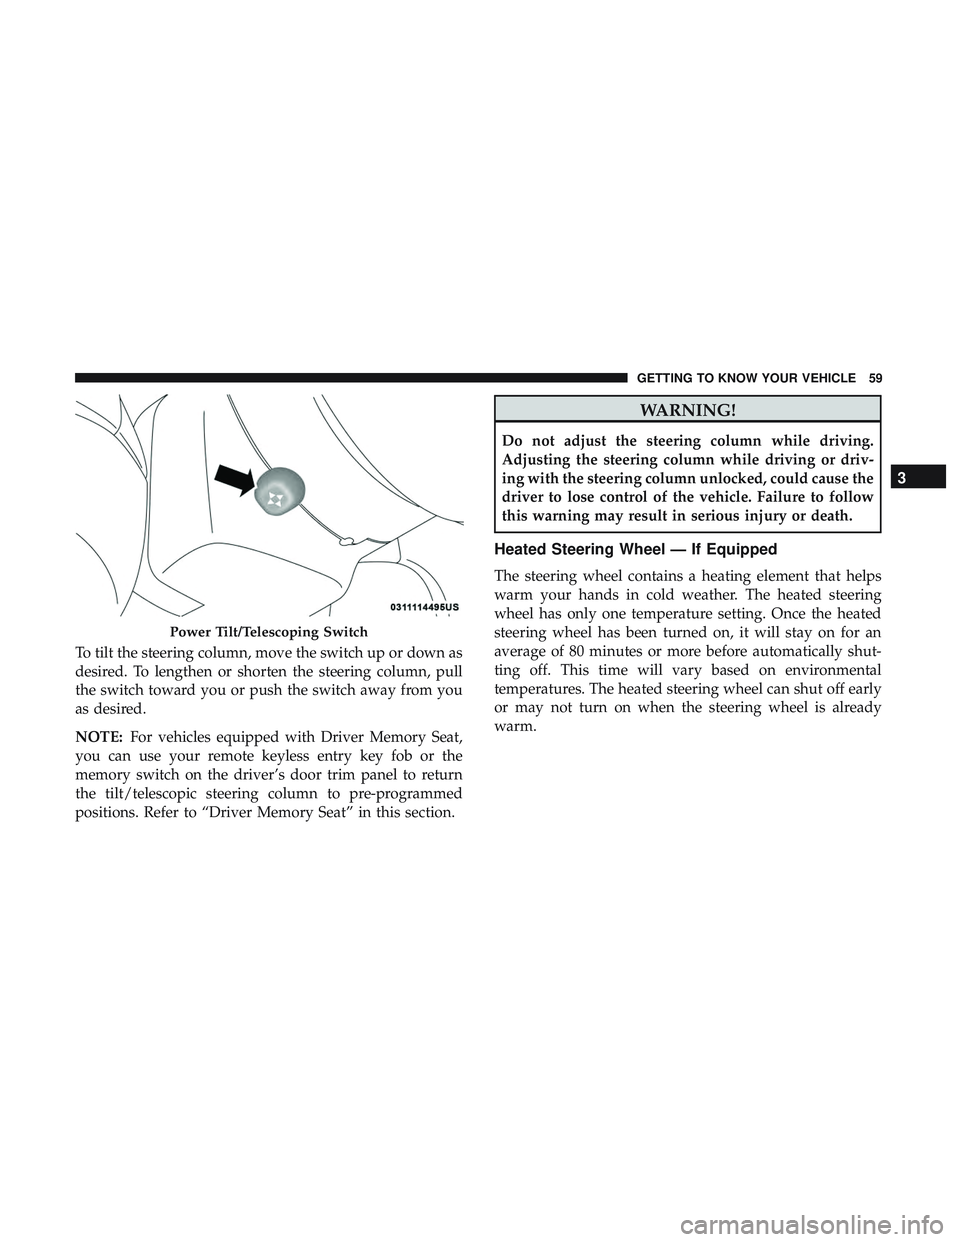
To tilt the steering column, move the switch up or down as
desired. To lengthen or shorten the steering column, pull
the switch toward you or push the switch away from you
as desired.
NOTE:For vehicles equipped with Driver Memory Seat,
you can use your remote keyless entry key fob or the
memory switch on the driver’s door trim panel to return
the tilt/telescopic steering column to pre-programmed
positions. Refer to “Driver Memory Seat” in this section.
WARNING!
Do not adjust the steering column while driving.
Adjusting the steering column while driving or driv-
ing with the steering column unlocked, could cause the
driver to lose control of the vehicle. Failure to follow
this warning may result in serious injury or death.
Heated Steering Wheel — If Equipped
The steering wheel contains a heating element that helps
warm your hands in cold weather. The heated steering
wheel has only one temperature setting. Once the heated
steering wheel has been turned on, it will stay on for an
average of 80 minutes or more before automatically shut-
ting off. This time will vary based on environmental
temperatures. The heated steering wheel can shut off early
or may not turn on when the steering wheel is already
warm.
Power Tilt/Telescoping Switch
3
GETTING TO KNOW YOUR VEHICLE 59
Page 62 of 553
The heated steering wheel control button is located within
the Uconnect system. You can gain access to the control
button through the climate screen or the controls screen.
•Press the heated steering wheel button
once to turn
the heating element on.
• Press the heated steering wheel buttona second time
to turn the heating element off.
NOTE: The engine must be running for the heated steering
wheel to operate.
Vehicles Equipped With Remote Start
On models that are equipped with remote start, the heated
steering wheel can be programmed to come on during a
remote start through the Uconnect system. Refer to
“Uconnect Settings” in “Multimedia” for further informa-
tion.
WARNING!
• Persons who are unable to feel pain to the skin
because of advanced age, chronic illness, diabetes,
spinal cord injury, medication, alcohol use, exhaus-
tion, or other physical conditions must exercise care
when using the steering wheel heater. It may cause
burns even at low temperatures, especially if used
for long periods.
• Do not place anything on the steering wheel that
insulates against heat, such as a blanket or steering
wheel covers of any type and material. This may
cause the steering wheel heater to overheat.
MIRRORS
Inside Day/Night Mirror — If Equipped
A single ball joint mirror is provided in the vehicle. It is a
twist on mirror that has a fixed position at the windshield.
The mirror installs on the windshield button with a coun-
terclockwise rotation and requires no tools for mounting.
The mirror head can be adjusted up, down, left, and right
for various drivers. The mirror should be adjusted to center
on the view through the rear window.
60 GETTING TO KNOW YOUR VEHICLE
Page 64 of 553
CAUTION!
To avoid damage to the mirror during cleaning, never
spray any cleaning solution directly onto the mirror.
Apply the solution onto a clean cloth and wipe the
mirror clean.
Outside Mirrors
To receive maximum benefit, adjust the outside mirror(s) to
center on the adjacent lane of traffic and a slight overlap of
the view obtained from the inside mirror.
NOTE:The passenger side convex outside mirror will give
a much wider view to the rear, and especially of the lane
next to your vehicle.
WARNING!
Vehicles and other objects seen in an outside convex
mirror will look smaller and farther away than they
really are. Relying too much on side convex mirrors
could cause you to collide with another vehicle or other
object. Use your inside mirror when judging the size or
distance of a vehicle seen in a side convex mirror.
Driver’s Outside Automatic Dimming Mirror — If
Equipped
The driver ’s outside mirror will automatically adjust for
glare from vehicles behind you. This feature is controlled
by the inside automatic dimming mirror and will automati-
cally adjust for headlight glare when the inside mirror
adjusts.
Outside Mirrors Approach Light — If Equipped
Driver and passenger outside mirrors equipped with ap-
proach lighting contain one LED, which is located in the
upper outboard mirror glass corner. The approach light
supplies illuminated entry lighting, which turns on in both
mirrors when you use the remote keyless entry key fob or
open any door. This LED shines outward to illuminate the
front and rear door handles. It also shines downward to
illuminate the area in front of the doors.
Power Mirrors
The power mirror controls are located on the driver’s door
trim panel.
62 GETTING TO KNOW YOUR VEHICLE
Page 506 of 553
•SPORT
Press the “Sport” button on the touchscreen to provide an
increased amount of steering feel, requiring a higher
amount of steering effort.
• NORMAL
Press the “Norm” button on the touchscreen to provide a
balanced steering feel and steering effort. This is also your
vehicles pre-set steering setting.
• COMFORT
Press the “Comf” button on the touchscreen to provide a
lower steering effort.
STEERING WHEEL AUDIO CONTROLS — IF
EQUIPPED
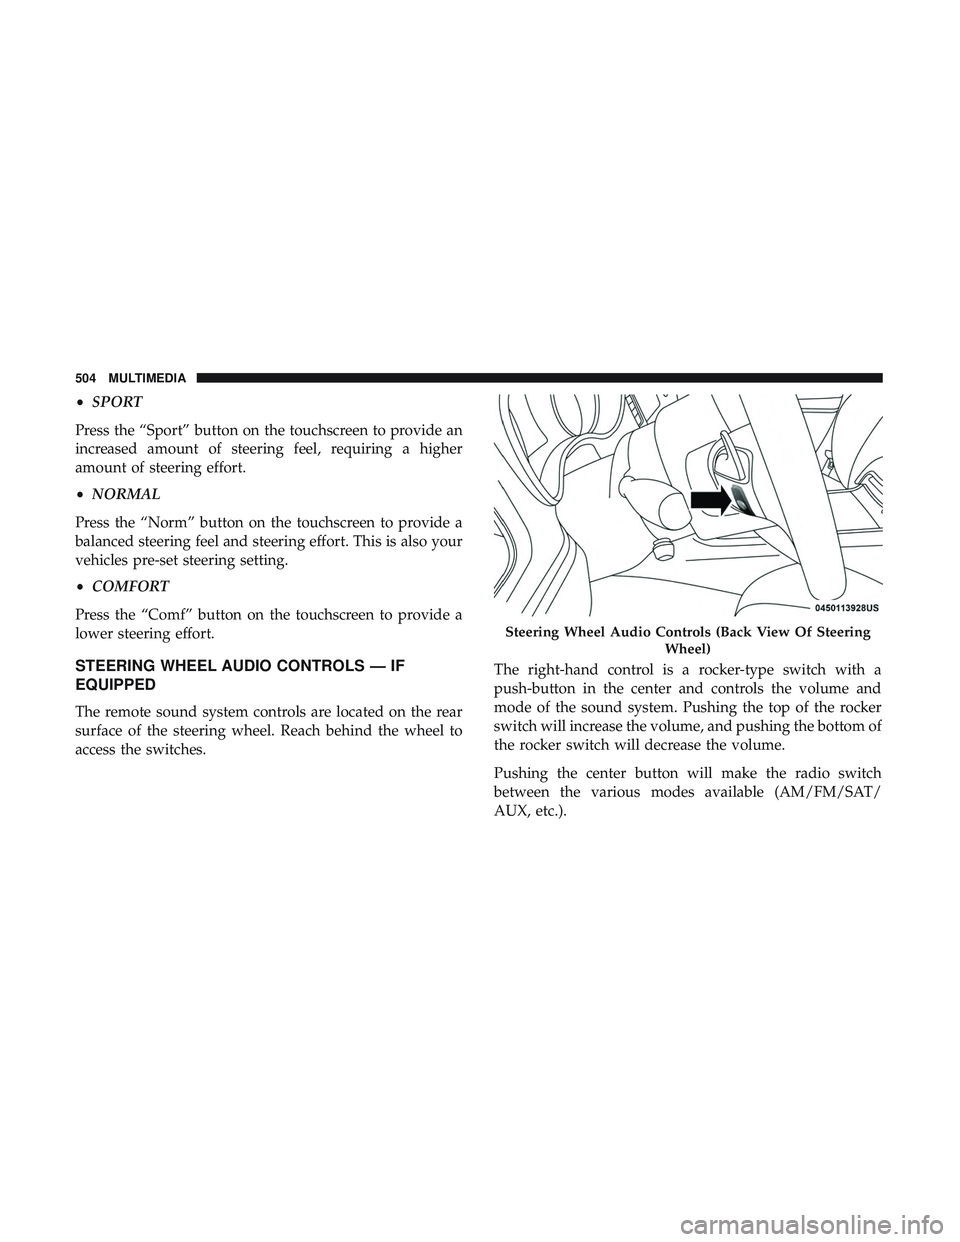
The remote sound system controls are located on the rear
surface of the steering wheel. Reach behind the wheel to
access the switches. The right-hand control is a rocker-type switch with a
push-button in the center and controls the volume and
mode of the sound system. Pushing the top of the rocker
switch will increase the volume, and pushing the bottom of
the rocker switch will decrease the volume.
Pushing the center button will make the radio switch
between the various modes available (AM/FM/SAT/
AUX, etc.).
Steering Wheel Audio Controls (Back View Of Steering
Wheel)
504 MULTIMEDIA
Page 539 of 553
Disposal Of Used Coolant..................384
Drain, Flush, And Refill ....................381
Inspection ............................. .384
Points To Remember ..................... .384
Pressure Cap ............................383
Radiator Cap .......................... .383
Selection Of Coolant (Antifreeze) .......381, 431, 432
Corrosion Protection ........................413
Cruise Control (Speed Control) ..............243, 246
Cruise Light .......................... .140, 141
Cupholders ...............................111
Customer Assistance ........................528
Cybersecurity ............................ .438
Daytime Running Lights ......................65
Dealer Service ............................ .367
Deck Lid Power Release ...........................98
Defroster, Windshield ........................215
Delay (Intermittent) Wipers ....................74
Diagnostic System, Onboard ...................142
Dimmer Switch Headlight ...............................66
Dipsticks Oil (Engine) ............................365 Disable Vehicle Towing
..................... .346
Disposal Antifreeze (Engine Coolant) .................384
Disturb ................................. .522
Door Ajar ............................... .133
Door Ajar Light ............................133
Door Locks Automatic ..............................41
Child-Protection Door Lock — Rear Doors .......41
Doors ....................................35
Drag And Drop Menu .......................437
Drive Modes ............................. .495
Driver ’s Seat Back Tilt ........................43
Driving Through Flowing, Rising, Or Shallow Standing
Water .................................296
E-85 Fuel ............................... .428
Electric Brake Control System ..................147
Anti-Lock Brake
System ....................146
Electronic Roll Mitigation ...............148, 155
Electric Remote Mirrors .......................62
Electronic Power Distribution Center (Fuses) .......312
Electronic Speed Control (Cruise Control) .........244
Electronic Stability Control (ESC) ...............149
12
INDEX 537