transmission oil DODGE CHARGER 2020 Owners Manual
[x] Cancel search | Manufacturer: DODGE, Model Year: 2020, Model line: CHARGER, Model: DODGE CHARGER 2020Pages: 412, PDF Size: 18.96 MB
Page 8 of 412
6
ENGINE COMPARTMENT .................................. 266 3.6L Engine ...............................................2665.7L Engine ...............................................2676.2L Supercharged Engine ......................268
6.4L Engine ...............................................269Checking Oil Level — 3.6L And 5.7L
Engine.........................................................270 Checking Oil Level — 6.2L Supercharged
Engine And 6.4L Engine ...........................270 Adding Washer Fluid..................................270Maintenance-Free Battery .......................271
Pressure Washing ......................................271
DEALER SERVICE .............................................. 272
Engine Oil .................................................. 272Engine Oil Filter ..........................................274Engine Air Cleaner Filter ...........................275
Air Conditioner Maintenance ...................275Accessory Drive Belt Inspection................276Body Lubrication ........................................277
Windshield Wiper Blades ..........................278
Exhaust System .........................................279
Cooling System .........................................280
Brake System ............................................284
Automatic Transmission ............................285
Rear Axle ....................................................286
RAISING THE VEHICLE ...................................... 286 TIRES....................................................................286
Tire Safety Information ............................. 286Tires — General Information .................... 293
Tire Types ................................................... 298
Spare Tires — If Equipped ......................... 298
Wheel And Wheel Trim Care .................... 300
Tire Chains And Traction Devices —
Non-SRT ..................................................... 301 Tire Chains And Traction Devices — SRT.. 302
Tire Rotation Recommendations —
Non-SRT ..................................................... 302
Tire Rotation Recommendations — SRT .... 303
DEPARTMENT OF TRANSPORTATION UNIFORM
TIRE QUALITY GRADES .....................................303
Treadwear .................................................. 303
Traction Grades ......................................... 303
Temperature Grades ................................. 304
VEHICLE STORAGE .............................................304
BODYWORK ........................................................ 304
Protection From Atmospheric Agents....... 304
Body And Underbody Maintenance .......... 305Preserving The Bodywork .......................... 305
INTERIORS ......................................................... 306
Seats And Fabric Parts .............................. 306
Plastic And Coated Parts ........................... 306
Leather Parts ............................................. 307
Glass Surfaces .......................................... 307
TECHNICAL SPECIFICATIONS
IDENTIFICATION DATA ...................................... 308Vehicle Identification Number .................. 308
BRAKE SYSTEM ................................................ 308
WHEEL AND TIRE TORQUE
SPECIFICATIONS ................................................ 308
Torque Specifications................................ 308
FUEL REQUIREMENTS ...................................... 309
3.6L Engine ................................................ 309
5.7L Engine ................................................ 310
6.2L And 6.4L Engine................................ 310
Reformulated Gasoline ............................ 310Materials Added To Fuel ........................... 310
Gasoline/Oxygenate Blends ..................... 311
Do Not Use E-85 In Non-Flex Fuel
Vehicles ...................................................... 311 CNG And LP Fuel System Modifications .. 312MMT In Gasoline........................................ 312
Fuel System Cautions................................ 312
Carbon Monoxide Warnings...................... 312
FLUID CAPACITIES — NON-SRT ....................... 313
FLUID CAPACITIES — SRT ................................ 314
FLUIDS AND LUBRICANTS — NON-SRT .......... 315 Engine ........................................................ 315
Chassis ....................................................... 317
FLUIDS AND LUBRICANTS — SRT ................... 318
Engine ........................................................ 318
Chassis ....................................................... 320
20_LD_OM_EN_USC_t.book Page 6
Page 90 of 412
88GETTING TO KNOW YOUR INSTRUMENT PANEL
Secondary Method Of Resetting Engine Oil Life
1. Without pressing the brake pedal, push the
ENGINE START/STOP button and place the
ignition to the ON/RUN position (do not
start the engine).
2. Fully press the accelerator pedal, slowly, three times within ten seconds.
3. Without pushing the brake pedal, push the ENGINE START/STOP button once to return
the ignition to the OFF/LOCK position.
NOTE:
If the indicator message illuminates when you
start the vehicle, the oil change indicator
system did not reset. If necessary, repeat this
procedure.
PERFORMANCE SHIFT INDICATOR (PSI)
— I
F EQUIPPED
The Performance Shift Indicator (PSI) is enabled
on vehicles with manual transmission, or when
a vehicle with automatic transmission is in
manual shift mode. The PSI provides the driver
with a visual indication within the instrument
cluster display when the driver configured gear
shift point has been reached and the driver is still accelerating. This indication notifies the
driver to change gear corresponding to the
configured RPMs in the head unit.
INSTRUMENT CLUSTER DISPLAY
S
ELECTABLE MENU ITEMS
Push and release the up or down arrow
button until the desired Selectable Menu item is
displayed in the instrument cluster display.
Follow the Menu or submenu prompts as
desired.
Speedometer
Push and release the up or down arrow
button until the speedometer menu is displayed
in the instrument cluster display. Push and
release the OK button to toggle units (km/h or
mph) of the speedometer.
Vehicle Info
Push and release the up or down arrow
button until the “Vehicle Info” menu is displayed
in the instrument cluster display. Push and
release the right or left arrow button to
scroll through the submenus items of “Vehicle
Info.” Follow the directional prompts to access or reset any of the following “Vehicle Info”
submenu items:
Tire Pressure
Coolant Temp
Trans Temp
Oil Temp
Oil Pressure
Oil Life
Battery Voltage
Storage Mode - Through this option, the
vehicle can be placed into Storage Mode.
AWD Status — If Equipped
Intake Air Temperature — If Equipped
Engine Torque — If Equipped
Engine Power — If Equipped
Air-Fuel Ratio — If Equipped
Boost Pressure — If Equipped
InterCooler (I/C) Temperature — If Equipped
20_LD_OM_EN_USC_t.book Page 88
Page 99 of 412
GETTING TO KNOW YOUR INSTRUMENT PANEL97
Engine Coolant Temperature Warning
Light
This warning light warns of an
overheated engine condition. If the
engine coolant temperature is too
high, this indicator will illuminate and
a single chime will sound. If the temperature
reaches the upper limit, a continuous chime will
sound for four minutes or until the engine is
able to cool, whichever comes first.
If the light turns on while driving, safely pull over
and stop the vehicle. If the Air Conditioning (A/C)
system is on, turn it off. Also, shift the
transmission into NEUTRAL and idle the vehicle.
If the temperature reading does not return to
normal, turn the engine off immediately and call
for service.
Refer to “If Your Engine Overheats” in “In Case
Of Emergency” for further information.
Oil Pressure Warning Light
This warning light will illuminate to
indicate low engine oil pressure. If the
light turns on while driving, stop the
vehicle, shut off the engine as soon as possible, and contact an authorized dealer. A
chime will sound when this light turns on.
Do not operate the vehicle until the cause is
corrected. This light does not indicate how
much oil is in the engine. The engine oil level
must be checked under the hood.
Oil Temperature Warning Light
This warning light will illuminate to
indicate the engine oil temperature is
high. If the light turns on while driving,
stop the vehicle and shut off the
engine as soon as possible. Wait for oil
temperature to return to normal levels.
Seat Belt Reminder Warning Light
This warning light indicates when the
driver or passenger seat belt is
unbuckled. When the ignition is first
placed in the ON/RUN or ACC/ON/
RUN position and if the driver’s seat belt is
unbuckled, a chime will sound and the light will
turn on. When driving, if the driver or front
passenger seat belt remains unbuckled, the
Seat Belt Reminder Light will flash or remain on
continuously and a chime will sound.
Refer to “Occupant Restraint Systems” in
“Safety” for further information.
Transmission Temperature Warning Light
— If Equipped
This warning light will illuminate to
warn of a high transmission fluid
temperature. This may occur with
strenuous usage such as trailer
towing. If this light turns on, stop the vehicle and
run the engine at idle or slightly faster, with the
transmission in PARK or NEUTRAL, until the
light turns off. Once the light turns off, you may
continue to drive normally.
WARNING!
If you continue operating the vehicle when
the Transmission Temperature Warning Light
is illuminated you could cause the fluid to boil
over, come in contact with hot engine or
exhaust components and cause a fire.
CAUTION!
Continuous driving with the Transmission
Temperature Warning Light illuminated will
eventually cause severe transmission
damage or transmission failure.
3
20_LD_OM_EN_USC_t.book Page 97
Page 165 of 412
STARTING AND OPERATING163
ENGINE BREAK-IN RECOMMENDATIONS —
3.6L & 5.7L
A long break-in period is not required for the
drivetrain (engine, transmission, clutch, and
rear axle) in your new vehicle.
Drive moderately during the first 300 miles
(500 km). After the initial 60 miles (100 km),
speeds up to 50 or 55 mph (80 or 90 km/h) are
desirable.
While cruising, brief full-throttle acceleration
within the limits of local traffic laws contributes
to a good break-in. However, wide-open throttle
acceleration in low gear can be detrimental and
should be avoided.
The engine oil, transmission fluid, and axle
lubricant installed at the factory is high-quality
and energy-conserving. Oil, fluid, and lubricant
changes should be consistent with anticipated
climate and conditions under which vehicle
operations will occur. For the recommended
viscosity and quality grades, refer to “Fluids And
Lubricants” in “Technical Specifications”. NOTE:
A new engine may consume some oil during its
first few thousand miles (kilometers) of opera
-
tion. This should be considered a normal part of
the break-in and not interpreted as an indica -
tion of difficulty. Please check your oil level with
the engine oil indicator often during the break in
period. Add oil as required.
ENGINE BREAK-IN RECOMMENDATIONS —
6.2L & 6.4L
The following tips will be helpful in obtaining
optimum performance and maximum durability
for your new vehicle.
Despite modern technology and World Class
manufacturing methods, the moving parts of
the vehicle must still wear in with each other.
This wearing in occurs mainly during the first
500 miles (805 km) and continues through the
first oil change interval. It is recommended for the operator to observe
the following driving behaviors during the new
vehicle break-in period:
0 to 100 miles (0 to 161 km):
Do not allow the engine to operate at idle for
an extended period of time.
Depress the accelerator pedal slowly and not
more than halfway to avoid rapid acceleration.
Avoid aggressive braking.
Drive with the engine speed less than
3,500 RPM.
Maintain vehicle speed below 55 mph
(88 km/h) and observe local speed limits.
100 to 300 miles (161 to 483 km):
Depress the accelerator pedal slowly and not
more than halfway to avoid rapid accelera -
tion in lower gears (FIRST to THIRD gears).
Avoid aggressive braking.
Drive with the engine speed less than
5,000 RPM.
Maintain vehicle speed below 70 mph
(112 km/h) and observe local speed limits.
CAUTION!
Never use Non-Detergent Oil or Straight
Mineral Oil in the engine or damage may result.
5
20_LD_OM_EN_USC_t.book Page 163
Page 166 of 412
164STARTING AND OPERATING
300 to 500 miles (483 to 805 km) :
Exercise the full engine RPM range, shifting
manually at higher RPM when possible.
Do not perform sustained operation with the
accelerator pedal at wide open throttle.
Maintain vehicle speed below 85 mph
(136 km/h) and observe local speed limits.
For the first 1,500 miles (2,414 km):
Do not participate in track events, sport
driving schools, or similar activities during
the first 1,500 miles (2,414 km).
NOTE:
Check engine oil with every refueling and add if
necessary. Oil and fuel consumption may be
higher through the first oil change interval.
Running the engine with an oil level below the
add mark can cause severe engine damage.
PARKING BRAKE
Before leaving the vehicle, make sure that the
parking brake is fully applied and place the gear
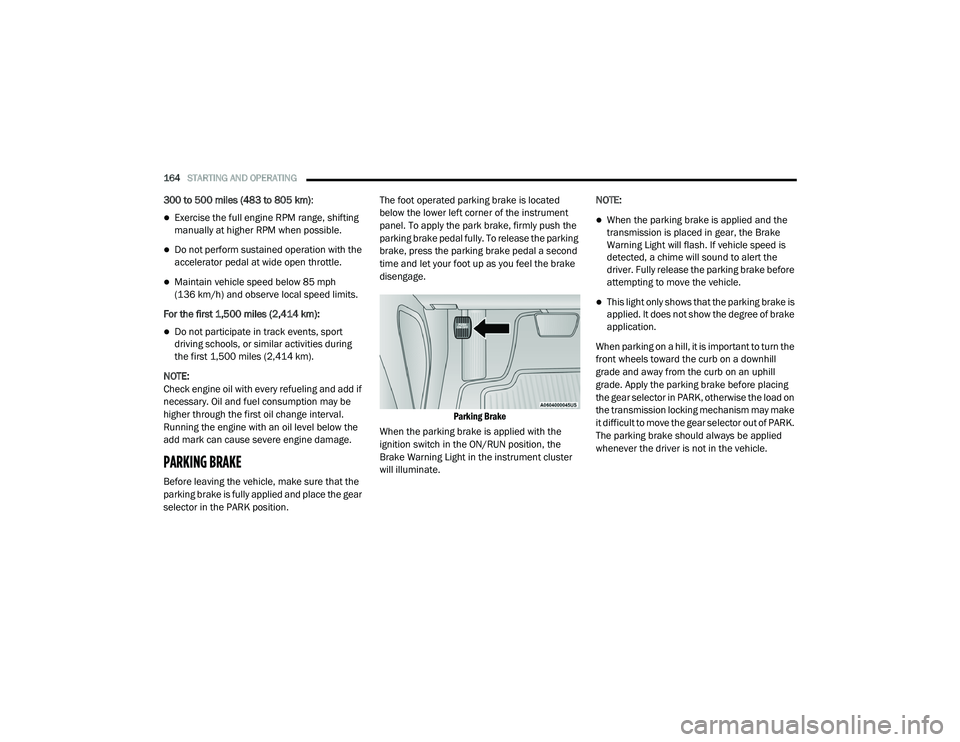
selector in the PARK position. The foot operated parking brake is located
below the lower left corner of the instrument
panel. To apply the park brake, firmly push the
parking brake pedal fully. To release the parking
brake, press the parking brake pedal a second
time and let your foot up as you feel the brake
disengage.
Parking Brake
When the parking brake is applied with the
ignition switch in the ON/RUN position, the
Brake Warning Light in the instrument cluster
will illuminate. NOTE:
When the parking brake is applied and the
transmission is placed in gear, the Brake
Warning Light will flash. If vehicle speed is
detected, a chime will sound to alert the
driver. Fully release the parking brake before
attempting to move the vehicle.
This light only shows that the parking brake is
applied. It does not show the degree of brake
application.
When parking on a hill, it is important to turn the
front wheels toward the curb on a downhill
grade and away from the curb on an uphill
grade. Apply the parking brake before placing
the gear selector in PARK, otherwise the load on
the transmission locking mechanism may make
it difficult to move the gear selector out of PARK.
The parking brake should always be applied
whenever the driver is not in the vehicle.
20_LD_OM_EN_USC_t.book Page 164
Page 213 of 412
STARTING AND OPERATING211
(Continued)
DRIVING THROUGH WATER
Driving through water more than a few inches/
centimeters deep will require extra caution to
ensure safety and prevent damage to your vehicle.
Flowing/Rising Water
Shallow Standing Water
Although your vehicle is capable of driving
through shallow standing water, consider the
following Warnings and Cautions before doing so.
WARNING!
Do not drive on or across a road or path
where water is flowing and/or rising (as in
storm run-off). Flowing water can wear away
the road or path's surface and cause your
vehicle to sink into deeper water.
Furthermore, flowing and/or rising water can
carry your vehicle away swiftly. Failure to
follow this warning may result in injuries that
are serious or fatal to you, your passengers,
and others around you.
WARNING!
Driving through standing water limits your
vehicle’s traction capabilities. Do not
exceed 5 mph (8 km/h) when driving
through standing water.
Driving through standing water limits your
vehicle’s braking capabilities, which
increases stopping distances. Therefore,
after driving through standing water, drive
slowly and lightly press on the brake pedal
several times to dry the brakes.
Failure to follow these warnings may result
in injuries that are serious or fatal to you,
your passengers, and others around you.
CAUTION!
Always check the depth of the standing water
before driving through it. Never drive through
standing water that is deeper than the bottom
of the tire rims mounted on the vehicle.
Determine the condition of the road or the
path that is under water and if there are any
obstacles in the way before driving through
the standing water.
Do not exceed 5 mph (8 km/h) when
driving through standing water. This will
minimize wave effects.
Driving through standing water may cause
damage to your vehicle’s drivetrain compo -
nents. Always inspect your vehicle’s fluids
(i.e., engine oil, transmission, axle, etc.) for
signs of contamination (i.e., fluid that is
milky or foamy in appearance) after driving
through standing water. Do not continue to
operate the vehicle if any fluid appears
contaminated, as this may result in further
damage. Such damage is not covered by
the New Vehicle Limited Warranty.
Getting water inside your vehicle’s engine
can cause it to lock up and stall out, and
cause serious internal damage to the
engine. Such damage is not covered by the
New Vehicle Limited Warranty.
CAUTION! (Continued)
5
20_LD_OM_EN_USC_t.book Page 211
Page 239 of 412
IN CASE OF EMERGENCY237
SEALING A TIRE WITH TIRE SERVICE KIT
(A) Whenever You Stop To Use Tire Service
Kit:
1. Pull over to a safe location and turn on the
vehicle’s Hazard Warning flashers.
2. Verify that the valve stem (on the wheel with the deflated tire) is in a position that is near
to the ground. This will allow the Tire Service
Kit Hoses (6) and (7) to reach the valve
stem and keep the Tire Service Kit flat on
the ground. This will provide the best
positioning of the kit when injecting the
sealant into the deflated tire and running
the air pump. Move the vehicle as
necessary to place the valve stem in this
position before proceeding.
3. Place the transmission in PARK (auto transmission) or in Gear (manual
transmission) and place the ignition in the
OFF position.
4. Apply the parking brake.
(B) Setting Up To Use Tire Service Kit:
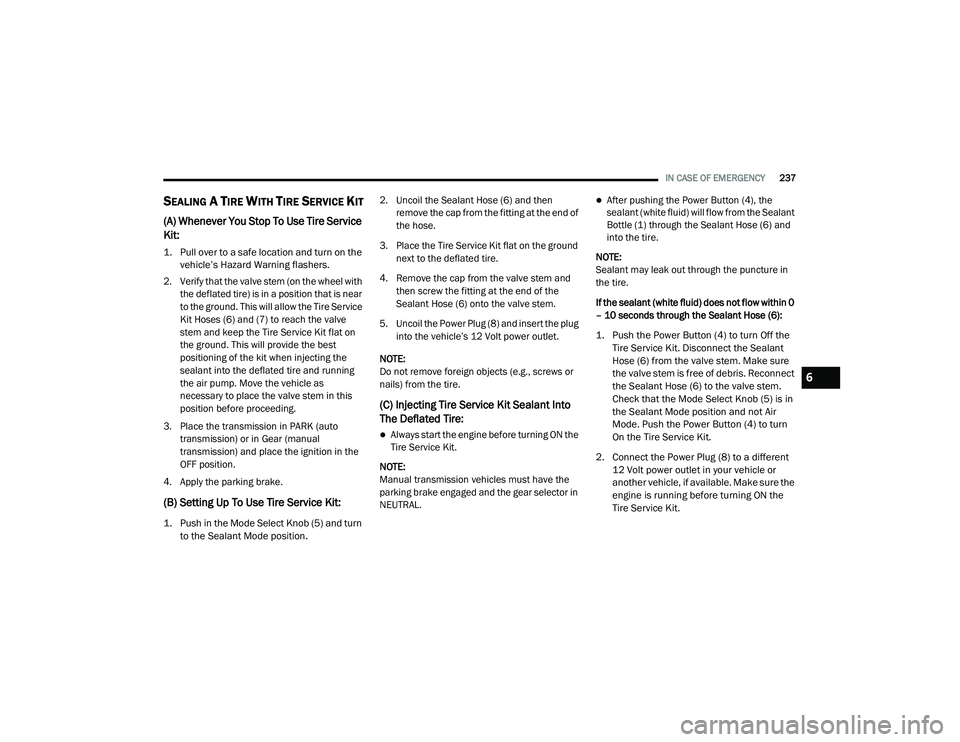
1. Push in the Mode Select Knob (5) and turn to the Sealant Mode position.
2. Uncoil the Sealant Hose (6) and then
remove the cap from the fitting at the end of
the hose.
3. Place the Tire Service Kit flat on the ground next to the deflated tire.
4. Remove the cap from the valve stem and then screw the fitting at the end of the
Sealant Hose (6) onto the valve stem.
5. Uncoil the Power Plug (8) and insert the plug into the vehicle’s 12 Volt power outlet.
NOTE:
Do not remove foreign objects (e.g., screws or
nails) from the tire.
(C) Injecting Tire Service Kit Sealant Into
The Deflated Tire:
Always start the engine before turning ON the
Tire Service Kit.
NOTE:
Manual transmission vehicles must have the
parking brake engaged and the gear selector in
NEUTRAL.
After pushing the Power Button (4), the
sealant (white fluid) will flow from the Sealant
Bottle (1) through the Sealant Hose (6) and
into the tire.
NOTE:
Sealant may leak out through the puncture in
the tire.
If the sealant (white fluid) does not flow within 0
– 10 seconds through the Sealant Hose (6):
1. Push the Power Button (4) to turn Off the Tire Service Kit. Disconnect the Sealant
Hose (6) from the valve stem. Make sure
the valve stem is free of debris. Reconnect
the Sealant Hose (6) to the valve stem.
Check that the Mode Select Knob (5) is in
the Sealant Mode position and not Air
Mode. Push the Power Button (4) to turn
On the Tire Service Kit.
2. Connect the Power Plug (8) to a different 12 Volt power outlet in your vehicle or
another vehicle, if available. Make sure the
engine is running before turning ON the
Tire Service Kit.
6
20_LD_OM_EN_USC_t.book Page 237
Page 288 of 412
286SERVICING AND MAINTENANCE
Fluid And Filter Changes — Eight-Speed
Transmission
Under normal operating conditions, the fluid
installed at the factory will provide satisfactory
lubrication for the life of the vehicle.
Routine fluid and filter changes are not
required. However, change the fluid and filter if
the fluid becomes contaminated (with water,
etc.), or if the transmission is disassembled for
any reason.
REAR AXLE
For normal service, periodic fluid level checks
are not required. When the vehicle is serviced
for other reasons the exterior surfaces of the
axle assembly should be inspected. If gear oil
leakage is suspected inspect the fluid level.
Refer to “Fluids And Lubricants” in “Technical
Specifications” for further information.
RAISING THE VEHICLE
In the case where it is necessary to raise the
vehicle, go to an authorized dealer or service
station.
TIRES
TIRE SAFETY INFORMATION
Tire safety information will cover aspects of the
following information: Tire Markings, Tire
Identification Numbers, Tire Terminology and
Definitions, Tire Pressures, and Tire Loading.
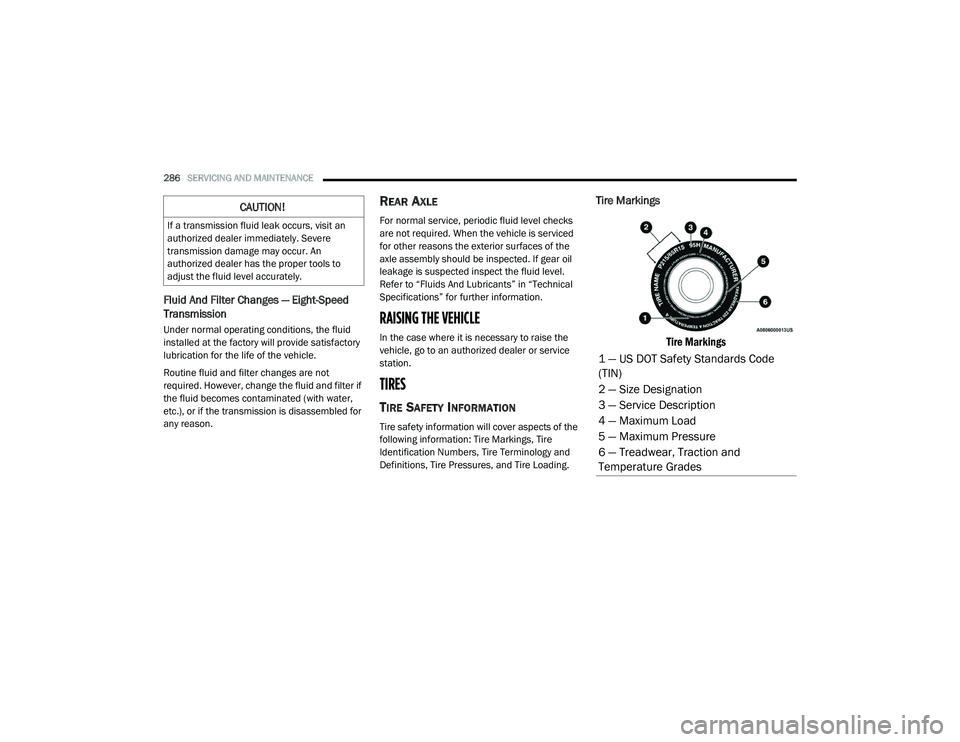
Tire Markings
Tire Markings
CAUTION!
If a transmission fluid leak occurs, visit an
authorized dealer immediately. Severe
transmission damage may occur. An
authorized dealer has the proper tools to
adjust the fluid level accurately.
1 — US DOT Safety Standards Code
(TIN)
2 — Size Designation
3 — Service Description
4 — Maximum Load
5 — Maximum Pressure
6 — Treadwear, Traction and
Temperature Grades
20_LD_OM_EN_USC_t.book Page 286
Page 398 of 412
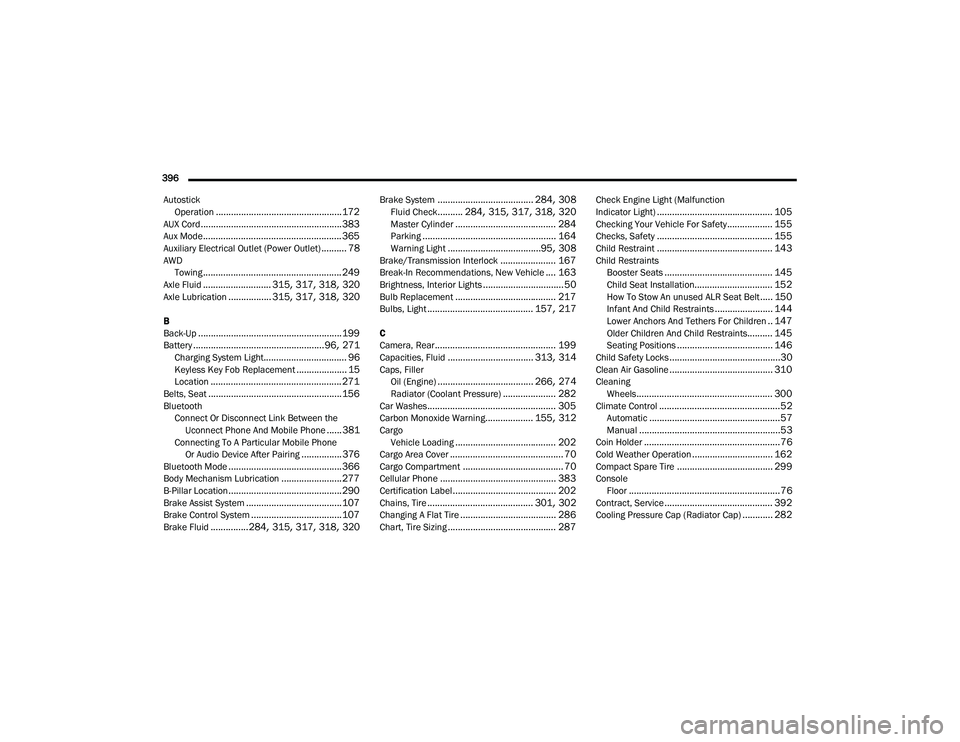
396 Autostick Operation
.................................................. 172AUX Cord........................................................ 383Aux Mode....................................................... 365Auxiliary Electrical Outlet (Power Outlet).......... 78AWDTowing....................................................... 249Axle Fluid........................... 315, 317, 318, 320Axle Lubrication................. 315, 317, 318, 320
B
Back-Up......................................................... 199Battery.................................................... 96, 271Charging System Light................................. 96Keyless Key Fob Replacement.................... 15Location.................................................... 271Belts, Seat..................................................... 156BluetoothConnect Or Disconnect Link Between the Uconnect Phone And Mobile Phone
...... 381Connecting To A Particular Mobile Phone Or Audio Device After Pairing................376Bluetooth Mode............................................. 366Body Mechanism Lubrication........................ 277B-Pillar Location............................................. 290Brake Assist System...................................... 107Brake Control System.................................... 107Brake Fluid...............284, 315, 317, 318, 320
Brake System...................................... 284, 308Fluid Check.......... 284, 315, 317, 318, 320Master Cylinder........................................ 284Parking..................................................... 164Warning Light.....................................95, 308Brake/Transmission Interlock...................... 167Break-In Recommendations, New Vehicle.... 163Brightness, Interior Lights................................ 50Bulb Replacement........................................ 217Bulbs, Light.......................................... 157, 217
C
Camera, Rear................................................ 199Capacities, Fluid.................................. 313, 314Caps, FillerOil (Engine)...................................... 266, 274Radiator (Coolant Pressure)..................... 282Car Washes................................................... 305Carbon Monoxide Warning................... 155, 312CargoVehicle Loading........................................ 202Cargo Area Cover............................................. 70Cargo Compartment........................................ 70Cellular Phone.............................................. 383Certification Label......................................... 202Chains, Tire.......................................... 301, 302Changing A Flat Tire...................................... 286Chart, Tire Sizing........................................... 287
Check Engine Light (Malfunction
Indicator Light).............................................. 105Checking Your Vehicle For Safety.................. 155Checks, Safety.............................................. 155Child Restraint.............................................. 143Child RestraintsBooster Seats........................................... 145Child Seat Installation............................... 152How To Stow An unused ALR Seat Belt..... 150Infant And Child Restraints....................... 144Lower Anchors And Tethers For Children.. 147Older Children And Child Restraints.......... 145Seating Positions...................................... 146Child Safety Locks............................................30Clean Air Gasoline......................................... 310CleaningWheels...................................................... 300Climate Control................................................52Automatic....................................................57Manual........................................................53Coin Holder......................................................76Cold Weather Operation................................ 162Compact Spare Tire...................................... 299ConsoleFloor............................................................76Contract, Service........................................... 392Cooling Pressure Cap (Radiator Cap)............ 282
20_LD_OM_EN_USC_t.book Page 396
Page 404 of 412
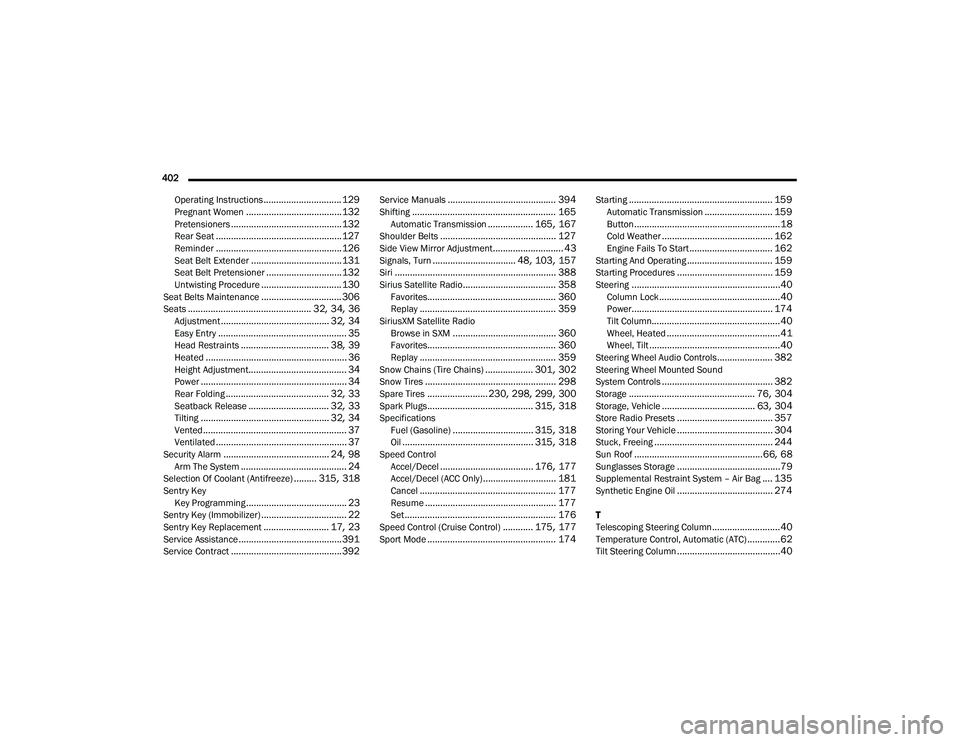
402 Operating Instructions
............................... 129Pregnant Women...................................... 132Pretensioners............................................ 132Rear Seat.................................................. 127Reminder.................................................. 126Seat Belt Extender.................................... 131Seat Belt Pretensioner.............................. 132Untwisting Procedure................................ 130Seat Belts Maintenance................................ 306Seats................................................. 32, 34, 36Adjustment........................................... 32, 34Easy Entry................................................... 35Head Restraints................................... 38, 39Heated........................................................ 36Height Adjustment....................................... 34Power.......................................................... 34Rear Folding......................................... 32, 33Seatback Release................................ 32, 33Tilting................................................... 32, 34Vented......................................................... 37Ventilated.................................................... 37Security Alarm.......................................... 24, 98Arm The System.......................................... 24Selection Of Coolant (Antifreeze)......... 315, 318Sentry KeyKey Programming........................................ 23Sentry Key (Immobilizer).................................. 22Sentry Key Replacement.......................... 17, 23Service Assistance......................................... 391Service Contract............................................ 392
Service Manuals........................................... 394Shifting......................................................... 165Automatic Transmission.................. 165, 167Shoulder Belts.............................................. 127Side View Mirror Adjustment............................ 43Signals, Turn................................. 48, 103, 157Siri................................................................ 388Sirius Satellite Radio..................................... 358Favorites................................................... 360Replay...................................................... 359SiriusXM Satellite RadioBrowse in SXM......................................... 360Favorites................................................... 360Replay...................................................... 359Snow Chains (Tire Chains)................... 301, 302Snow Tires.................................................... 298Spare Tires........................ 230, 298, 299, 300Spark Plugs.......................................... 315, 318SpecificationsFuel (Gasoline)................................ 315, 318Oil.................................................... 315, 318Speed ControlAccel/Decel..................................... 176, 177Accel/Decel (ACC Only)............................. 181Cancel...................................................... 177Resume.................................................... 177Set............................................................ 176Speed Control (Cruise Control)............ 175, 177Sport Mode................................................... 174
Starting......................................................... 159Automatic Transmission........................... 159Button..........................................................18Cold Weather............................................ 162Engine Fails To Start................................. 162Starting And Operating.................................. 159Starting Procedures...................................... 159Steering...........................................................40Column Lock................................................40Power........................................................ 174Tilt Column...................................................40Wheel, Heated.............................................41Wheel, Tilt....................................................40Steering Wheel Audio Controls...................... 382Steering Wheel Mounted Sound
System Controls............................................ 382Storage.................................................. 76, 304Storage, Vehicle..................................... 63, 304Store Radio Presets...................................... 357Storing Your Vehicle...................................... 304Stuck, Freeing............................................... 244Sun Roof...................................................66, 68Sunglasses Storage.........................................79Supplemental Restraint System – Air Bag.... 135Synthetic Engine Oil...................................... 274
T
Telescoping Steering Column...........................40Temperature Control, Automatic (ATC).............62Tilt Steering Column.........................................40
20_LD_OM_EN_USC_t.book Page 402