Additional Maintenance DODGE CHARGER 2023 Owners Manual
[x] Cancel search | Manufacturer: DODGE, Model Year: 2023, Model line: CHARGER, Model: DODGE CHARGER 2023Pages: 292, PDF Size: 13.05 MB
Page 93 of 292
STARTING AND OPERATING91
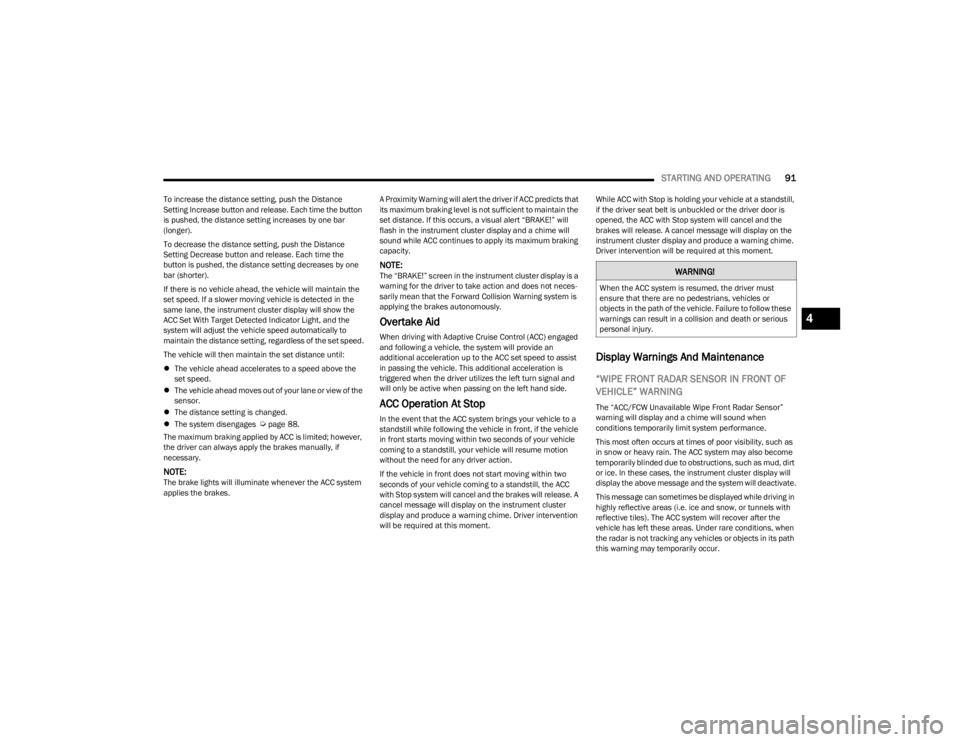
To increase the distance setting, push the Distance
Setting Increase button and release. Each time the button
is pushed, the distance setting increases by one bar
(longer).
To decrease the distance setting, push the Distance
Setting Decrease button and release. Each time the
button is pushed, the distance setting decreases by one
bar (shorter).
If there is no vehicle ahead, the vehicle will maintain the
set speed. If a slower moving vehicle is detected in the
same lane, the instrument cluster display will show the
ACC Set With Target Detected Indicator Light, and the
system will adjust the vehicle speed automatically to
maintain the distance setting, regardless of the set speed.
The vehicle will then maintain the set distance until:
The vehicle ahead accelerates to a speed above the
set speed.
The vehicle ahead moves out of your lane or view of the
sensor.
The distance setting is changed.
The system disengages
Úpage 88.
The maximum braking applied by ACC is limited; however,
the driver can always apply the brakes manually, if
necessary.
NOTE:The brake lights will illuminate whenever the ACC system
applies the brakes. A Proximity Warning will alert the driver if ACC predicts that
its maximum braking level is not sufficient to maintain the
set distance. If this occurs, a visual alert “BRAKE!” will
flash in the instrument cluster display and a chime will
sound while ACC continues to apply its maximum braking
capacity.
NOTE:The “BRAKE!” screen in the instrument cluster display is a
warning for the driver to take action and does not neces
-
sarily mean that the Forward Collision Warning system is
applying the brakes autonomously.
Overtake Aid
When driving with Adaptive Cruise Control (ACC) engaged
and following a vehicle, the system will provide an
additional acceleration up to the ACC set speed to assist
in passing the vehicle. This additional acceleration is
triggered when the driver utilizes the left turn signal and
will only be active when passing on the left hand side.
ACC Operation At Stop
In the event that the ACC system brings your vehicle to a
standstill while following the vehicle in front, if the vehicle
in front starts moving within two seconds of your vehicle
coming to a standstill, your vehicle will resume motion
without the need for any driver action.
If the vehicle in front does not start moving within two
seconds of your vehicle coming to a standstill, the ACC
with Stop system will cancel and the brakes will release. A
cancel message will display on the instrument cluster
display and produce a warning chime. Driver intervention
will be required at this moment. While ACC with Stop is holding your vehicle at a standstill,
if the driver seat belt is unbuckled or the driver door is
opened, the ACC with Stop system will cancel and the
brakes will release. A cancel message will display on the
instrument cluster display and produce a warning chime.
Driver intervention will be required at this moment.
Display Warnings And Maintenance
“WIPE FRONT RADAR SENSOR IN FRONT OF
VEHICLE” WARNING
The “ACC/FCW Unavailable Wipe Front Radar Sensor”
warning will display and a chime will sound when
conditions temporarily limit system performance.
This most often occurs at times of poor visibility, such as
in snow or heavy rain. The ACC system may also become
temporarily blinded due to obstructions, such as mud, dirt
or ice. In these cases, the instrument cluster display will
display the above message and the system will deactivate.
This message can sometimes be displayed while driving in
highly reflective areas (i.e. ice and snow, or tunnels with
reflective tiles). The ACC system will recover after the
vehicle has left these areas. Under rare conditions, when
the radar is not tracking any vehicles or objects in its path
this warning may temporarily occur.
WARNING!
When the ACC system is resumed, the driver must
ensure that there are no pedestrians, vehicles or
objects in the path of the vehicle. Failure to follow these
warnings can result in a collision and death or serious
personal injury.
4
23_LD_OM_EN_USC_t.book Page 91
Page 108 of 292
106STARTING AND OPERATING
(Continued)
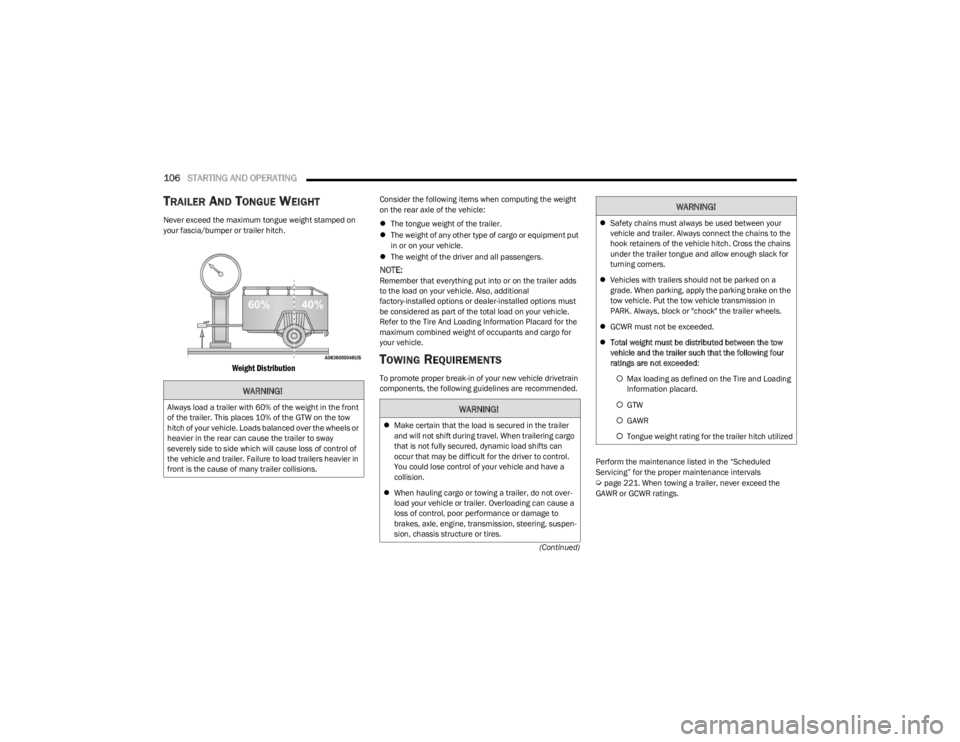
TRAILER AND TONGUE WEIGHT
Never exceed the maximum tongue weight stamped on
your fascia/bumper or trailer hitch.
Weight Distribution
Consider the following items when computing the weight
on the rear axle of the vehicle:
The tongue weight of the trailer.
The weight of any other type of cargo or equipment put
in or on your vehicle.
The weight of the driver and all passengers.
NOTE:Remember that everything put into or on the trailer adds
to the load on your vehicle. Also, additional
factory-installed options or dealer-installed options must
be considered as part of the total load on your vehicle.
Refer to the Tire And Loading Information Placard for the
maximum combined weight of occupants and cargo for
your vehicle.
TOWING REQUIREMENTS
To promote proper break-in of your new vehicle drivetrain
components, the following guidelines are recommended.
Perform the maintenance listed in the “Scheduled
Servicing” for the proper maintenance intervals
Úpage 221. When towing a trailer, never exceed the
GAWR or GCWR ratings.
WARNING!
Always load a trailer with 60% of the weight in the front
of the trailer. This places 10% of the GTW on the tow
hitch of your vehicle. Loads balanced over the wheels or
heavier in the rear can cause the trailer to sway
severely side to side which will cause loss of control of
the vehicle and trailer. Failure to load trailers heavier in
front is the cause of many trailer collisions.WARNING!
Make certain that the load is secured in the trailer
and will not shift during travel. When trailering cargo
that is not fully secured, dynamic load shifts can
occur that may be difficult for the driver to control.
You could lose control of your vehicle and have a
collision.
When hauling cargo or towing a trailer, do not over -
load your vehicle or trailer. Overloading can cause a
loss of control, poor performance or damage to
brakes, axle, engine, transmission, steering, suspen -
sion, chassis structure or tires.
Safety chains must always be used between your
vehicle and trailer. Always connect the chains to the
hook retainers of the vehicle hitch. Cross the chains
under the trailer tongue and allow enough slack for
turning corners.
Vehicles with trailers should not be parked on a
grade. When parking, apply the parking brake on the
tow vehicle. Put the tow vehicle transmission in
PARK. Always, block or "chock" the trailer wheels.
GCWR must not be exceeded.
Total weight must be distributed between the tow
vehicle and the trailer such that the following four
ratings are not exceeded :
Max loading as defined on the Tire and Loading
Information placard.
GTW
GAWR
Tongue weight rating for the trailer hitch utilized
WARNING!
23_LD_OM_EN_USC_t.book Page 106
Page 224 of 292
222SERVICING AND MAINTENANCE
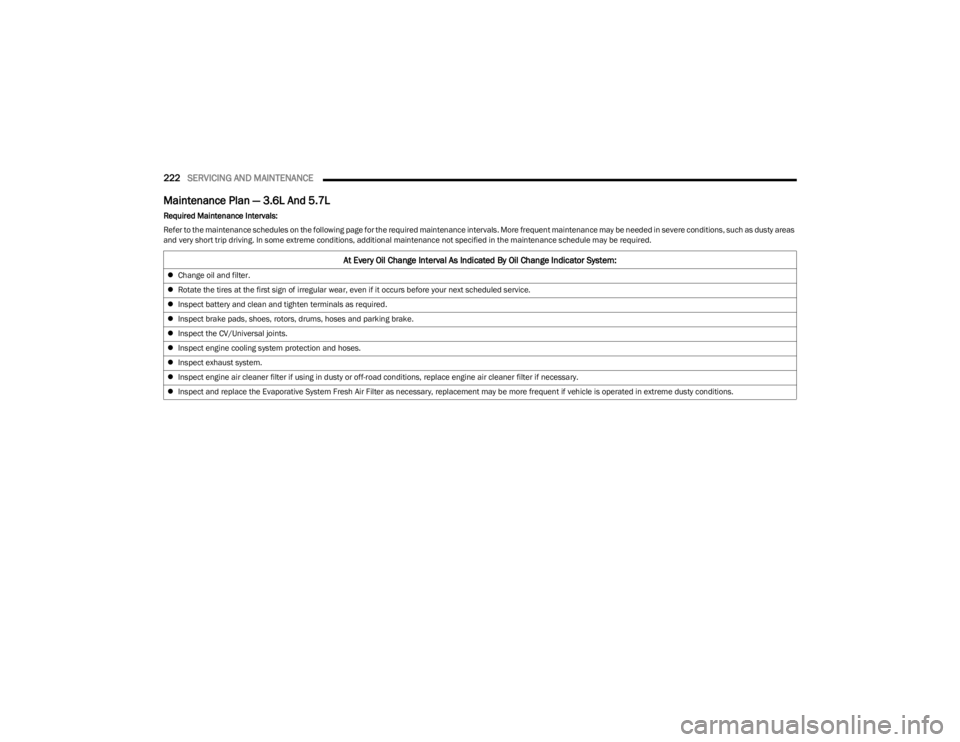
Maintenance Plan — 3.6L And 5.7L
Required Maintenance Intervals:
Refer to the maintenance schedules on the following page for the required maintenance intervals. More frequent maintenance may be needed in severe conditions, such as dusty areas
and very short trip driving. In some extreme conditions, additional maintenance not specified in the maintenance schedule may be required.
At Every Oil Change Interval As Indicated By Oil Change Indicator System:
Change oil and filter.
Rotate the tires at the first sign of irregular wear, even if it occurs before your next scheduled service.
Inspect battery and clean and tighten terminals as required.
Inspect brake pads, shoes, rotors, drums, hoses and parking brake.
Inspect the CV/Universal joints.
Inspect engine cooling system protection and hoses.
Inspect exhaust system.
Inspect engine air cleaner filter if using in dusty or off-road conditions, replace engine air cleaner filter if necessary.
Inspect and replace the Evaporative System Fresh Air Filter as necessary, replacement may be more frequent if vehicle is operated in extreme dusty conditions.
23_LD_OM_EN_USC_t.book Page 222
Page 225 of 292
SERVICING AND MAINTENANCE223
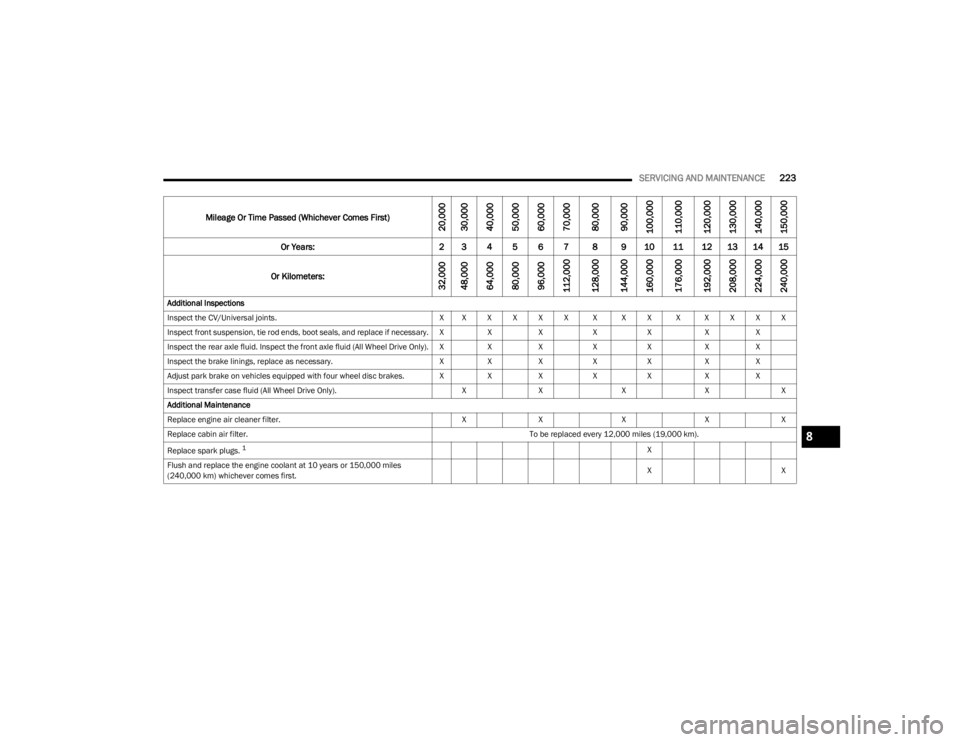
Mileage Or Time Passed (Whichever Comes First)20,000
30,000
40,000
50,000
60,000
70,000
80,000
90,000
100,000
110,000
120,000
130,000
140,000
150,000
Or Years: 2 3 4 5 6 7 8 9 10 11 12 13 14 15
Or Kilometers:
32,000
48,000
64,000
80,000
96,000
112,000
128,000
144,000
160,000
176,000
192,000
208,000
224,000
240,000
Additional Inspections
Inspect the CV/Universal joints. X X X X X X X X X X X X X X
Inspect front suspension, tie rod ends, boot seals, and replace if necessary. X XX XX XX
Inspect the rear axle fluid. Inspect the front axle fluid (All Wheel Drive Only). X XX XX XX
Inspect the brake linings, replace as necessary. XX X XX XX
Adjust park brake on vehicles equipped with four wheel disc brakes. X XX XX XX
Inspect transfer case fluid (All Wheel Drive Only). XX XXX
Additional Maintenance
Replace engine air cleaner filter. XX XXX
Replace cabin air filter. To be replaced every 12,000 miles (19,000 km).
Replace spark plugs.
1X
Flush and replace the engine coolant at 10 years or 150,000 miles
(240,000 km) whichever comes first. X
X8
23_LD_OM_EN_USC_t.book Page 223
Page 236 of 292
234SERVICING AND MAINTENANCE
(Continued)
To minimize the possibility of catalytic converter damage:
Do not shut off the engine or interrupt the ignition when
the transmission is in gear and the vehicle is in motion.
Do not try to start the engine by pushing or towing the
vehicle.
Do not idle the engine with any spark plug wires discon -
nected or removed, such as when diagnostic testing, or
for prolonged periods during very rough idle or malfunc -
tioning operating conditions.
NOTE:The vehicle exhaust system may be equipped with an Elec -
tronic Exhaust Valve (EEV) system, if the exhaust system is
replaced with aftermarket products a Malfunction Indi -
cator Light (MIL) will illuminate.
COOLING SYSTEM
Coolant Checks
Check engine coolant (antifreeze) protection every
12 months (before the onset of freezing weather, where
applicable). If the engine coolant is dirty, the system
should be drained, flushed, and refilled with fresh Organic
Additive Technology (OAT) coolant (conforming to
MS.90032) by an authorized dealer. Check the front of the
radiator for any accumulation of bugs, leaves, etc. If dirty,
clean by gently spraying water from a garden hose
vertically down the face of the condenser.
Check the coolant recovery bottle tubing for brittle rubber,
cracking, tears, cuts, and tightness of the connection at
the bottle and radiator. Inspect the entire system for
leaks. DO NOT REMOVE THE COOLANT PRESSURE CAP
WHEN THE COOLING SYSTEM IS HOT.
Cooling System — Drain, Flush And Refill
NOTE:Some vehicles require special tools to add coolant
properly. Failure to fill these systems properly could lead
to severe internal engine damage. If any coolant is needed
to be added to the system please contact an authorized
dealer. If the engine coolant (antifreeze) is dirty or contains visible
sediment, have an authorized dealer clean and flush with
Organic Additive Technology (OAT) coolant (conforming to
MS.90032).
For the proper maintenance intervals
Úpage 221.
Selection Of Coolant
For further information Úpage 271.
NOTE:
Mixing of engine coolant (antifreeze) other than speci-
fied Organic Additive Technology (OAT) engine coolant,
may result in engine damage and may decrease corro -
sion protection. OAT engine coolant is different and
should not be mixed with Hybrid Organic Additive Tech -
nology (HOAT) engine coolant or any “globally compat -
ible” coolant. If a non-OAT engine coolant is introduced
into the cooling system in an emergency, the cooling
system will need to be drained, flushed, and refilled
with fresh OAT coolant (conforming to MS.90032), by
an authorized dealer as soon as possible.
Do not use water alone or alcohol-based engine
coolant products. Do not use additional rust inhibitors
or anti-rust products, as they may not be compatible
with the radiator engine coolant and may plug the radi -
ator.
This vehicle has not been designed for use with
propylene glycol-based engine coolant. Use of
propylene glycol-based engine coolant is not recom -
mended.
WARNING!
You or others can be badly burned by hot engine
coolant (antifreeze) or steam from your radiator. If
you see or hear steam coming from under the hood,
do not open the hood until the radiator has had time
to cool. Never open a cooling system pressure cap
when the radiator or coolant bottle is hot.
Keep hands, tools, clothing, and jewelry away from
the radiator cooling fan when the hood is raised. The
fan starts automatically and may start at any time,
whether the engine is running or not.
When working near the radiator cooling fan, discon -
nect the fan motor lead or turn the ignition to the OFF
position. The fan is temperature controlled and can
start at any time the ignition is in the ON/RUN
position.
WARNING!
23_LD_OM_EN_USC_t.book Page 234
Page 238 of 292
236SERVICING AND MAINTENANCE
(Continued)
The radiator normally remains completely full, so there is
no need to remove the radiator/coolant pressure cap
unless checking for engine coolant freeze point or
replacing coolant. Advise your service attendant of this. As
long as the engine operating temperature is satisfactory,
the coolant bottle need only be checked once a month.
When additional engine coolant is needed to maintain the
proper level, only OAT coolant that meets the
requirements of manufacturer Material Standard
MS.90032 should be added to the coolant bottle.
Do not overfill.
Cooling System Notes
NOTE:When the vehicle is stopped after a few miles/kilometers
of operation, you may observe vapor coming from the front
of the engine compartment. This is normally a result of
moisture from rain, snow, or high humidity accumulating
on the radiator and being vaporized when the thermostat
opens, allowing hot engine coolant (antifreeze) to enter
the radiator.
If an examination of your engine compartment shows no
evidence of radiator or hose leaks, the vehicle may be
safely driven. The vapor will soon dissipate.
Do not overfill the coolant expansion bottle.
Check the coolant freeze point in the radiator and in
the coolant expansion bottle. If engine coolant needs
to be added, the contents of the coolant expansion
bottle must also be protected against freezing.
If frequent engine coolant additions are required, the
cooling system should be pressure tested for leaks.
Maintain engine coolant concentration at a minimum
of 50% OAT coolant (conforming to MS.90032) and
distilled water for proper corrosion protection of your
engine which contains aluminum components.
Make sure that the coolant expansion bottle overflow
hoses are not kinked or obstructed.
Keep the front of the radiator clean. If your vehicle is
equipped with air conditioning, keep the front of the
condenser clean.
Do not change the thermostat for Summer or Winter
operation. If replacement is ever necessary, install
ONLY the correct type thermostat. Other designs may
result in unsatisfactory engine cooling performance,
poor gas mileage, and increased emissions.
BRAKE SYSTEM
In order to ensure brake system performance, all brake
system components should be inspected periodically
Úpage 221.
Fluid Level Check — Brake Master Cylinder
Check the fluid level in the master cylinder immediately if
the Brake System Warning Light indicates system failure.
Check the fluid level in the master cylinder when
performing underhood services.
Clean the top of the master cylinder area before removing
the cap. Add fluid to bring the level up to the top of the
“FULL” mark on the side of the master cylinder reservoir.
Overfilling of fluid is not recommended because it may
cause leaking in the system.
Add enough fluid to bring the level up to the requirements
described on the brake fluid reservoir. With disc brakes,
fluid level can be expected to fall as the brake pads wear.
However, low fluid level may be caused by a leak and a
checkup may be needed.
Use only brake fluid that has been recommended by the
manufacturer, and has been kept in a tightly closed
container to avoid contamination from foreign matter or
moisture.
For further information
Úpage 271.
WARNING!
Riding the brakes can lead to brake failure and possibly
a collision. Driving with your foot resting or riding on the
brake pedal can result in abnormally high brake
temperatures, excessive lining wear, and possible brake
damage. You would not have your full braking capacity
in an emergency.WARNING!
Use only manufacturer's recommended brake fluid Úpage 271. Using the wrong type of brake fluid can
severely damage your brake system and/or impair its
performance. The proper type of brake fluid for your
vehicle is also identified on the original factory
installed hydraulic master cylinder reservoir.
23_LD_OM_EN_USC_t.book Page 236
Page 258 of 292
256SERVICING AND MAINTENANCE
Check tire pressures more often if subject to a wide range
of outdoor temperatures, as tire pressures vary with
temperature changes.
Tire pressures change by approximately 1 psi (7 kPa) per
12°F (7°C) of air temperature change. Keep this in mind
when checking tire pressure inside a garage, especially in
the Winter.
Example: If garage temperature = 68°F (20°C) and the
outside temperature = 32°F (0°C) then the cold tire
inflation pressure should be increased by 3 psi (21 kPa),
which equals 1 psi (7 kPa) for every 12°F (7°C) for this
outside temperature condition.
Tire pressure may increase from 2 to 6 psi (13 to 40 kPa)
during operation. DO NOT reduce this normal pressure
build up or your tire pressure will be too low.
Tire Pressures For High Speed Operation
The manufacturer advocates driving at safe speeds and
within posted speed limits. Where speed limits or
conditions are such that the vehicle can be driven at high
speeds, maintaining correct tire inflation pressure is very
important. Increased tire pressure and reduced vehicle
loading may be required for high-speed vehicle operation.
Refer to an authorized tire dealer or original equipment
vehicle dealer for recommended safe operating speeds,
loading and cold tire inflation pressures.
Radial Ply Tires
Tire Repair
If your tire becomes damaged, it may be repaired if it
meets the following criteria:
The tire has not been driven on when flat.
The damage is only on the tread section of your tire
(sidewall damage is not repairable).
The puncture is no greater than ¼ of an inch (6 mm). Consult an authorized tire dealer for tire repairs and
additional information.
Damaged Run Flat tires, or Run Flat tires that have
experienced a loss of pressure should be replaced
immediately with another Run Flat tire of identical size and
service description (Load Index and Speed Symbol).
Replace the tire pressure sensor as well as it is not
designed to be reused.
Run Flat Tires — If Equipped
Run Flat tires allow you the capability to drive 50 miles
(80 km) at 50 mph (80 km/h) after a rapid loss of inflation
pressure. This rapid loss of inflation is referred to as the
Run Flat mode. A Run Flat mode occurs when the tire
inflation pressure is of/or below 14 psi (96 kPa).
Once a Run Flat tire reaches the Run Flat mode it has
limited driving capabilities and needs to be replaced
immediately. A Run Flat tire is not repairable. When a Run
Flat tire is changed after being driven in a Run Flat mode
14 psi (96 kPa) condition, please replace the TPMS sensor
as it is not designed to be reused.
NOTE:TPMS Sensor must be replaced after driving the vehicle on
a flat tire condition.
WARNING!
High speed driving with your vehicle under maximum
load is dangerous. The added strain on your tires could
cause them to fail. You could have a serious collision.
Do not drive a vehicle loaded to the maximum capacity
at continuous speeds above 75 mph (120 km/h).
WARNING!
Combining radial ply tires with other types of tires on
your vehicle will cause your vehicle to handle poorly.
The instability could cause a collision. Always use radial
ply tires in sets of four. Never combine them with other
types of tires.
23_LD_OM_EN_USC_t.book Page 256
Page 275 of 292
273
CUSTOMER ASSISTANCE
SUGGESTIONS FOR OBTAINING SERVICE
FOR YOUR VEHICLE
PREPARE FOR THE APPOINTMENT
All work to be performed may not be covered by the
warranty. Discuss additional charges with the service
manager. Keep a maintenance log of your vehicle's
service history. This can often provide a clue to the current
problem.
PREPARE A LIST
Make a written list of your vehicle's problems or the
specific work you want done. If you've had an accident or
work done that is not on your maintenance log, let the
service advisor know.
BE REASONABLE WITH REQUESTS
If you list a number of items and you must have your
vehicle by the end of the day, discuss the situation with the
service advisor and list the items in order of priority.
At many authorized dealers, you may obtain a rental
vehicle (additional charges may apply). If you need a
rental, it is advisable to make these arrangements when
you call for an appointment.
IF YOU NEED ASSISTANCE
FCA US LLC and its authorized dealers are vitally
interested in your satisfaction. We want you to be happy
with our products and services.
Warranty service must be done by an authorized dealer.
We strongly recommend that you take the vehicle to an
authorized dealer. They know your vehicle the best, and
are most concerned that you get prompt and high quality
service. FCA US LLC’s authorized dealers have the
facilities, factory-trained technicians, special tools, and
the latest information to ensure the vehicle is fixed
correctly and in a timely manner.
This is why you should always talk to an authorized
dealer’s service manager first. If for some reason you are
still not satisfied, talk to the general manager or owner of
the authorized dealer. They want to know if you need
assistance. If an authorized dealer is unable to resolve the
concern, you may contact FCA US LLC’s Customer
Assistance center.
Any communication to FCA US LLC’s customer center
should include the following information:
Owner's name and address
Owner's telephone number (home, mobile, and office)
Authorized dealer name
Vehicle Identification Number (VIN)
Vehicle delivery date and mileage
ROADSIDE ASSISTANCE
Available 24 hours, 7 days a week.
Call 1-800-521-2779 or visit chrysler.rsahelp.com(USA)
Call 1-800-363-4869 or visit fca.roadsideaid.com
(Canada)
Who is Covered
You are covered by Roadside Assistance services if you
are a purchaser for use of the vehicle. Roadside
Assistance services last for five years or 60,000 miles on
the odometer, whichever occurs first, calculated from the
start date of the Basic Limited Warranty, as set forth in
your Warranty Information book.
1
1. Towing services provided through Cross Country Motor Club, Inc.
Medford, MA 02155, except in AK,CA, HI, OR, WI, and WY, where services
are provided by Cross Country Motor Club of California, Inc., Thousand
Oaks, CA 91360.
10
23_LD_OM_EN_USC_t.book Page 273