Jack DODGE DAKOTA 2004 3.G Owners Manual
[x] Cancel search | Manufacturer: DODGE, Model Year: 2004, Model line: DAKOTA, Model: DODGE DAKOTA 2004 3.GPages: 300, PDF Size: 5.23 MB
Page 207 of 300
WHAT TO DO IN EMERGENCIES
CONTENTS
mHazard Warning Flasher.................208
mAdding Fuel..........................208
mChanging A Flat Tire...................209
NJack Location........................209
NJack Removal And Stowage..............210
NRemoving The Spare Tire................210NTire Changing Procedure................211
mJump Starting.........................215
mTowing A Disabled Vehicle...............217
NFour-Wheel Drive Vehicles...............218
NTwo-Wheel Drive Vehicles...............218
6
Page 209 of 300
WARNING!
Remove the gas cap slowly to prevent fuel spray
from the filler neck which may cause injury.
The volatility of present gasolines may cause a build
up of pressure in the fuel tank that may increase
while you drive. This pressure can result in a spray
of gasoline and/or vapors when you remove the cap
from a hot vehicle. Removing the cap slowly allows
the pressure to vent and prevents fuel spray.
Never allow any lit smoking materials near the
vehicles while removing the cap or filling the tank.
Never add fuel to the vehicle when the engine is
running.
CHANGING A FLAT TIRE
Jack Location
The jack, jack drive tube, 2 tube extensions, and wheel
wrench are located behind the seat on the passenger's
side of the vehicle.
WARNING!
The jack is designed as a tool for changing tires only.
The jack should not be used to lift the vehicle for
service purposes, unless suitable supports are placed
under the vehicle as a safety measure. The vehicle
should be jacked on a firm level surface only. Avoid
ice or slippery areas.
²In the Regular Cab the jack and tools are stowed under
a formation in the carpet behind the passenger seat.
²In the Quad Cab the jack and tools are stowed under
the rear seat. Lift the passenger side rear seat cushion
to gain access to this area.
WHAT TO DO IN EMERGENCIES 209
6
Page 210 of 300
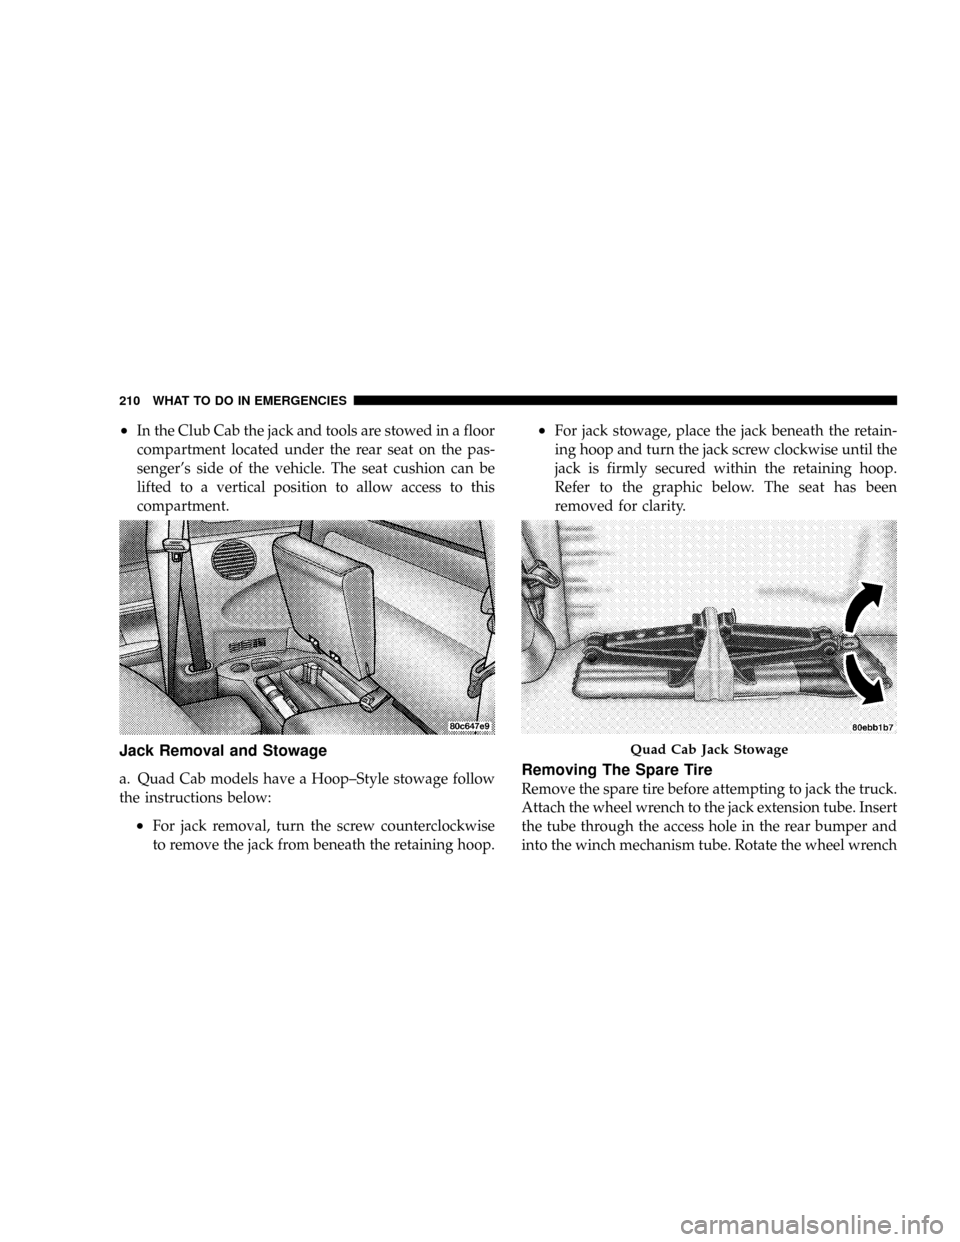
²In the Club Cab the jack and tools are stowed in a floor
compartment located under the rear seat on the pas-
senger's side of the vehicle. The seat cushion can be
lifted to a vertical position to allow access to this
compartment.
Jack Removal and Stowage
a. Quad Cab models have a Hoop±Style stowage follow
the instructions below:
²For jack removal, turn the screw counterclockwise
to remove the jack from beneath the retaining hoop.
²For jack stowage, place the jack beneath the retain-
ing hoop and turn the jack screw clockwise until the
jack is firmly secured within the retaining hoop.
Refer to the graphic below. The seat has been
removed for clarity.
Removing The Spare Tire
Remove the spare tire before attempting to jack the truck.
Attach the wheel wrench to the jack extension tube. Insert
the tube through the access hole in the rear bumper and
into the winch mechanism tube. Rotate the wheel wrench
Quad Cab Jack Stowage
210 WHAT TO DO IN EMERGENCIES
Page 211 of 300
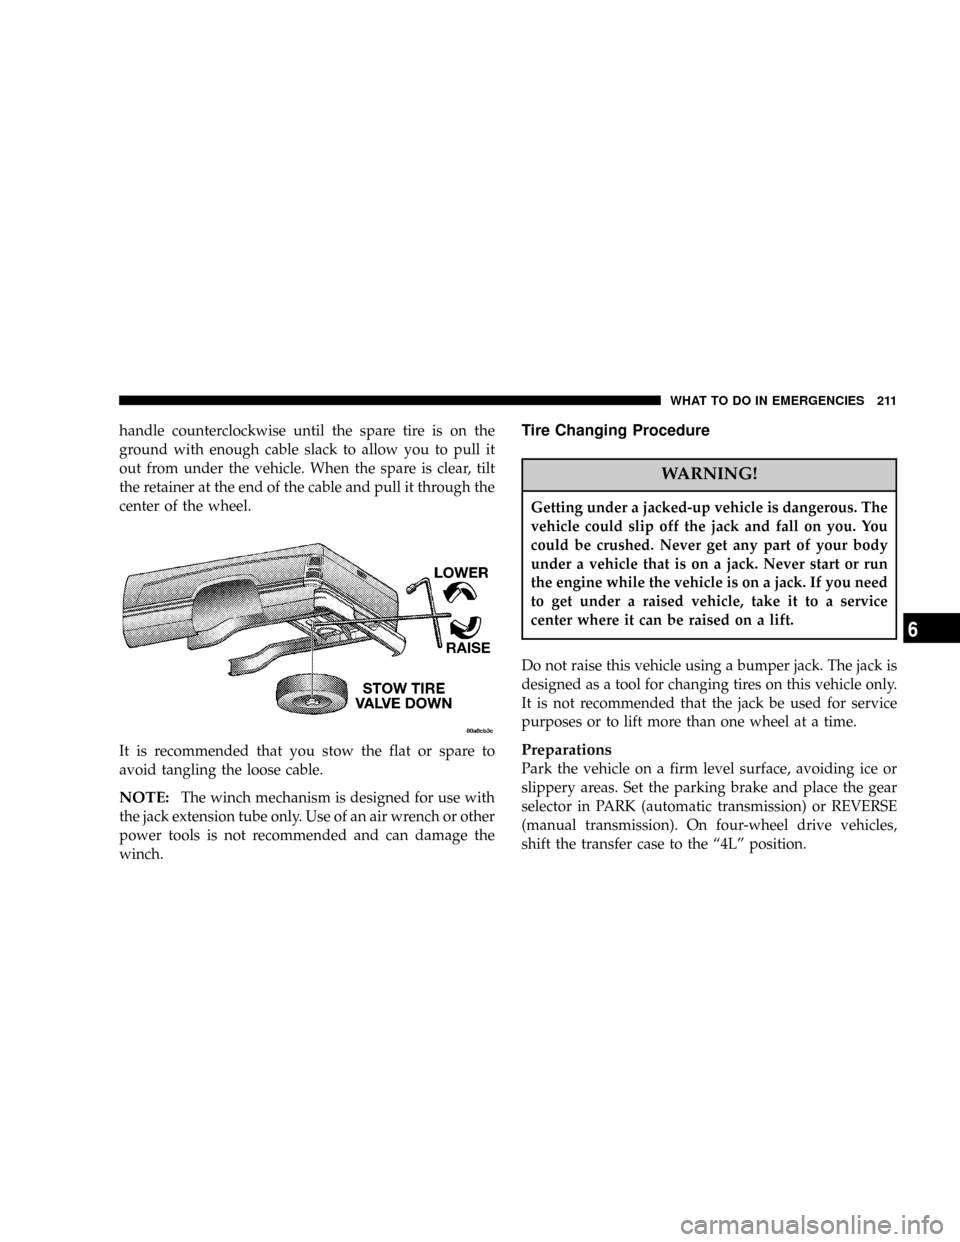
handle counterclockwise until the spare tire is on the
ground with enough cable slack to allow you to pull it
out from under the vehicle. When the spare is clear, tilt
the retainer at the end of the cable and pull it through the
center of the wheel.
It is recommended that you stow the flat or spare to
avoid tangling the loose cable.
NOTE:The winch mechanism is designed for use with
the jack extension tube only. Use of an air wrench or other
power tools is not recommended and can damage the
winch.
Tire Changing Procedure
WARNING!
Getting under a jacked-up vehicle is dangerous. The
vehicle could slip off the jack and fall on you. You
could be crushed. Never get any part of your body
under a vehicle that is on a jack. Never start or run
the engine while the vehicle is on a jack. If you need
to get under a raised vehicle, take it to a service
center where it can be raised on a lift.
Do not raise this vehicle using a bumper jack. The jack is
designed as a tool for changing tires on this vehicle only.
It is not recommended that the jack be used for service
purposes or to lift more than one wheel at a time.
Preparations
Park the vehicle on a firm level surface, avoiding ice or
slippery areas. Set the parking brake and place the gear
selector in PARK (automatic transmission) or REVERSE
(manual transmission). On four-wheel drive vehicles,
shift the transfer case to the ª4Lº position.
WHAT TO DO IN EMERGENCIES 211
6
Page 212 of 300
WARNING!
Do not attempt to change a tire on the side of the
vehicle close to moving traffic. Pull far enough off
the road to avoid the danger of being hit when
operating the jack or changing the wheel.
²Turn on the Hazard Warning Flasher.
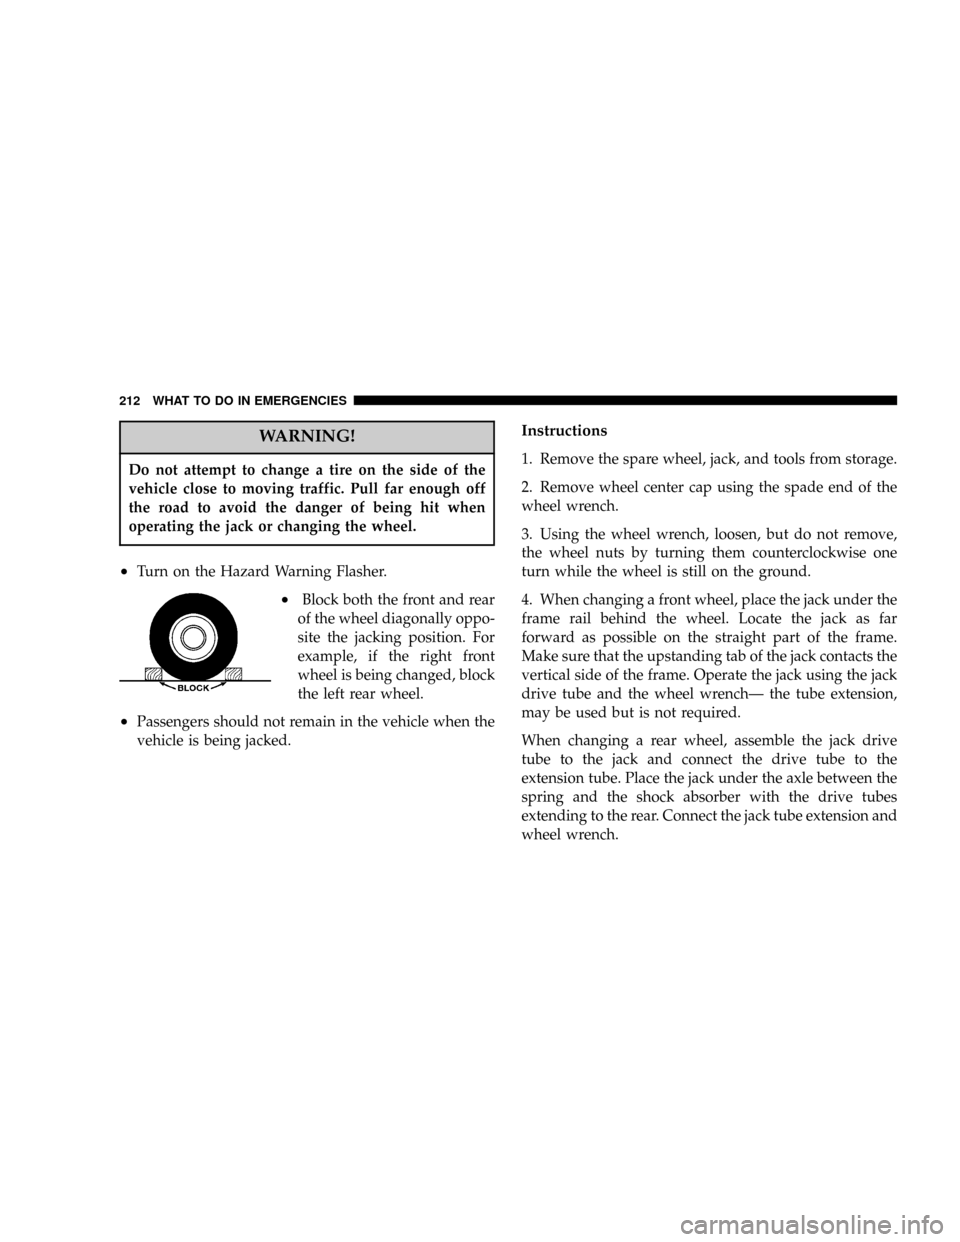
²Block both the front and rear
of the wheel diagonally oppo-
site the jacking position. For
example, if the right front
wheel is being changed, block
the left rear wheel.
²Passengers should not remain in the vehicle when the
vehicle is being jacked.
Instructions
1. Remove the spare wheel, jack, and tools from storage.
2. Remove wheel center cap using the spade end of the
wheel wrench.
3. Using the wheel wrench, loosen, but do not remove,
the wheel nuts by turning them counterclockwise one
turn while the wheel is still on the ground.
4. When changing a front wheel, place the jack under the
frame rail behind the wheel. Locate the jack as far
forward as possible on the straight part of the frame.
Make sure that the upstanding tab of the jack contacts the
vertical side of the frame. Operate the jack using the jack
drive tube and the wheel wrenchÐ the tube extension,
may be used but is not required.
When changing a rear wheel, assemble the jack drive
tube to the jack and connect the drive tube to the
extension tube. Place the jack under the axle between the
spring and the shock absorber with the drive tubes
extending to the rear. Connect the jack tube extension and
wheel wrench.
212 WHAT TO DO IN EMERGENCIES
Page 213 of 300
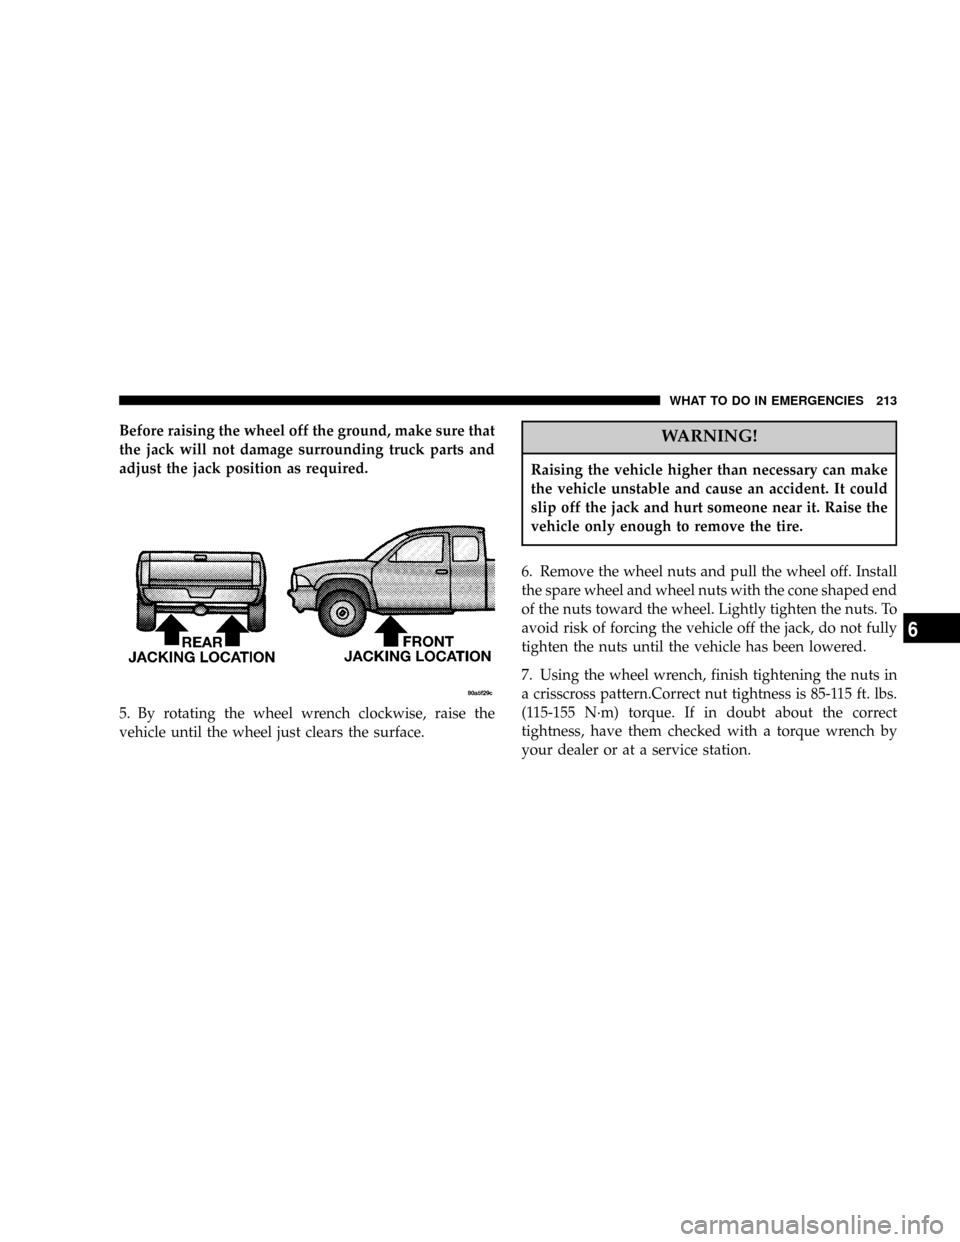
Before raising the wheel off the ground, make sure that
the jack will not damage surrounding truck parts and
adjust the jack position as required.
5. By rotating the wheel wrench clockwise, raise the
vehicle until the wheel just clears the surface.WARNING!
Raising the vehicle higher than necessary can make
the vehicle unstable and cause an accident. It could
slip off the jack and hurt someone near it. Raise the
vehicle only enough to remove the tire.
6. Remove the wheel nuts and pull the wheel off. Install
the spare wheel and wheel nuts with the cone shaped end
of the nuts toward the wheel. Lightly tighten the nuts. To
avoid risk of forcing the vehicle off the jack, do not fully
tighten the nuts until the vehicle has been lowered.
7. Using the wheel wrench, finish tightening the nuts in
a crisscross pattern.Correct nut tightness is 85-115 ft. lbs.
(115-155 N´m) torque. If in doubt about the correct
tightness, have them checked with a torque wrench by
your dealer or at a service station.
WHAT TO DO IN EMERGENCIES 213
6
Page 214 of 300
WARNING!
A loose tire or jack thrown forward in a collision or
hard stop could injure someone in the vehicle.
Always stow the jack parts and the extra tire and
wheel in the places provided.
8. Install wheel center cap and remove wheel blocks. Do
not install chrome or aluminum wheel center caps on the
spare wheel. This may result in cap damage.
9. Lower the jack to its fully closed position. Stow the
replaced tire, jack, and tools as previously described.
10. Adjust the tire pressure when possible.
NOTE:Do not oil wheel studs. For chrome wheels, do
not substitute with chrome plated wheel nuts.
WARNING!
Carefully follow these tire changing warnings to
help prevent personal injury or damage to your
vehicle:
²Always park on a firm, level surface as far from
the edge of the roadway as possible before raising
the vehicle.
²Block the wheel diagonally opposite the wheel to
be raised.
²Apply the parking brake firmly before jacking.
²Never start the engine with the vehicle on a jack.
²Do not let anyone sit in the vehicle when it is on
a jack.
²Do not get under the vehicle when it is on a jack.
²Only use the jack in the positions indicated.
²If working on or near a roadway, be extremely
careful of motor traffic.
214 WHAT TO DO IN EMERGENCIES
Page 291 of 300

Downshifting.......................... 151
Drive Belts............................ 230
Drive Shaft Universal Joints............... 235
Electrical Power Outlets................... 86
Electronic Power Distribution Center........ 252
Electronic Speed Control.................. 74
Emergency, In Case of
Freeing Vehicle When Stuck............. 167
Jacking............................. 211
Jump Starting........................ 215
Overheating......................... 239
Towing............................. 217
Emission Control System Maintenance....... 262
Emission Related Components............. 241
Engine
Air Cleaner.......................... 231
Air Cleaner Filter..................... 230
Block Heater......................... 146
Break-In Recommendations............... 52
Compartment.....................221,222
Coolant..........................238,259
Cooling............................ 237Exhaust Gas Caution................53,189
Fails to Start......................... 145
Flooded, Starting..................... 145
Fuel Requirements.................... 258
Oil ..........................226,258,259
Oil Selection......................... 258
Oil Synthetic......................... 229
Overheating......................... 239
Starting............................ 144
Temperature Gauge.................... 99
Entry System, Illuminated................. 12
Equipment Identification Plate............. 206
Exhaust Gas Caution..................53,237
Exhaust System......................53,236
Exterior Lighting........................ 68
Filters
Air Cleaner.......................... 230
Engine Fuel......................... 231
Engine Oil.......................229,259
Engine Oil Disposal................... 229
Flashers
Hazard Warning...................... 208
INDEX 291
10
Page 293 of 300
Headlights............................ 255
Dimmer Switch....................... 100
High Beam........................... 71
High Beam/Low Beam Select Switch....... 71
Lights On Reminder.................... 69
Replacing........................... 255
Switch.............................. 68
Heater............................... 133
Heater, Engine Block.................... 146
High Beam/Low Beam Select Switch......... 71
Hitches
Trailer Towing....................... 198
Holder, Cup........................... 89
Homelink Transmitter.................... 81
Hood Release.......................... 66
Hoses............................... 241
Ignition............................... 11
Cables............................. 230
Key ............................... 9,11
Lock................................ 11
Illuminated Entry....................... 12
Infant Restraint.......................38,39Inflation Pressure Tires................... 182
Inside Rearview Mirror................... 58
Instrument Cluster.....................97,99
Instrument Panel and Controls.............. 96
Instrument Panel Lens Cleaning............ 252
Interior Appearance Care................. 251
Interior Lights.......................... 67
Intermittent Wipers...................... 71
Introduction............................ 4
Jack Location.......................... 209
Jack Operation......................... 211
Jump Starting......................... 215
Key, Replacement....................... 10
Key, Sentry............................. 9
Key-In Reminder......................... 9
Keyless Entry System..................... 17
Keys.................................. 9
Knee Bolster........................... 31
Lane Change and Turn Signals............70,99
Lap Belts.............................. 30
INDEX 293
10
Page 299 of 300
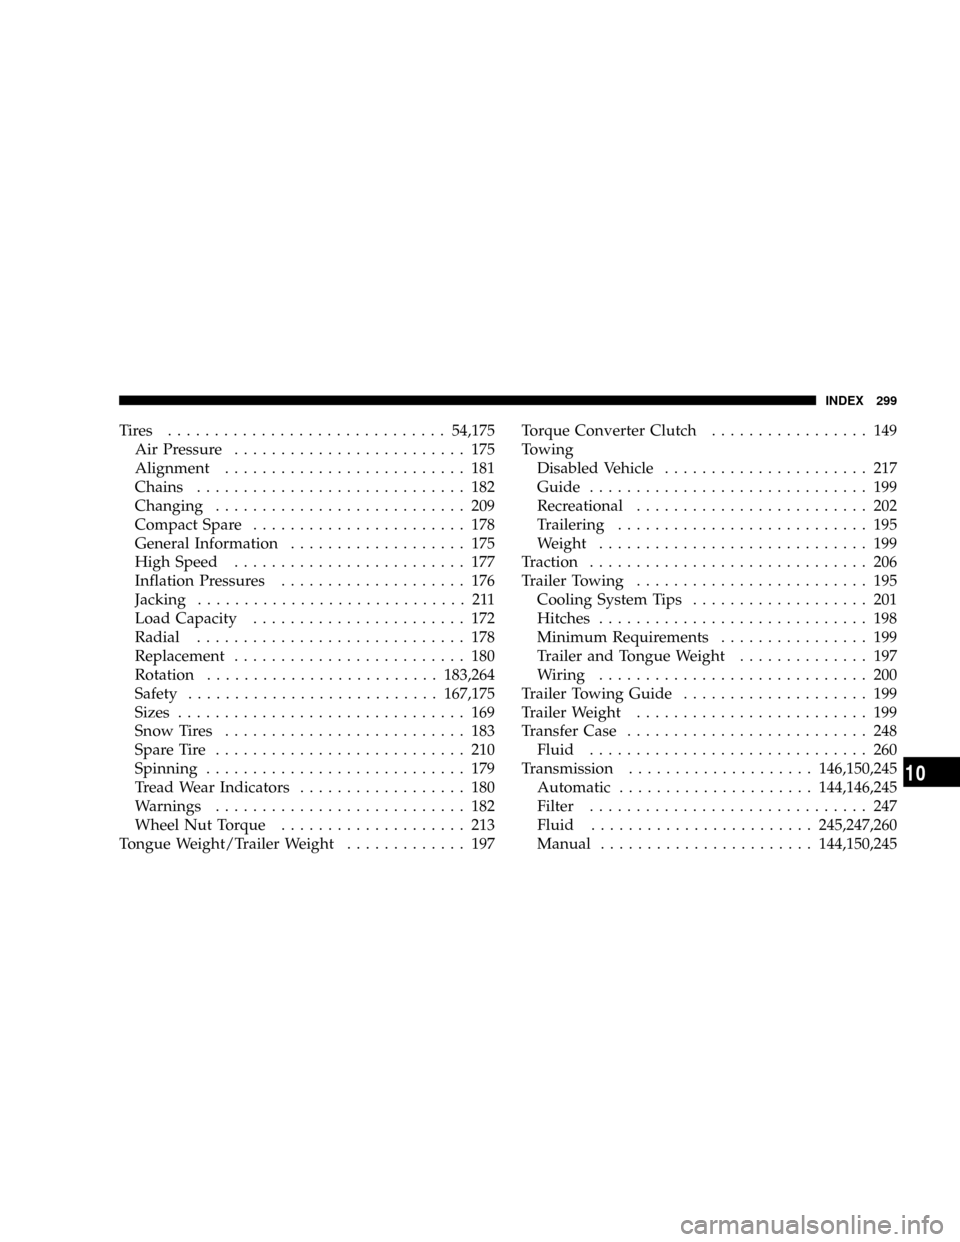
Tires ..............................54,175
Air Pressure......................... 175
Alignment.......................... 181
Chains............................. 182
Changing........................... 209
Compact Spare....................... 178
General Information................... 175
High Speed......................... 177
Inflation Pressures.................... 176
Jacking............................. 211
Load Capacity....................... 172
Radial............................. 178
Replacement......................... 180
Rotation.........................183,264
Safety...........................167,175
Sizes............................... 169
Snow Tires.......................... 183
Spare Tire........................... 210
Spinning............................ 179
Tread Wear Indicators.................. 180
Warnings........................... 182
Wheel Nut Torque.................... 213
Tongue Weight/Trailer Weight............. 197Torque Converter Clutch................. 149
Towing
Disabled Vehicle...................... 217
Guide.............................. 199
Recreational......................... 202
Trailering........................... 195
Weight............................. 199
Traction.............................. 206
Trailer Towing......................... 195
Cooling System Tips................... 201
Hitches............................. 198
Minimum Requirements................ 199
Trailer and Tongue Weight.............. 197
Wiring............................. 200
Trailer Towing Guide.................... 199
Trailer Weight......................... 199
Transfer Case.......................... 248
Fluid.............................. 260
Transmission....................146,150,245
Automatic.....................144,146,245
Filter.............................. 247
Fluid........................245,247,260
Manual.......................144,150,245
INDEX 299
10