check transmission fluid DODGE DAKOTA 2004 3.G Owners Manual
[x] Cancel search | Manufacturer: DODGE, Model Year: 2004, Model line: DAKOTA, Model: DODGE DAKOTA 2004 3.GPages: 300, PDF Size: 5.23 MB
Page 101 of 300
12. Seat Belt Reminder Light
This light comes on for several seconds after the
ignition is turned ON as a reminder to ªbuckle
up.º This light will remain on as long as the seat
belt remains unbuckled. If this light flashes, it indi-
cates a fault in the airbag system. Have the system
checked by an authorized dealer.
13. Low Washer Fluid Indicator
This light comes on when the washer fluid level falls
below approximately 1/4 full. The light will remain on
until fluid is added and ignition switch is cycled.
14. Brake System Warning Light
This light will light when the ignition key is turned to the
ON position and will remain on for a few seconds. If the
light stays on, it may be an indication that the parking
brake has not been released, or there is a low brake fluid
level. If the light remains on when the parking brake has
been disengaged, and the fluid level is at the full mark on
the master cylinder reservoir, it indicates a possible brake
hydraulic system malfunction. In this case, the light will
remain on until the cause is corrected. If the parking
brake is applied, the light will flash when the gearposition is out of park for automatic transmissions, or the
engine RPM is greater than 0 for manual transmissions.
If brake failure is indicated, immediate repair is neces-
sary.Operating the vehicle in this condition is danger-
ous!
15. SERVICE 4WD Indicator
This light monitors the electric shift 4WD
system. This light will come on when the
ignition key is turned to the ON position and
will stay on for 2 seconds. If the light stays
on or comes on during driving, it means that the 4WD
system is not functioning properly and that service is
required.
16. Check Gages
This light illuminates when the Voltmeter, En-
gine Oil Pressure or Engine Coolant Tempera-
ture gages indicate a reading either too high or too
low. Examine the gages carefully, and follow the
instructions above for each indicated problem.
NOTE:
When the ignition switch is turned to OFF, the
Fuel Gage, Voltmeter, Oil Pressure and Engine Coolant
INSTRUMENT PANEL AND CONTROLS 101
4
Page 102 of 300

Temperature gages may not show accurate readings.
When the engine is not running, turn the ignition switch
to ON to obtain accurate readings.
17. Airbag Indicator
The indicator lights and remains lit for 6 to 8
seconds when the ignition is first turned ON. If
the light does not come on when the ignition is first
turned on, or the light stays on or comes on while
driving, have the airbag system checked by an autho-
rized dealer.
18. Low Fuel Warning Light
This indicator lights when the fuel gauge reads
1/8 of a tank or less.
19. ABS Warning Light
This light monitors the Anti-Lock Brake Sys-
tem which is described elsewhere in this
manual. This light will come on when the
ignition key is turned to the ON position and
may stay on for 5 seconds. If this light remains on or
comes on during driving, it indicates that the anti-lockportion of the brake system is not functioning and that
service is required. See your authorized dealer imme-
diately.
20. Transmission Oil Temperature Warning Light
This light indicates that there is excessive
transmission fluid temperature that might
occur with severe usage such as trailer tow-
ing. If this light comes on, stop the vehicle
and run the engine at idle or faster, with the transmis-
sion in NEUTRAL until the light goes off.
21. Security
The light will flash rapidly for approximately 15 seconds
when the vehicle theft alarm is arming. The light will
flash at a slower rate after the alarm is set. The security
light will also come on for about three seconds when the
ignition is first turned ON.
22. Cargo Lamp
The Cargo Lamp light will illuminate when the Cargo
Lamp is activated from the Head Lamp switch.
102 INSTRUMENT PANEL AND CONTROLS
Page 245 of 300
WARNING!
Worn brake hoses can burst and cause brake failure.
You could have an accident. If you see any sign of
cracking, scuffing, or worn spots, have the brake
hoses replaced immediately.
Clutch Hydraulic System
The clutch hydraulic system is a sealed maintenance free
system. In the event of leakage or other malfunction, the
system must be replaced.
Manual Transmission
Fluid Level Check
This fluid should be checked whenever other underhood
services are performed. The fluid level is checked by
removing the fill plug. If the level of the lubricant is more
than 1/49(6.35 mm) below the bottom of the filler hole
while the vehicle is level, enough lubricant should be
added to bring the level to the bottom of the filler hole.
NV-3500 5-Speed Transmission Lubricant Selection
These transmissions are filled with manual transmission
fluid at the factory. This fluid does not require periodic
changing. If it becomes necessary to add or change the
fluid in these transmissions, Refer to Recommended
Fluids, Lubricants and Genuine Parts for correct fluid
type.
Automatic Transmission
Fluid Level Check ± 3.7/4.7L Engine
Check the fluid level while the transmission is at normal
operating temperature 180ÉF (82ÉC). This occurs after at
least 15 miles (25 km) of driving. At normal operating
temperature the fluid cannot be held comfortably be-
tween the fingertips.
To check the automatic transmission fluid level properly,
the following procedure must be used:
1. Operate the engine at idle speed and normal operating
temperature.
2. The vehicle must be on level ground.
MAINTAINING YOUR VEHICLE 245
7
Page 246 of 300
3. Fully apply the parking brake and press the brake
pedal.
4. Place the gear selector momentarily in each gear
position ending with the lever in P (Park).
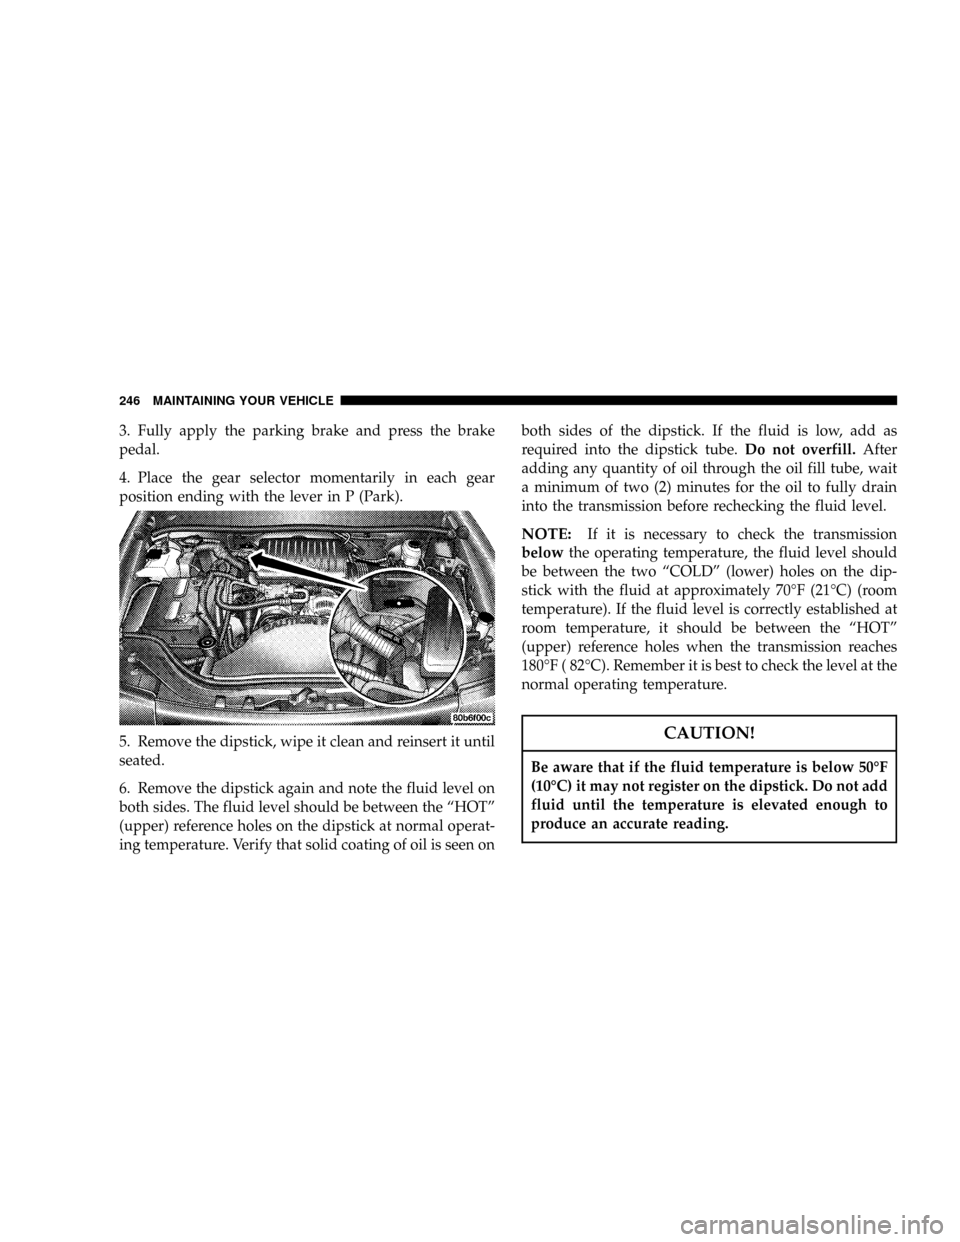
5. Remove the dipstick, wipe it clean and reinsert it until
seated.
6. Remove the dipstick again and note the fluid level on
both sides. The fluid level should be between the ªHOTº
(upper) reference holes on the dipstick at normal operat-
ing temperature. Verify that solid coating of oil is seen onboth sides of the dipstick. If the fluid is low, add as
required into the dipstick tube.Do not overfill.After
adding any quantity of oil through the oil fill tube, wait
a minimum of two (2) minutes for the oil to fully drain
into the transmission before rechecking the fluid level.
NOTE:If it is necessary to check the transmission
belowthe operating temperature, the fluid level should
be between the two ªCOLDº (lower) holes on the dip-
stick with the fluid at approximately 70ÉF (21ÉC) (room
temperature). If the fluid level is correctly established at
room temperature, it should be between the ªHOTº
(upper) reference holes when the transmission reaches
180ÉF ( 82ÉC). Remember it is best to check the level at the
normal operating temperature.
CAUTION!
Be aware that if the fluid temperature is below 50ÉF
(10ÉC) it may not register on the dipstick. Do not add
fluid until the temperature is elevated enough to
produce an accurate reading.
246 MAINTAINING YOUR VEHICLE
Page 247 of 300
7. Check for leaks. Release parking brake.
To prevent dirt and water from entering the transmission
after checking or replenishing fluid, make certain that the
dipstick cap is properly reseated. It is normal for the
dipstick cap to spring back slightly from its fully seated
position, as long as its seal remains engaged in the
dipstick tube.
Automatic Transmission Fluid And Filter Change
To obtain best performance and long life for automatic
transmissions, the manufacturer recommends that they
be given regular maintenance service by an Authorized
Dodge Dealer or Service Center. It is important that the
transmission be adjusted periodically, the fluid be main-
tained at the correct level, and that it be drained and
refilled as specified.
It is important that proper lubricant is used in the
transmission. Refer to Recommended Fluids, Lubricants
and Genuine Parts for correct fluid type. It is important
that the transmission fluid be maintained at the pre-
scribed level using the recommended fluid.
CAUTION!
Using a transmission fluid other than the manufac-
turers recommended fluid may cause deterioration
in transmission shift quality and/or torque converter
shudder. Using a transmission fluid other than the
manufacturers recommended fluid will result in
more frequent fluid and filter changes. Refer to
Recommended Fluids, Lubricants and Genuine Parts
for correct fluid type.
Refer to the ªMaintenance Schedulesº section for the
proper service intervals for your type of driving.
If the transmission is disassembled for any reason, the
fluid and filter should be changed, and the bands ad-
justed (if equipped).
Special Additives
The manufacturer strongly recommends against the ad-
dition of any fluid additives to the transmission. Excep-
tion to this policy is the use of special dyes to aid in
detecting fluid leaks. The use of transmission sealers
should be avoided, since they may adversely affect seals.
MAINTAINING YOUR VEHICLE 247
7
Page 264 of 300
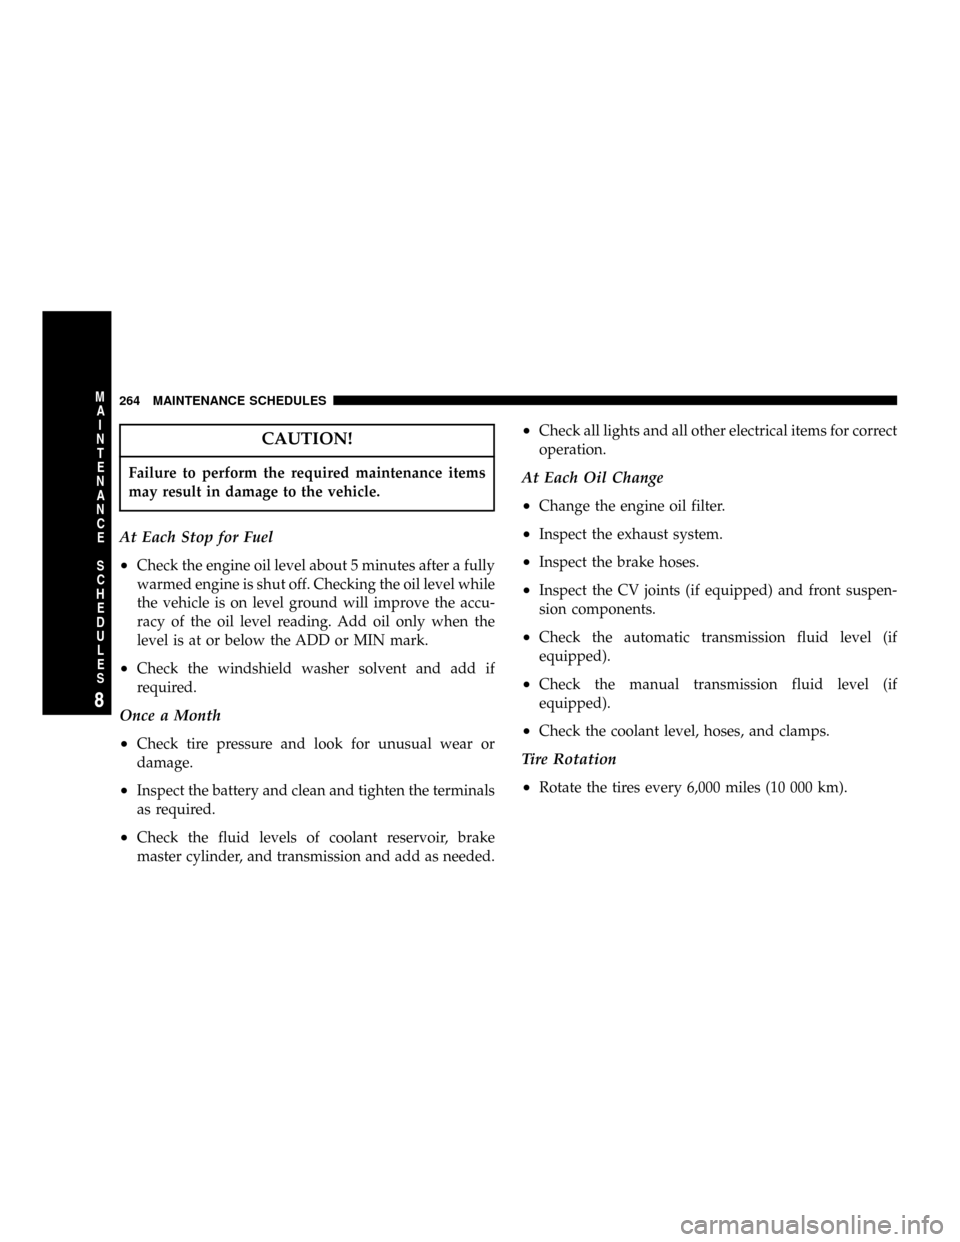
CAUTION!
Failure to perform the required maintenance items
may result in damage to the vehicle.
At Each Stop for Fuel
²
Check the engine oil level about 5 minutes after a fully
warmed engine is shut off. Checking the oil level while
the vehicle is on level ground will improve the accu-
racy of the oil level reading. Add oil only when the
level is at or below the ADD or MIN mark.
²Check the windshield washer solvent and add if
required.
Once a Month
²
Check tire pressure and look for unusual wear or
damage.
²Inspect the battery and clean and tighten the terminals
as required.
²Check the fluid levels of coolant reservoir, brake
master cylinder, and transmission and add as needed.
²Check all lights and all other electrical items for correct
operation.
At Each Oil Change
²
Change the engine oil filter.
²Inspect the exhaust system.
²Inspect the brake hoses.
²Inspect the CV joints (if equipped) and front suspen-
sion components.
²Check the automatic transmission fluid level (if
equipped).
²Check the manual transmission fluid level (if
equipped).
²Check the coolant level, hoses, and clamps.
Tire Rotation
²
Rotate the tires every 6,000 miles (10 000 km).
264 MAINTENANCE SCHEDULES
8
M
A
I
N
T
E
N
A
N
C
E
S
C
H
E
D
U
L
E
S
Page 267 of 300
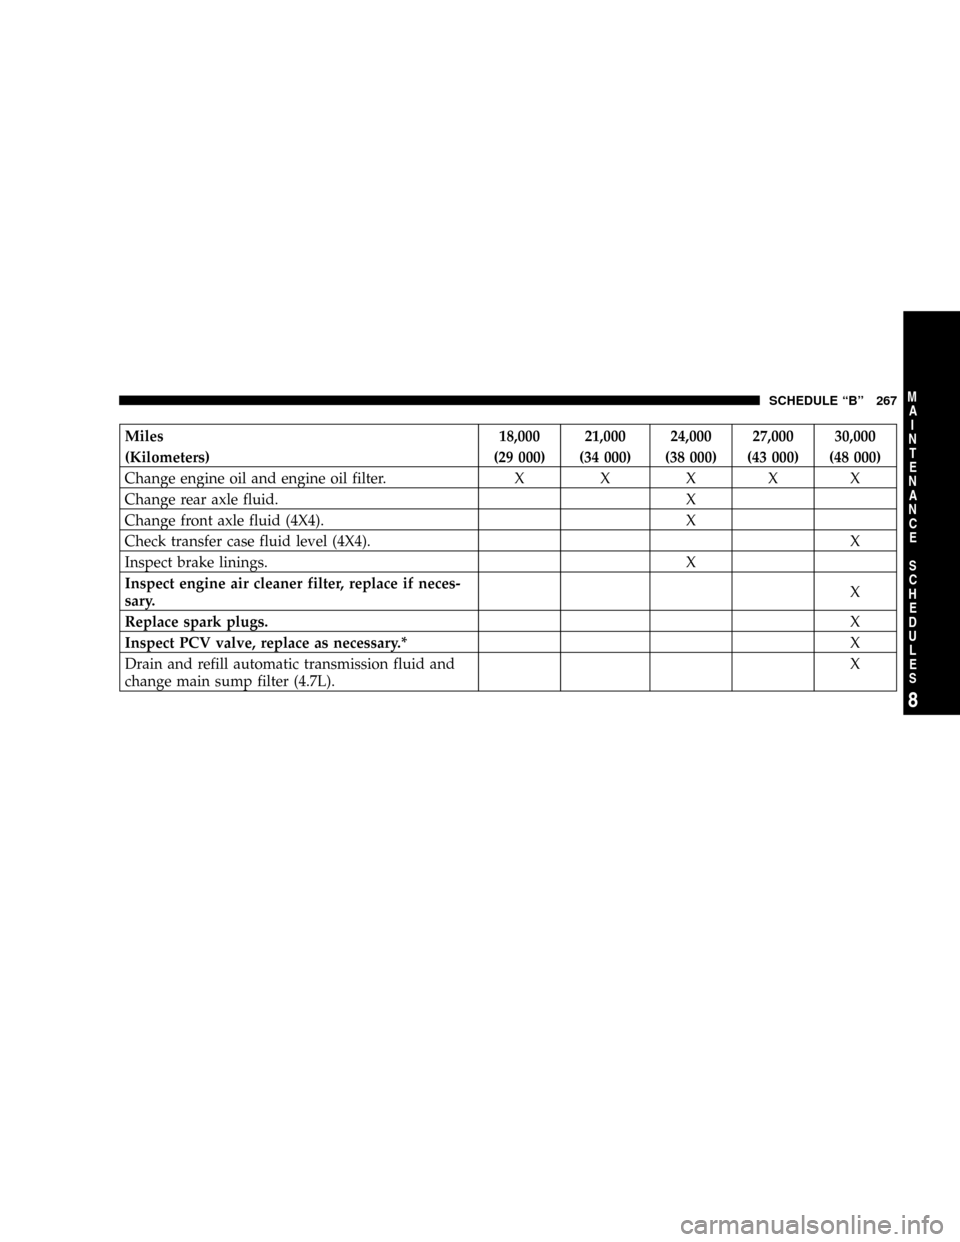
Miles 18,000 21,000 24,000 27,000 30,000
(Kilometers) (29 000) (34 000) (38 000) (43 000) (48 000)
Change engine oil and engine oil filter. X X X X X
Change rear axle fluid. X
Change front axle fluid (4X4). X
Check transfer case fluid level (4X4).X
Inspect brake linings. X
Inspect engine air cleaner filter, replace if neces-
sary.X
Replace spark plugs.X
Inspect PCV valve, replace as necessary.*X
Drain and refill automatic transmission fluid and
change main sump filter (4.7L).X
SCHEDULE ªBº 267
8
M
A
I
N
T
E
N
A
N
C
E
S
C
H
E
D
U
L
E
S
Page 271 of 300
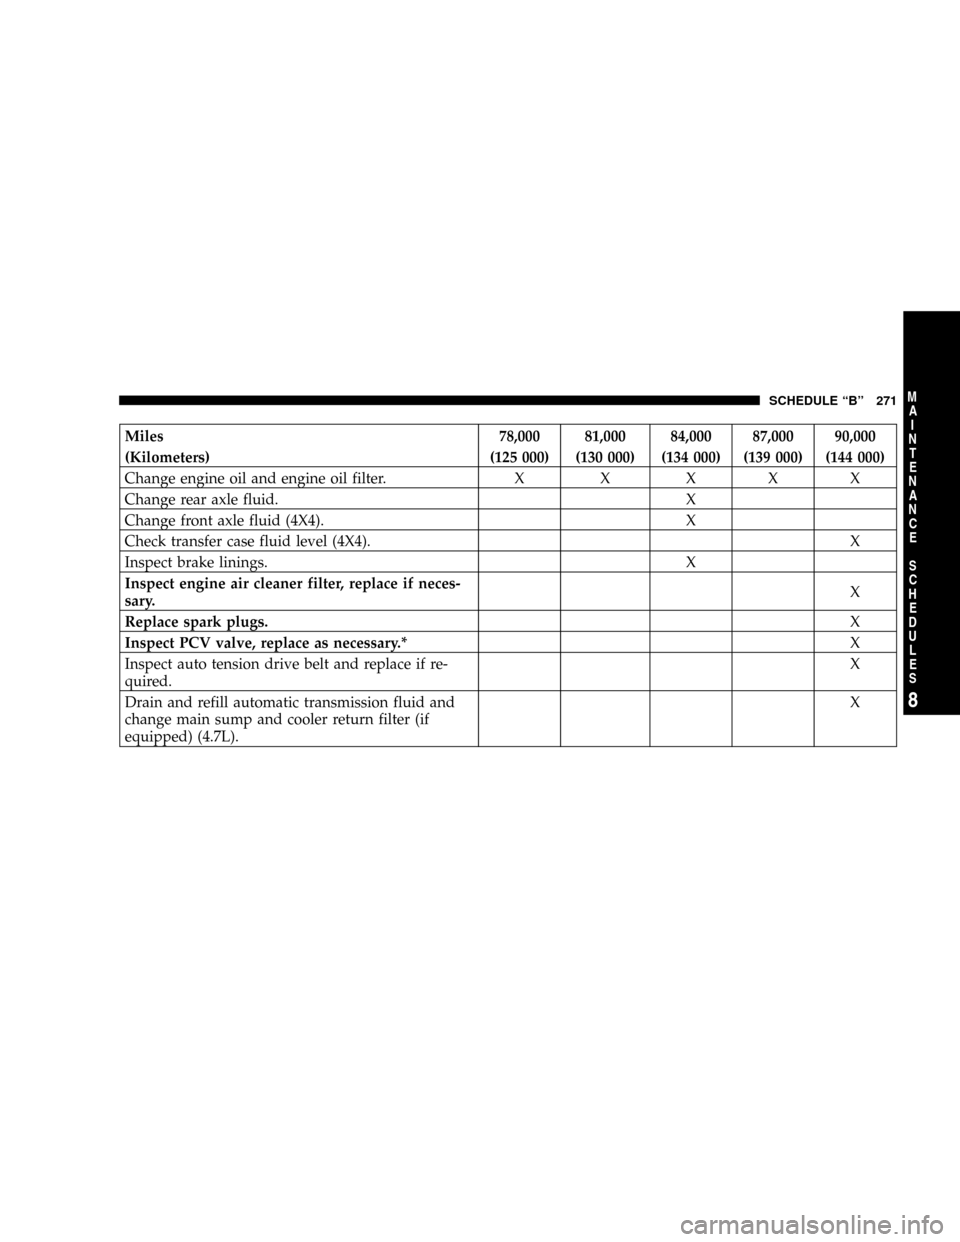
Miles 78,000 81,000 84,000 87,000 90,000
(Kilometers) (125 000) (130 000) (134 000) (139 000) (144 000)
Change engine oil and engine oil filter. X X X X X
Change rear axle fluid. X
Change front axle fluid (4X4). X
Check transfer case fluid level (4X4).X
Inspect brake linings. X
Inspect engine air cleaner filter, replace if neces-
sary.X
Replace spark plugs.X
Inspect PCV valve, replace as necessary.*X
Inspect auto tension drive belt and replace if re-
quired.X
Drain and refill automatic transmission fluid and
change main sump and cooler return filter (if
equipped) (4.7L).X
SCHEDULE ªBº 271
8
M
A
I
N
T
E
N
A
N
C
E
S
C
H
E
D
U
L
E
S
Page 276 of 300
![DODGE DAKOTA 2004 3.G Owners Manual Miles 72,000 78,000 84,000 90,000 96,000 100,000
(Kilometers) (115 000) (125 000) (134 000) (144000) (154 000) (160 000)
[Months] [72] [78] [84] [90] [96]
Change engine oil and engine oil filter. X X](/img/12/5586/w960_5586-275.png "DODGE DAKOTA 2004 3.G Owners Manual Miles 72,000 78,000 84,000 90,000 96,000 100,000
(Kilometers) (115 000) (125 000) (134 000) (144000) (154 000) (160 000)
[Months] [72] [78] [84] [90] [96]
Change engine oil and engine oil filter. X X")
Miles 72,000 78,000 84,000 90,000 96,000 100,000
(Kilometers) (115 000) (125 000) (134 000) (144000) (154 000) (160 000)
[Months] [72] [78] [84] [90] [96]
Change engine oil and engine oil filter. X X X X X
Check transfer case fluid Level (4X4). X
Inspect brake linings. X X
Replace engine air cleaner filter.X
Replace spark plugs.X
Inspect PCV valve, replace as necessary.*X
Inspect auto tension drive belt and replace if
required.³X
Drain and refill automatic transmission fluid
and change main sump and cooler return fil-
ter (if equipped) (4.7L).X
276 SCHEDULE ªAº
8
M
A
I
N
T
E
N
A
N
C
E
S
C
H
E
D
U
L
E
S
Page 288 of 300

Adding Engine Coolant (Antifreeze)......... 239
Adding Fuel........................186,208
Air Conditioner Maintenance.............. 233
Air Conditioning....................... 134
Air Conditioning, Operating Tips........135,137
Air Conditioning Refrigerant.............. 234
Air Conditioning System................. 134
Air Pressure, Tires...................176,182
Airbag...........................31,34,102
Airbag Light........................... 38
Airbag On/Off Switch.................... 34
Alarm.............................21,102
Alarm, Panic........................... 19
Alignment and Balance.................. 181
Alterations/Modifications, Vehicle............ 5
Antifreeze (Engine Coolant)............238,258
Anti-Lock Brake System...............164,165
Anti-Lock Warning Light................. 102
Anti-Theft System....................21,102
Appearance Care....................... 249
Automatic Dimming Mirror................ 59
Automatic Transmission............144,146,245
Adding Fluid........................ 246Fluid and Filter Changes................ 247
Fluid Level Check..................... 245
Fluid Type.......................247,260
Gear Ranges......................... 147
Overdrive........................... 148
Shifting............................ 146
Special Additives..................... 247
Torque Converter..................... 149
Axle Fluid............................ 260
Axle Lubrication....................... 248
Backfire, Engine........................ 190
Ball Joints............................ 235
Battery............................... 232
Charging........................... 215
Emergency Starting.................... 215
Gas Caution......................... 215
Keyless Transmitter Replacement.......... 21
Saving Feature........................ 68
Belts, Drive........................... 230
Belts, Seat............................. 25
Body Mechanism Lubrication.............. 235
B-Pillar Location....................... 172
288 INDEX