audio DODGE DART 2013 PF / 1.G Owner's Manual
[x] Cancel search | Manufacturer: DODGE, Model Year: 2013, Model line: DART, Model: DODGE DART 2013 PF / 1.GPages: 132, PDF Size: 4.13 MB
Page 57 of 132
NOTE:
When connecting your MP3 Player device for the first time, the system may take several
minutes to read your music, depending on the number of files. For example, the system
will take approximately five minutes for every 1000 songs loaded on the device. Also dur-
ing the reading process, the Shuffle and Browse functions will be disabled. This process
is needed to ensure the full use of your MP3 Player features and only happens the first
time it is connected. After the first time, the reading process of your MP3 Player will take
considerably less time unless changes are made or new songs are added to the playlist.
• The USB port supports certain Mini, Classic, Nano, Touch, and iPhone® devices. The USBport also supports playing music from compatible external USB Mass Storage Class
memory devices. Some iPod® software versions may not fully support the USB port
features. Please visit Apple’s website for iPod® software updates.
Audio Jack
• The Audio Jack allows a portable device, such as an MP3 player or an iPod® to be pluggedinto the radio and utilize the vehicle’s sound system, using a standard 3.5 mm audio
cable, to amplify the source and play through the vehicle speakers.
• Touch the Player soft-key on the then choose AUX source will change the mode to auxiliary device if the Audio Jack is connected, allowing the music from your portable
device to be heard through the vehicle's speakers.
• The functions of the portable device are controlled using the device controls. The volume may be controlled using the radio or portable device.
• To route the audio cable out of the center console, use the access cut out on the right side of the console.
Remote CD/Disc Player
• The CD/Disc Player is located inside the center console.
• With the printed side facing the rear of the car, lift up the protective door and insert thedisc into the disc slot. The radio pulls the disc in automatically. The radio selects the
appropriate mode after the disc is recognized, and starts playing the first track.
• The CD/Disc can also be selected by touching the Player soft-key, then touch the source soft-key and then touch the Disc soft-key.
NOTE: • Depending on the CD/Disc being used, you will only be able to browse by folder.
• There are Voice Commands available while in this mode. Refer to the Uconnect® VoiceCommand section in this guide.
ELECTRONICS
55
Page 58 of 132
SD Card
• Play songs stored on an SD card inserted into the SD card slot.
• Song playback can be controlled using the radio or Steering Wheel Audio Controls to play,skip to the next or previous track, browse, and list the contents.
Bluetooth® Streaming Audio
• If equipped with Uconnect® Voice Command, your Bluetooth-equipped MP3 Playerdevices, cell phones or other media players, may also be able to stream music to your
vehicle's sound system. Your connected device must be Bluetooth-compatible, and
paired with your Uconnect® system (see Uconnect® Phone section or
www.UconnectPhone.com for pairing instructions). You can access the music from your
connected Bluetooth® device by touching the Source soft-key while in Player mode.
GARMIN® NAVIGATION (8.4N ONLY)
• Uconnect® 8.4N integrates Garmin’s consumer-friendly navigation into your vehicle. Garmin Navigation includes Lane Assist and Junction View, Speed Limit information,
and a database with over 6 million points of interest.
• Touch the NAV soft-key in the menu bar to access the Navigation system.
Changing the Navigation Voice Prompt Volume
1. Program a destination.
2. While traveling on your route, touch the upper left area of the map screen where your next turn is displayed.
3. The Navigation system will then repeat the distance to your next turn.
4. While the Navigation system is speaking, use the ON/OFF VOLUME rotary knob to adjust the volume to a comfortable level. Please note the volume setting for Navigation Voice
Prompt is different than the audio system.
ELECTRONICS
56
Page 68 of 132
Changing The Volume
• Start a dialogue by pressing the Phone button, then say a command for example -
"Help".
• Use the radio ON/OFF VOLUME rotary knob to adjust the volume to a comfortable level while the Uconnect® system is speaking. Please note the volume setting for Uconnect® is
different than the audio system.
NOTE:
To access help, press the Uconnect® Phone
button on the steering wheel and say
"help." Touch the display or push either
orbutton and say "cancel" to cancel
the help session.
Voice Text Reply
• Uconnect® Phone can read or send new text messages on your mobile phone.
• Your mobile phone must support Voice Text Reply over Bluetooth® in order to use this feature. If the Uconnect® Phone determines your phone is not compatible with Voice Text
Reply messaging over Bluetooth® the “Messaging” button will be greyed out and the
feature will not be available for use.
NOTE: • For mobile phone compatibility and pairing instructions, please visitwww.UconnectPhone.com
• When the vehicle is in motion, Uconnect® Phone Voice Text Reply is only available though Voice Commands.
Read Messages:
• If you receive a new text message while your phone is connected to Uconnect® Phone, an announcement will be made to notify you that you have a new text message. Once a
message is received and viewed or listened to, you will have the following options:
• Send a Reply
•Forward
• Call
Send Messages Using Soft-Keys:
• With the vehicle in Park, you can send messages using Uconnect® Phone. To send a new message:
• Touch the “Phone” soft-key,
• Touch the “messaging” soft-key then “New Message”,
• Touch one of the 18 preset messages and the person you wish to send the message to,
• If multiple numbers are available for the contact select which number you would like tohave the message sent,
• Press “Send” or “Cancel”.
ELECTRONICS
66
Page 70 of 132
Changing The Volume
• Start a dialogue by pressing the Phone button, then say a command for example -
"Help".
• Use the radio ON/OFF VOLUME rotary knob to adjust the volume to a comfortable level while the Uconnect® system is speaking. Please note the volume setting for Uconnect® is
different than the audio system.
NOTE:
To access help, press the Uconnect® Phone
button on the steering wheel and say
"help." Touch the display or push either
orbutton and say "cancel" to cancel
the help session.
Common Voice Commands (Examples)
Switch Modes “FM”
“Satellite”
“AM”
“Change Source to my MP3 Player”
“Change Source to SD Card”
Radio (FM, AM) “95.5”
“95.5 FM”
“Go to preset 5”
Player “Play Album 'Greatest Hits”
“Play Artist 'Scott Joplin”
“Play Genre 'Rock”
“Play Song 'Maple Leaf Rag”
Sirius XM Satellite Radio “39”
“Foxxhole”
Sirius Travel Link “Show fuel prices”
“Show movie listings”
“Show current weather”
“Show extended weather”
“Show Travel Link favorites”
“Show NFL headlines”
“Show NBA rankings”
“Show NFL schedules”
“Show NBA scores”
NOTE:
For the shortened Sirius XM Satellite Radio mode commands to be recognized you must be
in that mode. For example, if you are in Sirius XM Satellite Radio mode you can say “39”, but
if you are not in Sirius XM mode, you would need to say “Tune to Satellite Channel 39.”
Common Navigation Voice Commands
• To access the navigation voice commands, press the Uconnect® Voice Command
button while in any mode and say “Navigation.”
• Once in the Navigation feature, you can simply Say What You Seeon the touch-screen to
give a navigation voice command.
ELECTRONICS
68
Page 72 of 132
STEERING WHEEL AUDIO CONTROLS
• The steering wheel audio controls are lo-cated on the rear surface of the steering
wheel.
Right Switch
• Press the switch up or down to increase or decrease the volume.
• Press the button in the center to change modes AM/FM/CD/SXM.
Left Switch
• Press the switch up or down to search for the next listenable station or select the next or previous CD track.
• Press the button in the center to select the next preset station (radio) or to change CDs if equipped with a CD Changer.
ELECTRONIC VEHICLE INFORMATION CENTER (EVIC) –
STANDARD (2 BUTTON)
• The EVIC features a driver interactive dis-play that is located in the instrument
cluster. Pressing the controls on the left
side of the steering wheel allows the
driver to select vehicle information/
personal settings. For additional informa-
tion, refer to Programmable Features in
this section.
• Press and release the UP
button to
scroll upward through the main menus
(Odometer, Digital Vehicle Speed, Trip
Info, Range To Empty, Average Fuel
Economy, Current Fuel Economy, Stored Messages, Settings).
• Press and release the SELECT
button to access the sub-menu screens of a main
menu item. Press and hold the RIGHT arrow button for two seconds to reset displayed/
selected features that can be reset.
ELECTRONICS
70
Page 77 of 132
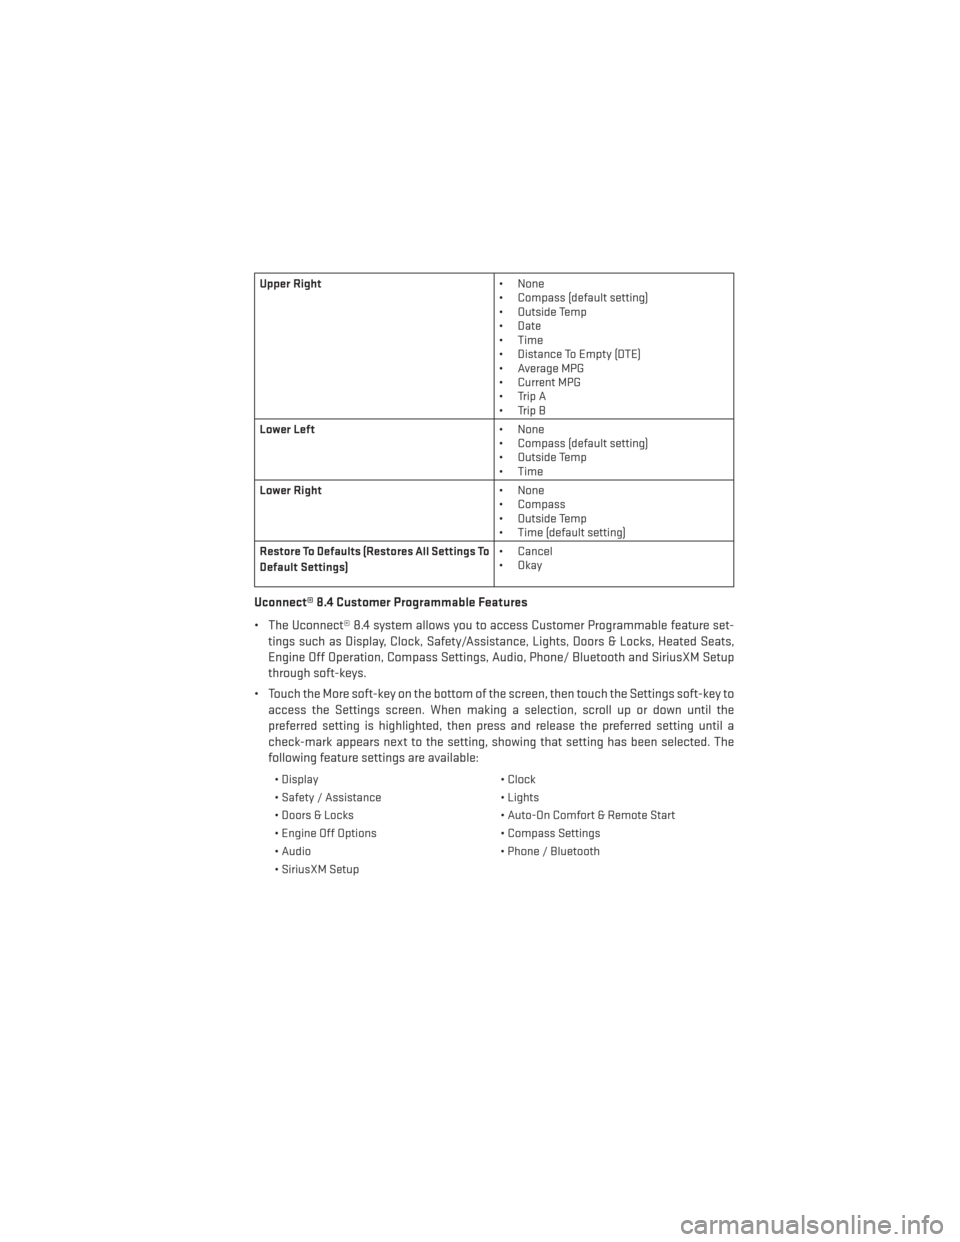
Upper Right• None
• Compass (default setting)
• Outside Temp
• Date
• Time
• Distance To Empty (DTE)
• Average MPG
• Current MPG
• Trip A
• Trip B
Lower Left • None
• Compass (default setting)
• Outside Temp
• Time
Lower Right • None
• Compass
• Outside Temp
• Time (default setting)
Restore To Defaults (Restores All Settings To
Default Settings) • Cancel
•Okay
Uconnect® 8.4 Customer Programmable Features
• The Uconnect® 8.4 system allows you to access Customer Programmable feature set-
tings such as Display, Clock, Safety/Assistance, Lights, Doors & Locks, Heated Seats,
Engine Off Operation, Compass Settings, Audio, Phone/ Bluetooth and SiriusXM Setup
through soft-keys.
• Touch the More soft-key on the bottom of the screen, then touch the Settings soft-key to access the Settings screen. When making a selection, scroll up or down until the
preferred setting is highlighted, then press and release the preferred setting until a
check-mark appears next to the setting, showing that setting has been selected. The
following feature settings are available:
• Display • Clock
• Safety / Assistance • Lights
• Doors & Locks • Auto-On Comfort & Remote Start
• Engine Off Options • Compass Settings
• Audio • Phone / Bluetooth
• SiriusXM Setup
ELECTRONICS
75
Page 125 of 132
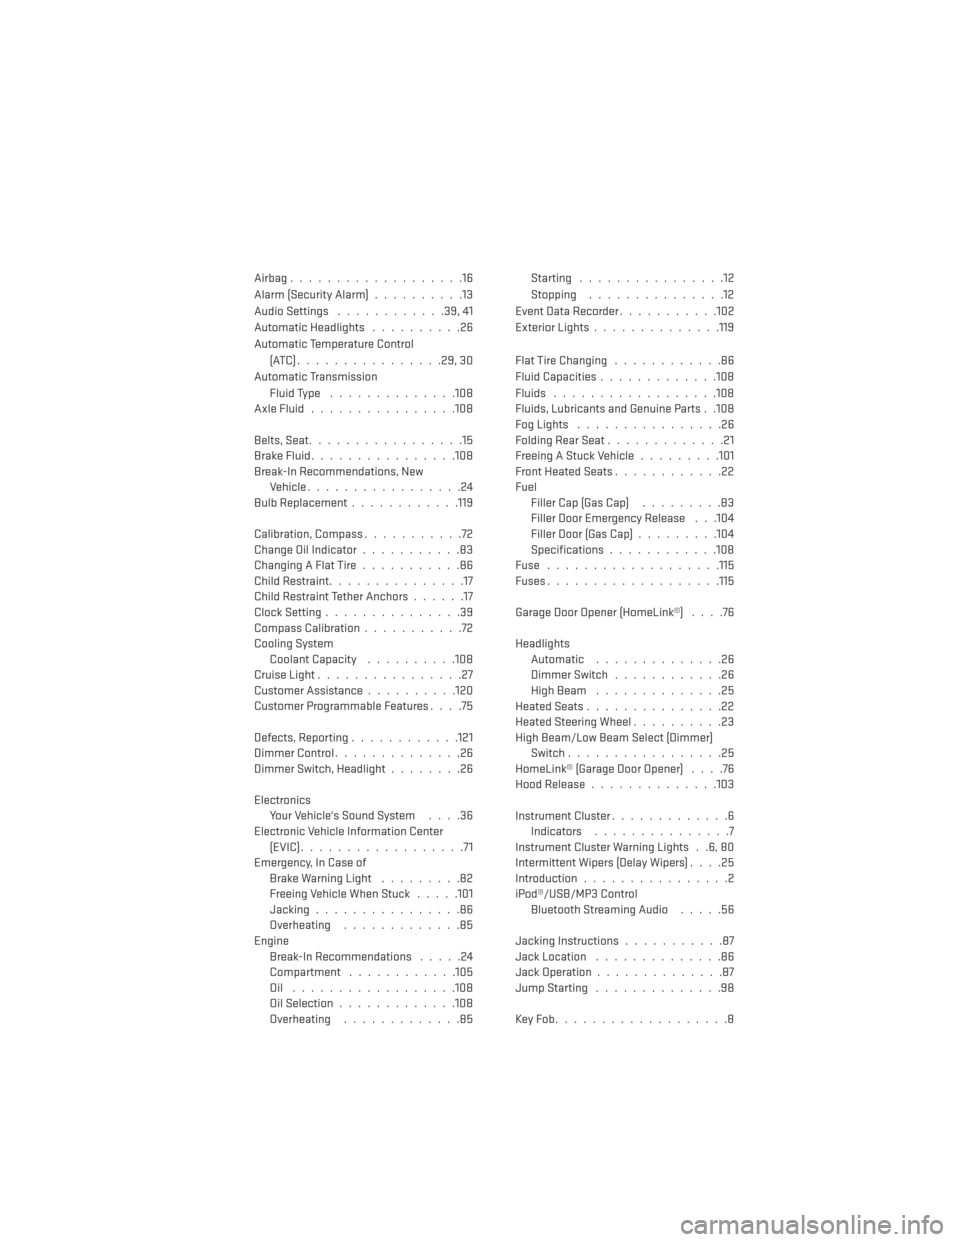
Airbag...................16
Alarm (Security Alarm)..........13
Audio Settings ............39,41
Automatic Headlights ..........26
Automatic Temperature Control (ATC)................29,30
Automatic Transmission Fluid Type ..............108
AxleFluid................108
Belts, Seat .................15
BrakeFluid................108
Break-In Recommendations, New Vehicle .................24
BulbReplacement........... .119
Calibration, Compass ...........72
Change Oil Indicator ...........83
Changing A Flat Tire ...........86
Child Restraint ...............17
Child Restraint Tether Anchors ......17
Clock Setting ...............39
Compass Calibration ...........72
Cooling System Coolant Capacity ..........108
Cruise Light ................27
Customer Assistance ..........120
Customer Programmable Features ....75
Defects, Reporting ............121
Dimmer Control ..............26
Dimmer Switch, Headlight ........26
Electronics Your Vehicle's Sound System ....36
Electronic Vehicle Information Center (EVIC)..................71
Emergency, In Case of Brake Warning Light .........82
Freeing Vehicle When Stuck .....101
Jacking ................86
Overheating .............85
Engine Break-In Recommendations .....24
Compartment ............105
Oil ..................108
Oil Selection .............108
Overheating .............85 Starting ................12
Stopping
...............12
EventDataRecorder...........102
Exterior Lights ..............119
FlatTireChanging ............86
Fluid Capacities .............108
Fluids ..................108
Fluids, Lubricants and Genuine Parts . .108
FogLights ................26
Folding Rear Seat .............21
Freeing A Stuck Vehicle .........101
Front Heated Seats ............22
Fuel Filler Cap (Gas Cap) .........83
Filler Door Emergency Release . . .104
Filler Door (Gas Cap) .........104
Specifications ............108
Fuse ...................115
Fuses.................. .115
Garage Door Opener (HomeLink®) ....76
Headlights Automatic ..............
26
Dimmer Switch ............26
HighBeam ..............25
Heated Seats ...............22
Heated Steering Wheel ..........23
High Beam/Low Beam Select (Dimmer) Switch .................25
HomeLink® (Garage Door Opener) ....76
Hood Release ..............103
Instrument Cluster .............6
Indicators ...............7
Instrument Cluster Warning Lights . .6, 80
Intermittent Wipers (Delay Wipers) ....25
Introduction ................2
iPod®/USB/MP3 Control Bluetooth Streaming Audio .....56
Jacking Instructions ...........87
Jack Location ..............86
Jack Operation ..............87
Jump Starting ..............98
KeyFob...................8
INDEX
123
Page 126 of 132
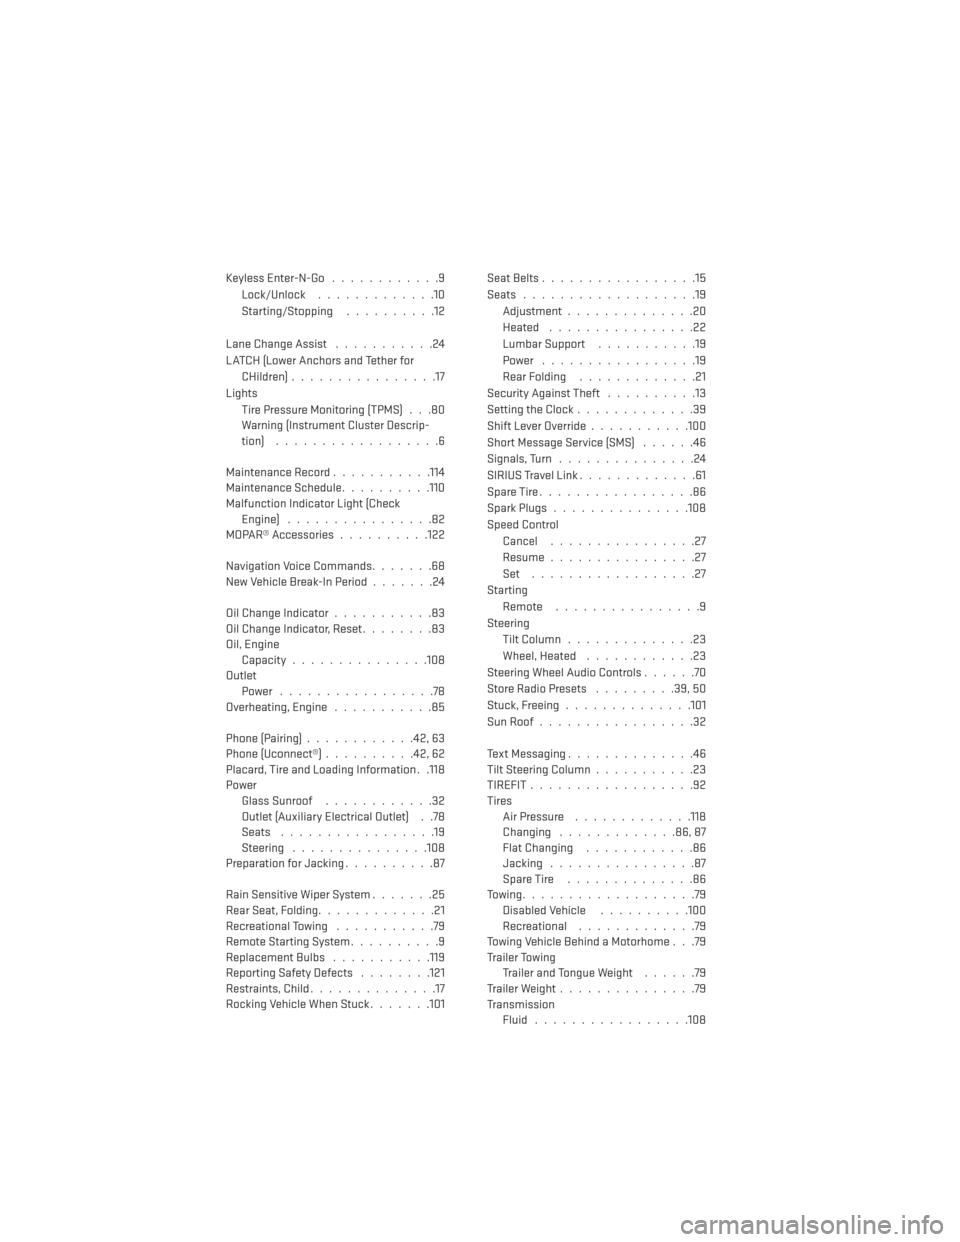
Keyless Enter-N-Go............9
Lock/Unlock .............10
Starting/Stopping ..........12
Lane Change Assist ...........24
LATCH (Lower Anchors and Tether for CHildren) ................17
Lights Tire Pressure Monitoring (TPMS) . . .80
Warning (Instrument Cluster Descrip-
tion) ..................6
Maintenance Record ...........114
Maintenance Schedule ..........110
Malfunction Indicator Light (Check Engine) ................82
MOPAR® Accessories ..........122
Navigation Voice Commands .......68
New Vehicle Break-In Period .......24
Oil Change Indicator ...........83
Oil Change Indicator, Reset ........83
Oil, Engine Capacity...............108
Outlet Power .................78
Overheating, Engine ...........85
Phone (Pairing) ............42,63
Phone (Uconnect®) ..........42,62
Placard, Tire and Loading Information . .118
Power Glass Sunroof ............32
Outlet (Auxiliary Electrical Outlet) . .78
Seats .................19
Steering ...............108
Preparation for Jacking ..........87
Rain Sensitive Wiper System .......25
Rear Seat, Folding .............21
Recreational Towing ...........79
Remote Starting System ..........9
ReplacementBulbs .......... .119
Reporting Safety Defects ........121
Restraints, Child ..............17
Rocking Vehicle When Stuck .......101Seat Belts
.................15
Seats ...................19
Adjustment..............20
Heated ................22
Lumbar Support ...........19
Power .................19
Rear Folding .............21
Security Against Theft ..........13
Setting the Clock .............39
Shift Lever Override ...........100
Short Message Service (SMS) ......46
Signals, Turn ...............24
SIRIUSTravelLink.............61
SpareTire.................86
SparkPlugs...............108
Speed Control Cancel ................27
Resume ................27
Set ..................27
Starting Remote ................9
Steering Tilt Column ..............23
Wheel, Heated ............23
Steering Wheel Audio Controls ......70
Store Radio Presets .........39,50
Stuck,
Freeing ..............101
SunRoof.................32
Text Messaging ..............46
Tilt Steering Column ...........23
TIREFIT..................92
Tires Air Pressure .............118
Changing .............86,87
Flat Changing ............86
Jacking ................87
SpareTire ..............86
Towing...................79 Disabled Vehicle ..........100
Recreational .............79
Towing Vehicle Behind a Motorhome . . .79
Trailer Towing Trailer and Tongue Weight ......79
Trailer Weight ...............79
Transmission Fluid .................108
INDEX
124
Page 128 of 132
FREQUENTLY ASKED QUESTIONS
GETTING STARTED
• How do I install my LATCH Equipped Child Seat? pg. 17
• How do I fold down my rear seat? pg. 21
ELECTRONICS
• Which radio is in my vehicle?• Uconnect® 200 pg. 38
• Uconnect® 8.4 & 8.4N pg. 47
• How do I operate the Audio Jack?
• Uconnect® 200 pg. 41
• Uconnect® 8.4 & 8.4N pg. 55
• How do I set the clock on my radio?
• Uconnect® 200 pg. 39
• Uconnect® 8.4 & 8.4N pg. 48
• How do I set the presets on my radio?
• Uconnect® 200 pg. 39
• Uconnect® 8.4 & 8.4N pg. 50
• How do I connect my portable media player/iPod/MP3?
• Uconnect® 200 pg. 41
• Uconnect® 8.4 & 8.4N pg. 49
• How do I use my USB port to listen to audio through my radio?
• Uconnect® 200 pg. 41
• Uconnect® 8.4 & 8.4N pg. 54
• What features do I have on my SiriusXM™ Satellite Radio?
• Uconnect® 200 pg. 41
• Uconnect® 8.4 & 8.4N pg. 61
• How do I pair my cell phone via Bluetooth® with the Uconnect® Phone Hands-Free Voice Activation System?
• Uconnect® 200 pg. 42
• Uconnect® 8.4 & 8.4N pg. 63
• How do I use the Uconnect® Voice Command?
• Uconnect® 200 pg. 44
• Uconnect® 8.4 & 8.4N pg. 67
FAQ (How To?)
126
Page 129 of 132
• How do I operate the Steering Wheel Audio Controls? pg. 70
• How do I configure my Universal Garage Door Opener (HomeLink)? pg. 76
UTILITY
• How do I know how much I can tow with my Dodge Dart? pg. 79
WHAT TO DO IN EMERGENCIES
• What do I do if my TPMS warning light comes on? pg. 80
• How do I change a flat tire? pg. 86
• How do I Jump-Start my vehicle? pg. 98
MAINTAINING YOUR VEHICLE
• Where is my Fuse Block located? pg. 115
• What type of oil do I use? pg. 108
• How often should I change my engine’s oil? pg. 110
• What should my tire pressure be set at? pg. 118
NOTES
127