spare wheel DODGE DART 2014 PF / 1.G User Guide
[x] Cancel search | Manufacturer: DODGE, Model Year: 2014, Model line: DART, Model: DODGE DART 2014 PF / 1.GPages: 656, PDF Size: 4.73 MB
Page 535 of 656
3. Remove the fastener securing the jack and spare tire. 4. Remove the scissors jack and wheel bolt wrench fromthe spare wheel as an assembly. Turn the jack screw to
the left to loosen the wheel bolt wrench, and remove
the wrench from the jack assembly.
5. Remove the spare tire.
Pull StrapJack Location6
WHAT TO DO IN EMERGENCIES 533
Page 536 of 656
WARNING!
A loose tire or jack thrown forward in a collision or
hard stop could endanger the occupants of the ve-
hicle. Always stow the jack parts and the spare tire in
the places provided. Have the deflated (flat) tire
repaired or replaced immediately.
Preparations For Jacking
1. Park the vehicle on a firm, level surface as far from theedge of the roadway as possible. Avoid icy or slippery
areas.
WARNING!
Do not attempt to change a tire on the side of the
vehicle close to moving traffic, pull far enough off
the road to avoid being hit when operating the jack
or changing the wheel. 2. Turn on the Hazard Warning flasher.
3. Set the parking brake.
4. Place the shift lever into PARK.
5. Turn OFF the ignition.
6. Block both the front and rear of the wheel diagonally
opposite of the jacking position. For
example, if changing the right front
tire, block the left rear wheel.
NOTE: Passengers should not remain in the vehicle
when the vehicle is being jacked.
534 WHAT TO DO IN EMERGENCIES
Page 538 of 656
CAUTION!
Do not attempt to raise the vehicle by jacking on
locations other than those indicated in the Jacking
Instructions for this vehicle.1. Remove the spare tire, jack, and wheel bolt wrench.
NOTE:
The jack handle attaches to the side of the jack
with two attachment points. When the jack is partially
expanded, the tension between the two attachment
points holds the jack handle in place.
Jacking LocationsRemoving Jack Handle From Jack
536 WHAT TO DO IN EMERGENCIES
Page 540 of 656
5. Raise the vehicle just enough to remove the flat tireand install the spare tire.
WARNING!
Raising the vehicle higher than necessary can make
the vehicle less stable. It could slip off the jack and
hurt someone near it. Raise the vehicle only enough
to remove the tire.
6. Remove the wheel bolts and tire.
7. Mount the spare tire.
CAUTION!
Be sure to mount the spare tire with the valve stem
facing outward. The vehicle could be damaged if the
spare tire is mounted incorrectly.Rear Jacking Location
538 WHAT TO DO IN EMERGENCIES
Page 541 of 656
NOTE:•For vehicles so equipped, do not attempt to install a
center cap or wheel cover on the compact spare.
• Refer to “Compact Spare Tire” and to “Limited-Use
Spare” under “Tires — General Information” in
“Starting and Operating” for additional warnings,
cautions, and information about the spare tire, its
use, and operation.
8. Install the wheel bolts with the threaded end of the wheel bolt toward the wheel. Lightly tighten the
wheel bolts.
WARNING!
To avoid the risk of forcing the vehicle off the jack,
do not fully tighten the wheel bolts until the vehicle
has been lowered. Failure to follow this warning may
result in personal injury.
Mounting Spare Tire6
WHAT TO DO IN EMERGENCIES 539
Page 542 of 656
9. Lower the vehicle to the ground by turning the jackhandle counterclockwise.
10. Finish tightening the wheel bolts. Push down on the wrench while at the end of the handle for increased
leverage. Tighten the wheel bolts in a star pattern
until each wheel bolt has been tightened twice. Refer
to “Torque Specifications” in this section for proper
lug bolt torque. If in doubt about the correct tight-
ness, have them checked with a torque wrench by
your authorized dealer or at a service station.
11. Lower the jack until it is free. Remove the wheel blocks. Reassemble the lug wrench to the jack assem-
bly and stow it in the spare tire area. Secure the
assembly using the means provided. Release the
parking brake before driving the vehicle.
12. Stow the jack, tools and flat tire.WARNING!
A loose tire or jack thrown forward in a collision or
hard stop could endanger the occupants of the ve-
hicle. Always stow the jack parts and the spare tire in
the places provided. Have the deflated (flat) tire
repaired or replaced immediately.
Road Tire Installation
Vehicles Equipped With Wheel Covers
1. Mount the road tire on the axle.
2. To ease the installation process for steel wheels with wheel covers, install two wheel bolts on the wheel
which are on each side of the valve stem. Install the
wheel bolts with the threaded end of the bolt toward
the wheel. Lightly tighten the wheel bolts.
540 WHAT TO DO IN EMERGENCIES
Page 544 of 656
6. Finish tightening the wheel bolts. Push down on thewrench while at the end of the handle for increased
leverage. Tighten the wheel bolts in a star pattern until
each wheel bolt has been tightened twice. Refer to
“Torque Specifications” in this section for proper lug
bolt torque. If in doubt about the correct tightness,
have them checked with a torque wrench by your
authorized dealer or service station.
7. Lower the jack until it is free. Remove the wheel blocks. Reassemble the lug wrench to the jack assem-
bly and stow it in the spare tire area. Secure the
assembly using the means provided. Release the park-
ing brake before driving the vehicle.
8. After 25 miles (40 km) check the wheel bolt torque with a torque wrench to ensure that all wheel bolts are
properly seated against the wheel.Road Tire Installation
1. Mount the road tire on the axle.
2. Install the remaining wheel bolts with the threadedend of the wheel bolt toward the wheel. Lightly
tighten the wheel bolts.
WARNING!
To avoid the risk of forcing the vehicle off the jack,
do not tighten the lug nuts fully until the vehicle has
been lowered. Failure to follow this warning may
result in personal injury.
3. Lower the vehicle to the ground by turning the jack handle counterclockwise.
542 WHAT TO DO IN EMERGENCIES
Page 545 of 656
4. Finish tightening the wheel bolts. Push down on thewrench while at the end of the handle for increased
leverage. Tighten the wheel bolts in a star pattern until
each wheel bolt has been tightened twice. Refer to
“Torque Specifications” in this section for the proper
lug bolt torque. If in doubt about the correct tightness,
have them checked with a torque wrench by your
authorized dealer or service station.
5. Lower the jack until it is free. Remove the wheel blocks. Reassemble the lug wrench to the jack assem-
bly and stow it in the spare tire area. Secure the
assembly using the means provided. Release the park-
ing brake before driving the vehicle.
6. After 25 miles (40 km) check the wheel bolt torque with a torque wrench to ensure that all wheel bolts are
properly seated against the wheel.JUMP-STARTING PROCEDURES
If your vehicle has a discharged battery it can be jump-
started using a set of jumper cables and a battery in
another vehicle or by using a portable battery booster
pack. Jump-starting can be dangerous if done improperly
so please follow the procedures in this section carefully.
NOTE: When using a portable battery booster pack
follow the manufacturer ’s operating instructions and
precautions.
CAUTION!
Do not use a portable battery booster pack or any
other booster source with a system voltage greater
than 12 Volts or damage to the battery, starter motor,
alternator or electrical system may occur.
6
WHAT TO DO IN EMERGENCIES 543
Page 650 of 656
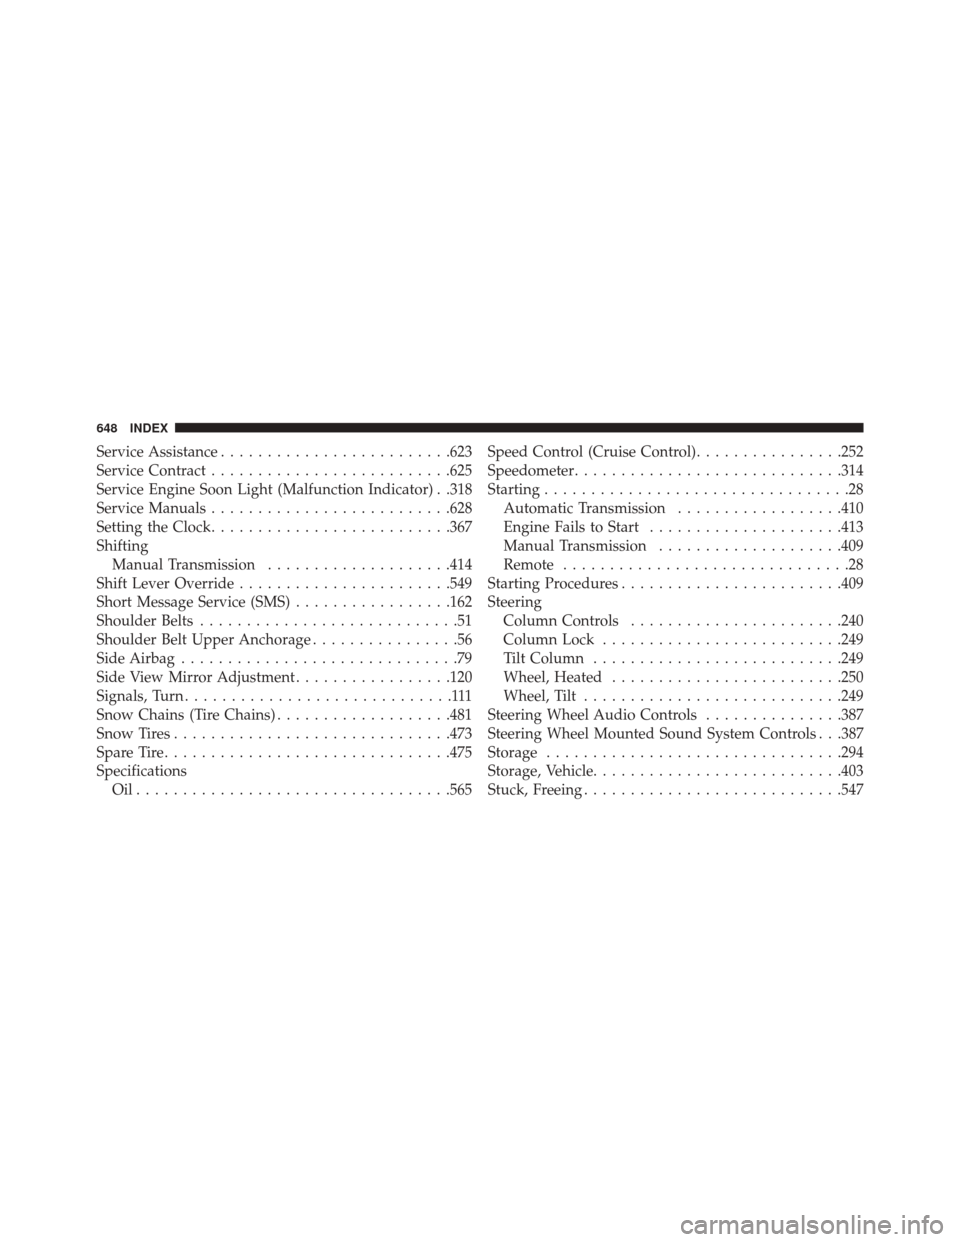
Service Assistance........................ .623
Service Contract ..........................625
Service Engine Soon Light (Malfunction Indicator) . .318
Service Manuals ..........................628
Setting the Clock ..........................367
Shifting Manual Transmission ....................414
Shift Lever Override .......................549
Short Message Service (SMS) .................162
Shoulder Belts ............................51
Shoulder Belt Upper Anchorage ................56
Side Airbag ..............................79
Side View Mirror Adjustment .................120
Signals, Turn .............................111
Snow Chains (Tire Chains) ...................481
Snow Tires ............................. .473
Spare Tire ...............................475
Specifications Oil..................................565 Speed Control (Cruise Control)
................252
Speedometer ............................ .314
Starting .................................28
Automatic Transmission ..................410
Engine Fails to Start .....................413
Manual Transmission ....................409
Remote ...............................28
Starting Procedures ........................409
Steering Column Controls .......................240
Column Lock ..........................249
Tilt Column .......................... .249
Wheel, Heated ........................ .250
Wheel, Tilt ............................249
Steering Wheel Audio Controls ...............387
Steering Wheel Mounted Sound System Controls . . .387
Storage ............................... .294
Storage, Vehicle .......................... .403
Stuck, Freeing ............................547
648 INDEX