ECO mode DODGE DART 2015 PF / 1.G User Guide
[x] Cancel search | Manufacturer: DODGE, Model Year: 2015, Model line: DART, Model: DODGE DART 2015 PF / 1.GPages: 664, PDF Size: 16.96 MB
Page 201 of 664
11. See you in
12. Stuck in traffic.
13. Start without me.
14. Where are you?
15. Are you there yet?
16. I need directions.
17. I’m lost.
18. See you later.
Bluetooth® Communication Link
Mobile phones have been found to lose connection to the
Uconnect® Phone. When this happens, the connection
can generally be re-established by switching the mobile
phone OFF/ON. Your mobile phone is recommended to
remain in Bluetooth® ON mode.
Power-Up
After switching the ignition key from OFF to either the
ON or ACC position, or after a language change, you
must wait at least 15 seconds prior to using the system.
3
UNDERSTANDING THE FEATURES OF YOUR VEHICLE 199
Page 209 of 664
Commands
The Voice Command system understands two types of
commands, Universal commands and Local commands.
Universal commands are available at all times. Local
commands are available if the supported radio mode is
active.
Changing The Volume
1. Start a dialogue by pushing the Voice Command
button.
2. Say a command (e.g., “Help”).
3. Use the ON/OFF VOLUME rotary knob to adjust the
volume to a comfortable level while the Voice Com-
mand system is speaking. Please note the volume
setting for Voice Command is different than the audio
system.
Main Menu
Start a dialogue by pushing the Voice Command
button. You may say “Main Menu” to switch to
the main menu.
In this mode, you can say the following commands:
•“Radio AM” (to switch to the radio AM mode)
•“Radio FM” (to switch to radio FM mode)
•“Sat” (to switch to Satellite radio mode)
•“Disc” (to switch to the disc mode)
•“USB” (to switch to USB mode)
•“Bluetooth Streaming” (to switch to Bluetooth®
Streaming mode)
•“Memo” (to switch to the memo recorder)
•“System Setup” (to switch to system setup)
3
UNDERSTANDING THE FEATURES OF YOUR VEHICLE 207
Page 212 of 664
Memo Mode
To switch to the voice recorder mode, say “Memo.” In
this mode, you may say the following commands:
•“New Memo” (to record a new memo) — During the
recording, you may push the Voice Command
button to stop recording. You proceed by say-
ing one of the following commands:
– “Save” (to save the memo)
– “Continue” (to continue recording)
– “Delete” (to delete the recording)
•“Play Memos” (to play previously recorded memos) —
During the playback you may push the Voice Com-
mandbutton to stop playing memos. You pro-
ceed by saying one of the following commands:
– “Repeat” (to repeat a memo)
– “Next” (to play the next memo)
– “Previous” (to play the previous memo)
– “Delete” (to delete a memo)
– “Delete All” (to delete all memos)
Setup
To switch to system setup, you may say one of the
following:
•“Change to setup”
•“Switch to system setup”
•“Main menu setup”
•“Switch to setup”
In this mode, you may say the following commands:
•“Language English”
•“Language French”
•“Language Spanish”
210 UNDERSTANDING THE FEATURES OF YOUR VEHICLE
Page 215 of 664
At any point, if the system does not recognize one of your
commands, you will be prompted to repeat it.
To hear available commands, push the Uconnect® Voice
Commandbutton and say “Help.” You will hear
available commands for the screen displayed.
Uconnect® Voice Commands
The Uconnect® Voice Command system understands
two types of commands. Universal commands are avail-
able at all times. Local commands are available if the
supported radio mode is active.
Start a dialogue by pushing the Uconnect® Voice Com-
mandbutton.
Changing The Volume
1. Start a dialogue by pushing the Voice Command
button.
2. Say a command (e.g., “Help”).
3. Use the ON/OFF VOLUME rotary knob to adjust the
volume to a comfortable level while the Voice Com-
mand system is speaking. Please note the volume
setting for Voice Command is different than the audio
system.
Starting Voice Recognition (VR) Session In
Radio/Player Modes
In this mode, you can say the following commands:
NOTE:The commands can be said on any screen when
a call is not active after pushing the Uconnect® Voice
Commandbutton.
Source
To switch to the audio source, say “Change source to
Disc” for example. This command can be given in any
mode or screen:
•“Track” (#) (to change the track)
3
UNDERSTANDING THE FEATURES OF YOUR VEHICLE 213
Page 239 of 664
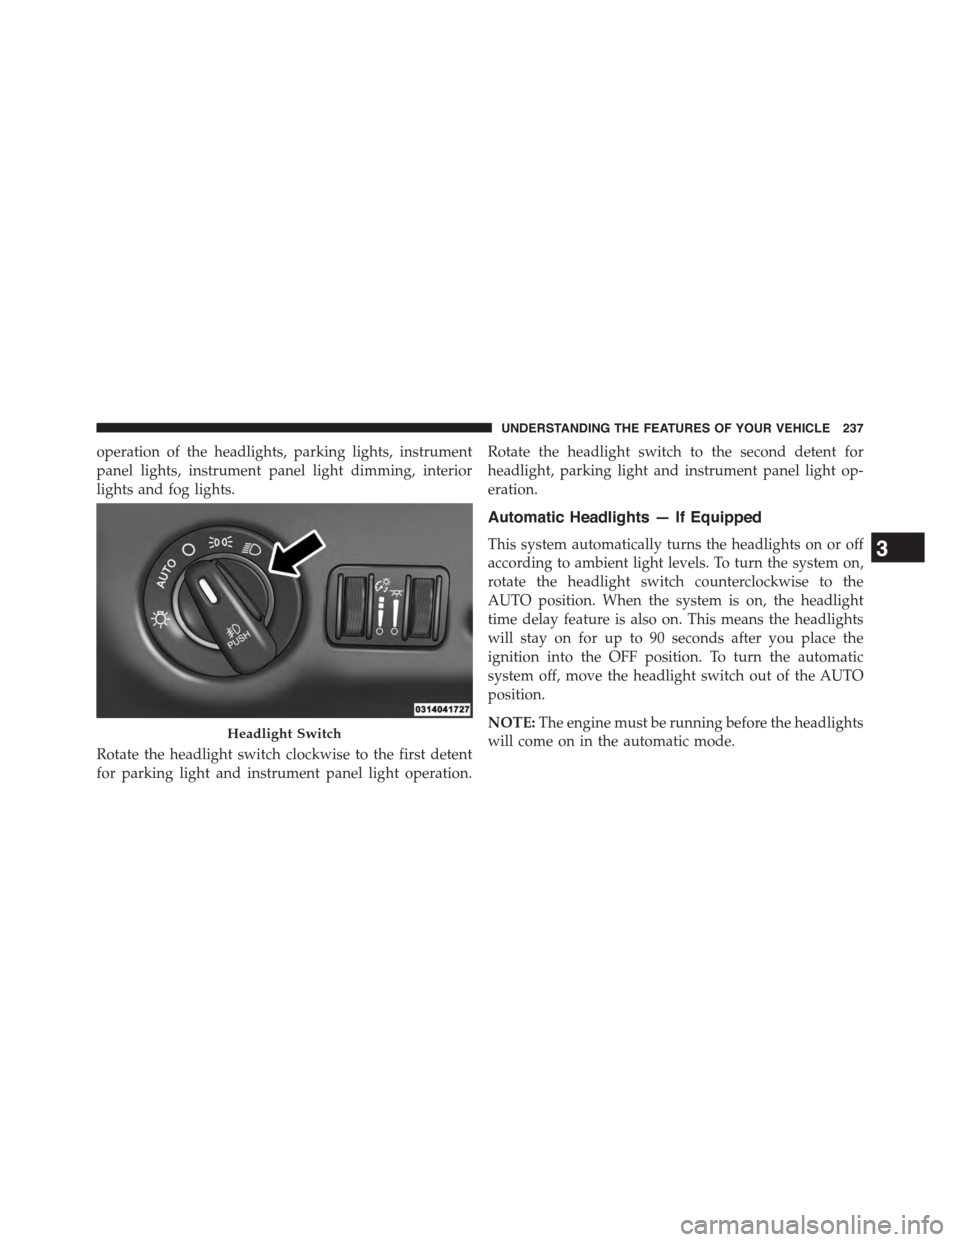
operation of the headlights, parking lights, instrument
panel lights, instrument panel light dimming, interior
lights and fog lights.
Rotate the headlight switch clockwise to the first detent
for parking light and instrument panel light operation.
Rotate the headlight switch to the second detent for
headlight, parking light and instrument panel light op-
eration.
Automatic Headlights — If Equipped
This system automatically turns the headlights on or off
according to ambient light levels. To turn the system on,
rotate the headlight switch counterclockwise to the
AUTO position. When the system is on, the headlight
time delay feature is also on. This means the headlights
will stay on for up to 90 seconds after you place the
ignition into the OFF position. To turn the automatic
system off, move the headlight switch out of the AUTO
position.
NOTE:The engine must be running before the headlights
will come on in the automatic mode.Headlight Switch
3
UNDERSTANDING THE FEATURES OF YOUR VEHICLE 237
Page 248 of 664
Dome Light Position
Rotate the left dimmer control completely upward to the
second detent to turn on the interior lights. The interior
lights will remain on when the dimmer control is in this
position.
Interior Light Defeat (OFF)
Rotate the left dimmer control to the extreme bottom
“OFF” position. The interior lights will remain off when
the doors are open.
Parade Mode (Daytime Brightness Feature)
Rotate the instrument panel dimmer control upward to
the first detent. This feature brightens all text displays
such as the odometer, Electronic Vehicle Information
Center (EVIC) or Driver Information Display (DID), and
radio when the position lights or headlights are on.
WINDSHIELD WIPERS AND WASHERS
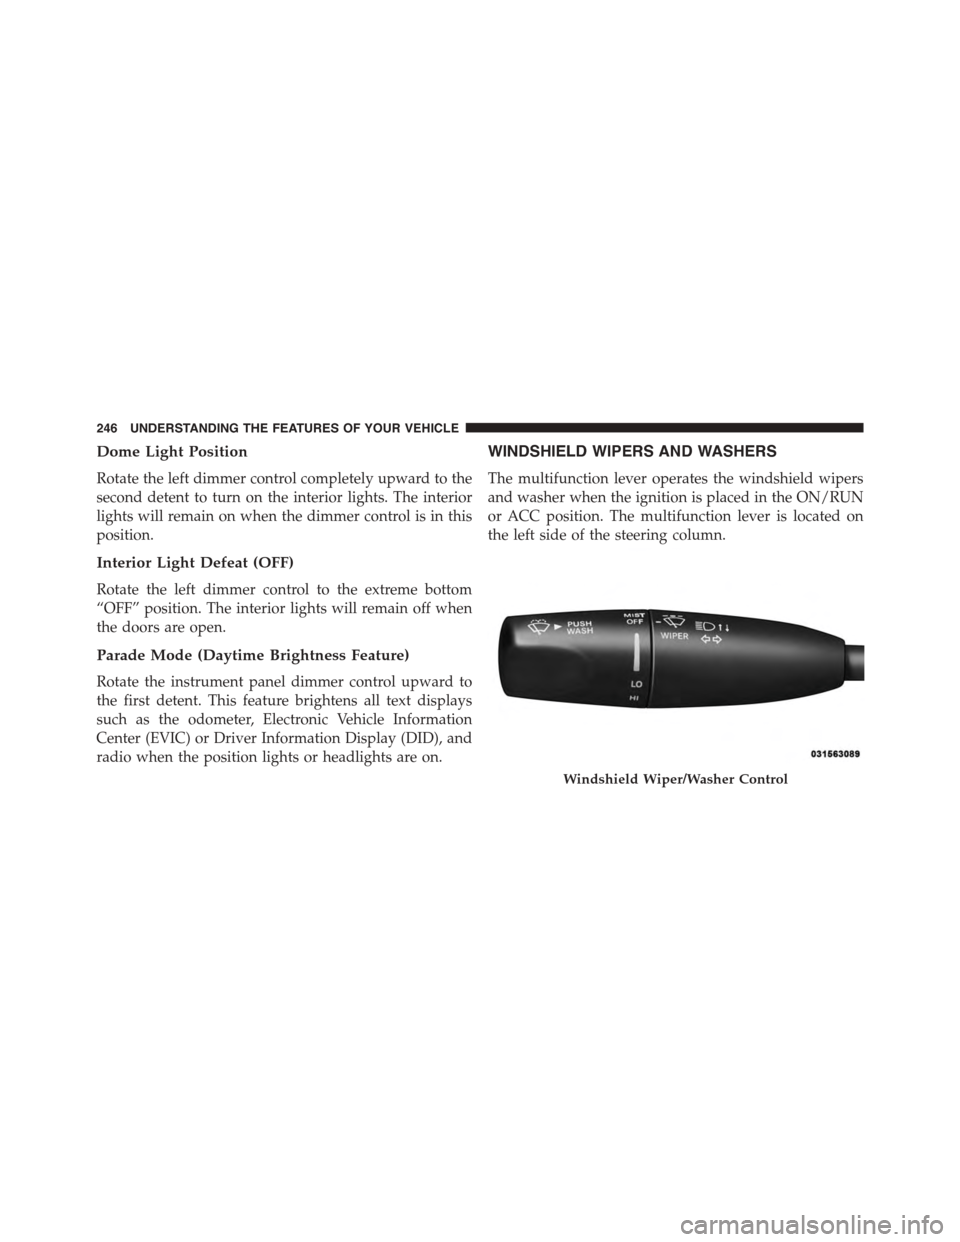
The multifunction lever operates the windshield wipers
and washer when the ignition is placed in the ON/RUN
or ACC position. The multifunction lever is located on
the left side of the steering column.
Windshield Wiper/Washer Control
246 UNDERSTANDING THE FEATURES OF YOUR VEHICLE
Page 252 of 664
NOTE:
•The Rain Sensing feature will not operate when the
wiper speed is in the low or high position.
•The Rain Sensing feature may not function properly
when ice or dried salt water is present on the wind-
shield.
•Use of Rain-X® or products containing wax or silicone
may reduce rain sensor performance.
The Rain Sensing system has protective features for the
wiper blades and arms. It will not operate under the
following conditions:
•Low Temperature Wipe Inhibit— The Rain Sensing
feature will not operate when the ignition is placed in
the RUN position, the vehicle is stationary and the
outside temperature is below 32°F (0°C), unless the
wiper control on the multifunction lever is moved, the
vehicle speed becomes greater than 0 mph (0 km/h) or
the outside temperature rises above freezing.
•Neutral Wipe Inhibit— The Rain Sensing feature will
not operate when the ignition is placed in the RUN
position, the automatic transmission shift lever is in
the NEUTRAL position and the vehicle speed is less
than 5 mph (8 km/h), unless the wiper control on the
multifunction lever is moved or the shift lever is
moved out of the NEUTRAL position.
•Remote Start Mode Inhibit— On vehicles equipped
with Remote Starting system, Rain Sensing wipers are
not operational when the vehicle is in the remote start
mode. Once the operator is in the vehicle and has
placed the ignition switch in the ON/RUN position,
rain sensing wiper operation can resume, if it has been
selected, and no other inhibit conditions (mentioned
previously) exist.
250 UNDERSTANDING THE FEATURES OF YOUR VEHICLE
Page 254 of 664
HEATED STEERING WHEEL — IF EQUIPPED
The steering wheel contains a heating element that helps
warm your hands in cold weather. The heated steering
wheel has only one temperature setting. Once the heated
steering wheel has been turned on it will operate for up
to 80 minutes before automatically shutting off. The
heated steering wheel can shut off early or may not turn
on when the steering wheel is already warm.
The heated steering wheel control button is located
within the Uconnect® system. You can gain access to the
control button through the climate screen or the controls
screen.
•Press the heated steering wheel buttononce to
turn the heating element ON.
•Press the heated steering wheel buttona second
time to turn the heating element OFF.
NOTE:The engine must be running for the heated
steering wheel to operate.
Vehicles Equipped With Remote Start
On models that are equipped with remote start, the
heated steering wheel can be programmed to come on
during a remote start through the Uconnect® system.
Refer to “Uconnect® Settings” in “Understanding Your
Instrument Panel” for further information.
252 UNDERSTANDING THE FEATURES OF YOUR VEHICLE
Page 257 of 664
For Premium Clusters Only
•When set to analog mode: The red outer line on the
speedometer changes from red to white to identify set
speed.
To Deactivate
A soft tap on the brake pedal, pushing the CANCEL
button, or normal brake pressure while slowing the
vehicle will deactivate Electronic Speed Control without
erasing the set speed memory. Pressing the ON/OFF
button or turning the ignition switch OFF erases the set
speed memory.
NOTE:After pressing the OFF button a “Cruise Control
Off” message is displayed for five seconds or until
another switch is pressed.
For Premium Clusters Only
•When set to analog mode: The white outer line on the
speedometer returns to red.
To Resume Speed
To resume a previously set speed, push the RES (+)
button and release. Resume can be used at any speed
above 20 mph (32 km/h).
To Vary The Speed Setting
To Increase Speed
When the Electronic Speed Control is set, you can in-
crease speed by pushing the RES (+) button.
3
UNDERSTANDING THE FEATURES OF YOUR VEHICLE 255
Page 273 of 664
PARKVIEW® REAR BACK UP CAMERA — IF
EQUIPPED
Your vehicle may be equipped with the ParkView® Rear
Back Up Camera that allows you to see an on-screen
image of the rear surroundings of your vehicle whenever
the shift lever is put into REVERSE. The image will be
displayed in the touchscreen display along with a caution
note to “check entire surroundings” across the top of the
screen. After five seconds this note will disappear. The
ParkView® camera is located on the rear of the vehicle
above the rear License plate.
When the vehicle is shifted out of REVERSE, the rear
camera mode is exited and the last selected touchscreen
appears again.
If your vehicle is equipped with the Camera Delay
feature and it is turned On, the rear camera image will be
displayed for up to 10 seconds when the vehicle is shifted
out of REVERSE unless the forward vehicle speed ex-
ceeds 8 mph (13 km/h), the transmission is shifted into
#PARK#or the vehicle’s ignition is cycled to the OFF
position.
Fixed guide lines are overlaid on the image to illustrate
the width of the vehicle.
NOTE:The ParkView® Rear Back Up Camera has pro-
grammable modes of operation that may be selected
through the Uconnect® System. Refer to “Uconnect®
Settings” in “Understanding Your Instrument Panel” for
further information.
Different colored zones indicate the distance to the rear of
the vehicle.
3
UNDERSTANDING THE FEATURES OF YOUR VEHICLE 271