radio DODGE DART 2015 PF / 1.G Owner's Guide
[x] Cancel search | Manufacturer: DODGE, Model Year: 2015, Model line: DART, Model: DODGE DART 2015 PF / 1.GPages: 664, PDF Size: 16.96 MB
Page 305 of 664
!RADIO OPERATION AND MOBILE
PHONES............................389
!CLIMATE CONTROLS...................390
▫Manual Heating And Air Conditioning — If
Equipped...........................390
▫Uconnect® 8.4 Climate Controls — If
Equipped...........................395
▫Climate Control Functions...............400
▫Automatic Temperature Control (ATC)......402
▫Operating Tips.......................404
4
UNDERSTANDING YOUR INSTRUMENT PANEL 303
Page 306 of 664
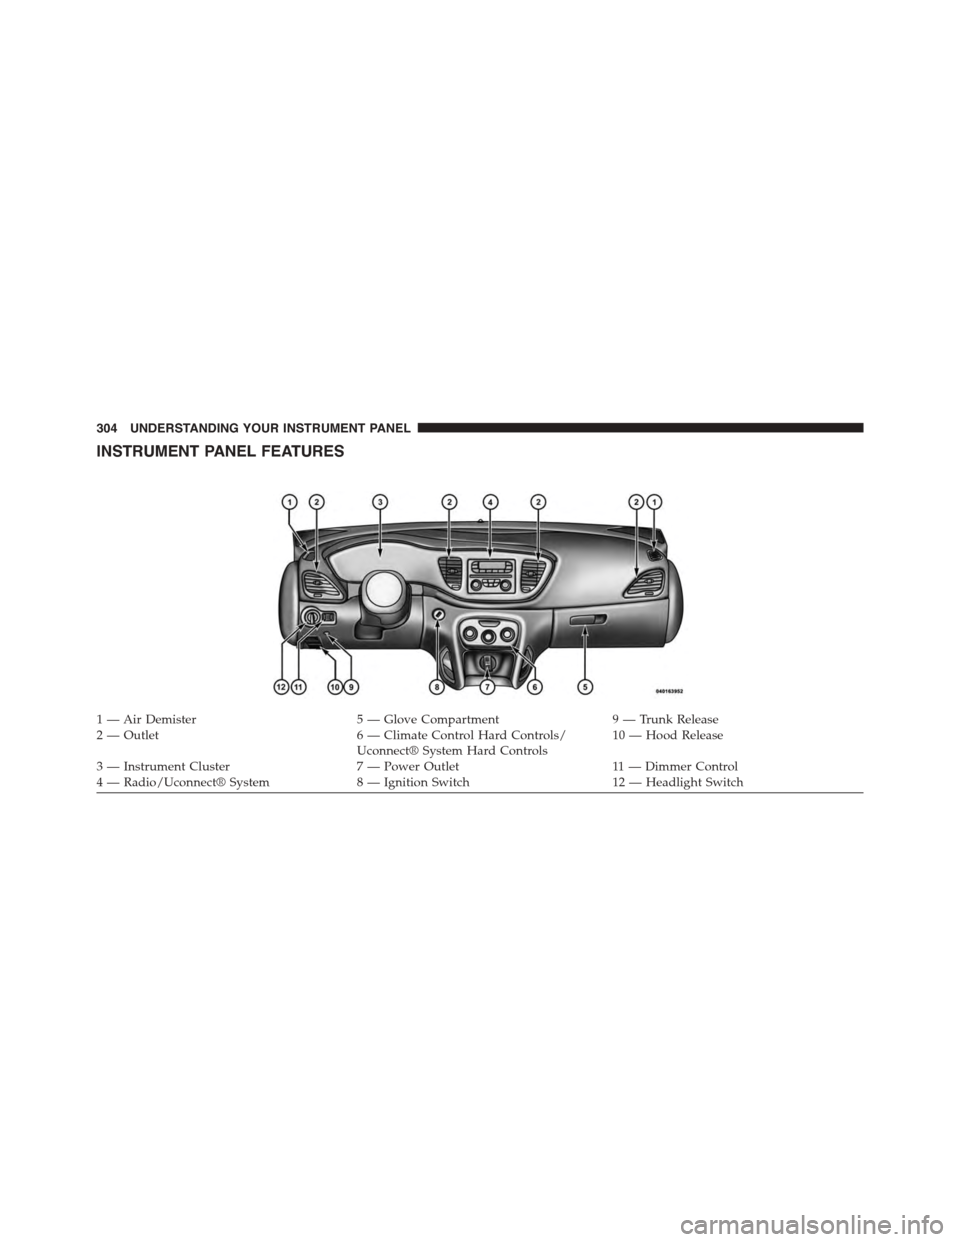
INSTRUMENT PANEL FEATURES
1—AirDemister5—GloveCompartment9—TrunkRelease2 — Outlet6 — Climate Control Hard Controls/Uconnect® System Hard Controls10 — Hood Release
3 — Instrument Cluster7 — Power Outlet11 — Dimmer Control4 — Radio/Uconnect® System8 — Ignition Switch12 — Headlight Switch
304 UNDERSTANDING YOUR INSTRUMENT PANEL
Page 319 of 664
instrument cluster. For further information, refer to
“Electronic Vehicle Information Center (EVIC)”.
NOTE:You must apply the brakes before shifting from
PARK.
Driver Information Display (DID)
The Driver Information Display (DID) features a driver-
interactive display that is located in the instrument
cluster. For further information, refer to “Driver Informa-
tion Display (DID)”.
23. Charging System Warning Light
This light shows the status of the electrical charg-
ing system. The light should turn on when the
ignition switch is first placed in ON/RUN and remain on
briefly as a bulb check. If the light stays on or turns on
while driving, turn off some of the vehicle’s non-essential
electrical devices (i.e., radio) or slightly increase engine
speed (if at idle). If the light remains on, it means that the
charging system is experiencing a problem. See your
local authorized dealer to obtain service immediately.
If jump starting is required, refer to “Jump Starting
Procedures” in “What To Do In Emergencies”.
24. Oil Pressure Warning Light
This light indicates low engine oil pressure. The
light should turn on momentarily when the engine is
started. If the light turns on while driving, stop the
vehicle and shut off the engine as soon as possible. A
chime will sound when this light turns on.
Do not operate the vehicle until the cause is corrected.
This light does not indicate how much oil is in the engine.
The engine oil level must be checked under the hood.
4
UNDERSTANDING YOUR INSTRUMENT PANEL 317
Page 355 of 664
Display
After pressing the Display button on the touchscreen the
following settings will be available.
•Display Mode
When in this display you may select one of the auto
display settings. To change Mode status, press and re-
lease the Day, Night or Auto button on the touchscreen.
Then press the back arrow button on the touchscreen.
NOTE:When Day or Night is selected for the Display
Mode, the usage of the Parade Mode feature will cause
the radio to activate the Display Brightness Day control
even though the headlights are on.
•Display Brightness With Headlights ON
When in this display, you may select the brightness with
the headlights on. Adjust the brightness with the + and –
setting buttons on the touchscreens or by selecting any
point on the scale between the + and – buttons on the
touchscreens. Then press the back arrow button on the
touchscreen.
•Display Brightness With Headlights OFF
When in this display, you may select the brightness with
the headlights off. Adjust the brightness with the + and –
setting buttons on the touchscreens or by selecting any
point on the scale between the + and – buttons on the
touchscreens. Then press the back arrow button on the
touchscreen.
•Set Language
When in this display, you may select one of three languages
for all display nomenclature, including the trip functions
and the navigation system (if equipped). Press the Set
Language button on the touchscreen and then press the
desired language button on the touchscreen until a check-
mark appears next to the language, showing that setting
4
UNDERSTANDING YOUR INSTRUMENT PANEL 353
Page 357 of 664
Clock
After pressing the Clock button on the touchscreen the
following settings will be available.
•Sync With GPS Time — If Equipped
When in this display, you may automatically have the
radio set the time. To change the Sync with GPS Time
setting press the “Sync with GPS Time” button on the
touchscreen until a check-mark appears next to the
setting, indicating that the setting has been selected. Press
the back arrow button on the touchscreen to return to the
previous menu.
•Set Time Hours
When in this display, you may adjust the hours. The
“Sync with GPS Time” button on the touchscreen must be
unchecked. To make your selection press the “+” or “–”
buttons on the touchscreen to adjust the hours up or
down. Press the back arrow button on the touchscreen to
return to the previous menu or press the “X” button on
the touchscreen to close out of the settings screen.
•Set Time Minutes
When in this display, you may adjust the minutes. The
“Sync with GPS Time” button on the touchscreen must be
unchecked. To make your selection press the “+” or “–”
buttons on the touchscreen to adjust the minutes up or
down. Press the back arrow button on the touchscreen to
return to the previous menu or press the “X” button on
the touchscreen to close out of the settings screen.
•Time Format
When in this display, you may select the time format
display setting. Press the “Time Format” button on the
touchscreen until a check-mark appears next to the 12hrs
or 24hrs setting, indicating that the setting has been
selected. Press the back arrow button on the touchscreen
to return to the previous menu.
4
UNDERSTANDING YOUR INSTRUMENT PANEL 355
Page 359 of 664
NOTE:If your vehicle has experienced any damage in
the area where the sensor is located, even if the fascia is
not damaged, the sensor may have become misaligned.
Take your vehicle to an authorized dealer to verify sensor
alignment. Having a sensor that is misaligned will result
in the BSM not operating to specification.
•ParkView® Backup Camera
Your vehicle may be equipped with the ParkView® Rear
Back Up Camera that allows you to see an on-screen
image of the rear surroundings of your vehicle whenever
the shift lever is put into REVERSE. The image will be
displayed on the radio touchscreen display along with a
caution note to “check entire surroundings” across the
top of the screen. After five seconds, this note will
disappear. The ParkView® camera is located on the rear
of the vehicle above the rear License plate. To make your
selection, press the ParkView® Backup Camera button on
the touchscreen, until a check-mark appears next to
setting, showing that setting has been selected. Press the
back arrow button on the touchscreen to return to the
previous menu.
•Rain Sensing Auto Wipers
When this feature is selected, the system will automati-
cally activate the windshield wipers if it senses moisture
on the windshield. To make your selection, press the Rain
Sensing button on the touchscreen, until a check-mark
appears next to setting, showing that setting has been
selected. Press the back arrow button on the touchscreen
to return to the previous menu.
Lights
After pressing the Lights button on the touchscreen the
following settings will be available.
•Interior Accent Lighting
When this feature is selected, the interior accent lighting
surrounding the instrument panel will illuminate. To
4
UNDERSTANDING YOUR INSTRUMENT PANEL 357
Page 364 of 664
Auto-On Comfort & Remote Start
After pressing the Auto-On Comfort & Remote Start
button on the touchscreen the following settings will be
available.
•Horn With Remote Start
When this feature is selected, the horn will sound when
the remote start is activated. To make your selection,
press the Sound Horn With Remote Start button on the
touchscreen, until a check-mark appears next to setting,
showing that setting has been selected. Press the back
arrow button on the touchscreen to return to the previous
menu.
•Auto-On Driver Heated Seat & Steering Wheel With
Vehicle Start — If Equipped
When this feature is selected the driver’s heated seat and
heated steering wheel will automatically turn on when
temperatures are below 40° F (4.4° C). To make your
selection, press the Auto Heated Seats button on the
touchscreen, until a check-mark appears next to setting,
showing that setting has been selected. Press the back
arrow button on the touchscreen to return to the previous
menu.
Engine Off Options
After pressing the “Engine Off Options” button on the
touchscreen the following settings will be available.
•Engine Off Power Delay
When this feature is selected, the power window
switches, radio, Uconnect® system (if equipped), DVD
video system (if equipped), power sunroof (if equipped),
and power outlets will remain active for up to 10 minutes
after the ignition is cycled to OFF. Opening either front
door will cancel this feature. To change the Engine Off
Power Delay status press the “0 seconds,” “45 seconds,#
“5 minutes” or “10 minutes” button on the touchscreen.
Then press the back arrow button on the touchscreen.
362 UNDERSTANDING YOUR INSTRUMENT PANEL
Page 367 of 664
•Music Info Cleanup
This feature helps organize music files for optimized music
navigation. To make your selection, press the Music Info
Cleanup button on the touchscreen, select On or Off fol-
lowed by pressing the back arrow button on the touchscreen.
•Surround Sound — If Equipped
This feature provides simulated surround sound mode.
To make your selection, press the Surround Sound button
on the touchscreen, select On or Off followed by pressing
the back arrow button on the touchscreen.
Phone/Bluetooth®
After pressing the “Phone/Bluetooth®” button on the
touchscreen the following settings will be available.
•Paired Devices
This feature shows which phones are paired to the
Phone/Bluetooth® system. For further information, refer
to the Uconnect® Supplement.
SiriusXM Setup
After pressing the “SIRIUS Setup” button on the touch-
screen the following settings will be available.
•Channel Skip
SiriusXM can be programmed to designate a group of
channels that are the most desirable to listen to or to exclude
undesirable channels while scanning. To make your selec-
tion, press the “Channel Skip” button on the touchscreen,
select the channels you would like to skip followed by
pressing the back arrow button on the touchscreen.
•Subscription Information
New vehicle purchasers or lessees will receive a free
limited time subscription to SiriusXM Satellite Radio
with your radio. Following the expiration of the free
services, it will be necessary to access the information on
the Subscription Information screen in order to re-
subscribe.
4
UNDERSTANDING YOUR INSTRUMENT PANEL 365
Page 368 of 664
Press the Subscription Info button on the touchscreen to
access the Subscription Information screen.
Write down the SIRIUS ID numbers for your receiver. To
reactivate your service, either call the number listed on
the screen or visit the provider online.
NOTE:SiriusXM Travel Link is a separate subscription.
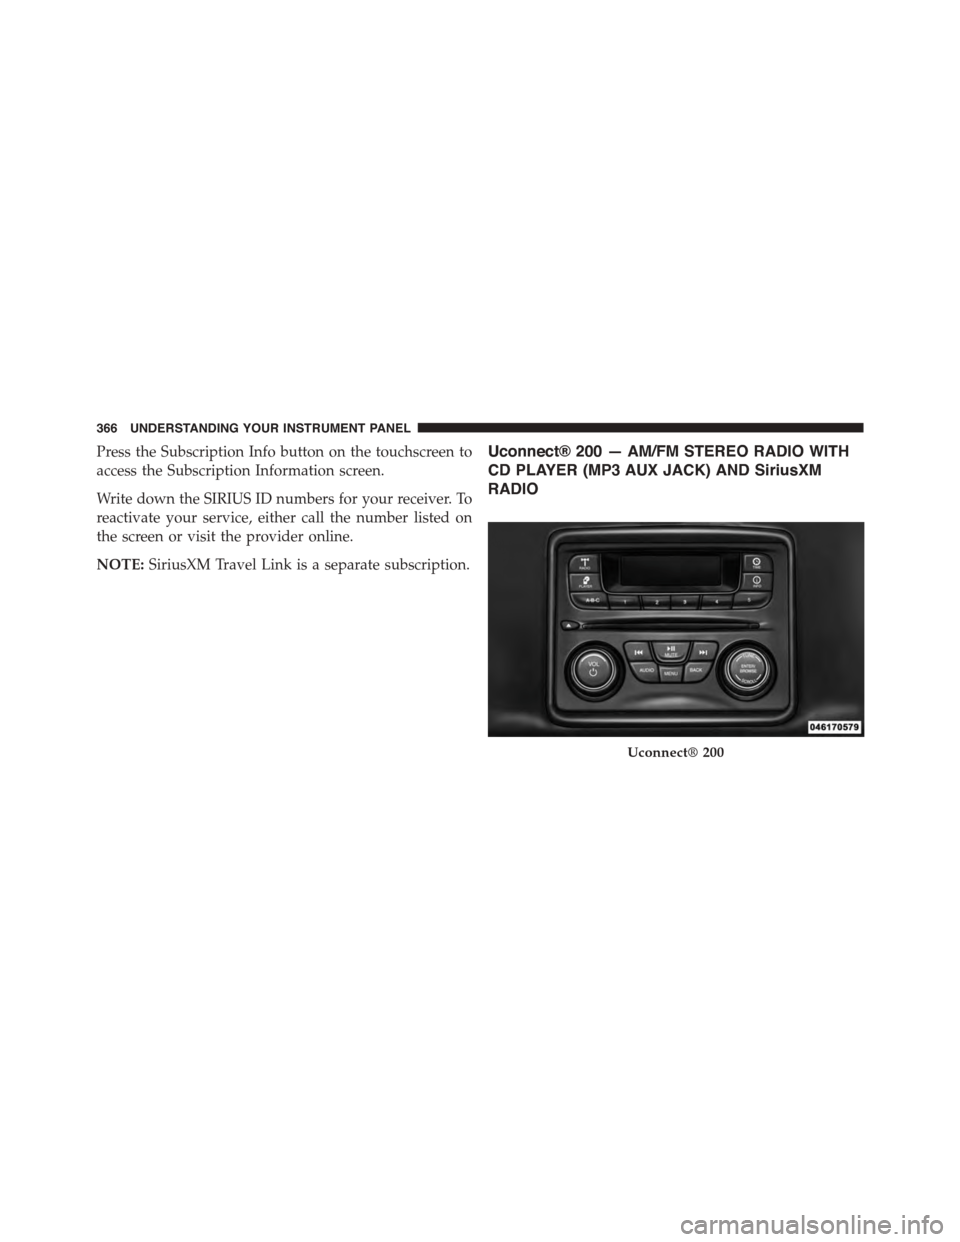
Uconnect® 200 — AM/FM STEREO RADIO WITH
CD PLAYER (MP3 AUX JACK) AND SiriusXM
RADIO
Uconnect® 200
366 UNDERSTANDING YOUR INSTRUMENT PANEL
Page 369 of 664
Operating Instructions — Radio Mode
NOTE:The ignition switch must be in the ON/RUN or
ACC position to operate the radio.
Power Switch/Volume Control (Rotary)
Push the ON/VOLUMEcontrol knob to turn on the
radio. Push the ON/VOLUMEcontrol knob a
second time to turn off the radio.
Electronic Volume Control
The electronic volume control turns continuously (360
degrees) in either direction, without stopping. Turning
the ON/VOLUME control knob to the right increases the
volume, and to the left decreases it.
When the audio system is turned on, the sound will be
set at the same volume level as last played.
SEEK Buttons
Press and release the SEEK buttonsto search for
the next listenable station in AM/FM mode. Press the
right switch to seek up and the left switch to seek
down. The radio will remain tuned to the new station
until you make another selection. Holding either but-
ton will bypass stations without stopping until you
release it.
TIME Button
Push the TIME button to alternate display of the time and
radio frequency.
Clock Setting Procedure
1. Press and hold the TIME button until the hours are
highlighted.
2. Adjust the hours by turning the right side TUNE/
SCROLL control knob.
4
UNDERSTANDING YOUR INSTRUMENT PANEL 367