ESP DODGE DURANGO 2012 3.G User Guide
[x] Cancel search | Manufacturer: DODGE, Model Year: 2012, Model line: DURANGO, Model: DODGE DURANGO 2012 3.GPages: 140, PDF Size: 4.3 MB
Page 2 of 140
If you are the first
registered retail owner of
your vehicle, you may obtain a
complimentary printed copy
of the Owner’s Manual,
Navigation/Media Center
Manuals or Warranty Booklet
by calling 1-800-423-6343 (U.S.)
or 1-800-387-1143 (Canada) or
by contacting your dealer.
The driver’s primary responsibility is the safe operation of the
vehicle. Driving while distracted can result in loss of vehicle
control, resulting in a collision and personal injury. Chrysler
Group LLC strongly recommends that the driver use extreme
caution when using any device or feature that may take their
attention off the road. Use of any electrical devices such as cell
phones, computers, portable radios, vehicle navigation or other
devices by the driver while the vehicle is moving is dangerous
and could lead to a serious collision. Texting while driving is
also dangerous and should never be done while the vehicle is
moving. If you find yourself unable to devote your full attention
to vehicle operation, pull off the road to a safe location and
stop your vehicle. Some States or Provinces prohibit the use of
cellular telephones or texting while driving. It is always the
driver’s responsibility to comply with all local laws.
This User Guide is intended to familiarize you with the important
features of your vehicle. The DVD enclosed contains your Owner’s
Manual, Navigation/Media Center Manuals, Warranty Booklets, Tire
Warranty and 24-Hour Towing Assistance (new vehicles
purchased in the U.S.) or Roadside Assistance (new vehicles
purchased in Canada) in electronic format. We hope you find it
useful. Replacement DVD kits may be purchased by visiting
www.techauthority.com. Copyright 2012 Chrysler Group LLC.
IMPORTANT
Driving after drinking can lead to an accident. Your
perceptions are less sharp, your reflexes are slower, and
your judgment is impaired when you have been drinking.
Never drink and then drive.
WARNING!
Drunken driving is one of the most frequent causes
of accidents. Your driving ability can be seriously
impaired with blood alcohol levels far below the legal
minimum. If you are drinking, don’t drive. Ride with a
designated non-drinking driver, call a cab, a friend, or
use public transportation.
dRIvING ANd AlCOhOl
dOdGe.COM
This guide has been prepared to help you get quickly acquainted with you\
r new Dodge
and to provide a convenient reference source for common questions. Howev\
er, it is not
a substitute for your Owner’s Manual.
For complete operational instructions, maintenance procedures and import\
ant safety
messages, please consult your Owner’s Manual, Navigation/Media Center Manuals,
Multimedia User Manual and other Warning Labels in your vehicle.
Not all features shown in this guide may apply to your vehicle. For addi\
tional information
on accessories to help personalize your vehicle, visit www.mopar.com or your local
Dodge dealer.
Page 4 of 140
WELCOME FROM CHRYSLER GROUP LLC
Congratulations on selecting your new Chrysler Group LLC vehicle. Be assured that it
represents precision workmanship, distinctive styling, and high quality - all essentials
that are traditional to our vehicles.
Your new Chrysler Group LLC vehicle has characteristics to enhance the driver's control
under some driving conditions. These are to assist the driver and are never a substitute
for attentive driving. They can never take the driver's place. Always drive carefully.
Your new vehicle has many features for the comfort and convenience of you and your
passengers. Some of these should not be used when driving because they take your
eyes from the road or your attention from driving. Never text while driving or take your
eyes more than momentarily off the road.
This guide illustrates and describes the operation of features and equipment that are
either standard or optional on this vehicle. This guide may also include a description of
features and equipment that are no longer available or were not ordered on this vehicle.
Please disregard any features and equipment described in this guide that are not
available on this vehicle. Chrysler Group LLC reserves the right to make changes in
design and specifications and/or make additions to or improvements to its products
without imposing any obligation upon itself to install them on products previously
manufactured.
This User Guide has been prepared to help you quickly become acquainted with the
important features of your vehicle. It contains most things you will need to operate and
maintain the vehicle, including emergency information.
The DVD includes a computer application containing detailed owner's information
which can be viewed on a personal computer or MAC computer. The multimedia DVD
also includes videos which can be played on any standard DVD player (including the
Media Center Touch-Screen Radios). Additional DVD operational information is located
on the back of the DVD sleeve.
For complete owner information, refer to your Owner's Manual on the DVD in the
owner’s kit provided at the time of new vehicle purchase. For your convenience, the
information contained on the DVD may also be printed and saved for future reference.
Chrysler Group LLC is committed to protecting our environment and natural resources.
By converting from paper to electronic delivery for the majority of the user information
for your vehicle, together we greatly reduce the demand for tree-based products and
lessen the stress on our environment.
Vehicles Sold In Canada
With respect to any vehicles sold in Canada, the name Chrysler Group LLC shall be
deemed to be deleted and the name Chrysler Canada Inc. used in substitution
therefore.
INTRODUCTION/WELCOME
2
Page 26 of 140
Front Ventilated Seats
• Located in the seat cushion and seatback are small fans that draw the air from thepassenger compartment and blow air through fine perforations in the seat cover to
help keep the driver and front passenger cooler in higher ambient temperatures.
• The ventilated seat switches are located in the climate controls near the center of the instrument panel. Press the switch once to select High speed. Press the switch
a second time to select Low speed. Press the switch a third time to turn the fans
Off.
Rear Heated Seats
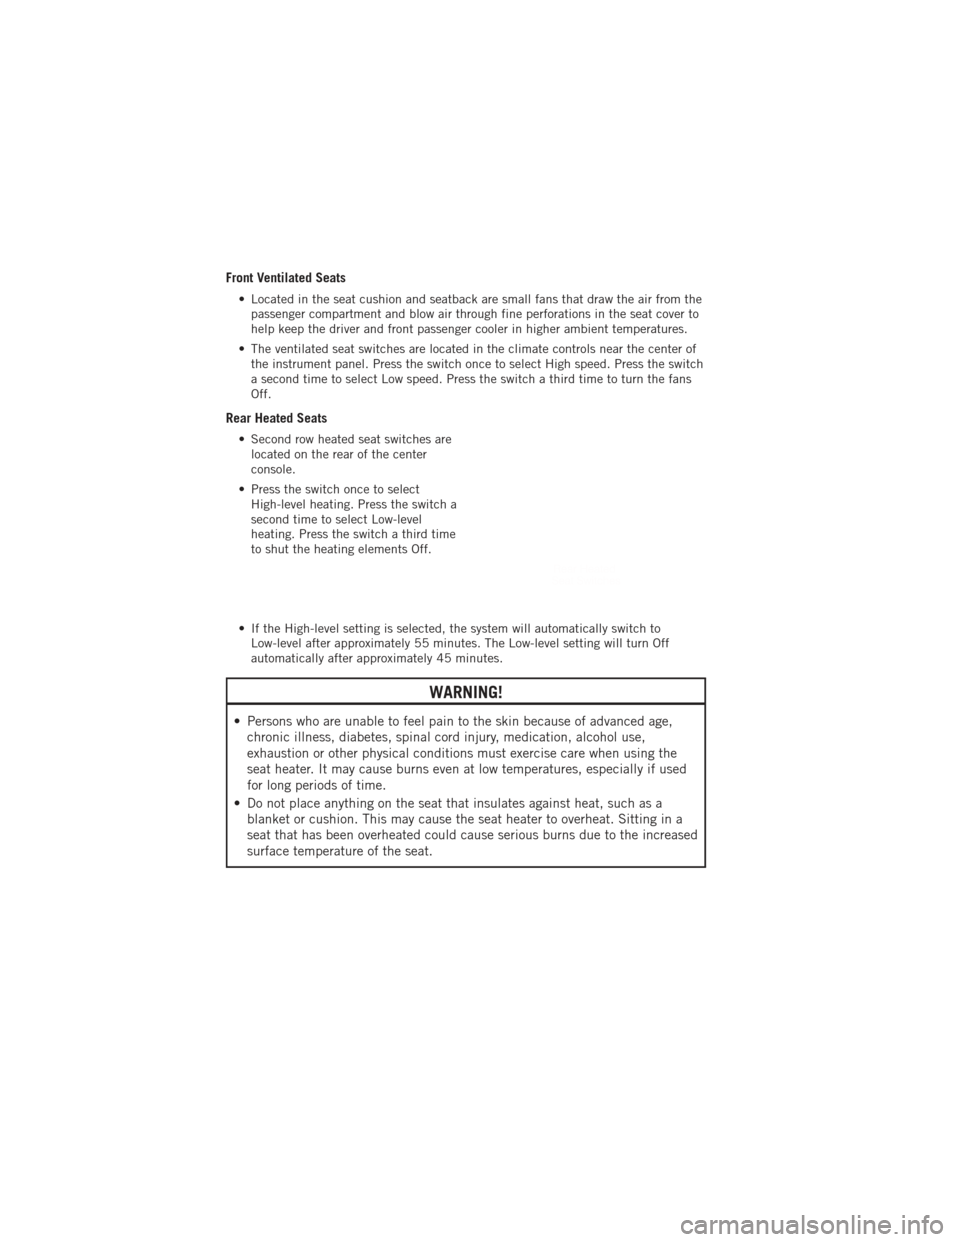
• Second row heated seat switches arelocated on the rear of the center
console.
• Press the switch once to select High-level heating. Press the switch a
second time to select Low-level
heating. Press the switch a third time
to shut the heating elements Off.
• If the High-level setting is selected, the system will automatically switch to Low-level after approximately 55 minutes. The Low-level setting will turn Off
automatically after approximately 45 minutes.
WARNING!
• Persons who are unable to feel pain to the skin because of advanced age,chronic illness, diabetes, spinal cord injury, medication, alcohol use,
exhaustion or other physical conditions must exercise care when using the
seat heater. It may cause burns even at low temperatures, especially if used
for long periods of time.
• Do not place anything on the seat that insulates against heat, such as a blanket or cushion. This may cause the seat heater to overheat. Sitting in a
seat that has been overheated could cause serious burns due to the increased
surface temperature of the seat.
GETTING STARTED
24
Page 35 of 140
WARNING!(Continued)
The ACC system:
• Does not react to pedestrians, oncoming vehicles, and stationary objects (i.e.,a stopped vehicle in a traffic jam or a disabled vehicle).
• Cannot take street, traffic, and weather conditions into account, and may be limited upon adverse sight distance conditions.
• Does not predict the lane curvature or the movement of preceding vehicles and will not compensate for such changes.
• Does not always fully recognize complex driving conditions, which can result in wrong or missing distance warnings.
• Can only apply a maximum of 25% of the vehicle’s braking capability, and will not bring the vehicle to a complete stop.
You should switch off the ACC system:
• When driving in fog, heavy rain, heavy snow, sleet, heavy traffic, and complex driving situations (i.e., in highway construction zones).
• When entering a turn lane or highway off ramp; when driving on roads that are winding, icy, snow-covered, slippery, or have steep uphill or downhill
slopes; and when towing a trailer.
• When circumstances do not allow safe driving at a constant speed.
• Failure to follow these warnings can result in a collision.
• Forward Collision Warning (FCW) is not intended to avoid a collision on its own. The driver has the responsibility to avoid a collision by controlling the
vehicle via braking and steering. Failure to follow this warning could lead to
serious injury or death.
OPERATING YOUR VEHICLE
33
Page 64 of 140
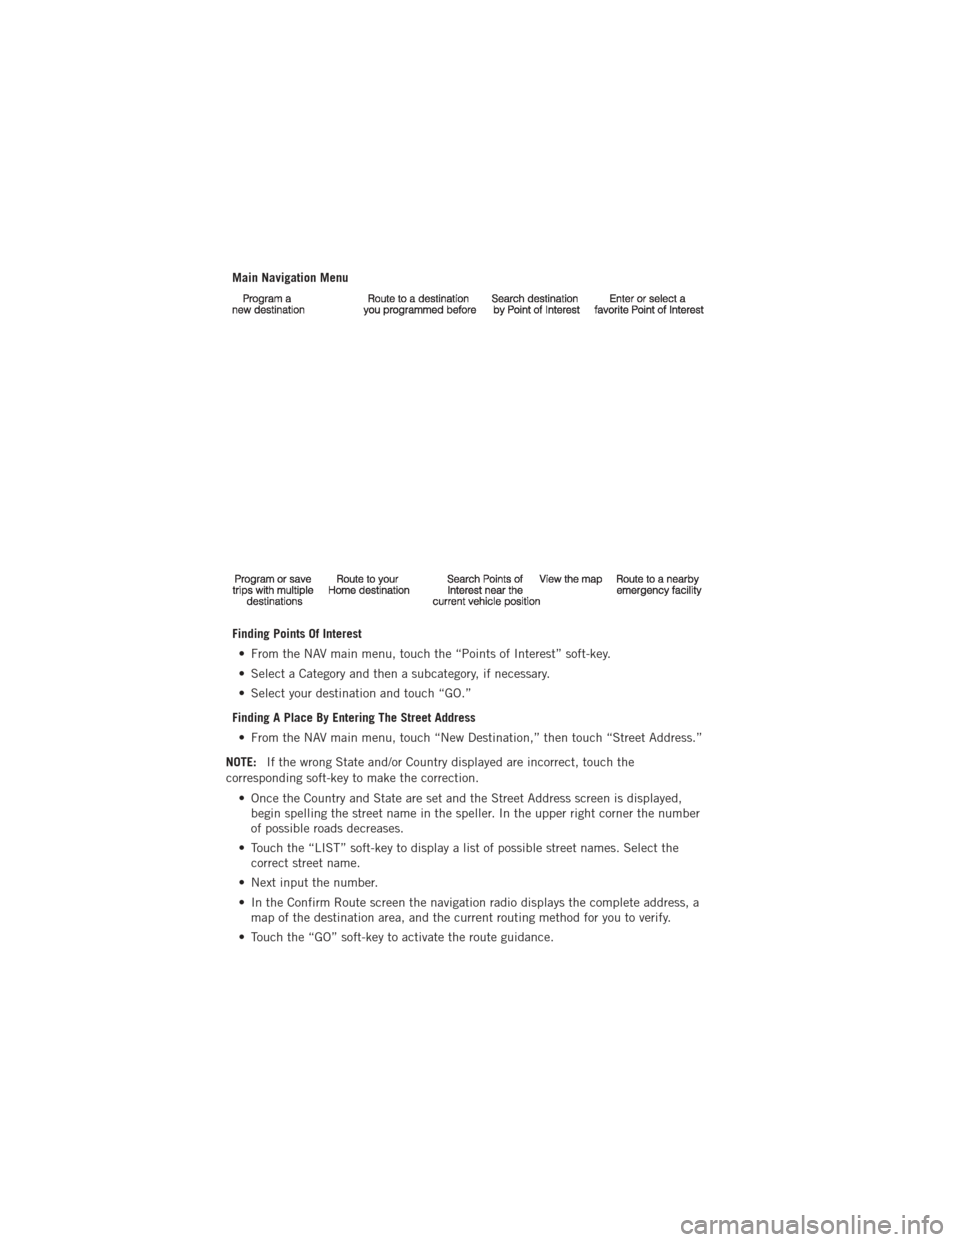
Main Navigation Menu
Finding Points Of Interest• From the NAV main menu, touch the “Points of Interest” soft-key.
• Select a Category and then a subcategory, if necessary.
• Select your destination and touch “GO.”
Finding A Place By Entering The Street Address • From the NAV main menu, touch “New Destination,” then touch “Street Address.”
NOTE: If the wrong State and/or Country displayed are incorrect, touch the
corresponding soft-key to make the correction.
• Once the Country and State are set and the Street Address screen is displayed,begin spelling the street name in the speller. In the upper right corner the number
of possible roads decreases.
• Touch the “LIST” soft-key to display a list of possible street names. Select the correct street name.
• Next input the number.
• In the Confirm Route screen the navigation radio displays the complete address, a map of the destination area, and the current routing method for you to verify.
• Touch the “GO” soft-key to activate the route guidance.
ELECTRONICS
62
Page 68 of 140
NOTE:Refer to your Media Center 730N or
Media Center 430/430N User's Manual for
more information.
Display SAT Favorites List• Touch the “Search/Browse” soft-key and select “Favorites” from the SAT Browse screen.
• Touch the desired favorites soft-key to switch the SAT tuner to the
corresponding channel.
• You may use the “LIST” soft-key to toggle between:
• Favorite Songs.
• Favorite Artists.
• Currently playing favorites.
Replay
• While you are in SAT mode, you can replay 44 minutes of the current Sirius
XM™ channel (when the channel is
changed, this audio buffer is erased).
Press the REPLAY button to listen to
the stored audio.
• You can touch the on-screen controls to pause and rewind audio playback, touch the SCAN button to preview each of the tracks stored in the buffer, or select a
track from the list.
• The time displayed below the bar indicates how much time is present between the current buffer play position and the live broadcast.
ELECTRONICS
66
Page 75 of 140
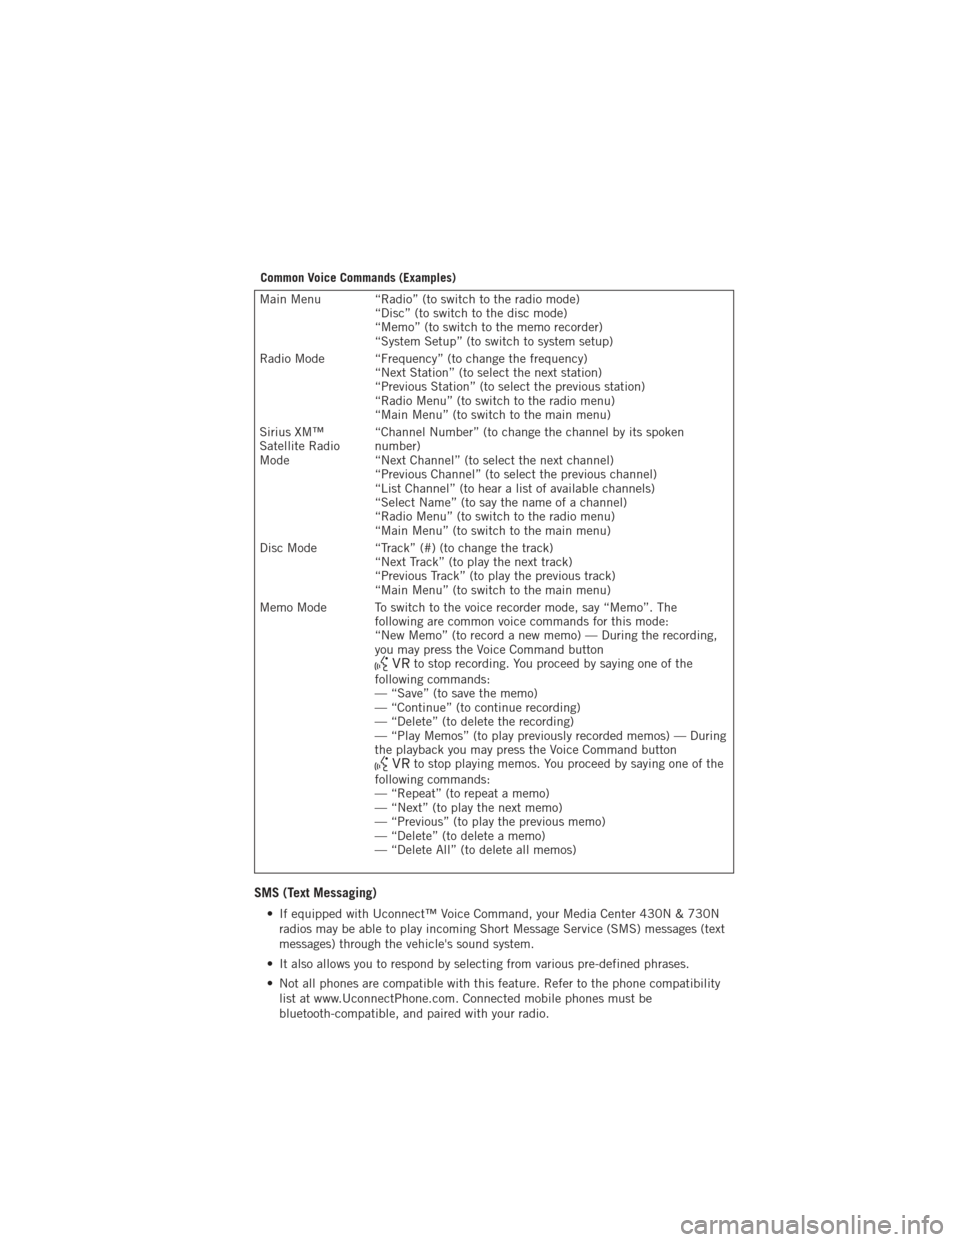
Common Voice Commands (Examples)
Main Menu “Radio” (to switch to the radio mode)“Disc” (to switch to the disc mode)
“Memo” (to switch to the memo recorder)
“System Setup” (to switch to system setup)
Radio Mode “Frequency” (to change the frequency) “Next Station” (to select the next station)
“Previous Station” (to select the previous station)
“Radio Menu” (to switch to the radio menu)
“Main Menu” (to switch to the main menu)
Sirius XM™
Satellite Radio
Mode “Channel Number” (to change the channel by its spoken
number)
“Next Channel” (to select the next channel)
“Previous Channel” (to select the previous channel)
“List Channel” (to hear a list of available channels)
“Select Name” (to say the name of a channel)
“Radio Menu” (to switch to the radio menu)
“Main Menu” (to switch to the main menu)
Disc Mode “Track” (#) (to change the track) “Next Track” (to play the next track)
“Previous Track” (to play the previous track)
“Main Menu” (to switch to the main menu)
Memo Mode To switch to the voice recorder mode, say “Memo”. The following are common voice commands for this mode:
“New Memo” (to record a new memo) — During the recording,
you may press the Voice Command button
to stop recording. You proceed by saying one of the
following commands:
— “Save” (to save the memo)
— “Continue” (to continue recording)
— “Delete” (to delete the recording)
— “Play Memos” (to play previously recorded memos) — During
the playback you may press the Voice Command button
to stop playing memos. You proceed by saying one of the
following commands:
— “Repeat” (to repeat a memo)
— “Next” (to play the next memo)
— “Previous” (to play the previous memo)
— “Delete” (to delete a memo)
— “Delete All” (to delete all memos)
SMS (Text Messaging)
• If equipped with Uconnect™ Voice Command, your Media Center 430N & 730N radios may be able to play incoming Short Message Service (SMS) messages (text
messages) through the vehicle's sound system.
• It also allows you to respond by selecting from various pre-defined phrases.
• Not all phones are compatible with this feature. Refer to the phone compatibility list at www.UconnectPhone.com. Connected mobile phones must be
bluetooth-compatible, and paired with your radio.
ELECTRONICS
73
Page 77 of 140
• The video screen displays information in a split-screen format. The left side of thescreen is referred to as Channel 1 and the right side of the screen is referred to as
Channel 2. All modes except video modes are displayed in a split-screen format.
• To use the headphones, press the power button located on the right ear cup. Select the channel on the headphones (1 or 2) that corresponds to the channel selected
on the VES™ screen.
Operation Of The Touch-Screen Radio
• To view a DVD video, press the OPEN/CLOSE or LOAD hard-key and insert the disc.Playback will begin automatically after the DVD is recognized by the disc drive. If
playback does not begin automatically, follow these steps:
• Press the MENU hard-key, then touch the Rear VES™ soft-key. If a chapter list appears on the right side of the screen touch the HIDE LIST soft-key to display
the Rear VES™ Control screen.
• Touch the 1 soft-key to select an audio channel, then touch the DISC soft-key in the MEDIA column.
Operation Of The Remote
• The remote control operates similarly to any DVD remote you have used before andallows the rear seat passengers to change stations, tracks, discs and audio/video
modes.
• The remote control is designed to control either channel by using the selector switch located on the right side of the remote.
• Pressing the power button will turn the VES™ system ON/OFF.
• Pressing the MODE button causes the Mode Selection menu to appear on the VES™ screen. Use the remote control arrow buttons to scroll through the available
modes, then press ENTER to select the desired mode.
Auxiliary Audio/Video Input Jacks
• The Aux jacks are located on the rear of the center console.
• Connect the video game or other external media devices to the AUX jacks followingthe color coding for VES™ jacks.
• Using either the touch-screen radio or remote control, select AUX from the Rear VES™ Control or Mode Selection screen.
• Refer to your vehicle's Owners Manual on the DVD for further details.
ELECTRONICS
75
Page 91 of 140
24-HOUR TOWING ASSISTANCE
• Dial toll-free 1-800-521-2779 or 1-800-363-4869 for Canadian residents.
• Provide your name, vehicle identification number and license plate number.
• Provide your location, including telephone number, from which you are calling.
• Briefly describe the nature of the problem and answer a few simple questions.
• You will be given the name of the service provider and an estimated time of arrival.If you feel you are in an “unsafe situation”, please let us know. With your consent,
we will contact local police or safety authorities.
INSTRUMENT CLUSTER WARNING LIGHTS
- Tire Pressure Monitoring System (TPMS) Light
• Each tire, including the spare (if provided), should be checked monthly, when coldand inflated to the inflation pressure recommended by the vehicle manufacturer on
the vehicle placard or tire inflation pressure label. (If your vehicle has tires of a
different size than the size indicated on the vehicle placard or tire inflation
pressure label, you should determine the proper tire inflation pressure for those
tires.)
• As an added safety feature, your vehicle has been equipped with a Tire Pressure Monitoring System (TPMS) that illuminates a low tire pressure telltale when one or
more of your tires is significantly under-inflated. Accordingly, when the low tire
pressure telltale illuminates, you should stop and check your tires as soon as
possible, and inflate them to the proper pressure. Driving on a significantly
under-inflated tire causes the tire to overheat and can lead to tire failure.
Under-inflation also reduces fuel efficiency and tire tread life, and may affect the
vehicle’s handling and stopping ability.
• IF THE LIGHT STARTS FLASHING INDICATING A LOW TIRE PRESSURE, ADJUST THE AIR
PRESSURE IN THE LOW TIRE TO THE AIR PRESSURE SHOWN ON THE VEHICLE PLACARD
OR TIRE INFLATION PRESSURE LABEL LOCATED ON THE DRIVER'S DOOR. NOTE: AFTER
INFLATION, THE VEHICLE MAY NEED TO BE DRIVEN FOR 20 MINUTES BEFORE THE
FLASHING LIGHT WILL TURN OFF.
• Please note that the TPMS is not a substitute for proper tire maintenance, and it is the driver’s responsibility to maintain correct tire pressure, even if under-inflation
has not reached the level to trigger illumination of the TPMS low tire pressure
telltale.
• Your vehicle has also been equipped with a TPMS malfunction indicator to indicate when the system is not operating properly. The TPMS malfunction indicator is
combined with the low tire pressure telltale. When the system detects a
malfunction, the telltale will flash for approximately one minute and then remain
continuously illuminated. This sequence will continue each time the vehicle is
restarted as long as the malfunction exists.
WHAT TO DO IN EMERGENCIES
89
Page 92 of 140
• When the malfunction indicator is illuminated, the system may not be able todetect or signal low tire pressure as intended. TPMS malfunctions may occur for a
variety of reasons, including the installation of replacement or alternate tires or
wheels on the vehicle that prevent the TPMS from functioning properly. Always
check the TPMS malfunction telltale after replacing one or more tires or wheels on
your vehicle, to ensure that the replacement or alternate tires and wheels allow the
TPMS to continue to function properly.
NOTE: Tire pressures change by approximately 1 psi (7 kPa) per 12° F (7° C) of air
temperature change. Keep this in mind when checking tire pressure inside a garage,
especially in the Winter. Example: If garage temperature is 68°F (20°C) and the outside
temperature is 32°F (0°C), then the cold tire inflation pressure should be increased by
3 psi (21 kPa), which equals 1 psi (7 kPa) for every 12°F (7°C) for this outside
temperature condition.
CAUTION!
The TPMS has been optimized for the original equipment tires and wheels.
TPMS pressures and warning have been established for the tire size equipped
on your vehicle. Undesirable system operation or sensor damage may result
when using replacement equipment that is not of the same size, type, and/or
style. Aftermarket wheels can cause sensor damage. Do not use tire sealant
from a can, or balance beads if your vehicle is equipped with a TPMS, as
damage to the sensors may result.
BRAKE- Brake Warning Light
• The Brake Warning light illuminates when there is either a system malfunction or the parking brake is applied. If the light is on and the parking brake is not applied,
it indicates a possible brake hydraulic malfunction, brake booster problem or an
Anti-Lock Brake System problem.
• Please have your vehicle serviced immediately.
WARNING!
Driving a vehicle with the red brake light on is dangerous. Part of the brake
system may have failed. It will take longer to stop the vehicle. You could have a
collision. Have the vehicle checked immediately.
- Malfunction Indicator Light (MIL)
• Certain conditions, such as a loose or missing gas cap, poor fuel quality, etc., may illuminate the MIL after engine start. The vehicle should be serviced if the light
stays on through several typical driving cycles. In most situations, the vehicle will
drive normally and not require towing.
• If the MIL flashes when the engine is running, serious conditions may exist that could lead to immediate loss of power or severe catalytic converter damage. We
recommend you do not operate the vehicle. Have the vehicle serviced immediately.
WHAT TO DO IN EMERGENCIES
90