low beam DODGE DURANGO 2012 3.G User Guide
[x] Cancel search | Manufacturer: DODGE, Model Year: 2012, Model line: DURANGO, Model: DODGE DURANGO 2012 3.GPages: 140, PDF Size: 4.3 MB
Page 9 of 140
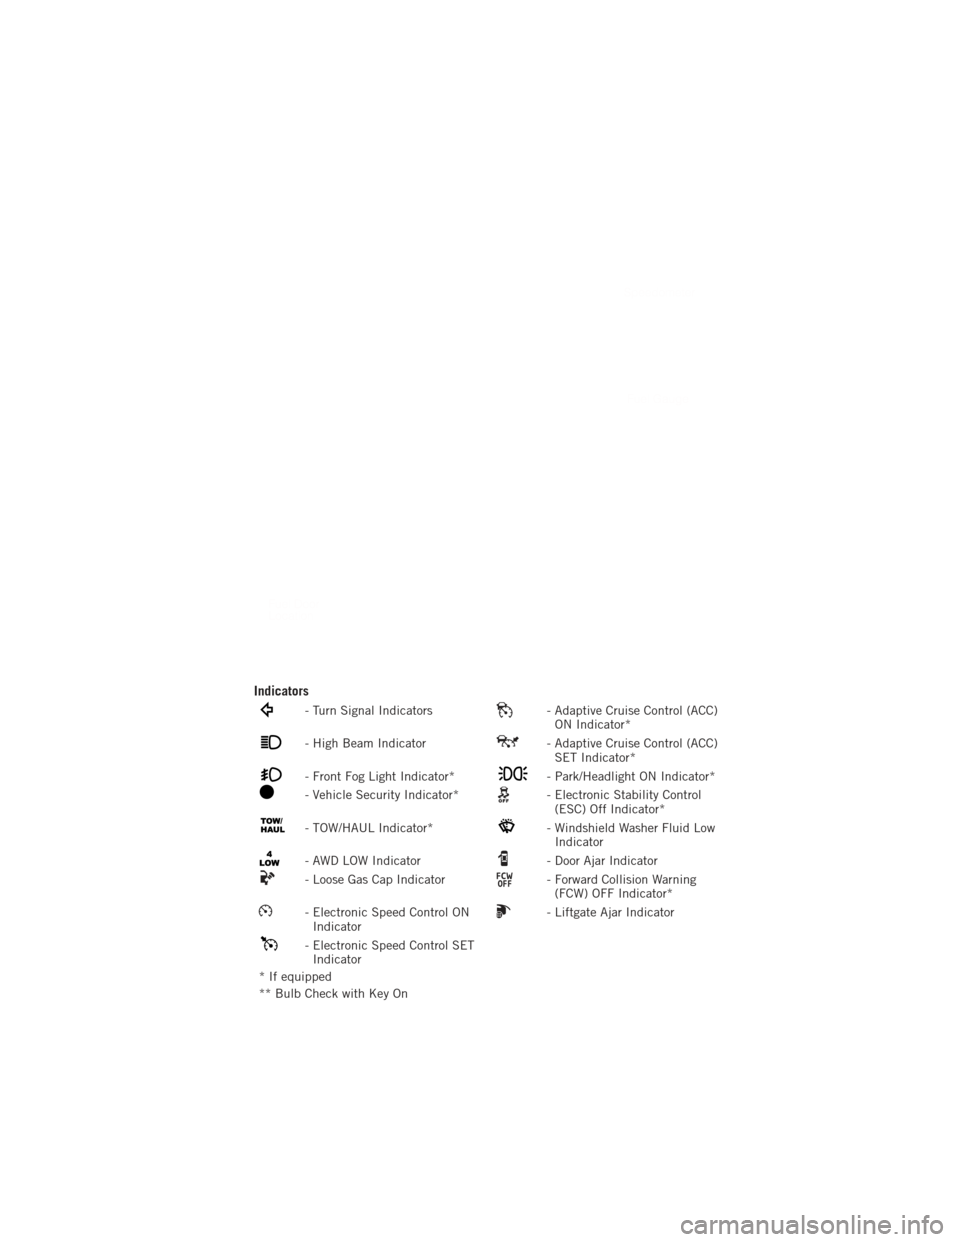
Indicators
- Turn Signal Indicators- Adaptive Cruise Control (ACC)ON Indicator*
- High Beam Indicator- Adaptive Cruise Control (ACC)SET Indicator*
- Front Fog Light Indicator*- Park/Headlight ON Indicator*
- Vehicle Security Indicator*- Electronic Stability Control(ESC) Off Indicator*
- TOW/HAUL Indicator*- Windshield Washer Fluid LowIndicator
- AWD LOW Indicator- Door Ajar Indicator
- Loose Gas Cap Indicator- Forward Collision Warning(FCW) OFF Indicator*
- Electronic Speed Control ONIndicator- Liftgate Ajar Indicator
- Electronic Speed Control SETIndicator
* If equipped
** Bulb Check with Key On
CONTROLS AT A GLANCE
7
Page 28 of 140
TILT/TELESCOPING STEERING COLUMN
Manual - Tilt/Telescoping Steering Column
• The tilt/telescoping control handle islocated below the steering wheel at the
end of the steering column.
• Push the handle down to unlock the steering column.
• To tilt the steering column, move the steering wheel upward or downward as
desired. To lengthen or shorten the
steering column, pull the steering
wheel outward or push it inward as
desired.
• Pull up on the handle to lock the column firmly in place.
Power - Tilt/Telescoping Steering Column
• The power tilt/telescoping steering control is located below the turn
signal/wiper/washer/high beam lever on
the steering column.
• To tilt the steering column, move the power tilt/telescoping control up or
down as desired. To lengthen or
shorten the steering column, pull the
control toward you or push the control
away from you as desired.
WARNING!
• Do not adjust the steering wheel while driving. The tilt/telescopingadjustment must be locked while driving. Adjusting the steering wheel while
driving or driving without the tilt/telescoping adjustment locked could cause
the driver to lose control of the vehicle. Failure to follow this warning may
result in you and others being severely injured or killed.
• Moving the steering column while the vehicle is moving is dangerous. Without a stable steering column, you could lose control of the vehicle and
have a collision. Adjust the column only while the vehicle is stopped.
GETTING STARTED
26
Page 29 of 140
ENGINE BREAK-IN RECOMMENDATIONS
• A long break-in period is not required for the engine and drivetrain (transmissionand axle) in your vehicle.
• Drive moderately during the first 300 miles (500 km). After the initial 60 miles (100 km), speeds up to 50 or 55 mph (80 or 90 km/h) are desirable.
• While cruising, brief full-throttle acceleration within the limits of local traffic laws contributes to a good break-in. Wide-open throttle acceleration in low gear can be
detrimental and should be avoided.
• The engine oil installed in the engine at the factory is a high-quality energy conserving type lubricant. Oil changes should be consistent with anticipated
climate conditions under which vehicle operations will occur. For the
recommended viscosity and quality grades, refer to “Maintaining Your Vehicle”.
NOTE: A new engine may consume some oil during its first few thousand miles
(kilometers) of operation. This should be considered a normal part of the break-in and
not interpreted as an indication of difficulty.
CAUTION!
Never use Non-Detergent Oil or Straight Mineral Oil in the engine or damage
may result.
HEADLIGHT SWITCH
Automatic Headlights/Parking
Lights/Headlights
• Rotate the headlight switch, located on the instrument panel to the left of the
steering wheel, to the first detent for
parking lights
andtothe
second detent for headlights.
• With the parking lights or low beam headlights on, push the headlight
switch once for fog lights.
• Rotate the headlight switch to “AUTO” for AUTO headlights.
• When set to AUTO, the system automatically turns the headlights on
or off based on ambient light levels.
SmartBeams™
• This system automatically controls the use of the headlight high beams. Refer toProgrammable Features in Electronics for further details.
OPERATING YOUR VEHICLE
27
Page 30 of 140
Instrument Panel Dimmer
• Rotate the dimmer control to the extreme bottom position to fully dim theinstrument panel lights and prevent the interior lights from illuminating when a
door is opened.
• Rotate the dimmer control up to increase the brightness of the instrument panel when the parking lights or headlights are on.
• Rotate the dimmer control up to the next detent position to fully brighten the odometer and radio when the parking lights or headlights are on. Refer to your
Media Center/Radio User Manual on the DVD for display dimming.
• Rotate the dimmer control up to the last detent position to turn on the interior lighting.
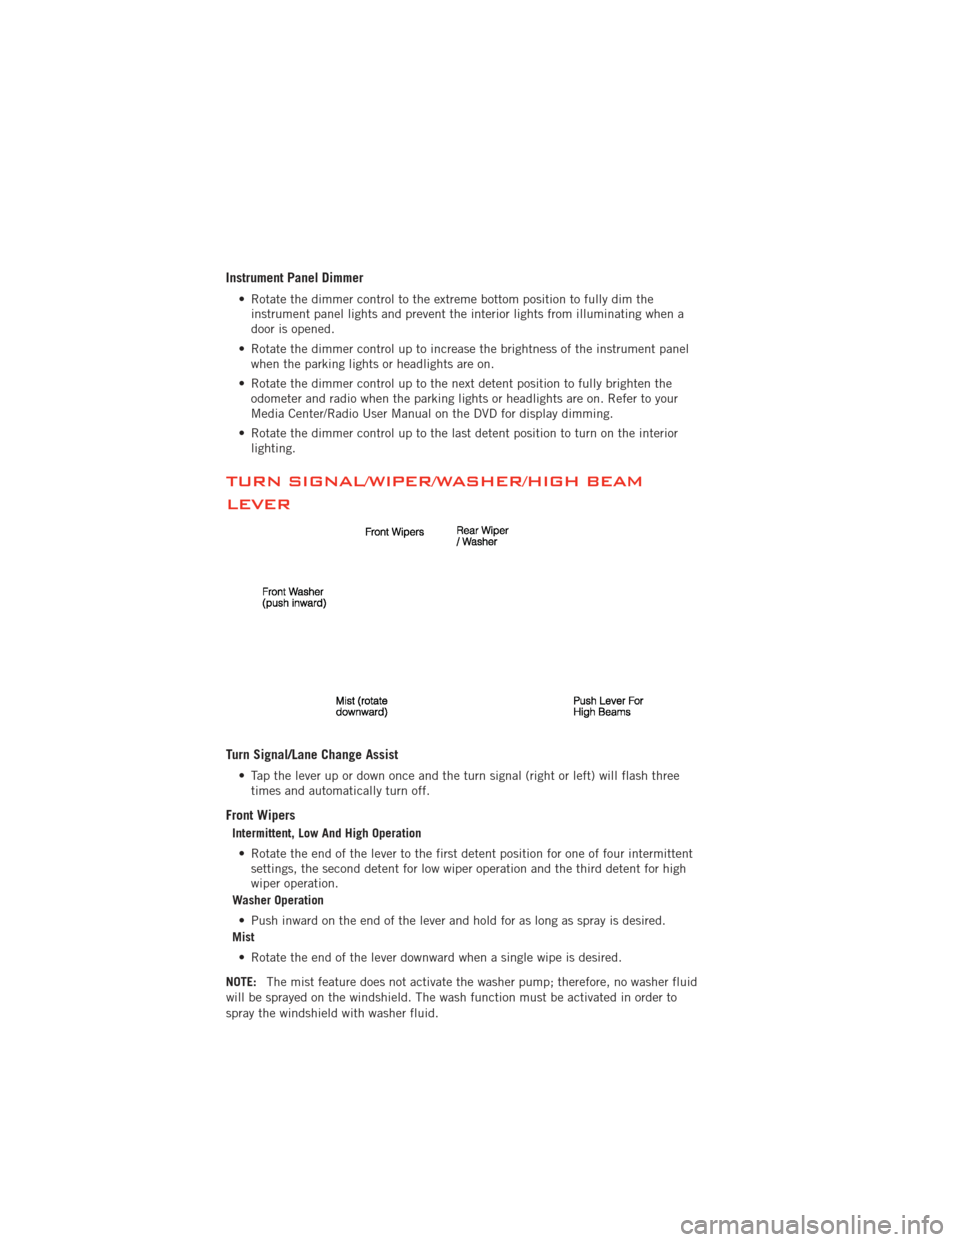
TURN SIGNAL/WIPER/WASHER/HIGH BEAM
LEVER
Turn Signal/Lane Change Assist
• Tap the lever up or down once and the turn signal (right or left) will flash threetimes and automatically turn off.
Front Wipers
Intermittent, Low And High Operation
• Rotate the end of the lever to the first detent position for one of four intermittent settings, the second detent for low wiper operation and the third detent for high
wiper operation.
Washer Operation
• Push inward on the end of the lever and hold for as long as spray is desired.
Mist
• Rotate the end of the lever downward when a single wipe is desired.
NOTE: The mist feature does not activate the washer pump; therefore, no washer fluid
will be sprayed on the windshield. The wash function must be activated in order to
spray the windshield with washer fluid.
OPERATING YOUR VEHICLE
28
Page 79 of 140
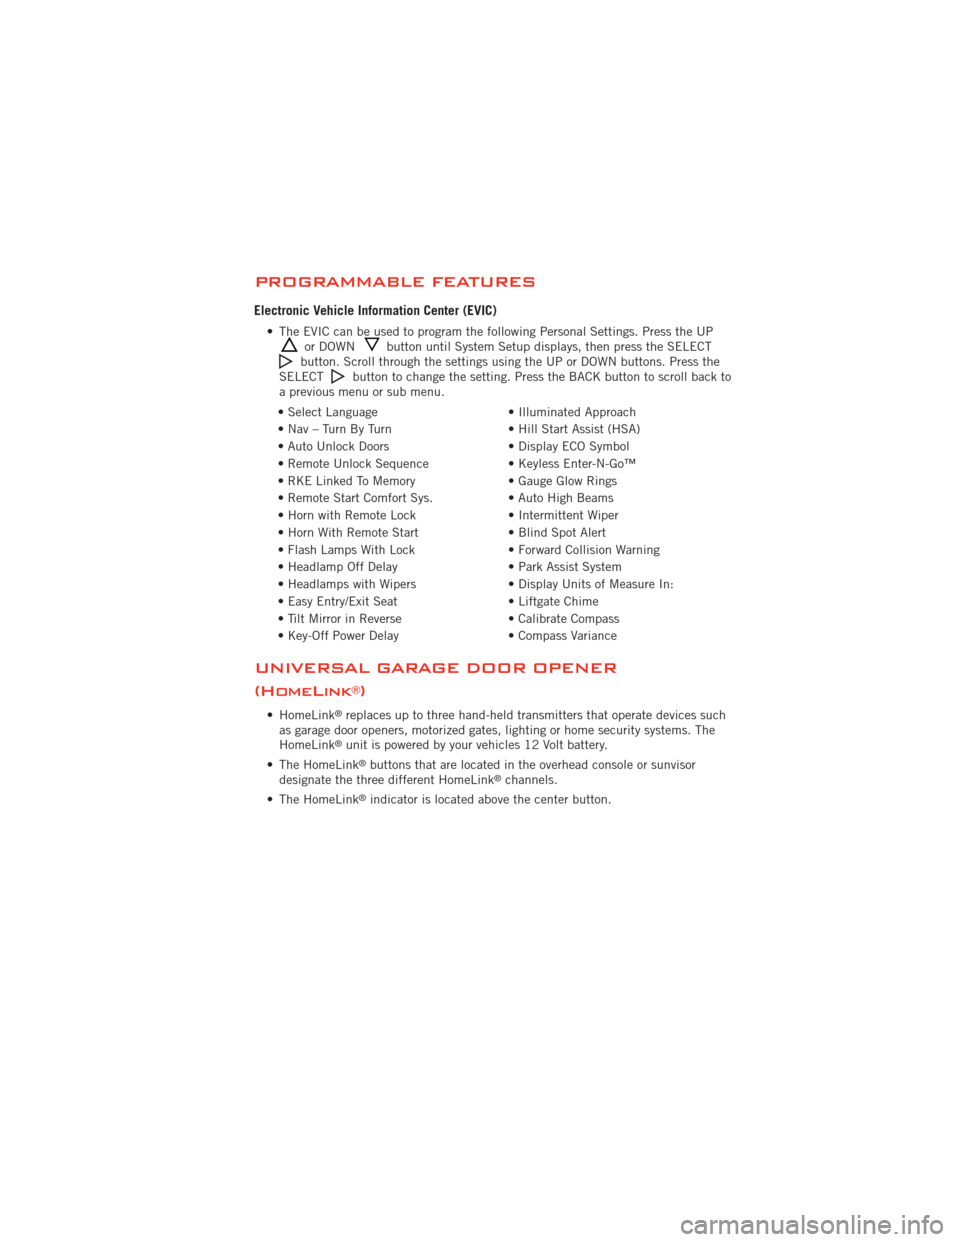
PROGRAMMABLE FEATURES
Electronic Vehicle Information Center (EVIC)
• The EVIC can be used to program the following Personal Settings. Press the UPor DOWNbutton until System Setup displays, then press the SELECTbutton. Scroll through the settings using the UP or DOWN buttons. Press the
SELECTbutton to change the setting. Press the BACK button to scroll back to
a previous menu or sub menu.
• Select Language • Illuminated Approach
• Nav – Turn By Turn • Hill Start Assist (HSA)
• Auto Unlock Doors • Display ECO Symbol
• Remote Unlock Sequence • Keyless Enter-N-Go™
• RKE Linked To Memory • Gauge Glow Rings
• Remote Start Comfort Sys. • Auto High Beams
• Horn with Remote Lock • Intermittent Wiper
• Horn With Remote Start • Blind Spot Alert
• Flash Lamps With Lock • Forward Collision Warning
• Headlamp Off Delay • Park Assist System
• Headlamps with Wipers • Display Units of Measure In:
• Easy Entry/Exit Seat • Liftgate Chime
• Tilt Mirror in Reverse • Calibrate Compass
• Key-Off Power Delay • Compass Variance
UNIVERSAL GARAGE DOOR OPENER
(HomeLink
®)
• HomeLink®replaces up to three hand-held transmitters that operate devices such
as garage door openers, motorized gates, lighting or home security systems. The
HomeLink
®unit is powered by your vehicles 12 Volt battery.
• The HomeLink
®buttons that are located in the overhead console or sunvisor
designate the three different HomeLink®channels.
• The HomeLink
®indicator is located above the center button.
ELECTRONICS
77
Page 124 of 140
WHEEL AND WHEEL TRIM CARE
• All wheels and wheel trim, especially aluminum and chrome plated wheels, shouldbe cleaned regularly with a mild soap and water to prevent corrosion.
• To remove heavy soil and/or excessive brake dust, use MOPAR
®Wheel Cleaner or
equivalent or select a non-abrasive, non-acidic cleaner.
CAUTION!
Do not use scouring pads, steel wool, a bristle brush, or metal polishes. Do not
use oven cleaner. These products may damage the wheel's protective finish.
Avoid automatic car washes that use acidic solutions or harsh brushes that may
damage the wheel's protective finish. Only MOPAR
®Wheel Cleaner or
equivalent is recommended.
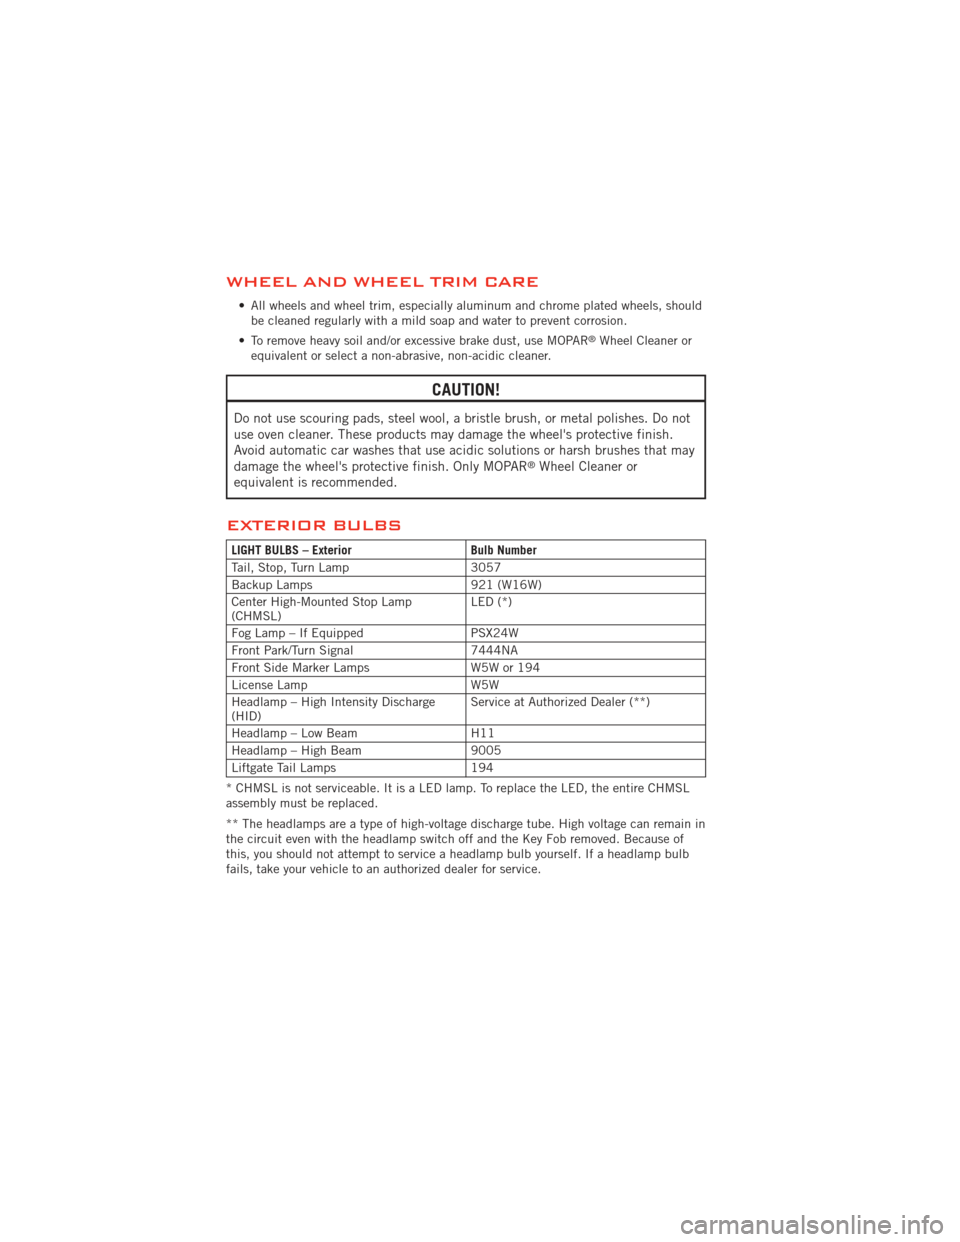
EXTERIOR BULBS
LIGHT BULBS – Exterior Bulb Number
Tail, Stop, Turn Lamp 3057
Backup Lamps 921 (W16W)
Center High-Mounted Stop Lamp
(CHMSL) LED (*)
Fog Lamp – If Equipped PSX24W
Front Park/Turn Signal 7444NA
Front Side Marker Lamps W5W or 194
License Lamp W5W
Headlamp – High Intensity Discharge
(HID) Service at Authorized Dealer (**)
Headlamp – Low Beam H11
Headlamp – High Beam 9005
Liftgate Tail Lamps 194
* CHMSL is not serviceable. It is a LED lamp. To replace the LED, the entire CHMSL
assembly must be replaced.
** The headlamps are a type of high-voltage discharge tube. High voltage can remain in
the circuit even with the headlamp switch off and the Key Fob removed. Because of
this, you should not attempt to service a headlamp bulb yourself. If a headlamp bulb
fails, take your vehicle to an authorized dealer for service.
MAINTAINING YOUR VEHICLE
122
Page 129 of 140
Fluid Capacities............ 113
Fluids ................. 113
FogLights ................ 27
Folding Front Passenger Seat ..... 21
Folding Power Third Row
Head Restraints ............ 23
FoldingRearSeat ......... 21,22
Four Wheel Drive ............ 83
Operation ............... 83
Systems ................ 83
Four Wheel Drive Operation ...... 83
Front Heated Seats ........... 23
Fuel Filler Cap (Gas Cap) ......... 92
Filler Door (Gas Cap) ....... 109
Filler Door Emergency Release . . 110
Specifications ........113,114
Fuses .................. 118
Garage Door Opener (HomeLink
®)..77
Gas Cap (Fuel Filler Cap) ....... 92
Head Restraints Power Folding Third Row ...... 23
Headlights ............... 27 Automatic .............. 27
Dimmer Switch ........... 28
HighBeam .............. 29
High Beam/Low Beam Select
Switch ................ 29
Heated Mirrors ............. 35
Heated Seats .............. 23
Heated Steering Wheel ........ 25
High Beam/Low Beam Select
(Dimmer) Switch ............ 29
HomeLink
®(Garage Door Opener)
Transmitter ............... 77
Hood Release ............. 109
Instrument Cluster ............ 6
Indicators ............... 7
Instrument Cluster Warning
Lights ................. 6,89
Integrated Power Module (Fuses) . . 119
Intermittent Wipers (Delay Wipers) . . 28
Introduction ............... 2
Inverter Outlet (115V) ......... 80Inverter, Power
............. 80
iPod
®/USB/MP3 Control ........ 68
Bluetooth Streaming Audio ..... 74
Jack Location .............. 94
Jack Operation ........... 94,97
Jacking Instructions .......... 97
Jump Starting ............. 103
KeyFob .................. 8
Keyless Enter-N-Go™ ......... 11
Lock/Unlock ........... 11,12
Starting/Stopping .......... 13
Lane Change Assist .......... 28
LATCH (Lower Anchors and Tether for
CHildren) ................ 16
Liftgate, Power .............. 8
LightBulbs .............. 122
Lights Warning (Instrument Cluster
Description) .............. 6
Luggage Rack (Roof Rack) ...... 85
Maintenance Record ......... 117
MaintenanceSchedule ........ 115
Malfunction Indicator Light (Check
Engine) ................. 90
MediaCenterRadio ........ 42,44
MemorySeat .............. 19
Mirrors Automatic Dimming ......... 29
Heated ................ 35
MOPAR
®Accessories ........ 125
Navigation .............. 52,61
New Vehicle Break-In Period ..... 27
Oil Change Indicator .......... 92
Oil Change Indicator, Reset ...... 92
Oil Pressure Light ........... 91
Oil, Engine Capacity ............... 113
Outlet Power ................. 81
INDEX
127