transmission DODGE DURANGO 2013 3.G User Guide
[x] Cancel search | Manufacturer: DODGE, Model Year: 2013, Model line: DURANGO, Model: DODGE DURANGO 2013 3.GPages: 140, PDF Size: 4.38 MB
Page 9 of 140
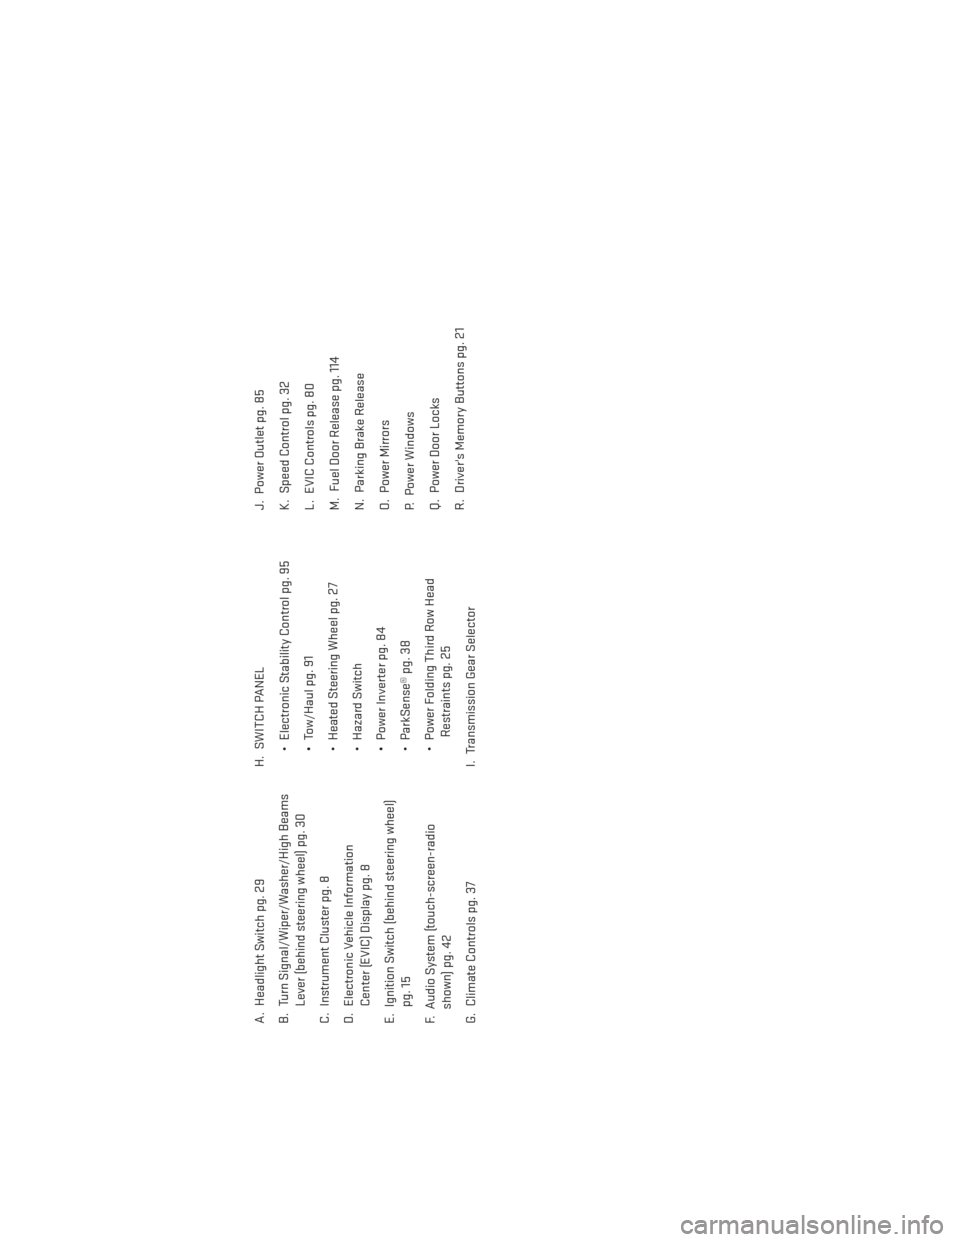
A. Headlight Switch pg. 29
B. Turn Signal/Wiper/Washer/High BeamsLever (behind steering wheel) pg. 30
C. Instrument Cluster pg. 8
D. Electronic Vehicle Information Center (EVIC) Display pg. 8
E. Ignition Switch (behind steering wheel) pg. 15
F. Audio System (touch-screen-radio shown) pg. 42
G. Climate Controls pg. 37 H. SWITCH PANEL
• Electronic Stability Control pg. 95
• Tow/Haul pg. 91
• Heated Steering Wheel pg. 27
• Hazard Switch
• Power Inverter pg. 84
• ParkSense® pg. 38
• Power Folding Third Row HeadRestraints pg. 25
I. Transmission Gear Selector J. Power Outlet pg. 85
K. Speed Control pg. 32
L. EVIC Controls pg. 80
M. Fuel Door Release pg. 114
N. Parking Brake Release
O. Power Mirrors
P. Power Windows
Q. Power Door Locks
R. Driver's Memory Buttons pg. 21
CONTROLS AT A GLANCE
7
Page 10 of 140
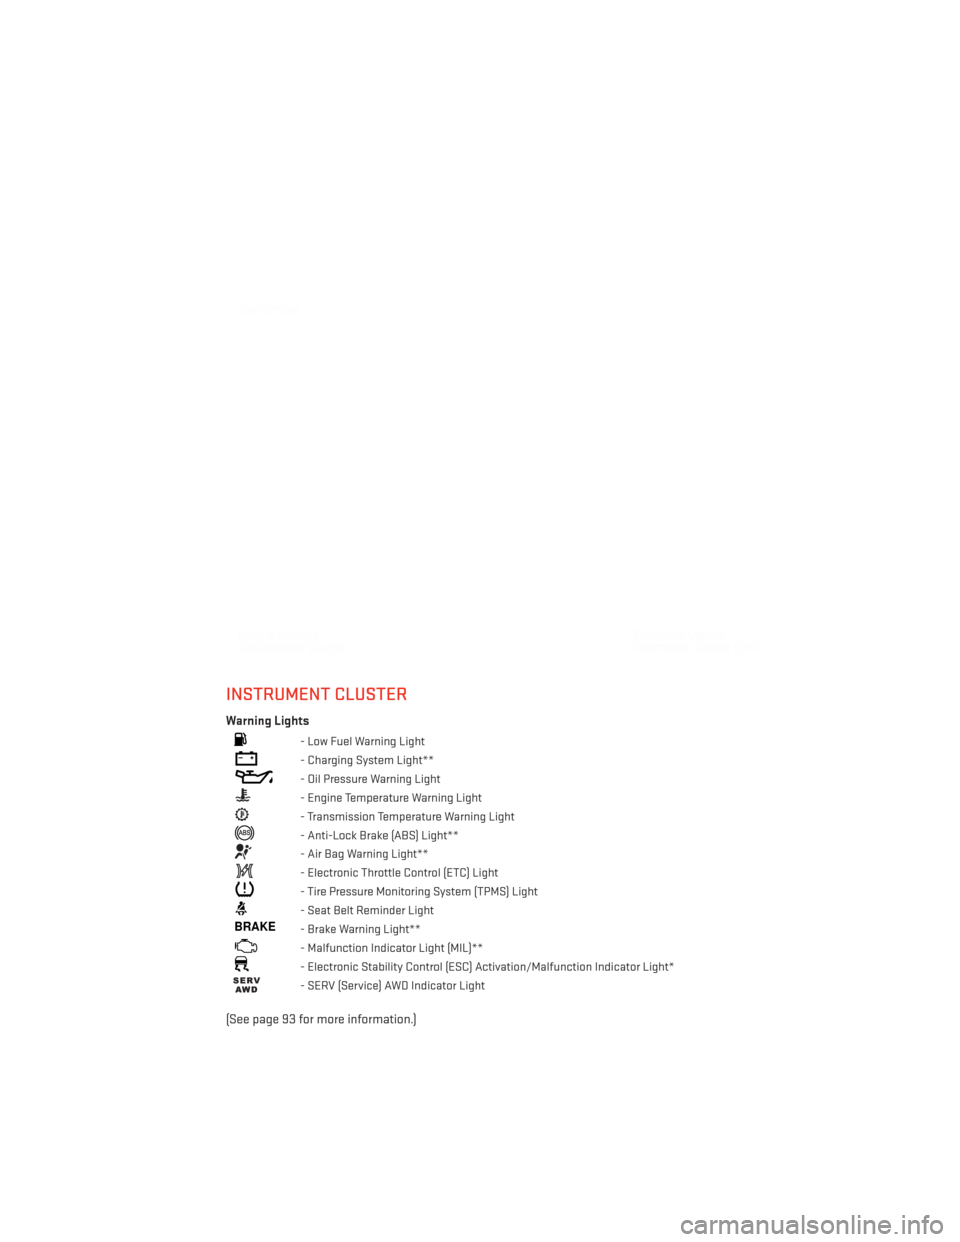
INSTRUMENT CLUSTER
Warning Lights
- Low Fuel Warning Light
- Charging System Light**
- Oil Pressure Warning Light
- Engine Temperature Warning Light
- Transmission Temperature Warning Light
- Anti-Lock Brake (ABS) Light**
- Air Bag Warning Light**
- Electronic Throttle Control (ETC) Light
- Tire Pressure Monitoring System (TPMS) Light
- Seat Belt Reminder Light
BRAKE- Brake Warning Light**
- Malfunction Indicator Light (MIL)**
- Electronic Stability Control (ESC) Activation/Malfunction Indicator Light*
- SERV (Service) AWD Indicator Light
(See page 93 for more information.)
CONTROLS AT A GLANCE
8
Page 17 of 140
Engine Starting/Stopping
Starting
• With a valid Keyless Enter-N-Go™ Key Fobinside the vehicle.
• Place the shift lever in PARK or NEUTRAL.
• While pressing the brake pedal, press the ENGINE START/STOP button once. If the
engine fails to start, the starter will disen-
gage automatically after 10 seconds.
•
To stop the cranking of the engine prior to
the engine starting, press the button again.
Stopping
• Bring the vehicle to a complete stop.
• Place the shift lever in the PARK position.
• Press the ENGINE START/STOP button once. The ignition switch will return to the OFF position.
NOTE:
If the shift lever is not in PARK and the vehicle is in motion, the ENGINE START/STOP
button must be held for two seconds with the vehicle speed above 5 mph (8 km/h) before
the engine will shut off.
Accessory Positions with Engine Off
NOTE:
The following functions are with the driver’s foot OFF the Brake Pedal (transmission in PARK
or NEUTRAL).
Starting With The Ignition Switch In The OFF Position:
• Press the ENGINE START/STOP button once to change the ignition switch to the ACC position.
• Press the ENGINE START/STOP button a second time to change the ignition switch to the ON/RUN position.
• Press the ENGINE START/STOP button a third time to return the ignition switch to the OFF position.
NOTE:
If the ignition switch is left in the ACC or
ON/RUN (engine not running) position and
the transmission is in PARK, the system will
automatically time out after 30 minutes of
inactivity and the ignition will switch to the
OFF position.
GETTING STARTED
15
Page 31 of 140
ENGINE BREAK-IN RECOMMENDATIONS
• A long break-in period is not required for the engine and drivetrain (transmission andaxle) in your vehicle.
• Drive moderately during the first 300 miles (500 km). After the initial 60 miles (100 km), speeds up to 50 or 55 mph (80 or 90 km/h) are desirable.
• While cruising, brief full-throttle acceleration within the limits of local traffic laws contributes to a good break-in. Wide-open throttle acceleration in low gear can be
detrimental and should be avoided.
• The engine oil installed in the engine at the factory is a high-quality energy conserving type lubricant. Oil changes should be consistent with anticipated climate conditions
under which vehicle operations will occur. For the recommended viscosity and quality
grades, refer to “Maintaining Your Vehicle”.
NOTE:
A new engine may consume some oil during its first few thousand miles (kilometers) of
operation. This should be considered a normal part of the break-in and not interpreted as
an indication to an engine problem or malfunction.
CAUTION!
Never use Non-Detergent Oil or Straight Mineral Oil in the engine or damage may result.
HEADLIGHT SWITCH
Automatic Headlights/Parking Lights/Headlights
• Rotate the headlight switch, located on the instrument panel to the left of the
steering wheel, to the first detent for park-
ing lights
and to the second detent
for headlights
.
• With the parking lights or low beam head- lights on, push the headlight switch once
for fog lights.
• Rotate the headlight switch to “AUTO” for AUTO headlights.
• When set to AUTO, the system automati- cally turns the headlights on or off based
on ambient light levels.
OPERATING YOUR VEHICLE
29
Page 38 of 140
ELECTRONIC RANGE SELECTION (ERS)
•Electronic Range Select (ERS) allows you to
limit the highest available transmission
gear, and can be activated during any driv-
ing condition. When towing a trailer, using
ERS shift control will help you maximize
both performance and engine braking.
• To switch from DRIVE mode to ERS mode, tap the shift lever to the left (-) once. The
instrument cluster will display the current
gear and the transmission will not upshift
beyond that gear. Tapping the shift lever
to the left (-) or right (+) will decrease or
increase the top available gear. To disable
ERS, simply hold the shift lever to the
right (+) until “D” is again displayed in the
instrument cluster.
• Switching between ERS and DRIVE mode can be done at any vehicle speed.
• Refer to your Owner's Manual on the DVD for further details.
OPERATING YOUR VEHICLE
36
Page 84 of 140
UNIVERSAL GARAGE DOOR OPENER (HomeLink®)
•HomeLink® replaces up to three hand-held transmitters that operate devices such as
garage door openers, motorized gates, lighting or home security systems. The HomeLink®
unit is powered by your vehicles 12 Volt battery.
• The HomeLink® buttons that are located in the overhead console or sunvisor designate the three different HomeLink® channels.
• The HomeLink® indicator is located above the center button.
Before You Begin Programming HomeLink®
•
Be sure that your vehicle is parked outside of
the garage before you begin programming.
•For more efficient programming and accu-
rate transmission of the radio-frequency
signal it is recommended that a new battery
be placed in the hand-held transmitter of
the device that is being programmed to the
HomeLink® system.
•Erase all channels before you begin pro-
gramming. To erase the channels, place the
ignition switch into the ON/RUN position,
then press and hold the two outside
HomeLink® buttons (I and III) for up to
20 seconds or until the red indicator flashes.
NOTE:
• Erasing all channels should only be performed when programming HomeLink® for the
first time. Do not erase channels when programming additional buttons.
• If you have any problems, or require assistance, please call toll-free 1–800–355– 3515 or, on the Internet at www.HomeLink.com for information or assistance.
Programming A Rolling Code
• For programming Garage Door Openers that were manufactured after 1995. These Garage Door Openers can be identified by the “LEARN” or “TRAIN” button located where
the hanging antenna is attached to the Garage Door Opener. It is NOT the button that is
normally used to open and close the door. The name and color of the button may vary by
manufacturer.
• Place the ignition switch into the ON/RUN position.
• Place the hand-held transmitter 1 to 3 in (3 to 8 cm) away from the HomeLink® button you wish to program while keeping the HomeLink® indicator light in view.
• Simultaneously press and hold both the HomeLink® button you want to program and the hand-held transmitter button.
ELECTRONICS
82
Page 90 of 140
Shifting Procedures
AWD AUTO To LOW RANGE
NOTE:
When shifting into or out of LOW RANGE some gear noise may be heard. This noise is
normal and is not detrimental to the vehicle or occupants.
• Shifting can be performed with the vehicle rolling 2 to 3 mph (3 to 5 km/h) or completelystopped. Use either of the following procedures:
Preferred Procedure
• With the engine running, slow the vehicle to 2 to 3 mph (3 to 5 km/h).
• Shift the transmission into NEUTRAL.
• While still rolling, rotate the transfer case control switch to the desired position.
• After the desired position indicator light is ON (not flashing), shift the transmission back into gear.
Alternate Procedure
• Bring the vehicle to complete stop.
• With the ignition switch in the ON position and the engine either OFF or running, shift the transmission into NEUTRAL.
• Rotate the transfer case control switch to the desired position.
• After the desired position indicator light is ON (not flashing), shift the transmission back into gear.
NOTE:
• If Steps 1 or 2 of either the Preferred or Alternate Procedure are not satisfied prior to attempting the shift or if they no longer are being met while the shift attempt is in
process, the desired position indicator light will flash continuously while the original
position indicator light is ON, until all requirements have been met.
• The ignition switch must be in the ON position for a shift to take place and for the position indicator lights to be operable. If the ignition switch is not in the ON position, then the
shift will not take place and no position indicator lights will be on or flashing.
WARNING!
• Always engage the parking brake when powering down the vehicle if the “SERV AWD
Warning Light” is illuminated. Not engaging the parking brake may allow the vehicle
to roll which may cause personal injury.
•
You or others could be injured if you leave the vehicle unattended with the transfer case
in the NEUTRAL position without first fully engaging the parking brake. The transfer case
NEUTRAL position disengages both the front and rear driveshafts from the powertrain
and will allow the vehicle to move regardless of the transmission position. The parking
brake should always be applied when the driver is not in the vehicle.
OFF-ROAD CAPABILITIES
88
Page 93 of 140
TOW/HAUL MODE
• When driving in hilly areas, towing a trailer, carrying a heavy load, etc., and frequenttransmission shifting occurs, press the TOW/HAUL switch to select TOW/HAUL mode.
This will improve performance and reduce the potential for transmission overheating or
failure due to excessive shifting. When operating in TOW/HAUL mode, transmission
upshifts are delayed, and the transmission will automatically downshift (for engine
braking) during steady braking maneuvers.
•
The “TOW/HAUL Indicator Light” will illumi-
nate in the instrument cluster to indicate
that TOW/HAUL mode has been activated.
Pressing the switch a second time restores
normal operation. If the TOW/HAUL mode
is desired, the switch must be pressed each
time the engine is started.
RECREATIONAL TOWING (BEHIND MOTORHOME, ETC.)
Rear-Wheel Drive Models
• Recreational towing is not allowed.
All-Wheel Drive Models (Single-Speed Transfer Case)
• Recreational towing is not allowed. This model does not have a NEUTRAL position in the
transfer case.
All-Wheel Drive Models (Two-Speed Transfer Case)
NOTE:
The transfer case must be in the NEUTRAL position, and the transmission must be in the
PARK position for recreational towing.
UTILITY
91
Page 94 of 140
Shifting Into NEUTRAL
Use the following procedure to prepare your vehicle for recreational towing.
• Bring the vehicle to a complete stop and shift the transmission to PARK.
• Turn the engine off.
• For vehicles with Keyless Enter-N-Go, remove the Keyless Enter-N-Go button and use theKey Fob to complete this procedure.
• Turn the ignition switch to the ON/RUN position, but do not start the engine.
• Press and hold the brake pedal and shift the transmission into NEUTRAL.
• Press and hold the transfer case N (Neutral) button for four seconds, until the light next to the N symbol starts to blink, indicating shift in progress. The light will stop blinking
(stay on solid) when the shift to N (Neutral) is complete.
• Start the engine and shift the transmission into REVERSE.
• Release the brake pedal for five seconds and ensure that there is no vehicle movement.
• Turn the engine off and firmly apply the parking brake.
• Shift the transmission into PARK and remove the Key Fob.
• Attach the vehicle to the tow vehicle using a suitable tow bar and release the parking brake.
CAUTION!
•Towing with the rear wheels on the ground will cause severe transmission damage.
Damage from improper towing is not covered under the New Vehicle Limited Warranty.
• Front or rear wheel lifts should not be used. Internal damage to the transmission or
transfer case will occur if a front or rear wheel lift is used when recreational towing.
• It is necessary to follow these steps to be certain that the transfer case is fully in NEUTRAL before recreational towing to prevent damage to internal parts.
WARNING!
You or others could be injured if you leave the vehicle unattended with the transfer case
in the NEUTRAL position without first fully engaging the parking brake. The transfer case
NEUTRAL position disengages both the front and rear driveshafts from the powertrain
and will allow the vehicle to move even if the transmission is in PARK. The parking brake
should always be applied when the driver is not in the vehicle.
UTILITY
92
Page 99 of 140
Vehicles Not Equipped With Keyless Enter-N-Go™
• Turn the ignition switch to the ON/RUN position (Do not start the engine.)
• Fully depress the accelerator pedal, slowly, three times within 10 seconds.
• Turn the ignition switch to the OFF/LOCK position.
NOTE:
If the indicator message illuminates when you start the vehicle, the oil change indicator
system did not reset. If necessary, repeat this procedure.
IF YOUR ENGINE OVERHEATS
• In any of the following situations, you can reduce the potential for overheating by takingthe appropriate action.
• On the highways — slow down.
• In city traffic — while stopped, place the transmission in NEUTRAL, but do not increase engine idle speed.
NOTE:
There are steps that you can take to slow down an impending overheat condition:
• If your air conditioner (A/C) is on, turn it off. The A/C system adds heat to the engine cooling system and turning the A/C off can help remove this heat.
• You can also turn the temperature control to maximum heat, the mode control to floor and the blower control to high. This allows the heater core to act as a supplement to the
radiator and aids in removing heat from the engine cooling system.
CAUTION!
Driving with a hot cooling system could damage your vehicle. If the temperature gauge
reads HOT (H), pull over and stop the vehicle. Idle the vehicle with the air conditioner turned
off until the pointer drops back into the normal range. If the pointer remains on HOT (H), and
you hear continuous chimes, turn the engine off immediately, and call for service.
WARNING!
You or others can be badly burned by hot engine coolant (antifreeze) or steam from your
radiator. If you see or hear steam coming from under the hood, do not open the hood until
the radiator has had time to cool. Never try to open a cooling system pressure cap when
the radiator or coolant bottle is hot.
WHAT TO DO IN EMERGENCIES
97