ECO mode DODGE DURANGO 2014 3.G Owner's Manual
[x] Cancel search | Manufacturer: DODGE, Model Year: 2014, Model line: DURANGO, Model: DODGE DURANGO 2014 3.GPages: 188, PDF Size: 3.8 MB
Page 49 of 188
Closing Sunroof
Express Closing
• Press the switch forward and release it within one-half second. The sunroof will fullyclose automatically from any position.
Manual Closing
• Press and hold the switch forward to close the sunroof. Any release of the switch will stop the movement, and the sunroof will remain in a partially closed position until the switch
is pressed again.
Pinch Protection Feature
This feature will detect an obstruction in the opening of the sunroof during Express Close
operation. If an obstruction in the path of the sunroof is detected, the sunroof will auto-
matically retract. Remove the obstruction if this occurs. Next, press the switch forward and
release to Express Close.
NOTE:
If three consecutive sunroof close attempts result in Pinch Protect reversals, the fourth
close attempt will be a Manual Close movement with Pinch Protect disabled.
WARNING!
• Do not let children play with the sunroof. Never leave children unattended in a vehicle,
or with access to an unlocked vehicle. Do not leave the Key Fob in or near the vehicle,
and do not leave the ignition of a vehicle equipped with Keyless Enter-N-Go™ in the
ACC or ON/RUN mode. Occupants, particularly unattended children, can become
entrapped by the power sunroof while operating the power sunroof switch. Such
entrapment may result in serious injury or death.
• In a collision, there is a greater risk of being thrown from a vehicle with an open
sunroof. You could also be severely injured or killed. Always fasten your seat belt
properly and make sure all passengers are properly secured.
• Do not allow small children to operate the sunroof. Never allow your fingers, other
body parts, or any object to project through the sunroof opening. Injury may result.
WIND BUFFETING
Wind buffeting can be described as a helicopter-type percussion sound. If buffeting occurs
with the rear windows open, adjust the front and rear windows together.
If buffeting occurs with the sunroof open, adjust the sunroof opening, or adjust any window.
This will minimize buffeting.
OPERATING YOUR VEHICLE
47
Page 69 of 188
Equalizer
• Touch the “Equalizer” soft-key to adjust the Bass, Mid and Treble. Use the + or - soft-keyto adjust the equalizer to your desired settings. Press the “Back Arrow” soft-key when
done.
Balance/Fade
• Touch the “Balance/Fade” soft-key to adjust the sound from the speakers. Use the arrow soft-key to adjust the sound level from the front and rear or right and left side speakers.
Touch the Center “C” soft-key to reset the balance and fade to the factory setting. Press
the “Back Arrow” arrow soft-key when done.
Speed Adjusted Volume
• Touch the “Speed Adjusted Volume” soft-key to select between OFF, 1, 2 or 3. This will decrease the radio volume relative to a decrease in vehicle speed. Press the “Back Arrow”
soft-key when done.
Loudness
• Touch the “Loudness” soft-key to select the Loudness feature. When this feature is activated it improves sound quality at lower volumes.
Surround Sound
• Touch the “Surround Sound” soft-key, select On or Off followed by pressing the “Back Arrow” soft-key. When this feature is activated, it provides simulated surround sound
mode.
Radio Operation
Seek Up/Down Buttons
• Press to seek through radio stations in AM, FM or SXM bands.
• Hold either button to bypass stations without stopping.
Store Radio Presets
• When you are receiving a station that you wish to commit into memory, press and holdthe desired numbered soft-key for more than two seconds, or until you hear a confirma-
tion beep.
• The Radio stores up to 12 presets in each of the Radio modes. Four presets are visible at the top of the radio screen. Touching the “all” soft-key on the radio home screen will
display all of the preset stations for that mode.
ELECTRONICS
67
Page 78 of 188
RADIO
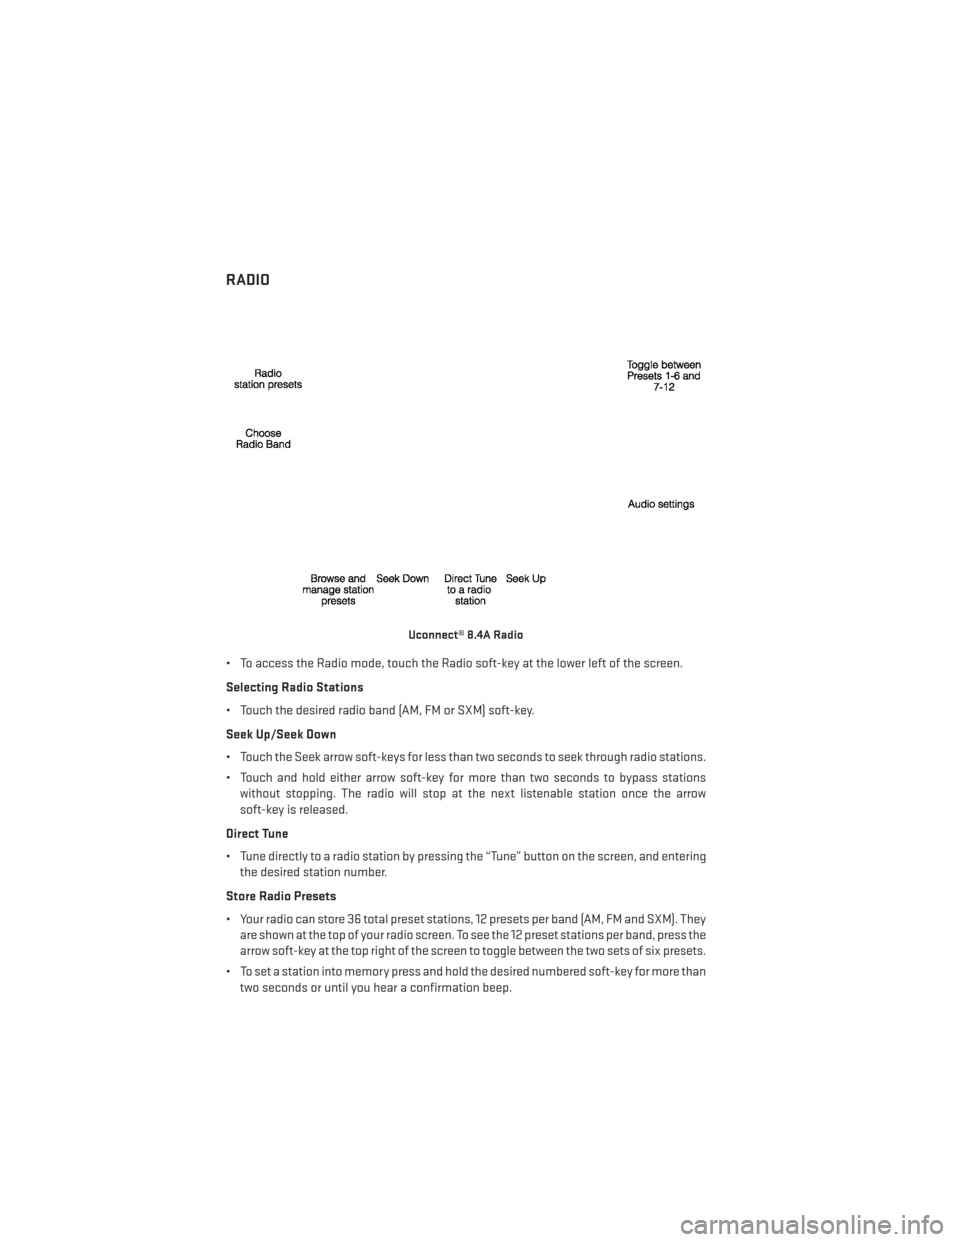
• To access the Radio mode, touch the Radio soft-key at the lower left of the screen.
Selecting Radio Stations
• Touch the desired radio band (AM, FM or SXM) soft-key.
Seek Up/Seek Down
• Touch the Seek arrow soft-keys for less than two seconds to seek through radio stations.
• Touch and hold either arrow soft-key for more than two seconds to bypass stationswithout stopping. The radio will stop at the next listenable station once the arrow
soft-key is released.
Direct Tune
• Tune directly to a radio station by pressing the “Tune” button on the screen, and entering the desired station number.
Store Radio Presets
• Your radio can store 36 total preset stations, 12 presets per band (AM, FM and SXM). They are shown at the top of your radio screen. To see the 12 preset stations per band, press the
arrow soft-key at the top right of the screen to toggle between the two sets of six presets.
• To set a station into memory press and hold the desired numbered soft-key for more than two seconds or until you hear a confirmation beep.
Uconnect® 8.4A Radio
ELECTRONICS
76
Page 79 of 188
SiriusXM PREMIER OVER 160 CHANNELS
•Get every channel available on your satellite radio, and enjoy all you want, all in one place.
Hear commercial-free music plus sports, news, talk and entertainment. Get all the premium
programming, including Howard Stern, every NFL game, Oprah Radio®, every MLB® and
NHL® game, every NASCAR® race, Martha Stewart and more. And get 20+ extra channels,
including SiriusXM Latino, offering 20 channels of commercial free music, news, talk,
comedy, sports and more dedicated to Spanish language programming.
• To access SiriusXM Satellite Radio, touch the “SXM” soft-key on the main Radio screen.
• The following describes features that are available when in SiriusXM Satellite Radio mode.
Seek Up/Seek Down
• Touch the “Seek” arrow soft-keys for less than two seconds to seek through channels in SXM mode.
• Touch and hold either “arrow” soft-key for more than two seconds to bypass channels without stopping. The radio will stop at the next listenable channel once the “arrow”
soft-key is released.
Direct Tune
• Tune directly to a SXM channel by pressing the “Tune” soft-key on the screen, and entering the desired station number.
Jump
• Automatically tells you when Traffic & Weather for a favorite city is available, and gives you the option to switch to that channel. Touch “Jump” to activate the feature. After
listening to Traffic and Weather, touch “Jump” again to return to the previous channel.
Fav
• Activates the favorites menu. You can add up to 50 favorite artists or songs. Just touch “Add Fav Artist” or “Add Fav Song” while the song is playing. You will then be alerted any
time one of these songs, or works by these artists, is playing on other SiriusXM channels.
SiriusXM Parental Controls
• You can skip or hide certain channels from view if you do not want access to them. Touch the “More” soft-key, then the “Settings” soft-key, next touch the “Sirius Setup” soft-key,
then select “Channel Skip”. Touch the box, check-mark, next to the channel you want
skipped. They will not show up in normal usage.
• SiriusXM also offers the option to permanently block selected channels. Call (1-888-601-6297 for U.S. customers, 1-877-438-9677 for Canadian customers) and
request the Family - Friendly Package.
ELECTRONICS
77
Page 98 of 188
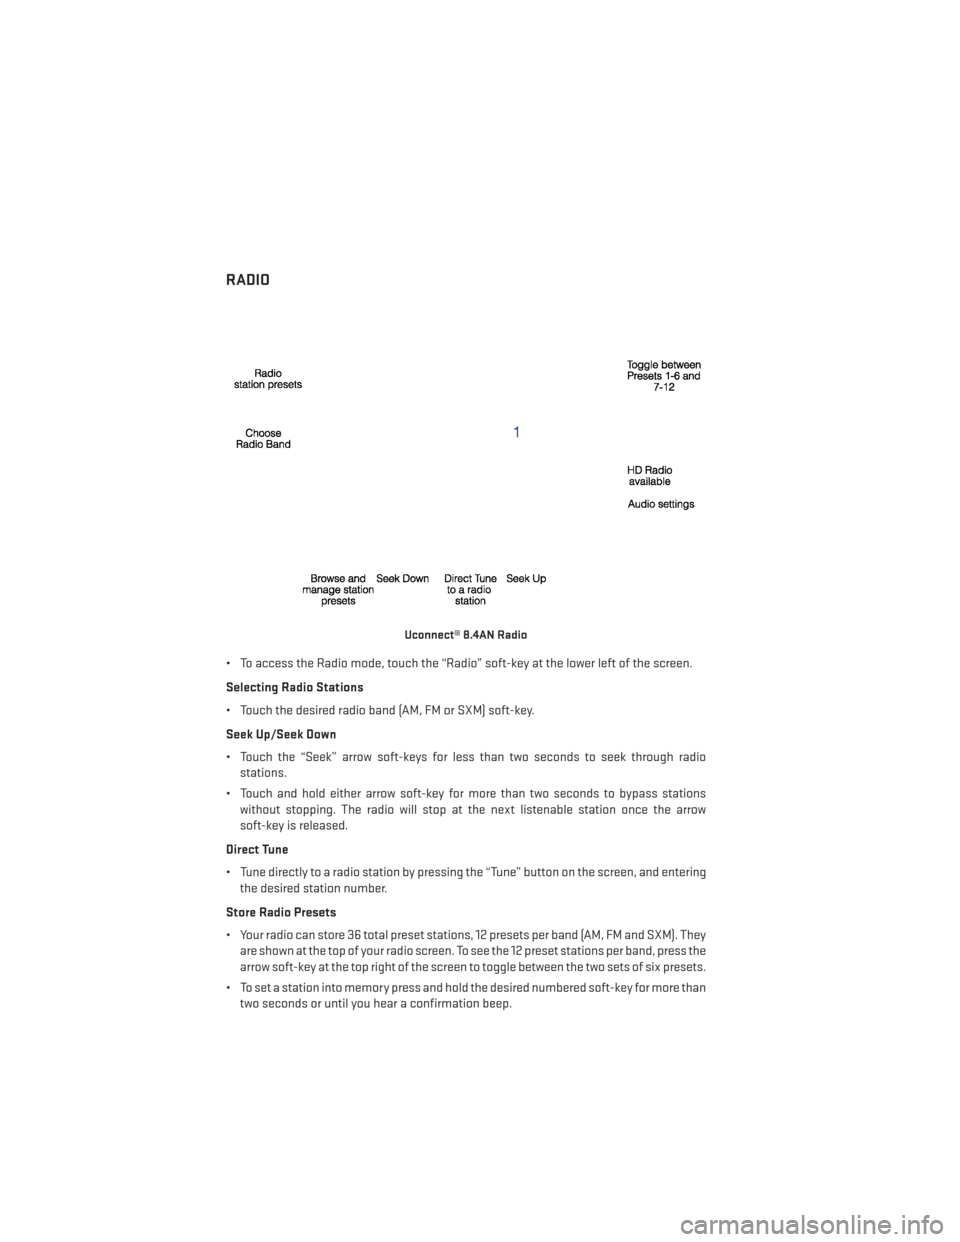
RADIO
• To access the Radio mode, touch the “Radio” soft-key at the lower left of the screen.
Selecting Radio Stations
• Touch the desired radio band (AM, FM or SXM) soft-key.
Seek Up/Seek Down
• Touch the “Seek” arrow soft-keys for less than two seconds to seek through radiostations.
• Touch and hold either arrow soft-key for more than two seconds to bypass stations without stopping. The radio will stop at the next listenable station once the arrow
soft-key is released.
Direct Tune
• Tune directly to a radio station by pressing the “Tune” button on the screen, and entering the desired station number.
Store Radio Presets
• Your radio can store 36 total preset stations, 12 presets per band (AM, FM and SXM). They are shown at the top of your radio screen. To see the 12 preset stations per band, press the
arrow soft-key at the top right of the screen to toggle between the two sets of six presets.
• To set a station into memory press and hold the desired numbered soft-key for more than two seconds or until you hear a confirmation beep.
Uconnect® 8.4AN Radio
ELECTRONICS
96
Page 99 of 188
HD Radio
• HD Radio technology (available on Uconnect® 8.4AN) allows broadcasters to transmit ahigh-quality digital signal.
• With an HD radio receiver, the listener is provided with a clear sound that enhances the listening experience. HD radio can also transmit data such as song title or artist.
SiriusXM PREMIER OVER 160 CHANNELS
•Get every channel available on your satellite radio, and enjoy all you want, all in one place.
Hear commercial-free music plus sports, news, talk and entertainment. Get all the premium
programming, including Howard Stern, every NFL game, Oprah Radio®, every MLB® and
NHL® game, every NASCAR® race, Martha Stewart and more. And get 20+ extra channels,
including SiriusXM Latino, offering 20 channels of commercial free music, news, talk,
comedy, sports and more dedicated to Spanish language programming.
• To access SiriusXM Satellite Radio, touch the “SXM” soft-key on the main Radio screen.
•
The following describes features that are available when in SiriusXM Satellite Radio mode.
Seek Up/Seek Down
• Touch the “Seek” arrow soft-keys for less than two seconds to seek through channels in SXM mode.
• Touch and hold either “arrow” soft-key for more than two seconds to bypass channels without stopping. The radio will stop at the next listenable channel once the “arrow”
soft-key is released.
Direct Tune
• Tune directly to a SXM channel by pressing the “Tune” soft-key on the screen, and entering the desired station number.
Jump
• Automatically tells you when Traffic & Weather for a favorite city is available, and gives you the option to switch to that channel. Touch “Jump” to activate the feature. After
listening to Traffic and Weather, touch “Jump” again to return to the previous channel.
Fav
• Activates the favorites menu. You can add up to 50 favorite artists or songs. Just touch “Add Fav Artist” or “Add Fav Song” while the song is playing. You will then be alerted any
time one of these songs, or works by these artists, is playing on other SiriusXM channels.
SiriusXM Parental Controls
• You can skip or hide certain channels from view if you do not want access to them. Touch the “More” soft-key, then the “Settings” soft-key, next touch the “Sirius Setup” soft-key,
then select “Channel Skip”. Touch the box, check-mark, next to the channel you want
skipped. They will not show up in normal usage.
•
SiriusXM also offers the option to permanently block selected channels. Call (1-888-601-6297
for U.S. customers, 1-877-438-9677 for Canadian customers) and request the Family - Friendly
Package.
ELECTRONICS
97
Page 117 of 188
STEERING WHEEL AUDIO CONTROLS
The steering wheel audio controls are located on the rear surface of the steering wheel.
Right Switch
• Press the switch up or down to increase ordecrease the volume.
• Press the button in the center to change modes AM/FM/CD/SXM.
Left Switch
• Press the switch up or down to search forthe next listenable station or select the
next or previous CD track.
•
Press the button in the center to select the
next preset station (radio) or to change CDs
if equipped with a CD Changer.
ELECTRONIC VEHICLE INFORMATION CENTER (EVIC)
The EVIC features a driver interactive display that is located in the instrument cluster.
Pressing the controls on the left side of the steering wheel allows the driver to select vehicle
information and Personal Settings. For additional information, refer to Programmable
Features in this guide.
•
Press and release the UPbutton to
scroll upward through the main menus
(Speedometer, MPH/km/h, Vehicle Info,
Terrain, Driver Assist, Fuel Economy, Trip A,
Trip B, Audio, Stored Messages, Screen
Set Up).
• Press and release the DOWNbutton
to scroll downward through the main
menu and submenus (Speedometer,
MPH/km/h, Vehicle Info, Terrain, Driver
Assist, Fuel Economy, Trip A, Trip B, Audio,
Stored Messages, Screen Set Up).
• Press and release the RIGHT
button
to access the information screens or
sub-menu screens of a main menu item.
• Press the BACK/LEFT
button to
access the information screens or sub-
menu screens of a main menu item.
• Press the OKbutton to access/select the information screens or sub-menu screens of a
main menu item. Press and hold the OK button for two seconds to reset displayed/
selected features that can be reset.1 — EVIC Controls
ELECTRONICS
115
Page 125 of 188
ALL-WHEEL DRIVE OPERATION
Single-Speed Operating Instructions/Precautions
This system contains a single-speed (HI range only) transfer case, which provides conve-
nient full-time all-wheel drive. No driver interaction is required. The Brake Traction Control
(BTC) System, which combines standard ABS and Traction Control, provides resistance to
any wheel that is slipping to allow additional torque transfer to wheels with traction.
NOTE:
This system is not appropriate for conditions where AWD LOW range is recommended. Refer to
“Off-Road Driving Tips” in “Starting and Operating” on the DVD for further information.
Electronically Shifted Transfer Case (Three-Position Switch)
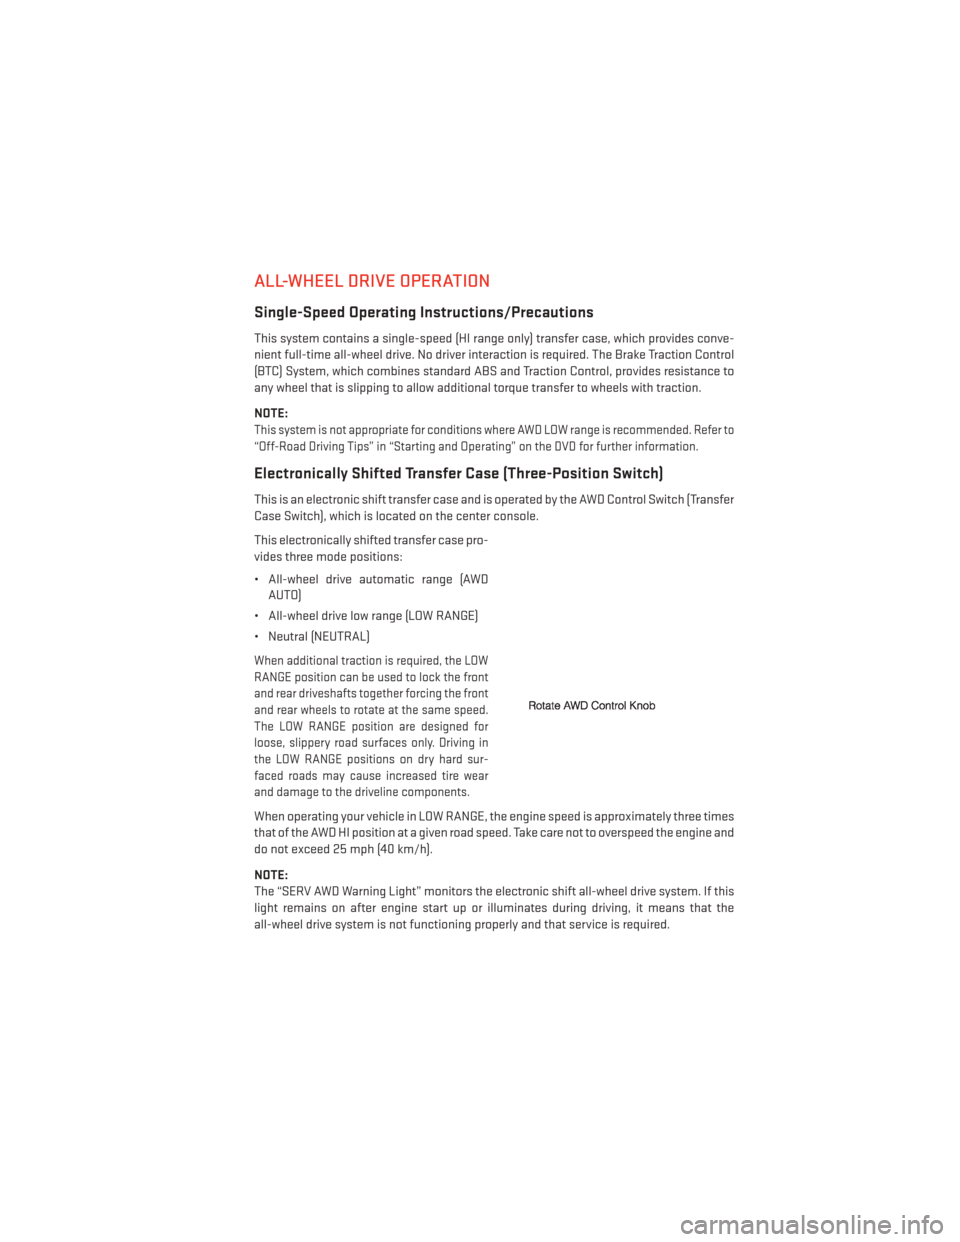
This is an electronic shift transfer case and is operated by the AWD Control Switch (Transfer
Case Switch), which is located on the center console.
This electronically shifted transfer case pro-
vides three mode positions:
• All-wheel drive automatic range (AWDAUTO)
• All-wheel drive low range (LOW RANGE)
• Neutral (NEUTRAL)
When additional traction is required, the LOW
RANGE position can be used to lock the front
and rear driveshafts together forcing the front
and rear wheels to rotate at the same speed.
The LOW RANGE position are designed for
loose, slippery road surfaces only. Driving in
the LOW RANGE positions on dry hard sur-
faced roads may cause increased tire wear
and damage to the driveline components.
When operating your vehicle in LOW RANGE, the engine speed is approximately three times
that of the AWD HI position at a given road speed. Take care not to overspeed the engine and
do not exceed 25 mph (40 km/h).
NOTE:
The “SERV AWD Warning Light” monitors the electronic shift all-wheel drive system. If this
light remains on after engine start up or illuminates during driving, it means that the
all-wheel drive system is not functioning properly and that service is required.
OFF-ROAD CAPABILITIES
123
Page 136 of 188
- Electronic Stability Control (ESC) Activation/Malfunction
Indicator Light
The “ESC Activation/Malfunction Indicator Light” in the instrument cluster will come on
when the ignition switch is turned to the ON/RUN position. It should go out with the engine
running. If the “ESC Activation/Malfunction Indicator Light” comes on continuously with
the engine running, a malfunction has been detected in the ESC system. If this light
remains on after several ignition cycles, and the vehicle has been driven several miles
(kilometers) at speeds greater than 30 mph (48 km/h), see your authorized dealer as soon
as possible to have the problem diagnosed and corrected.
NOTE:
• The “ESC Off Indicator Light” and the “ESC Activation/Malfunction Indicator Light” come
on momentarily each time the ignition switch is turned to ON/RUN.
• Each time the ignition is turned to ON/RUN, the ESC system will be ON, even if it was turned off previously.
• The ESC system will make buzzing or clicking sounds when it is active. This is normal; the sounds will stop when ESC becomes inactive following the maneuver that caused the
ESC activation.
• To improve the vehicle's traction when starting off in deep snow, sand or gravel, it may be desirable to switch the ESC system to Partial Off mode by momentarily pressing the ESC
Off
switch located below the climate controls, on the switch panel.
- Charging System Light
This light shows the status of the electrical charging system. If the charging system light
remains on, it means that the vehicle is experiencing a problem with the charging system.
We recommend you do not continue driving if the charging system light is on. Have the
vehicle serviced immediately.
- Oil Pressure Warning Light
This light indicates low engine oil pressure. If the light turns on while driving, stop the
vehicle and shut off the engine as soon as possible. A chime will sound for four minutes
when this light turns on.
We recommend you do not operate the vehicle or engine damage will occur. Have the
vehicle serviced immediately.
WHAT TO DO IN EMERGENCIES
134
Page 154 of 188
FREEING A STUCK VEHICLE
• If your vehicle becomes stuck in mud, sand or snow, it can often be moved by a rockingmotion. Turn your steering wheel right and left to clear the area around the front wheels.
Then, move the shift lever/gear selector back and forth between REVERSE and DRIVE.
Using minimal accelerator pedal pressure to maintain the rocking motion, without
spinning the wheels, is most effective.
• Allow the engine to idle with the transmission shift lever/gear selector in NEUTRAL for at least one minute after every five rocking-motion cycles. This minimizes overheating and
reduce the risk of transmission failure during prolonged efforts to free a stuck vehicle.
NOTE:
If your vehicle is equipped with Electronic Stability Control (ESC) then press the "ESC Off"
switch, to place the Electronic Stability Control (ESC) system in "Partial Off" mode, before
rocking the vehicle.
CAUTION!
Revving the engine or spinning the wheels too fast may lead to transmission overheating
and failure. It can also damage the tires. Do not spin the wheels above 30 mph (48 km/h)
while in gear (no transmission shifting occurring).
WARNING!
Fast spinning tires can be dangerous. Forces generated by excessive wheel speeds may
cause tire damage or failure. A tire could explode and injure someone. Do not spin your
vehicle's wheels faster than 30 mph (48 km/h) when you are stuck. Do not let anyone
near a spinning wheel, no matter what the speed.
WHAT TO DO IN EMERGENCIES
152