lock DODGE DURANGO 2014 3.G User Guide
[x] Cancel search | Manufacturer: DODGE, Model Year: 2014, Model line: DURANGO, Model: DODGE DURANGO 2014 3.GPages: 188, PDF Size: 3.8 MB
Page 5 of 188
VEHICLES SOLD IN CANADA
With respect to any vehicles sold in Canada, the name Chrysler Group LLC shall be deemed
to be deleted and the name Chrysler Canada Inc. used in substitution.
WARNING!
• Pedals that cannot move freely can cause loss of vehicle control and increase therisk of serious personal injury.
• Always make sure that objects cannot fall into the driver foot well while the vehicle is
moving. Objects can become trapped under the brake pedal and accelerator pedal
causing a loss of vehicle control.
• Failure to properly follow floor mat installation or mounting can cause interference
with the brake pedal and accelerator pedal operation causing loss of control of the
vehicle.
• Never leave children alone in a vehicle, or with access to an unlocked vehicle.
Allowing children to be in a vehicle unattended is dangerous for a number of reasons.
A child or others could be seriously or fatally injured. Children should be warned not
to touch the parking brake, brake pedal or the shift lever/gear selector.
• Never use the ‘PARK’ position as a substitute for the parking brake. Always apply the parking brake fully when parked to guard against vehicle movement and possible
injury or damage.
• Refer to your Owner's Manual on the DVD for further details.
INTRODUCTION/WELCOME
3
Page 9 of 188
11. Switch Panel• ParkSense® pg. 45
• ECO On pg. 41
•
Electronic Stability Control (ESC) OFFpg.
152
• Forward Collision Warning (FCW) pg. 37
12. Media Hub
• Audio Jack (AUX)
• USB Port
• SD Port 13. Electronic Shifter pg. 39
14. Front Power Outlet pg. 121
15. Speed Control pg. 33
16. EVIC Controls pg. 115
17. Parking Brake Release
18. Instrument Panel Dimmer pg. 31
19. Power Windows
20. Power Door Locks
CONTROLS AT A GLANCE
7
Page 10 of 188
INSTRUMENT CLUSTER
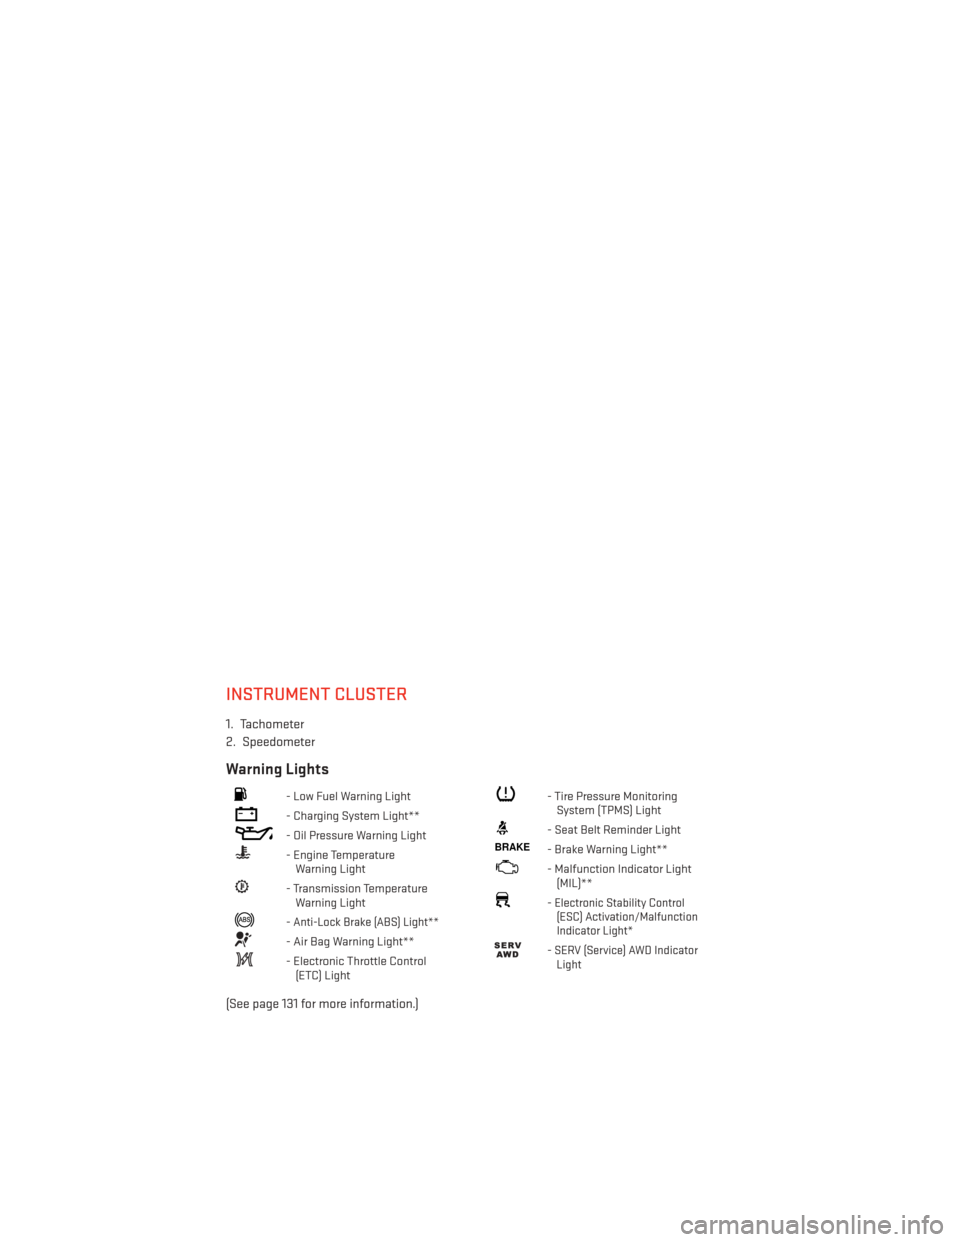
1. Tachometer
2. Speedometer
Warning Lights
- Low Fuel Warning Light
- Charging System Light**
- Oil Pressure Warning Light
- Engine TemperatureWarning Light
- Transmission TemperatureWarning Light
-Anti-Lock Brake (ABS) Light**
- Air Bag Warning Light**
- Electronic Throttle Control(ETC) Light
- Tire Pressure MonitoringSystem (TPMS) Light
- Seat Belt Reminder Light
BRAKE- Brake Warning Light**
- Malfunction Indicator Light(MIL)**
-Electronic Stability Control(ESC) Activation/Malfunction
Indicator Light*
-SERV (Service) AWD Indicator Light
(See page 131 for more information.)
CONTROLS AT A GLANCE
8
Page 12 of 188
KEY FOB
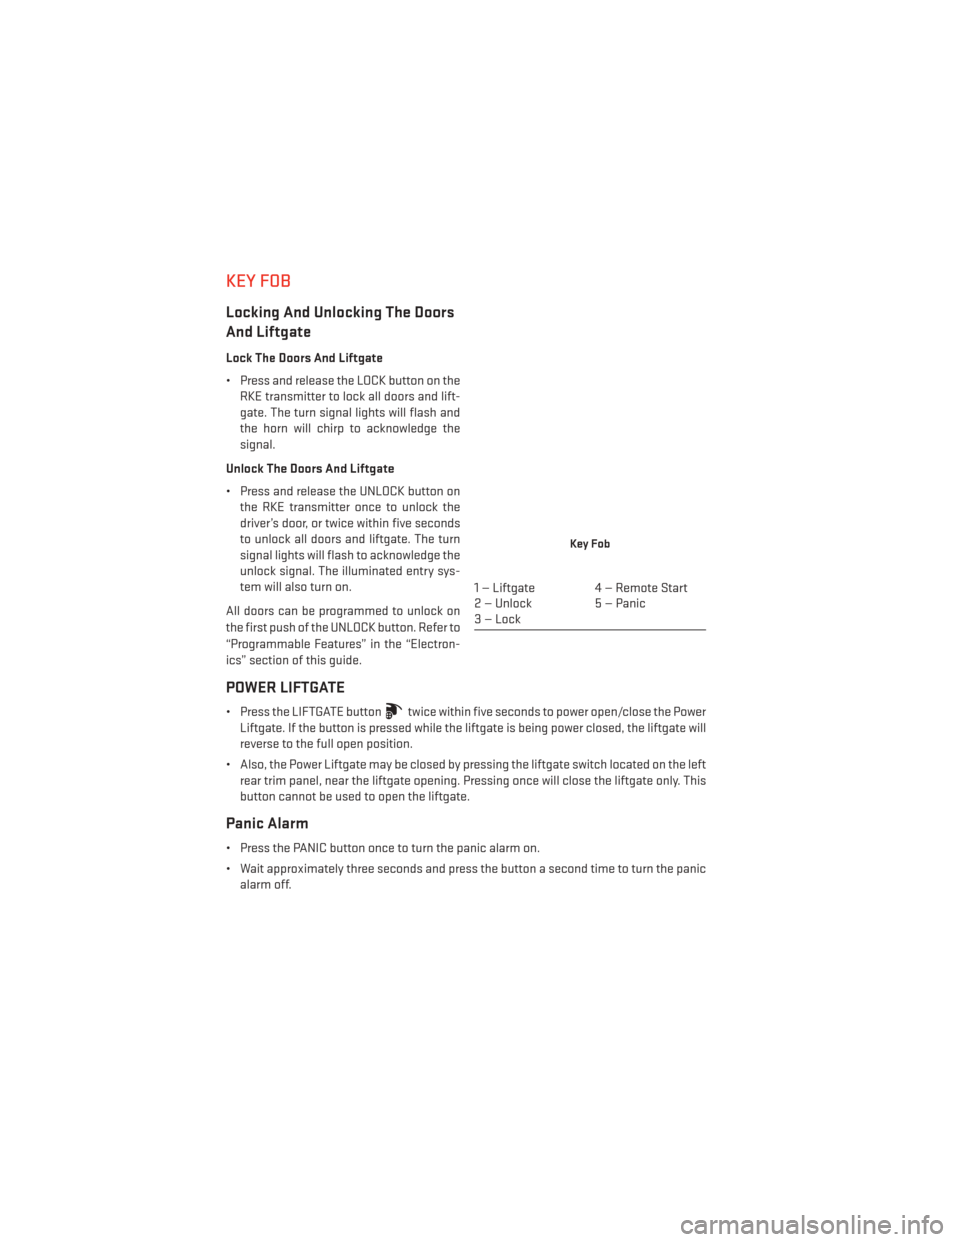
Locking And Unlocking The Doors
And Liftgate
Lock The Doors And Liftgate
• Press and release the LOCK button on theRKE transmitter to lock all doors and lift-
gate. The turn signal lights will flash and
the horn will chirp to acknowledge the
signal.
Unlock The Doors And Liftgate
• Press and release the UNLOCK button on the RKE transmitter once to unlock the
driver’s door, or twice within five seconds
to unlock all doors and liftgate. The turn
signal lights will flash to acknowledge the
unlock signal. The illuminated entry sys-
tem will also turn on.
All doors can be programmed to unlock on
the first push of the UNLOCK button. Refer to
“Programmable Features” in the “Electron-
ics” section of this guide.
POWER LIFTGATE
• Press the LIFTGATE buttontwice within five seconds to power open/close the Power
Liftgate. If the button is pressed while the liftgate is being power closed, the liftgate will
reverse to the full open position.
• Also, the Power Liftgate may be closed by pressing the liftgate switch located on the left rear trim panel, near the liftgate opening. Pressing once will close the liftgate only. This
button cannot be used to open the liftgate.
Panic Alarm
• Press the PANIC button once to turn the panic alarm on.
• Wait approximately three seconds and press the button a second time to turn the panicalarm off.
Key Fob
1 — Liftgate 4 — Remote Start
2 — Unlock 5 — Panic
3—Lock
GETTING STARTED
10
Page 13 of 188
REMOTE START
• Press the REMOTE START buttonx2on the Key Fob twice within five seconds. Pressing
the REMOTE START button a third time shuts the engine off.
• To drive the vehicle, with a valid Keyless Enter-N-Go™ Key Fob within 5 ft (1.5m) of the driver's side of the vehicle, grab the front driver door handle to unlock the driver's door
automatically, then press the Start/Stop switch. Or press the UNLOCK button, insert the
Key Fob in the ignition and turn to the ON/RUN position.
• With remote start, the engine will only run for 15 minutes (timeout) unless the ignition is placed in the ON/RUN position.
• The vehicle must be started with the Key Fob after two consecutive timeouts.
WARNING!
• Do not start or run an engine in a closed garage or confined area. Exhaust gas contains Carbon Monoxide (CO) which is odorless and colorless. Carbon Monoxide is
poisonous and can cause you or others to be severely injured or killed when inhaled.
• Keep Key Fob transmitters away from children. Operation of the Remote Start
System, windows, door locks or other controls could cause you and others to be
severely injured or killed.
KEYLESS ENTER-N-GO™
The Keyless Enter-N-Go™ system is an enhancement to the vehicle's Key Fob. This feature
allows you to lock and unlock the vehicle's door(s) and liftgate without having to press the
Key Fob lock or unlock buttons, as well as starting and stopping the vehicle with the press of
a button.
To Unlock From The Driver Or Passenger Side
• With a valid Keyless Enter-N-Go™ Key Foblocated outside the vehicle and within 5 ft
(1.5m) of the driver or passenger side door
handle, grab either front door handle to
unlock the door automatically.
GETTING STARTED
11
Page 14 of 188
To Lock The Vehicle
• Both front door handles have LOCK buttons located on the outside of the handle. Withone of the vehicle's Keyless Enter-N-Go™ Key Fobs located outside the vehicle and within
5 ft (1.5m) of the driver's or passenger front door handle, press the door handle LOCK
button to lock all four doors and liftgate.
• DO NOT grab the door handle, when pressing the door handle lock button. This could unlock the door(s).
NOTE:
• If “Unlock All Doors 1st Press” is programmed all doors will unlock when you grab hold of the front driver's door handle. To select between “Unlock Driver Door 1st Press” and
“Unlock All Doors 1st Press”, refer to the “Customer Programmable Features ” in your
vehicle's Owner's Manual on the DVD.
• If “Unlock All Doors 1st Press” is programmed all doors and liftgate will unlock when you press the liftgate button. If “Unlock Driver Door 1st Press” is programmed only the liftgate
will unlock when you press the liftgate button. To select between “Unlock Driver Door 1st
Press” and “Unlock All Doors 1st Press”, refer to the “Customer Programmable Features ”
in your vehicle's Owner's Manual on the DVD.
• If a Key Fob is detected in the vehicle when locking the vehicle using the power door lock switch, the doors and liftgate will unlock and the horn will chirp three times. On the third
attempt, your Key Fob can be locked inside the vehicle.
• After pressing the Keyless Enter-N-Go™ LOCK button, you must wait two seconds before you can lock or unlock the vehicle using the door handle. This is done to allow you to
check if the vehicle is locked by pulling the door handle, without the vehicle reacting and
unlocking.
• If a Keyless Enter-N-Go™ door handle has not been used for 72 hours, the Keyless Enter-N-Go™ feature for that handle may time out. Pulling the deactivated front door
handle will reactivate the door handle's Keyless Enter-N-Go™ feature.
GETTING STARTED
12
Page 15 of 188
Lock Or Unlock The Liftgate
• To Lock The Liftgate — With a RemoteKeyless Entry (RKE) transmitter within 3 ft
(1.0 m) of the liftgate, press the passive
entry lock button located to the right of
electronic liftgate handle.
•
To Unlock/Enter The Liftgate — The liftgate
passive entry unlock feature is built into the
electronic liftgate handle. With a Remote
Keyless Entry (RKE) transmitter within 3 ft
(1.0 m) of the liftgate, press the electronic
release switch to open the liftgate.
NOTE:
Refer to your Owner's Manual on the DVD for
further information.
Engine Starting/Stopping
Starting
Perform the following starting procedure
with a Remote Keyless Entry (RKE) transmit-
ter inside the vehicle:
1. Rotate the shifter control to PARK.
2. While pressing the brake pedal, press the
ENGINE START/STOP button once. If the
engine fails to start, the starter will disen-
gage automatically after 10 seconds.
3.
To stop the cranking of the engine prior to
the engine starting, press the button again.
Stopping
1. Bring the vehicle to a complete stop.
2. Rotate the shifter control to PARK (P).
3. Press the ENGINE START/STOP button once. The ignition switch will return to the OFF position.
NOTE:
If the transmission is not in PARK and the vehicle is in motion, the ENGINE START/STOP
button must be held for two seconds with the vehicle speed above 5 mph (8 km/h) before
the engine will shut off.
Electronic Liftgate Handle
1 — Electronic Release Switch
2 — Lock Button Location
GETTING STARTED
13
Page 16 of 188
Accessory Positions With Engine Off
NOTE:
The following functions are with the driver’s foot OFF the Brake Pedal (transmission in PARK
or NEUTRAL).
Beginning With The Ignition Switch In The OFF Position:
• Push the ENGINE START/STOP button once to cycle the ignition to the ACC position.
• Push the ENGINE START/STOP button a second time to cycle the ignition to the ON/RUNposition.
• Push the ENGINE START/STOP button a third time to return the ignition to the OFF position.
NOTE:
If the ignition is left in the ACC or ON/RUN
(engine not running) position and the trans-
mission is in PARK, the system will auto-
matically time out after 30 minutes of inac-
tivity and the ignition is returned to the OFF
position.
VEHICLE SECURITY ALARM
This Vehicle Security Alarm monitors the doors, liftgate, and ignition switch for unauthor-
ized operation.
When the alarm is activated, the interior switches for door locks are disabled. The Vehicle
Security Alarm provides both audio and visual signals repeatedly for three minutes. If the
disturbance is still present (driver's door, passenger door, other doors, ignition) after three
minutes, the parking lights and tail lights will flash for an additional 15 minutes.
To Arm
Cycle the Keyless Enter-N-Go™ START/STOP button until the button display indicates that
the vehicle ignition is “OFF”. Push the power door lock switch while the door is open, push
the Key Fob LOCK button, or with one of the Key Fobs located outside the vehicle and within
5 ft (1.5 m) of the driver's and passenger front door handles, push the Keyless Enter-N-Go™
LOCK button located on the door handle.
NOTE:
After pushing the Keyless Enter-N-Go™ LOCK button, you must wait two seconds before you
can lock or unlock the vehicle via the door handle.
Accessory Positions
GETTING STARTED
14
Page 17 of 188
To Disarm
Push the Key Fob UNLOCK button or with one of the Key Fobs located outside the vehicle
and within 5 ft (1.5 m) of the driver's and passenger front door handles, grab the Keyless
Enter-N-Go™ door handle and enter the vehicle, then push the Keyless Enter-N-Go™
START/STOP button (requires at least one valid Key Fob in the vehicle).
SEAT BELT
Be sure everyone in your vehicle is in a seat and using a seat belt properly.
• Position the lap belt across your thighs, below your abdomen. To remove slack in the lapportion, pull up a bit on the shoulder belt. To loosen the lap belt if it is too tight, tilt the
latch plate and pull on the lap belt. A snug belt reduces the risk of sliding under the belt
in a collision.
• Position the shoulder belt on your chest so that it is comfortable and not resting on your neck. The retractor will withdraw any slack in the belt.
A shoulder belt placed behind you will not protect you from injury during a collision. You are
more likely to hit your head in a collision if you do not wear your shoulder belt. The lap and
shoulder belt are meant to be used together.
A belt that is too loose will not protect you properly. In a sudden stop you could move too far
forward, increasing the possibility of injury. Wear your seat belt snugly.
A frayed or torn belt could rip apart in a collision and leave you with no protection. Inspect
the belt system periodically, checking for cuts, frays, or loose parts. Damaged parts must be
replaced immediately. Do not disassemble or modify the system. Seat belt assemblies
must be replaced after a collision if they have been damaged (bent retractor, torn webbing,
etc.).
The seat belts for both front seating positions are equipped with pretensioning devices that
are designed to remove slack from the seat belt in the event of a collision.
A deployed pretensioner or a deployed air bag must be replaced immediately.
WARNING!
In a collision, you and your passengers can suffer much greater injuries if you are not
buckled up properly. You can strike the interior of your vehicle or other passengers, or you
can be thrown out of the vehicle. Always be sure you and others in your vehicle are
buckled up properly.
GETTING STARTED
15
Page 21 of 188
3. If the child restraint has a tether strap, connect it to the top tether anchorage. See belowfor directions to attach a tether anchor.
4. Tighten all of the straps as you push the child restraint rearward and downward into the seat. Remove slack in the straps according to the child restraint manufacturer’s instruc-
tions.
5. Test that the child restraint is installed tightly by pulling back and forth on the child seat at the belt path. It should not move more than 1 inch (25.4 mm) in any direction.
Installing The Child Restraint Using The Vehicle Seat Belts
The seat belt in the passenger seating position are equipped with a Switchable Automatic
Locking Retractor (ALR) that is designed to keep the lap portion of the seat belt tight around
the child restraint. Any seat belt system will loosen with time, so check the belt occasion-
ally, and pull it tight if necessary.
Always use the tether anchor when using the seat belt to install a forward facing child
restraint, up to the recommended weight limit of the child restraint.
To Install A Child Seat Using An ALR:
1. Pull enough of the seat belt webbing from the retractor to pass it through the belt path ofthe child restraint. Do not twist the belt webbing in the belt path.
2. Slide the latch plate into the buckle until you hear a “click.”
3. Pull on the webbing to make the lap portion tight against the child seat.
4. To lock the seat belt, pull down on the shoulder part of the belt until you have pulled all the seat belt webbing out of the retractor. Then, allow the webbing to retract back into the
retractor. As the webbing retracts, you will hear a clicking sound. This means the seat
belt is now in the Automatic Locking mode.
5. Try to pull the webbing out of the retractor. If it is locked, you should not be able to pull out any webbing. If the retractor is not locked, repeat the last step.
6. Finally, pull up on any extra webbing to tighten the lap portion around the child restraint while you push the child restraint rearward and downward into the vehicle seat.
7. If the child restraint has a top tether strap and the seating position has a top tether anchorage, connect the tether strap to the anchorage and tighten the tether strap. See
below for directions to attach a tether anchor.
8. Test that the child restraint is installed tightly by pulling back and forth on the child seat at the belt path. It should not move more than 1 inch (25.4 mm) in any direction.
GETTING STARTED
19