check engine light DODGE DURANGO 2018 User Guide
[x] Cancel search | Manufacturer: DODGE, Model Year: 2018, Model line: DURANGO, Model: DODGE DURANGO 2018Pages: 592, PDF Size: 6.57 MB
Page 277 of 592
When parking on a level surface, you may shift the
transmission into PARK first, and then apply the parking
brake.
When parking on a hill, apply the parking brake before
shifting the transmission to PARK. As an added precau-
tion, turn the front wheels toward the curb on a downhill
grade and away from the curb on an uphill grade.
NOTE:On vehicles equipped with the electronically
shifted transfer case, ensure that the transfer case is in
AWD AUTO or LOW RANGE position on the AWD
Control Switch. Ensure that the NEUTRAL position light is
NOT illuminated.
When exiting the vehicle, always:
• Apply the parking brake.
• Shift the transmission into PARK.
• Turn the ignition OFF.
• Remove the key fob from the vehicle.WARNING!
•Never use the PARK position as a substitute for the
parking brake. Always apply the parking brake fully
when exiting the vehicle to guard against vehicle
movement and possible injury or damage.
• Your vehicle could move and injure you and others if
it is not in PARK. Check by trying to move the
transmission gear selector out of PARK with the
brake pedal released. Make sure the transmission is
in PARK before exiting the vehicle.
• The transmission may not engage PARK if the ve-
hicle is moving. Always bring the vehicle to a
complete stop before shifting to PARK, and verify
that the transmission gear position indicator solidly
indicates PARK (P) without blinking. Ensure that the
vehicle is completely stopped, and the PARK posi-
tion is properly indicated, before exiting the vehicle.
• It is dangerous to shift out of PARK or NEUTRAL if
the engine speed is higher than idle speed. If your
foot is not firmly pressing the brake pedal, the
vehicle could accelerate quickly forward or in re-
verse. You could lose control of the vehicle and hit
someone or something. Only shift into gear when the
(Continued)
6
STARTING AND OPERATING 275
Page 291 of 592
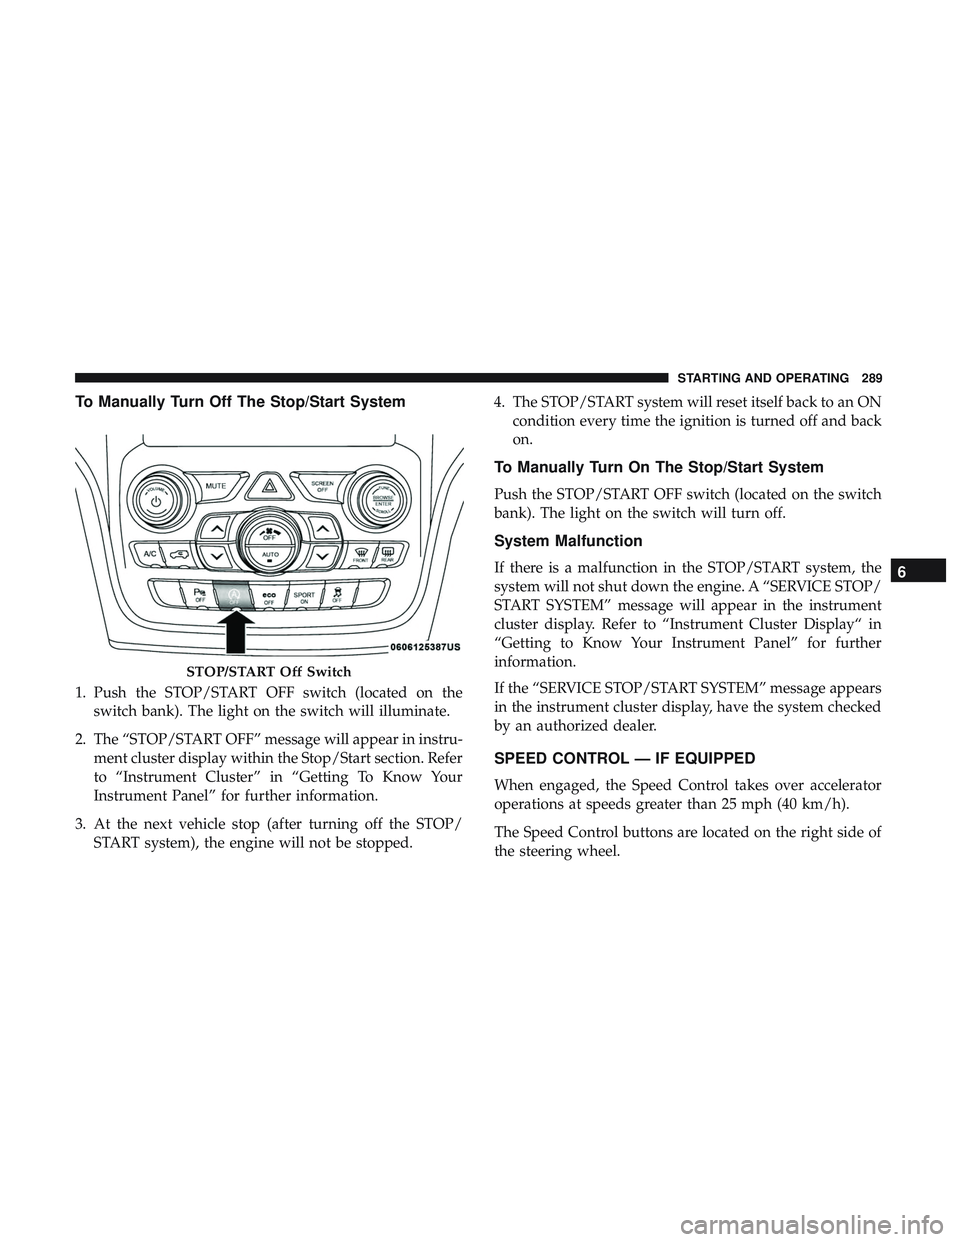
To Manually Turn Off The Stop/Start System
1. Push the STOP/START OFF switch (located on theswitch bank). The light on the switch will illuminate.
2. The “STOP/START OFF” message will appear in instru- ment cluster display within the Stop/Start section. Refer
to “Instrument Cluster” in “Getting To Know Your
Instrument Panel” for further information.
3. At the next vehicle stop (after turning off the STOP/ START system), the engine will not be stopped. 4. The STOP/START system will reset itself back to an ON
condition every time the ignition is turned off and back
on.
To Manually Turn On The Stop/Start System
Push the STOP/START OFF switch (located on the switch
bank). The light on the switch will turn off.
System Malfunction
If there is a malfunction in the STOP/START system, the
system will not shut down the engine. A “SERVICE STOP/
START SYSTEM” message will appear in the instrument
cluster display. Refer to “Instrument Cluster Display“ in
“Getting to Know Your Instrument Panel” for further
information.
If the “SERVICE STOP/START SYSTEM” message appears
in the instrument cluster display, have the system checked
by an authorized dealer.
SPEED CONTROL — IF EQUIPPED
When engaged, the Speed Control takes over accelerator
operations at speeds greater than 25 mph (40 km/h).
The Speed Control buttons are located on the right side of
the steering wheel.
STOP/START Off Switch
6
STARTING AND OPERATING 289
Page 411 of 592
SCHEDULED SERVICING
Your vehicle is equipped with an automatic oil change
indicator system. The oil change indicator system will
remind you that it is time to take your vehicle in for
scheduled maintenance.
Based on engine operation conditions, the oil change
indicator message will illuminate. This means that service
is required for your vehicle. Operating conditions such as
frequent short-trips, trailer tow, extremely hot or cold
ambient temperatures, and E85 fuel usage will influence
when the “Oil Change Required” message is displayed.
Severe Operating Conditions can cause the change oil
message to illuminate as early as 3,500 miles (5,600 km)
since last reset. Have your vehicle serviced as soon as
possible, within the next 500 miles (800 km).
Your authorized dealer will reset the oil change indicator
message after completing the scheduled oil change.
NOTE:Under no circumstances should oil change inter-
vals exceed 10,000 miles (16,000 km), twelve months or 350
hours of engine run time, whichever comes first. The 350
hours of engine run or idle time is generally only a concern
for fleet customers. Severe Duty All Models
Change Engine Oil at 4,000 miles (6,500 km) or 350 hours of
engine run time if the vehicle is operated in a dusty and off
road environment or is operated predominately at idle or
only very low engine RPM’s. This type of vehicle use is
considered Severe Duty.
Once A Month Or Before A Long Trip:
•
Check engine oil level
• Check windshield washer fluid level
• Check the tire inflation pressures and look for unusual
wear or damage
• Check the fluid levels of the coolant reservoir, brake
master cylinder and fill as needed.
• Check function of all interior and exterior lights
8
SERVICING AND MAINTENANCE 409
Page 418 of 592
Checking Oil Level
To assure proper lubrication of your vehicle’s engine, the
engine oil must be maintained at the correct level. Check
the oil level at regular intervals, such as every fuel stop.
The best time to check the engine oil level is about five
minutes after a fully warmed up engine is shut off.
Checking the oil while the vehicle is on level ground will
improve the accuracy of the oil level readings. Always
maintain the oil level within the SAFE zone on the dipstick.
Adding one quart of oil when the reading is at the bottom
of the SAFE zone will result in a reading at the top of the
safe zone on these engines.
CAUTION!
Overfilling or underfilling will cause oil aeration or
loss of oil pressure. This could damage your engine.
Adding Washer Fluid
The instrument cluster display will indicate when the
washer fluid level is low. When the sensor detects a low
fluid level, the windshield will light on the vehicle graphic
outline and the “WASHER FLUID LOW” message will be
displayed.The fluid reservoir for the windshield washers and the rear
window washer is shared. The fluid reservoir is located in
the engine compartment, be sure to check the fluid level at
regular intervals. Fill the reservoir with windshield washer
solvent only (not radiator antifreeze). When refilling the
washer fluid reservoir, take some washer fluid and apply it
to a cloth or towel and wipe clean the wiper blades, this
will help blade performance. To prevent freeze-up of your
windshield washer system in cold weather, select a solu-
tion or mixture that meets or exceeds the temperature
range of your climate. This rating information can be found
on most washer fluid containers.
WARNING!
Commercially available windshield washer solvents
are flammable. They could ignite and burn you. Care
must be exercised when filling or working around the
washer solution.
Maintenance-Free Battery
Your vehicle is equipped with a maintenance-free battery.
You will never have to add water, nor is periodic mainte-
nance required.
416 SERVICING AND MAINTENANCE
Page 439 of 592
WARNING!
Riding the brakes can lead to brake failure and possi-
bly a collision. Driving with your foot resting or riding
on the brake pedal can result in abnormally high brake
temperatures, excessive lining wear, and possible
brake damage. You would not have your full braking
capacity in an emergency.
Fluid Level Check — Brake Master Cylinder
The fluid level of the master cylinder should be checked
whenever the vehicle is serviced, or immediately if the
brake system warning light is on. If necessary, add fluid to
bring level within the designated marks on the side of the
reservoir of the brake master cylinder. Be sure to clean the
top of the master cylinder area before removing cap. With
disc brakes, fluid level can be expected to fall as the brake
pads wear. Brake fluid level should be checked when pads
are replaced. If the brake fluid is abnormally low, check the
system for leaks.
Refer to “Fluids And Lubricants” in “Technical Specifica-
tions” for further information.
WARNING!
•Use only manufacturer’s recommended brake fluid.
Refer to “Fluids And Lubricants” in “Technical
Specifications” for further information. Using the
wrong type of brake fluid can severely damage your
brake system and/or impair its performance. The
proper type of brake fluid for your vehicle is also
identified on the original factory installed hydraulic
master cylinder reservoir.
• To avoid contamination from foreign matter or mois-
ture, use only new brake fluid or fluid that has been
in a tightly closed container. Keep the master cylin-
der reservoir cap secured at all times. Brake fluid in
a open container absorbs moisture from the air
resulting in a lower boiling point. This may cause it
to boil unexpectedly during hard or prolonged brak-
ing, resulting in sudden brake failure. This could
result in a collision.
• Overfilling the brake fluid reservoir can result in
spilling brake fluid on hot engine parts, causing the
brake fluid to catch fire. Brake fluid can also damage
painted and vinyl surfaces, care should be taken to
avoid its contact with these surfaces.
(Continued)
8
SERVICING AND MAINTENANCE 437
Page 508 of 592
System Information
After pressing the “System Information” button on the
touchscreen, the following settings will be available:
Setting NameSelectable Options
Software License System Software Information Screen
NOTE:
When the “System Information” feature is selected, a “System Software Information” screen will appear, displaying
the system software version.
Customer Programmable Features — Uconnect
4C/4C NAV Settings
Press the “Apps” button, then press the “Settings”
button on the touchscreen to display the menu setting
screen. In this mode the Uconnect system allows you to
access programmable features that may be equipped
such as Display, Units, Voice, Clock, Safety & Driving
Assistance, Lights, Doors & Locks, Auto-On Comfort,
Engine Off Options, Audio, Phone/Bluetooth, SiriusXM
Setup, Restore Settings, Clear Personal Data, and Sys-
tem Information.
NOTE: Depending on the vehicles options, feature settings
may vary. When making a selection, press the button on the touch-
screen to enter the desired mode. Once in the desired
mode, press and release the preferred setting “option” until
a check-mark appears next to the setting, showing that
setting has been selected. Once the setting is complete,
either press the “Back” Arrow button on the touchscreen to
return to the previous menu, or press the “X” button on the
touchscreen to close out of the settings screen. Pressing the
“Up” or “Down” Arrow button on the right side of the
screen will allow you to toggle up or down through the
available settings.
506 MULTIMEDIA
Page 577 of 592
Anti-Lock Warning Light.....................163
Apple CarPlay ............................564
Arming System Security Alarm ...........................29
Assist, Hill Start .......................... .174
Audio Systems (Radio) .......................485
Auto Down Power Windows ..................103
Automatic Headlights ........................74
Automatic High Beams .......................74
Automatic Temperature Control (ATC) ............98
Automatic Transmission ..................262, 273
Adding Fluid .......................... .439
Fluid And Filter Change ...................439
Fluid Change .......................... .439
Fluid Level Check .....................438, 439
Fluid Type ..........................438, 481
Special Additives ........................ .438
Automatic Transmission Limp Home Mode ........278
Auxiliary Electrical Outlet (Power Outlet) .........128
Auxiliary Power Outlet ..................... .128
Axle Fluid ...............................481
Battery ...............................157, 416
Charging System Light ....................157
Keyless Key Fob Replacement ................19Belts, Seat
............................... .253
Blind Spot Monitoring .......................181
Body Mechanism Lubrication ..................425
B-Pillar Location .......................... .446
Brake Assist System ........................ .174
Brake Control System, Electronic ................173
Brake Fluid .......................... .437, 481
Brake System ..........................436, 471
Anti-Lock (ABS) ........................ .471
Fluid Check ............................437
Master Cylinder ........................ .437
Parking ...............................268
Warning Light .......................... .156
Brake/T ransmission
Interlock..................272
Bulb Replacement .......................372, 373
Bulbs, Light ............................. .256
Camera, Rear ............................ .337
Capacities, Fluid .......................... .477
Caps, Filler Oil (Engine) ........................ .414, 419
Radiator (Coolant Pressure) .................435
Carbon Monoxide Warning ................253, 476
Cargo Area Cover .......................111,112
Cargo Compartment .........................111
12
INDEX 575
Page 578 of 592
Light.................................111
Luggage Carrier ........................ .133
Cargo Light ...............................111
Cargo Tie-Downs ...........................112
Car Washes ...............................465
Cellular Phone ............................547
Center High Mounted Stop Light ...............376
Chains, Tire ............................. .461
Changing A Flat Tire ........................441
Chart, Tire Sizing .......................... .442
Check Engine Light (Malfunction Indicator Light). . . .168
Checking Your Vehicle For Safety ...............252
Checks, Safety ............................ .252
Child Restraint ............................226
Child Restraints Booster Seats ............................230
Child Seat Installation .....................246
How To Stow An unused ALR Seat Belt ........242
Infant And Child Restraints .................228
Locating The LATCH Anchorages .............236
Lower Anchors And Tethers For Children .......232
Older Children And Child Restraints ...........229
Seating Positions ........................ .231
Child Safety Locks ..........................39
Clean Air Gasoline ........................ .474Cleaning
Wheels ............................... .460
Climate Control ............................85
Automatic ..............................86
Cold Weather Operation ..................... .267
Compact Disc (CD) Maintenance ................566
Compact Spare Tire ........................ .458
Contract, Service .......................... .570
Cooling Pressure Cap (Radiator Cap) ............435
Cooling System ............................432
Adding Coolant (Antifreeze) .................434
Coolant Level .......................... .435
Cooling Capacity ........................ .477
Disposal Of
Used Coolant ..................435
Drain, Flush, And Refill ....................433
Inspection ..........................432, 435
Points To Remember ..................... .436
Pressure Cap ............................435
Radiator Cap .......................... .435
Selection Of Coolant (Antifreeze) .......433, 477, 479
Corrosion Protection ........................464
Cruise Control (Speed Control) ..............289, 293
Cruise Light .......................... .165, 166
Cupholders .......................... .125, 126
Customer Assistance ........................568
576 INDEX
Page 580 of 592
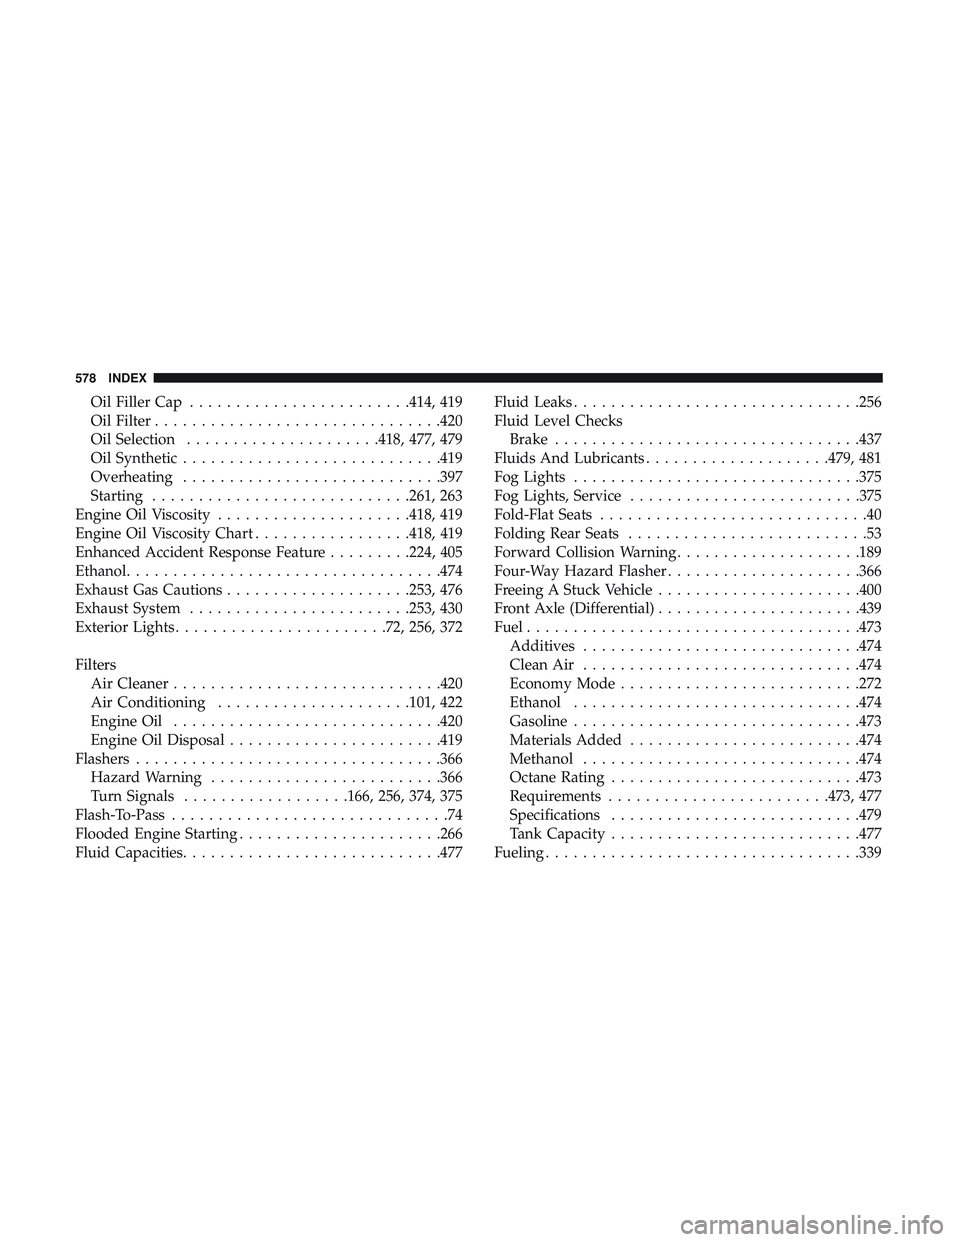
Oil Filler Cap........................414, 419
Oil Filter ...............................420
Oil Selection .....................418, 477, 479
Oil Synthetic ............................419
Overheating ............................397
Starting ............................261, 263
Engine Oil Viscosity .....................418, 419
Engine Oil Viscosity Chart .................418, 419
Enhanced Accident Response Feature .........224, 405
Ethanol ................................. .474
Exhaust Gas Cautions ....................253, 476
Exhaust System ........................253, 430
Exterior Lights .......................72, 256, 372
Filters Air Cleaner ............................ .420
Air Conditioning .....................101, 422
Engine Oil ............................ .420
Engine Oil Disposal .......................419
Flashers .................................366
Hazard Warning ........................ .366
Turn Signals ..................166, 256, 374, 375
Flash-To-Pass ..............................74
Flooded Engine Starting ..................... .266
Fluid Capacities ............................477 Fluid Leaks
...............................256
Fluid Level Checks Brake .................................437
Fluids And Lubricants ....................479, 481
Fog Lights ...............................375
Fog Lights, Service ........................ .375
Fold-Flat Seats .............................40
Folding Rear Seats ..........................53
Forward Collision Warning ....................189
Four-Way Hazard Flasher .....................366
Freeing A Stuck Vehicle ..................... .400
Front Axle (Differential) ..................... .439
Fuel ................................... .473
Additives ............................. .474
Clean Air............................. .474
Economy
Mode..........................272
Ethanol ...............................474
Gasoline ...............................473
Materials Added ........................ .474
Methanol ............................. .474
Octane Rating .......................... .473
Requirements ........................473, 477
Specifications .......................... .479
Tank Capacity .......................... .477
Fueling ................................. .339
578 INDEX
Page 583 of 592

Headlights..........................373, 374
Headlights On With Wipers ..................75
Interior ................................77
Malfunction Indicator (Check Engine) ..........160
Park ................................. .165
Passing ................................74
Reading ................................78
Rear Servicing .......................... .375
Rear Tail Lamps ........................ .375
Seat Belt Reminder .......................155
Security Alarm ..........................160
Service ............................ .372, 373
Side Marker ............................375
Traction Control ........................ .179
Turn Signals ................72, 166, 256, 374, 375
Vanity Mirror ............................71
Warning Instrument Cluster Descriptions . . . .158, 166
Loading Vehicle ............................342
Tires................................. .446
Load Shed Battery Saver Mode .................153
Load Shed Battery Saver On ...................153
Load Shed Electrical Load Reduction .............153
Load Shed Intelligent Battery Sensor .............153
Locks Child Protection ..........................39 Manual
................................31
Power Door .............................32
Lubrication, Body ..........................425
Luggage Carrier .......................... .133
Lug Nuts ............................... .471
Maintenance Free Battery .....................416
Maintenance Schedule .......................409
Malfunction Indicator Light (Check Engine) . . . .160, 168
Manual, Service ............................572
Memory Feature (Memory Seats) ..............40, 47
Memory Seat ............................40, 47
Memory Seats And Radio ...................40, 47
Methanol ............................... .474
Mirrors .................................. 6
8
Electric Remote ...........................70
Exterior Folding ..........................69
Heated .................................71
Outside ................................69
Rearview ............................68, 366
Vanity .................................71
Modifications/Alterations Vehicle .................................6
Monitor, Tire Pressure System ..................192
Mopar Parts ............................. .571
12
INDEX 581