headrest DODGE DURANGO 2018 Owners Manual
[x] Cancel search | Manufacturer: DODGE, Model Year: 2018, Model line: DURANGO, Model: DODGE DURANGO 2018Pages: 592, PDF Size: 6.57 MB
Page 66 of 592

WARNING!(Continued)
re-installation instructions above prior to operating
the vehicle or occupying a seat.
• Sitting in a seat with the head restraint in its lowered
position could result in serious injury or death in a
collision. Always make sure the outboard head re-
straints are in their upright positions when the seat is
to be occupied. NOTE:
For proper routing of a Child Seat Tether, refer to
“Occupant Restraints” in “Safety” for further information.
WARNING!
• A loose head restraint thrown forward in a collision
or hard stop could cause serious injury or death to
occupants of the vehicle. Always securely stow re-
moved head restraints in a location outside the
occupant compartment.
• ALL the head restraints MUST be reinstalled in the
vehicle to properly protect the occupants. Follow the
re-installation instructions above prior to operating
the vehicle or occupying a seat.
Power Folding Third Row Head Restraints
For improved visibility when in reverse, the third row head
restraints can be folded using the Uconnect System.
Press the “Controls” button located on the bottom of the
Uconnect display.
Press the Headrest Fold button
to power fold the third
row head restraints.
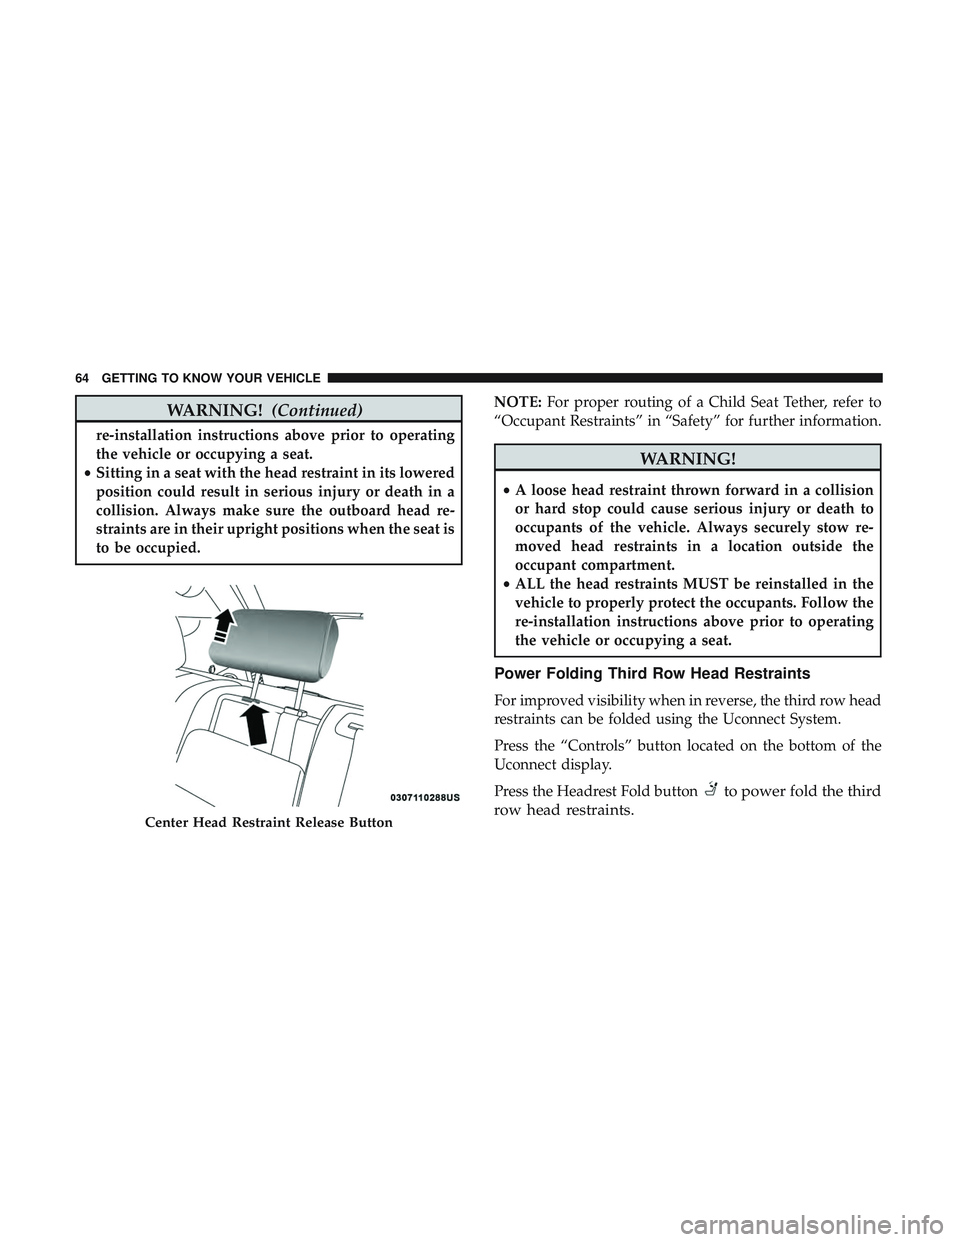
Center Head Restraint Release Button
64 GETTING TO KNOW YOUR VEHICLE
Page 67 of 592

NOTE:
•The head restraints can only be folded downward using
the Headrest Fold button. The head restraints must be
raised manually when occupying the third row.
• Do not fold if there are passengers seated in the third
row seats.
STEERING WHEEL
Manual Tilt/Telescoping Steering Column — If
Equipped
This feature allows you to tilt the steering column upward
or downward. It also allows you to lengthen or shorten the
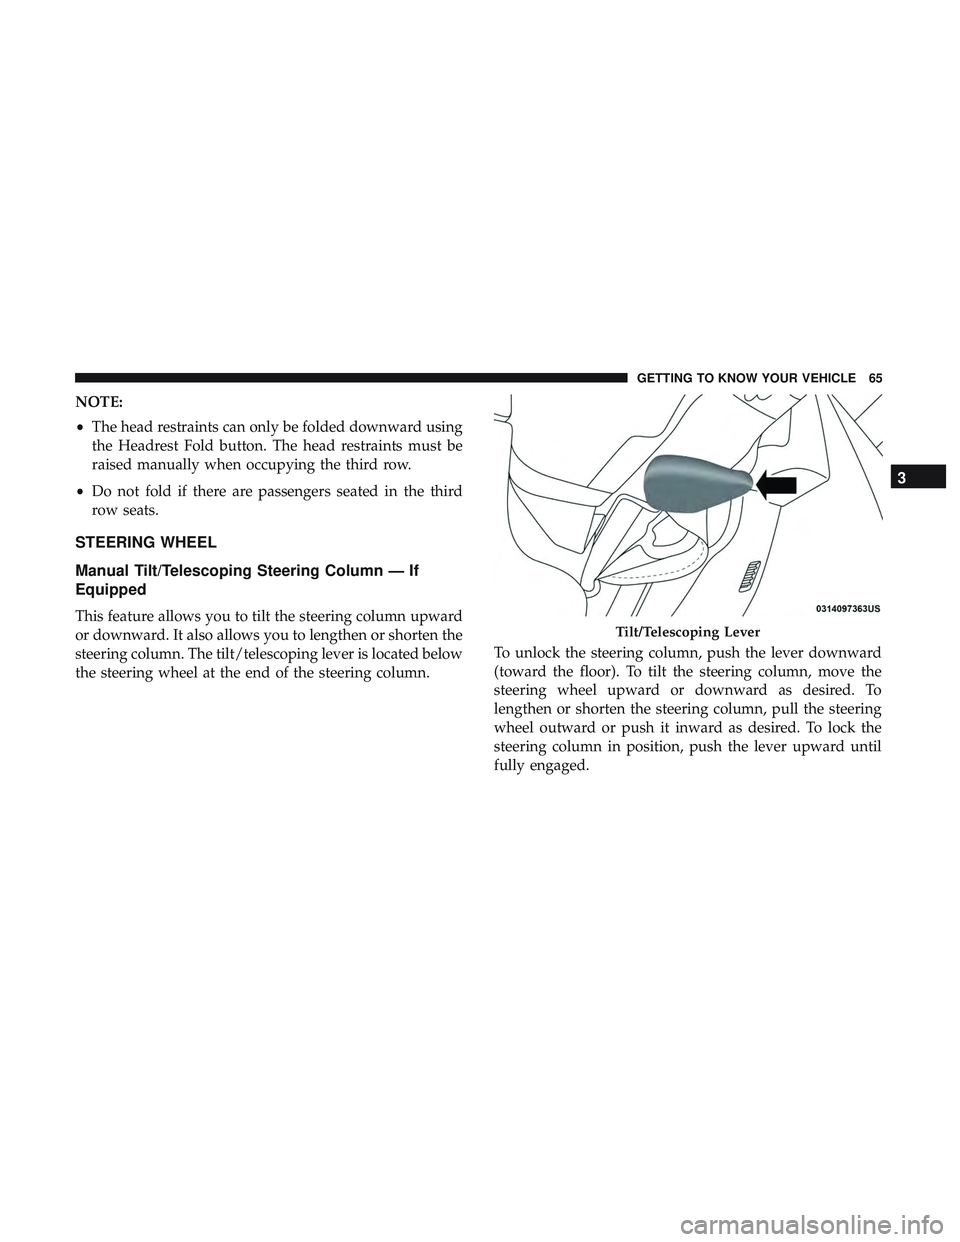
steering column. The tilt/telescoping lever is located below
the steering wheel at the end of the steering column. To unlock the steering column, push the lever downward
(toward the floor). To tilt the steering column, move the
steering wheel upward or downward as desired. To
lengthen or shorten the steering column, pull the steering
wheel outward or push it inward as desired. To lock the
steering column in position, push the lever upward until
fully engaged.Tilt/Telescoping Lever
3
GETTING TO KNOW YOUR VEHICLE 65
Page 252 of 592

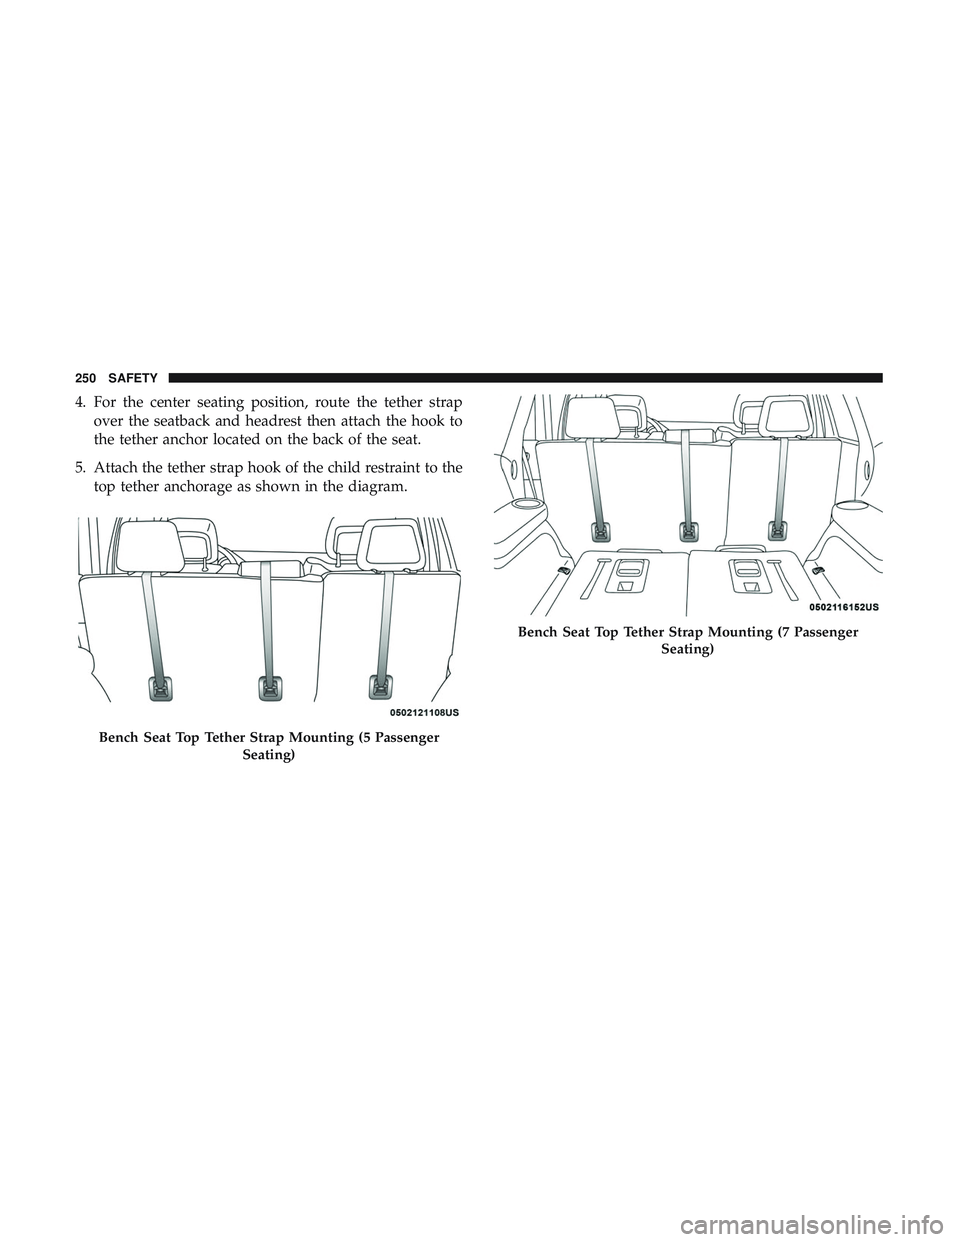
4. For the center seating position, route the tether strapover the seatback and headrest then attach the hook to
the tether anchor located on the back of the seat.
5. Attach the tether strap hook of the child restraint to the top tether anchorage as shown in the diagram.
Bench Seat Top Tether Strap Mounting (5 Passenger
Seating)
Bench Seat Top Tether Strap Mounting (7 PassengerSeating)
250 SAFETY
Page 380 of 592

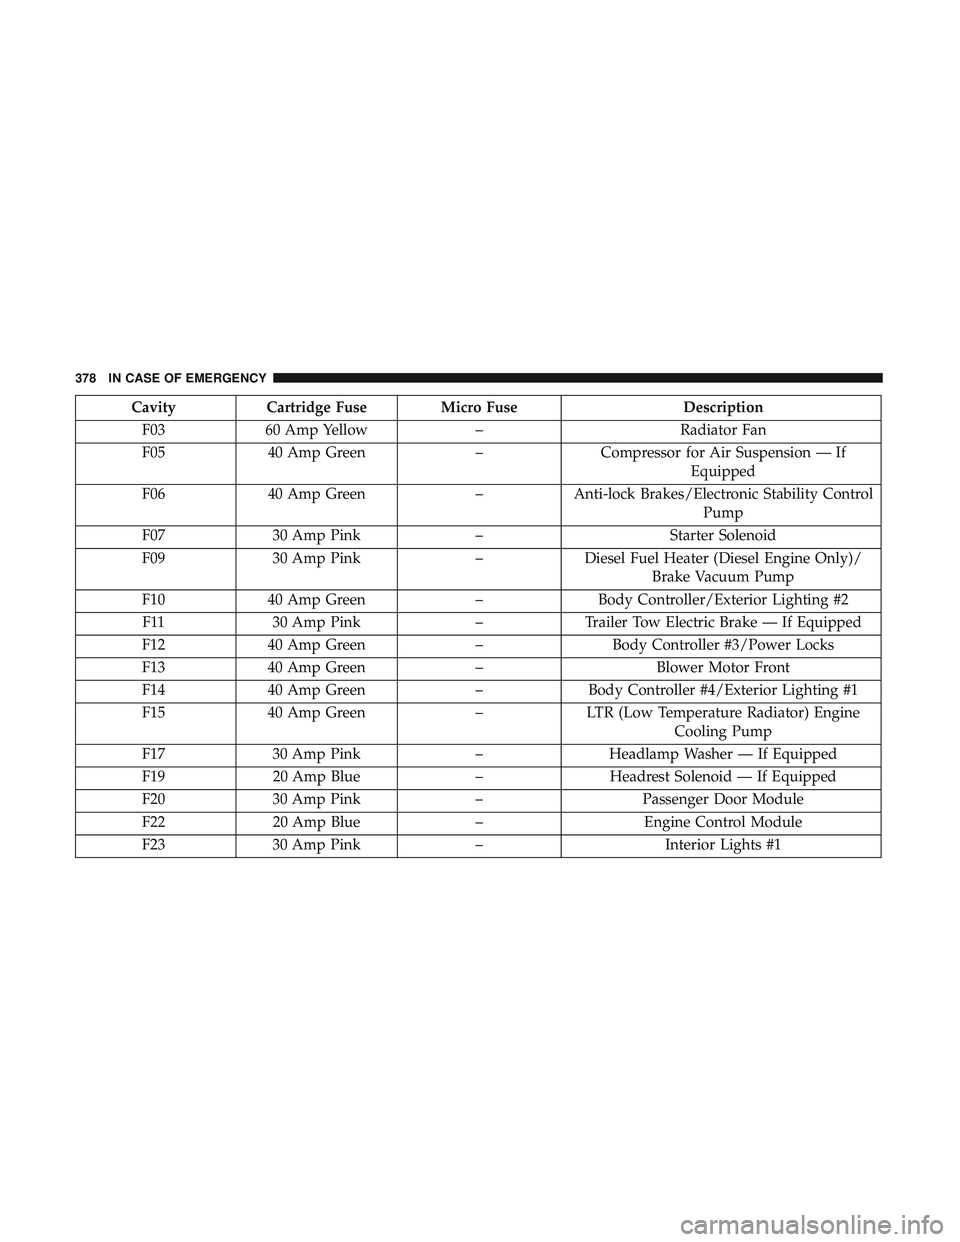
CavityCartridge Fuse Micro Fuse Description
F03 60 Amp Yellow –Radiator Fan
F05 40 Amp Green –Compressor for Air Suspension — If
Equipped
F06 40 Amp Green –Anti-lock Brakes/Electronic Stability Control
Pump
F07 30 Amp Pink –Starter Solenoid
F09 30 Amp Pink –Diesel Fuel Heater (Diesel Engine Only)/
Brake Vacuum Pump
F10 40 Amp Green –Body Controller/Exterior Lighting #2
F11 30 Amp Pink –Trailer Tow Electric Brake — If Equipped
F12 40 Amp Green –Body Controller #3/Power Locks
F13 40 Amp Green –Blower Motor Front
F14 40 Amp Green –Body Controller #4/Exterior Lighting #1
F15 40 Amp Green –LTR (Low Temperature Radiator) Engine
Cooling Pump
F17 30 Amp Pink –Headlamp Washer — If Equipped
F19 20 Amp Blue –Headrest Solenoid — If Equipped
F20 30 Amp Pink –Passenger Door Module
F22 20 Amp Blue –Engine Control Module
F23 30 Amp Pink –Interior Lights #1
378 IN CASE OF EMERGENCY