ignition DODGE DURANGO 2020 Owner's Manual
[x] Cancel search | Manufacturer: DODGE, Model Year: 2020, Model line: DURANGO, Model: DODGE DURANGO 2020Pages: 464, PDF Size: 22.14 MB
Page 53 of 464

GETTING TO KNOW YOUR VEHICLE51
NOTE:
Your vehicle is equipped with plastic head -
light and fog light (if equipped) lenses that
are lighter and less susceptible to stone
breakage than glass lights. Plastic is not as
scratch resistant as glass and therefore
different lens cleaning procedures must be
followed.
To minimize the possibility of scratching the
lenses and reducing light output, avoid
wiping with a dry cloth. To remove road dirt,
wash with a mild soap solution followed by
rinsing.
DAYTIME RUNNING LIGHTS (DRLS) —
I
F EQUIPPED
The Daytime Running Lights (DRLs) come on
whenever the engine is running, and the
transmission is not in the PARK position. The lights will remain on until the ignition is
placed in the OFF or ACC position, or the parking
brake is engaged. The headlight switch must be
used for normal night time driving.
NOTE:
If allowed by law in the country in which the
vehicle was purchased, the Daytime Running
Lights can be turned on and off using the
Uconnect system, refer to “Uconnect
Settings” in “Multimedia” for further informa
-
tion.
On some vehicles, the Daytime Running
Lights may deactivate, or reduce intensity, on
one side of the vehicle (when a turn signal is
activated on that side), or on both sides of
the vehicle (when the hazard warning lights
are activated).
HIGH/LOW BEAM SWITCH
Push the multifunction lever toward the
instrument panel to switch the headlights to
high beams. Pulling the multifunction back
toward the steering wheel will turn the low
beams back on, or shut the high beams off.
AUTOMATIC HIGH BEAM — IF EQUIPPED
The Automatic High Beam Headlamp Control
system provides increased forward lighting at
night by automating high beam control through
the use of a digital camera mounted on the
inside rearview mirror. This camera detects
vehicle specific light and automatically switches
from high beams to low beams until the
approaching vehicle is out of view.
NOTE:
The Automatic High Beam Headlamp Control
can be turned on or off by selecting or dese -
lecting “Auto High Beam” within your Ucon -
nect settings, as well as turning the headlight
switch to the AUTO position. Refer to “Ucon -
nect Settings” in “Multimedia” for further
information.
Broken, muddy, or obstructed headlights and
taillights of vehicles in the field of view will
cause headlights to remain on longer (closer
to the vehicle). Also, dirt, film, and other
obstructions on the windshield or camera
lens will cause the system to function
improperly.
CAUTION!
Do not use abrasive cleaning components,
solvents, steel wool or other abrasive
materials to clean the lenses.
2
20_WD_OM_EN_USC_t.book Page 51
Page 54 of 464

52GETTING TO KNOW YOUR VEHICLE
If the windshield or Automatic High Beam
Headlamp Control mirror is replaced, the mirror
must be re-aimed to ensure proper
performance. See a local authorized dealer.
FLASH-TO-PASS
You can signal another vehicle with your
headlights by lightly pulling the multifunction
lever toward you. This will cause the high beam
headlights to turn on, and remain on, until the
lever is released.
AUTOMATIC HEADLIGHTS
This system automatically turns the headlights
on or off according to ambient light levels. To
turn the system on, rotate the headlight switch
counterclockwise to the AUTO position. When
the system is on, the headlight time delay
feature is also on. This means the headlights
will stay on for up to 90 seconds after you place
the ignition into the OFF position. The headlight
time delay can be programmed 0/30/60/
90 seconds.
Refer to “Uconnect Settings” in “Multimedia”
for further information.
To turn the automatic system off, move the
headlight switch out of the AUTO position. NOTE:
The engine must be running before the head
-
lights will come on in the automatic mode.
PARKING LIGHTS AND PANEL LIGHTS
To turn on the parking lights and instrument
panel lights, rotate the headlight switch
clockwise. To turn off the parking lights, rotate
the headlight switch back to the O (off) position.
HEADLIGHTS ON AUTOMATICALLY WITH
W
IPERS
If your vehicle is equipped with Automatic
Headlights, it also has this
customer-programmable feature. When your
headlights are in the automatic mode and the
engine is running, they will automatically turn
on when the wiper system is on. This feature is
programmable through the Uconnect system.
Refer to “Uconnect Settings” in “Multimedia”
for further information.
NOTE:
When your headlights come on during the
daytime, the vehicle will monitor outside bright -
ness and decide if the instrument panel needs
to be dimmed or not. Refer to “Interior Lights” in
this chapter for further information.
HEADLIGHT DELAY
To aid in your exit, your vehicle is equipped with
a headlight delay that will leave the headlights
on for approximately 90 seconds. This delay is
initiated when the ignition is placed in the OFF
position while the headlight switch is on, and
then the headlight switch is cycled off.
Headlight delay can be canceled by either
turning the headlight switch on then off, or by
placing the ignition in the ON position.
NOTE:
The headlight delay time is programmable
through the Uconnect System. Refer to “Ucon -
nect Settings” in “Multimedia” for further infor -
mation.
LIGHTS-ON REMINDER
If the headlights, parking lights, or cargo lights
are left on after the ignition is placed in the OFF
position, a chime will sound when the driver’s
door is opened.
20_WD_OM_EN_USC_t.book Page 52
Page 55 of 464

GETTING TO KNOW YOUR VEHICLE53
FOG LIGHTS — IF EQUIPPED
The fog lights are turned on by rotating the
headlight switch to the parking light or headlight
position and pushing in the headlight rotary
control.
Fog Light Operation
The fog lights will operate only when the parking
lights are on or when the vehicle headlights are
on low beam. An indicator light located in the
instrument cluster display will illuminate when
the fog lights are on. The fog lights will turn off
when the switch is pushed a second time, when
the headlight switch is rotated to the off
position, or the high beam is selected.
TURN SIGNALS
Move the multifunction lever up or down and
the arrows on each side of the instrument
cluster will flash to show proper operation of the
front and rear turn signal lights.
NOTE:
If either light remains on and does not flash, or
there is a very fast flash rate, check for a defec -
tive outside light bulb. If an indicator fails to
light when the lever is moved, it would suggest
that the indicator bulb is defective.
LANE CHANGE ASSIST — IF EQUIPPED
Tap the multifunction lever up or down once,
without moving beyond the detent, and the turn
signal (right or left) will flash three times then
automatically turn off.
BATTERY SAVER
To protect the life of your vehicle’s battery, load
shedding is provided for both the interior and
exterior lights.
If the ignition is placed in the OFF position and
any door is left ajar for 10 minutes or the
dimmer control is rotated all the way up to the
dome on position for 10 minutes, the interior
lights will automatically turn off.
NOTE:
Battery saver mode is canceled if the ignition is
in the ON position.
If the headlights remain on while the ignition is
placed in the OFF position, the exterior lights will
automatically turn off after eight minutes. If the
headlights are turned on and left on for eight
minutes while the ignition is in the OFF position,
the exterior lights will automatically turn off.
2
20_WD_OM_EN_USC_t.book Page 53
Page 59 of 464

GETTING TO KNOW YOUR VEHICLE57
RAIN SENSING WIPERS — IF EQUIPPED
This feature senses rain or snowfall on the
windshield and automatically activates the
wipers for the driver. The feature is especially
useful for road splash or overspray from the
windshield washers of the vehicle ahead.
Rotate the end of the multifunction lever to one
of four settings to activate this feature.
The sensitivity of the system can be adjusted
with the multifunction lever. Wiper delay
position one is the least sensitive, and wiper
delay position four is the most sensitive.
NOTE:
Wiper delay position three should be used for
normal rain conditions.
Settings one and two can be used if the driver
desires less wiper sensitivity. Setting four can
be used if the driver desires more sensitivity.
Place the wiper switch in the OFF position when
not using the system. NOTE:The Rain Sensing feature will not operate
when the wiper switch is in the low or
high-speed position.
The Rain Sensing feature may not function
properly when ice, or dried salt water is
present on the windshield.
Use of Rain-X or products containing wax or
silicone may reduce Rain Sensing perfor
-
mance.
The Rain Sensing feature can be turned on
and off using the Uconnect System, refer to
“Uconnect Settings” in “Multimedia” for
further information. The Rain Sensing system has protection
features for the wiper blades and arms, and will
not operate under the following conditions:
Low Ambient Temperature
— When the igni-
tion is first placed in the ON position, the Rain
Sensing system will not operate until the
wiper switch is moved, vehicle speed is
greater than 3 mph (5 km/h), or the outside
temperature is greater than 32°F (0°C).
Transmission In NEUTRAL Position — When
the ignition is in the ON position, and the gear
selector is in NEUTRAL, the Rain Sensing
system will not operate until the wiper switch
is moved, vehicle speed is greater than
3 mph (5 km/h), or the gear selector is
moved out of NEUTRAL.
2
20_WD_OM_EN_USC_t.book Page 57
Page 60 of 464
58GETTING TO KNOW YOUR VEHICLE
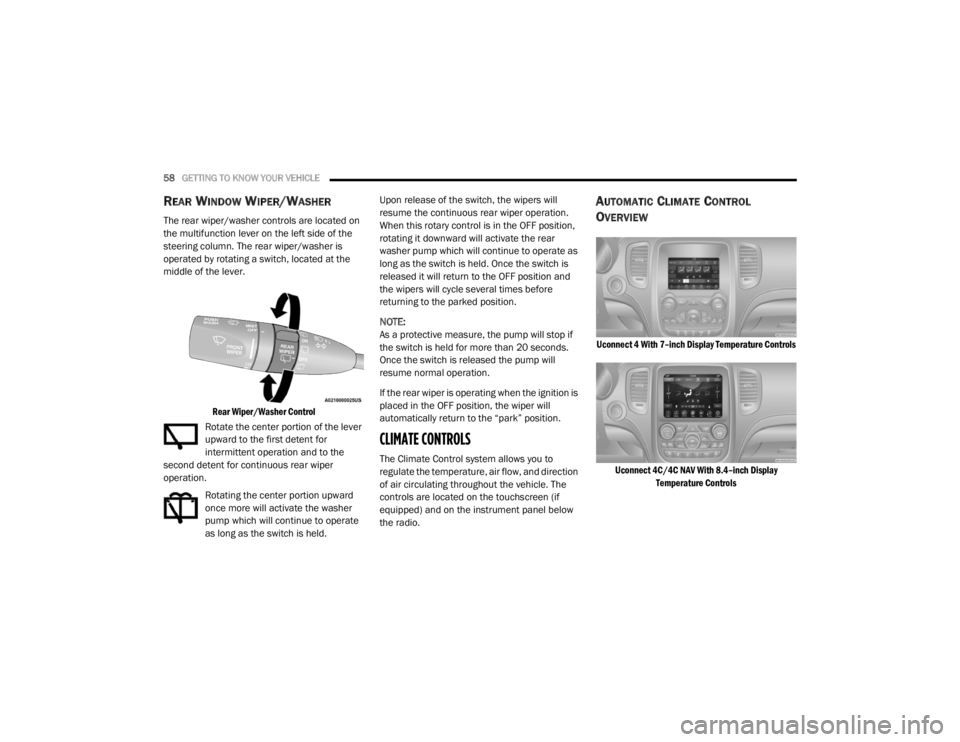
REAR WINDOW WIPER/WASHER
The rear wiper/washer controls are located on
the multifunction lever on the left side of the
steering column. The rear wiper/washer is
operated by rotating a switch, located at the
middle of the lever.
Rear Wiper/Washer Control
Rotate the center portion of the lever
upward to the first detent for
intermittent operation and to the
second detent for continuous rear wiper
operation.
Rotating the center portion upward
once more will activate the washer
pump which will continue to operate
as long as the switch is held. Upon release of the switch, the wipers will
resume the continuous rear wiper operation.
When this rotary control is in the OFF position,
rotating it downward will activate the rear
washer pump which will continue to operate as
long as the switch is held. Once the switch is
released it will return to the OFF position and
the wipers will cycle several times before
returning to the parked position.
NOTE:
As a protective measure, the pump will stop if
the switch is held for more than 20 seconds.
Once the switch is released the pump will
resume normal operation.
If the rear wiper is operating when the ignition is
placed in the OFF position, the wiper will
automatically return to the “park” position.
CLIMATE CONTROLS
The Climate Control system allows you to
regulate the temperature, air flow, and direction
of air circulating throughout the vehicle. The
controls are located on the touchscreen (if
equipped) and on the instrument panel below
the radio.
AUTOMATIC CLIMATE CONTROL
O
VERVIEW
Uconnect 4 With 7–inch Display Temperature Controls
Uconnect 4C/4C NAV With 8.4–inch Display Temperature Controls
20_WD_OM_EN_USC_t.book Page 58
Page 73 of 464
GETTING TO KNOW YOUR VEHICLE71
WINDOWS
POWER WINDOWS
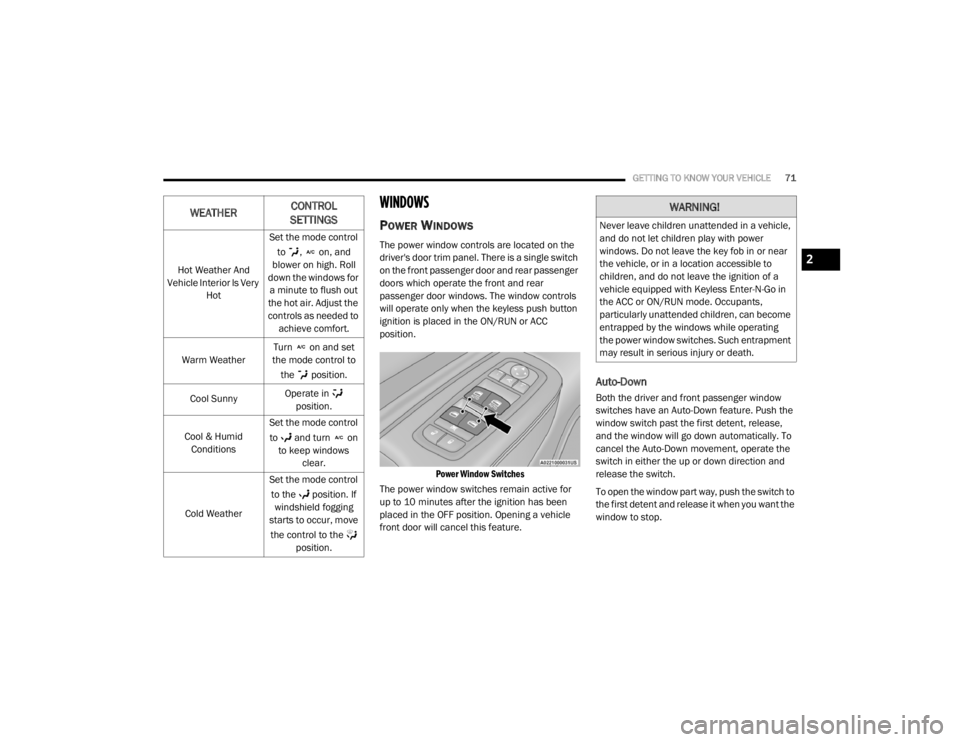
The power window controls are located on the
driver's door trim panel. There is a single switch
on the front passenger door and rear passenger
doors which operate the front and rear
passenger door windows. The window controls
will operate only when the keyless push button
ignition is placed in the ON/RUN or ACC
position.
Power Window Switches
The power window switches remain active for
up to 10 minutes after the ignition has been
placed in the OFF position. Opening a vehicle
front door will cancel this feature.
Auto-Down
Both the driver and front passenger window
switches have an Auto-Down feature. Push the
window switch past the first detent, release,
and the window will go down automatically. To
cancel the Auto-Down movement, operate the
switch in either the up or down direction and
release the switch.
To open the window part way, push the switch to
the first detent and release it when you want the
window to stop.
WEATHER CONTROL
SETTINGS
Hot Weather And
Vehicle Interior Is Very Hot Set the mode control
to , on, and
blower on high. Roll
down the windows for a minute to flush out
the hot air. Adjust the
controls as needed to achieve comfort.
Warm Weather Turn on and set
the mode control to
the position.
Cool Sunny Operate in
position.
Cool & Humid Conditions Set the mode control
to and turn on to keep windows clear.
Cold Weather Set the mode control
to the position. If windshield fogging
starts to occur, move
the control to the position.
WARNING!
Never leave children unattended in a vehicle,
and do not let children play with power
windows. Do not leave the key fob in or near
the vehicle, or in a location accessible to
children, and do not leave the ignition of a
vehicle equipped with Keyless Enter-N-Go in
the ACC or ON/RUN mode. Occupants,
particularly unattended children, can become
entrapped by the windows while operating
the power window switches. Such entrapment
may result in serious injury or death.
2
20_WD_OM_EN_USC_t.book Page 71
Page 75 of 464
GETTING TO KNOW YOUR VEHICLE73
POWER SUNROOF — IF EQUIPPED
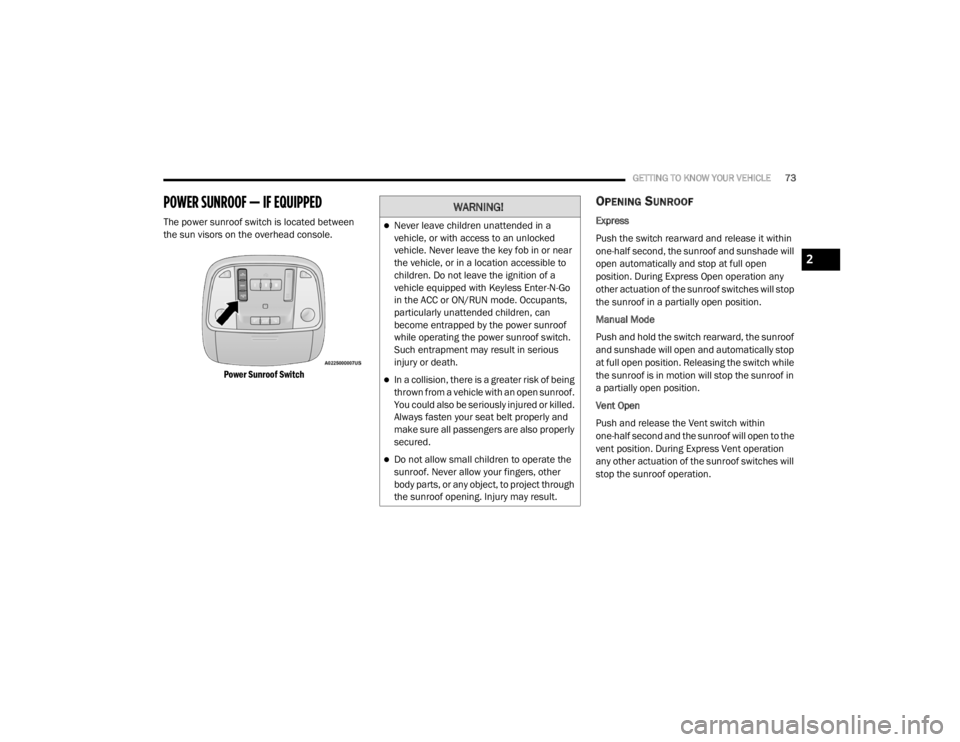
The power sunroof switch is located between
the sun visors on the overhead console.
Power Sunroof Switch
OPENING SUNROOF
Express
Push the switch rearward and release it within
one-half second, the sunroof and sunshade will
open automatically and stop at full open
position. During Express Open operation any
other actuation of the sunroof switches will stop
the sunroof in a partially open position.
Manual Mode
Push and hold the switch rearward, the sunroof
and sunshade will open and automatically stop
at full open position. Releasing the switch while
the sunroof is in motion will stop the sunroof in
a partially open position.
Vent Open
Push and release the Vent switch within
one-half second and the sunroof will open to the
vent position. During Express Vent operation
any other actuation of the sunroof switches will
stop the sunroof operation.
WARNING!
Never leave children unattended in a
vehicle, or with access to an unlocked
vehicle. Never leave the key fob in or near
the vehicle, or in a location accessible to
children. Do not leave the ignition of a
vehicle equipped with Keyless Enter-N-Go
in the ACC or ON/RUN mode. Occupants,
particularly unattended children, can
become entrapped by the power sunroof
while operating the power sunroof switch.
Such entrapment may result in serious
injury or death.
In a collision, there is a greater risk of being
thrown from a vehicle with an open sunroof.
You could also be seriously injured or killed.
Always fasten your seat belt properly and
make sure all passengers are also properly
secured.
Do not allow small children to operate the
sunroof. Never allow your fingers, other
body parts, or any object, to project through
the sunroof opening. Injury may result.
2
20_WD_OM_EN_USC_t.book Page 73
Page 76 of 464
74GETTING TO KNOW YOUR VEHICLE
CLOSING SUNROOF
Express
Push the switch forward and release it within
one-half second and the sunroof will close
automatically from any position. During Express
Close operation any other actuation of the
sunroof switches will stop the sunroof in a
partially open position.
Manual Mode
Push and hold the switch forward and the
sunroof will close from any position and stop at
a full closed position. Releasing the switch while
the sunroof is in motion will stop the sunroof in
a partially open position.
WIND BUFFETING
Wind buffeting can be described as the
perception of pressure on the ears or a
helicopter-type sound in the ears. Your vehicle
may exhibit wind buffeting with the windows
down, or the sunroof (if equipped) in certain
open or partially open positions. This is a normal
occurrence and can be minimized. If the
buffeting occurs with the rear windows open,
then open the front and rear windows together
to minimize the buffeting. If the buffeting occurs with the sunroof open,
adjust the sunroof opening to minimize the
buffeting or open any window.
SUNSHADE OPERATION
The sunshade can be opened manually.
However, the sunshade will open automatically
as the sunroof opens.
NOTE:
The sunshade cannot be closed if the sunroof is
open.
PINCH PROTECT FEATURE
This feature will detect an obstruction in the
closing of the sunroof during the Express Close
operation. If an obstruction in the path of the
sunroof is detected, the sunroof will
automatically retract. Remove the obstruction if
this occurs.
NOTE:
If three consecutive sunroof close attempts
result in Pinch Protect reversals, Pinch Protect
will disable and the sunroof must be closed in
Manual Mode.
SUNROOF MAINTENANCE
Use only a non-abrasive cleaner and a soft cloth
to clean the glass panel. Periodically check for
and clear out any debris that may have
collected in the tracks.
IGNITION OFF OPERATION
NOTE:
The power sunroof switch can remain active
in Accessory Delay for up to approximately
10 minutes after the vehicle’s ignition is
placed to the OFF position. Opening either
front door will cancel this feature.
This feature is programmable using the Ucon
-
nect System. Refer to “Uconnect Settings” in
“Multimedia” for further information.WARNING!
There is no anti-pinch protection when the
sunroof is almost closed. To avoid personal
injury be sure to clear your arms, hands,
fingers and all objects from the top’s path
before closing.
20_WD_OM_EN_USC_t.book Page 74
Page 81 of 464
GETTING TO KNOW YOUR VEHICLE79
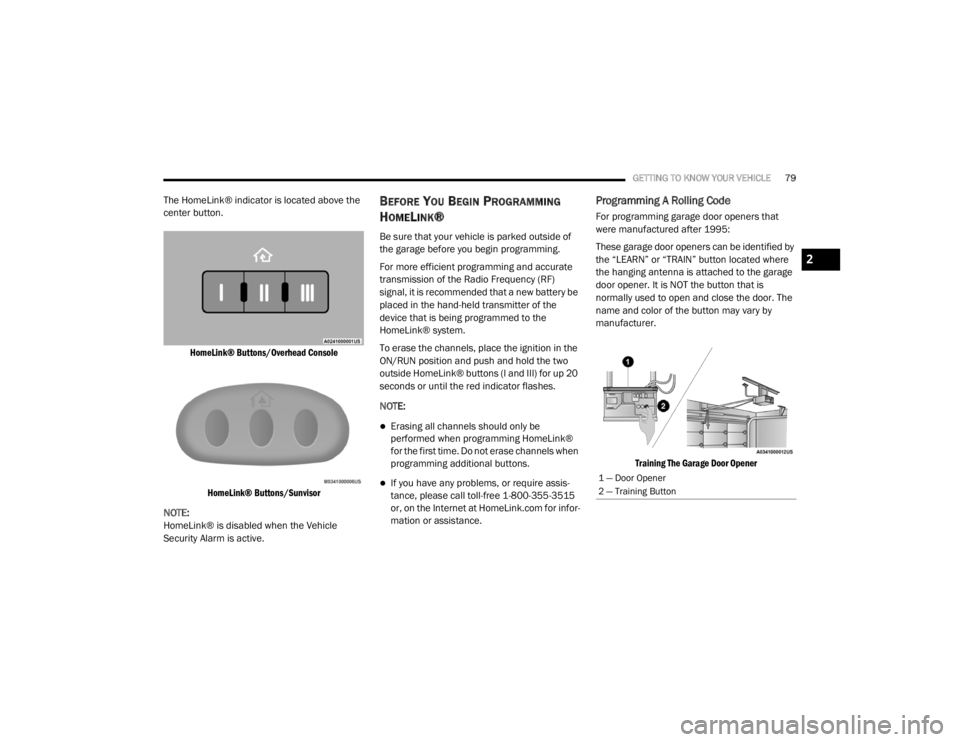
The HomeLink® indicator is located above the
center button.
HomeLink® Buttons/Overhead ConsoleHomeLink® Buttons/Sunvisor
NOTE:
HomeLink® is disabled when the Vehicle
Security Alarm is active.BEFORE YOU BEGIN PROGRAMMING
H
OMELINK®
Be sure that your vehicle is parked outside of
the garage before you begin programming.
For more efficient programming and accurate
transmission of the Radio Frequency (RF)
signal, it is recommended that a new battery be
placed in the hand-held transmitter of the
device that is being programmed to the
HomeLink® system.
To erase the channels, place the ignition in the
ON/RUN position and push and hold the two
outside HomeLink® buttons (I and III) for up 20
seconds or until the red indicator flashes.
NOTE:
Erasing all channels should only be
performed when programming HomeLink®
for the first time. Do not erase channels when
programming additional buttons.
If you have any problems, or require assis -
tance, please call toll-free 1-800-355-3515
or, on the Internet at HomeLink.com for infor -
mation or assistance.
Programming A Rolling Code
For programming garage door openers that
were manufactured after 1995:
These garage door openers can be identified by
the “LEARN” or “TRAIN” button located where
the hanging antenna is attached to the garage
door opener. It is NOT the button that is
normally used to open and close the door. The
name and color of the button may vary by
manufacturer.
Training The Garage Door Opener
1 — Door Opener
2 — Training Button
2
20_WD_OM_EN_USC_t.book Page 79
Page 82 of 464

80GETTING TO KNOW YOUR VEHICLE
1. Place the ignition in the ON/RUN position.
NOTE:
For vehicles equipped with Keyless Enter-N-Go,
place the ignition in the RUN position with the
engine on. Make sure while programming
HomeLink® with the engine on that your vehicle
is outside of your garage, or that the garage
door remains open at all times.
2. Place the hand-held transmitter 1 to
3 inches (3 to 8 cm) away from the
HomeLink® button you wish to program
while keeping the HomeLink® indicator
light in view.
3. Push and hold the HomeLink® button you want to program while you push and hold
the hand-held transmitter button.
4. Continue to hold both buttons and observe the indicator light. The HomeLink®
indicator will flash slowly and then rapidly
after HomeLink® has received the
frequency signal from the hand-held
transmitter. Release both buttons after the
indicator light changes from slow to rapid. 5. At the garage door opener (in the garage),
locate the “LEARN” or “TRAINING” button.
This can usually be found where the
hanging antenna wire is attached to the
garage door opener/device motor. Firmly
push and release the “LEARN” or
“TRAINING” button. On some garage door
openers/devices there may be a light that
blinks when the garage door opener/device
is in the LEARN/TRAIN mode.
NOTE:
You have 30 seconds in which to initiate the
next step after the LEARN button has been
pushed.
6. Return to the vehicle and push the programmed HomeLink® button twice
(holding the button for two seconds each
time). If the garage door opener/device
activates, programming is complete.
NOTE:
If the garage door opener/device does not acti -
vate, push the button a third time (for two
seconds) to complete the training.
To program the remaining two HomeLink®
buttons, repeat each step for each remain -
ing button. DO NOT erase the channels.Programming A Non-Rolling Code
For programming garage door openers
manufactured before 1995:
1. Place the ignition in the ON/RUN position.
NOTE:
For vehicles equipped with Keyless Enter-N-Go,
place the ignition in the RUN position with the
engine on. Make sure while programming
HomeLink® with the engine on that your vehicle
is outside of your garage, or that the garage
door remains open at all times.
2. Place the hand-held transmitter 1 to 3 inches (3 to 8 cm) away from the
HomeLink® button you wish to program
while keeping the HomeLink® indicator
light in view.
3. Push and hold the Homelink® button you want to program while you push and hold
the hand-held transmitter button.
4. Continue to hold both buttons and observe the indicator light. The Homelink® indicator
will flash slowly and then rapidly after
HomeLink® has received the frequency
signal from the hand-held transmitter.
20_WD_OM_EN_USC_t.book Page 80