parking brake DODGE DURANGO 2020 Owners Manual
[x] Cancel search | Manufacturer: DODGE, Model Year: 2020, Model line: DURANGO, Model: DODGE DURANGO 2020Pages: 464, PDF Size: 22.14 MB
Page 6 of 464

4
ONBOARD DIAGNOSTIC SYSTEM — OBD II .... 120 Onboard Diagnostic System
(OBD II) Cybersecurity ................................120
EMISSIONS INSPECTION AND
MAINTENANCE PROGRAMS ............................ 121
SAFETY
SAFETY FEATURES ............................................ 122
Anti-Lock Brake System (ABS) ................. 122
Electronic Brake Control (EBC) System ....123
AUXILIARY DRIVING SYSTEMS ........................ 131
Blind Spot Monitoring (BSM) —
If Equipped .................................................131 Forward Collision Warning (FCW) With
Mitigation ...................................................136 Tire Pressure Monitoring System
(TPMS) ........................................................ 138
OCCUPANT RESTRAINT SYSTEMS .................. 143
Occupant Restraint Systems Features.....143
Important Safety Precautions ...................143Seat Belt Systems ..................................... 144Supplemental Restraint Systems (SRS) ...153Child Restraints .........................................163
Transporting Pets ......................................180 SAFETY TIPS ....................................................... 180
Transporting Passengers .......................... 180Exhaust Gas .............................................. 180
Safety Checks You Should Make
Inside The Vehicle ..................................... 181 Periodic Safety Checks You Should Make
Outside The Vehicle ................................... 183STARTING AND OPERATING
STARTING THE ENGINE .....................................184
Automatic Transmission............................ 184
Keyless Enter-N-Go — Ignition ................... 184
Normal Starting ......................................... 185
If Engine Fails To Start ............................. 187Cold Weather Operation (Below –22°F
Or −30°C) ................................................. 188 After Starting .............................................. 188
ENGINE BLOCK HEATER — IF EQUIPPED ........188
ENGINE BREAK-IN RECOMMENDATIONS –
NON-SRT .............................................................. 188
ENGINE BREAK-IN RECOMMENDATIONS –
SRT ....................................................................... 189
PARKING BRAKE ............................................... 190 AUTOMATIC TRANSMISSION ........................... 191
Ignition Park Interlock ............................... 192Brake/Transmission Shift Interlock
System ....................................................... 192 Fuel Economy (ECO) Mode........................ 192
Eight-Speed Automatic Transmission ...... 193
SPORT MODE — IF EQUIPPED.......................... 199
ALL-WHEEL DRIVE OPERATION ....................... 199
Single-Speed Operating Instructions/
Precautions— If Equipped ........................ 199 Electronically Shifted Transfer Case
(Three-Position Switch) — If Equipped...... 199 Shifting Procedure ..................................... 201
FUEL SAVER TECHNOLOGY 5.7L/6.4L
ONLY — IF EQUIPPED ........................................ 202
POWER STEERING............................................. 202
STOP/START SYSTEM — IF EQUIPPED ........... 203 Automatic Mode ........................................ 203
Possible Reasons The Engine Does Not
Autostop ..................................................... 204 To Start The Engine While In Autostop
Mode .......................................................... 204 To Manually Turn Off The Stop/Start
System........................................................ 205 To Manually Turn On The Stop/Start
System........................................................ 205 System Malfunction................................... 205
20_WD_OM_EN_USC_t.book Page 4
Page 20 of 464
18GETTING TO KNOW YOUR VEHICLE
(Continued)
NOTE:
In case the ignition switch does not change with
the push of a button, the key fob may have a low
or depleted battery. In this situation, a back up
method can be used to operate the ignition
switch. Put the nose side of the key fob (side
opposite of the emergency key) against the
START/STOP ignition button and push to
operate the ignition switch.
IGNITION OR ACCESSORY ON MESSAGE
Upon opening the driver's door when the
ignition is in ACC or ON (engine not running), a
chime will sound to remind you to place the
ignition in the OFF position. In addition to the
chime, the ignition or accessory on message will
display in the cluster.
NOTE:
With the Uconnect system, the power window
switches, radio, power sunroof (if equipped),
and power outlets will remain active for up to
10 minutes after the ignition is placed in the
OFF position. Opening either front door will
cancel this feature. The timing for this feature is programmable.
Refer to “Uconnect Settings” in “Multimedia”
for further information.
DEPLETED KEY FOB BATTERY
Key Not Detected Feature
If the ignition position does not change with a
push of the ignition button, and the instrument
cluster display message “Key Fob Not
Detected” is being displayed, the key fob may
have a low or depleted battery. In this situation,
a back up method can be used to operate the
keyless push button ignition.
WARNING!
Before exiting a vehicle, always shift the
automatic transmission into PARK and
apply the parking brake. Always make sure
the keyless ignition node is in the “OFF”
mode, remove the key fob from the vehicle
and lock the vehicle.
Never leave children alone in a vehicle, or
with access to an unlocked vehicle.
Allowing children to be in a vehicle unat
-
tended is dangerous for a number of
reasons. A child or others could be seriously
or fatally injured. Children should be
warned not to touch the parking brake,
brake pedal or the gear selector.
Do not leave the key fob in or near the
vehicle, or in a location accessible to chil-
dren, and do not leave the ignition of a
vehicle equipped with Keyless Enter-N-Go
in the ACC or ON/RUN mode. A child could
operate power windows, other controls, or
move the vehicle.
Do not leave children or animals inside
parked vehicles in hot weather. Interior
heat build-up may cause serious injury or
death.
CAUTION!
An unlocked vehicle is an invitation. Always
remove the key fobs from vehicle, place the
ignition in the OFF position and lock all doors
when leaving the vehicle unattended.
WARNING! (Continued)
20_WD_OM_EN_USC_t.book Page 18
Page 27 of 464
GETTING TO KNOW YOUR VEHICLE25
(Continued)
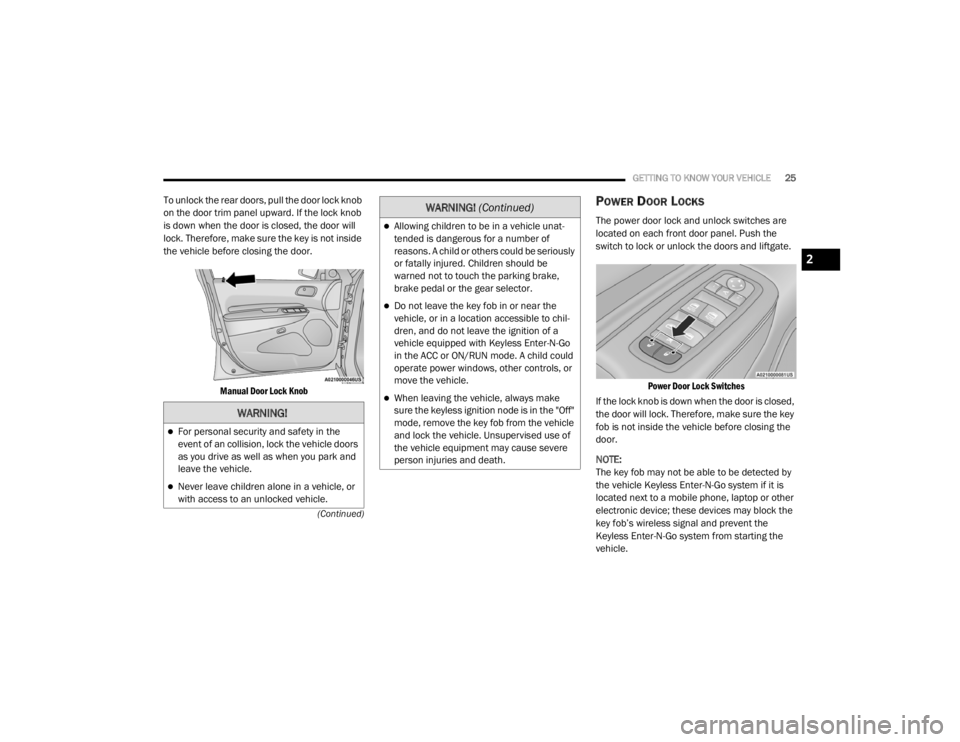
To unlock the rear doors, pull the door lock knob
on the door trim panel upward. If the lock knob
is down when the door is closed, the door will
lock. Therefore, make sure the key is not inside
the vehicle before closing the door.
Manual Door Lock Knob
POWER DOOR LOCKS
The power door lock and unlock switches are
located on each front door panel. Push the
switch to lock or unlock the doors and liftgate.
Power Door Lock Switches
If the lock knob is down when the door is closed,
the door will lock. Therefore, make sure the key
fob is not inside the vehicle before closing the
door.
NOTE:
The key fob may not be able to be detected by
the vehicle Keyless Enter-N-Go system if it is
located next to a mobile phone, laptop or other
electronic device; these devices may block the
key fob’s wireless signal and prevent the
Keyless Enter-N-Go system from starting the
vehicle.
WARNING!
For personal security and safety in the
event of an collision, lock the vehicle doors
as you drive as well as when you park and
leave the vehicle.
Never leave children alone in a vehicle, or
with access to an unlocked vehicle.
Allowing children to be in a vehicle unat -
tended is dangerous for a number of
reasons. A child or others could be seriously
or fatally injured. Children should be
warned not to touch the parking brake,
brake pedal or the gear selector.
Do not leave the key fob in or near the
vehicle, or in a location accessible to chil-
dren, and do not leave the ignition of a
vehicle equipped with Keyless Enter-N-Go
in the ACC or ON/RUN mode. A child could
operate power windows, other controls, or
move the vehicle.
When leaving the vehicle, always make
sure the keyless ignition node is in the "Off"
mode, remove the key fob from the vehicle
and lock the vehicle. Unsupervised use of
the vehicle equipment may cause severe
person injuries and death.
WARNING! (Continued)
2
20_WD_OM_EN_USC_t.book Page 25
Page 53 of 464
GETTING TO KNOW YOUR VEHICLE51
NOTE:
Your vehicle is equipped with plastic head -
light and fog light (if equipped) lenses that
are lighter and less susceptible to stone
breakage than glass lights. Plastic is not as
scratch resistant as glass and therefore
different lens cleaning procedures must be
followed.
To minimize the possibility of scratching the
lenses and reducing light output, avoid
wiping with a dry cloth. To remove road dirt,
wash with a mild soap solution followed by
rinsing.
DAYTIME RUNNING LIGHTS (DRLS) —
I
F EQUIPPED
The Daytime Running Lights (DRLs) come on
whenever the engine is running, and the
transmission is not in the PARK position. The lights will remain on until the ignition is
placed in the OFF or ACC position, or the parking
brake is engaged. The headlight switch must be
used for normal night time driving.
NOTE:
If allowed by law in the country in which the
vehicle was purchased, the Daytime Running
Lights can be turned on and off using the
Uconnect system, refer to “Uconnect
Settings” in “Multimedia” for further informa
-
tion.
On some vehicles, the Daytime Running
Lights may deactivate, or reduce intensity, on
one side of the vehicle (when a turn signal is
activated on that side), or on both sides of
the vehicle (when the hazard warning lights
are activated).
HIGH/LOW BEAM SWITCH
Push the multifunction lever toward the
instrument panel to switch the headlights to
high beams. Pulling the multifunction back
toward the steering wheel will turn the low
beams back on, or shut the high beams off.
AUTOMATIC HIGH BEAM — IF EQUIPPED
The Automatic High Beam Headlamp Control
system provides increased forward lighting at
night by automating high beam control through
the use of a digital camera mounted on the
inside rearview mirror. This camera detects
vehicle specific light and automatically switches
from high beams to low beams until the
approaching vehicle is out of view.
NOTE:
The Automatic High Beam Headlamp Control
can be turned on or off by selecting or dese -
lecting “Auto High Beam” within your Ucon -
nect settings, as well as turning the headlight
switch to the AUTO position. Refer to “Ucon -
nect Settings” in “Multimedia” for further
information.
Broken, muddy, or obstructed headlights and
taillights of vehicles in the field of view will
cause headlights to remain on longer (closer
to the vehicle). Also, dirt, film, and other
obstructions on the windshield or camera
lens will cause the system to function
improperly.
CAUTION!
Do not use abrasive cleaning components,
solvents, steel wool or other abrasive
materials to clean the lenses.
2
20_WD_OM_EN_USC_t.book Page 51
Page 112 of 464
110GETTING TO KNOW YOUR INSTRUMENT PANEL
RED WARNING LIGHTS
Seat Belt Reminder Warning Light
This warning light indicates when the
driver or passenger seat belt is
unbuckled. When the ignition is first
placed in the ON/RUN or ACC/ON/
RUN position and if the driver’s seat belt is
unbuckled, a chime will sound and the light will
turn on. When driving, if the driver or front
passenger seat belt remains unbuckled, the
Seat Belt Reminder Light will flash or remain on
continuously and a chime will sound.
Refer to “Occupant Restraint Systems” in
“Safety” for further information.
Air Bag Warning Light
This warning light will illuminate to
indicate a fault with the air bag, and
will turn on for four to eight seconds
as a bulb check when the ignition is
placed in the ON/RUN or ACC/ON/RUN
position. This light will illuminate with a single
chime when a fault with the air bag has been
detected, it will stay on until the fault is cleared. If the light is either not on during startup, stays
on, or turns on while driving, have the system
inspected at an authorized dealer as soon as
possible.
Brake Warning Light
This warning light monitors various
brake functions, including brake fluid
level and parking brake application. If
the brake light turns on it may
indicate that the parking brake is applied, that
the brake fluid level is low, or that there is a
problem with the Anti-Lock Brake System
reservoir.
If the light remains on when the parking brake
has been disengaged, and the fluid level is at
the full mark on the master cylinder reservoir, it
indicates a possible brake hydraulic system
malfunction or that a problem with the Brake
Booster has been detected by the Anti-Lock
Brake System (ABS) / Electronic Stability
Control (ESC) system. In this case, the light will
remain on until the condition has been
corrected. If the problem is related to the brake
booster, the ABS pump will run when applying
the brake, and a brake pedal pulsation may be
felt during each stop. The dual brake system provides a reserve
braking capacity in the event of a failure to a
portion of the hydraulic system. A leak in either
half of the dual brake system is indicated by the
Brake Warning Light, which will turn on when
the brake fluid level in the master cylinder has
dropped below a specified level.
The light will remain on until the cause is
corrected.
NOTE:
The light may flash momentarily during sharp
cornering maneuvers, which change fluid level
conditions. The vehicle should have service
performed, and the brake fluid level checked.
If brake failure is indicated, immediate repair is
necessary.
WARNING!
Driving a vehicle with the red brake light on is
dangerous. Part of the brake system may
have failed. It will take longer to stop the
vehicle. You could have a collision. Have the
vehicle checked immediately.
20_WD_OM_EN_USC_t.book Page 110
Page 113 of 464
GETTING TO KNOW YOUR INSTRUMENT PANEL111
Vehicles equipped with the Anti-Lock Brake
System (ABS) are also equipped with Electronic
Brake Force Distribution (EBD). In the event of
an EBD failure, the Brake Warning Light will turn
on along with the ABS Light. Immediate repair to
the ABS system is required.
Operation of the Brake Warning Light can be
checked by turning the ignition switch from the
OFF position to the ON/RUN position. The light
should illuminate for approximately two
seconds. The light should then turn off unless
the parking brake is applied or a brake fault is
detected. If the light does not illuminate, have
the light inspected by an authorized dealer.
The light also will turn on when the parking
brake is applied with the ignition switch in the
ON/RUN position.
NOTE:
This light shows only that the parking brake is
applied. It does not show the degree of brake
application.Battery Charge Warning Light
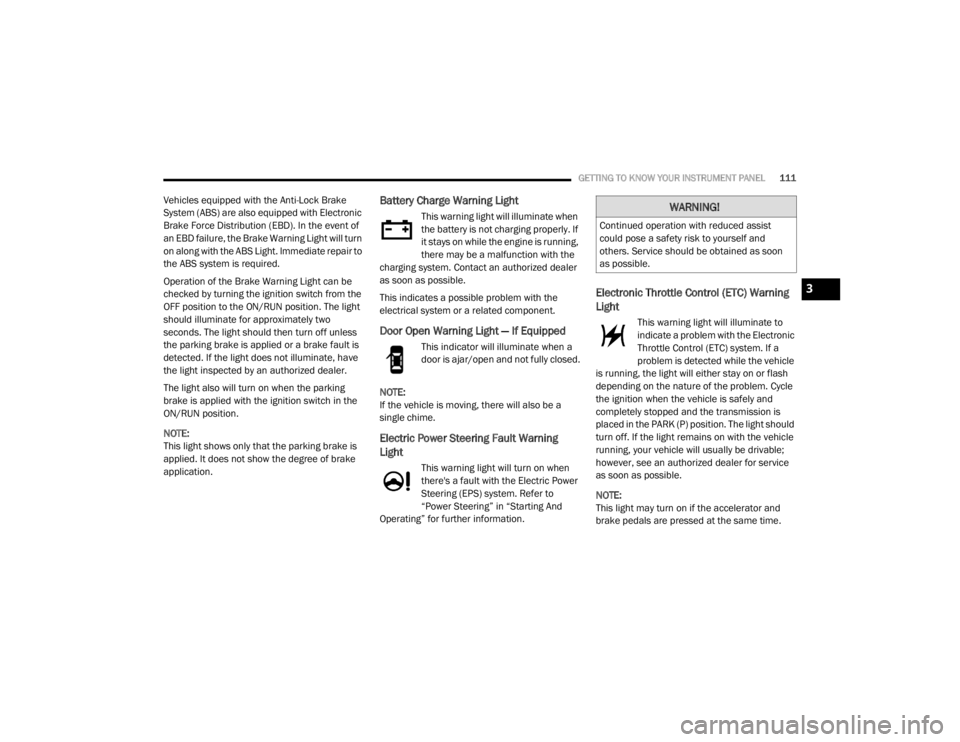
This warning light will illuminate when
the battery is not charging properly. If
it stays on while the engine is running,
there may be a malfunction with the
charging system. Contact an authorized dealer
as soon as possible.
This indicates a possible problem with the
electrical system or a related component.
Door Open Warning Light — If Equipped
This indicator will illuminate when a
door is ajar/open and not fully closed.
NOTE:
If the vehicle is moving, there will also be a
single chime.
Electric Power Steering Fault Warning
Light
This warning light will turn on when
there's a fault with the Electric Power
Steering (EPS) system. Refer to
“Power Steering” in “Starting And
Operating” for further information.
Electronic Throttle Control (ETC) Warning
Light
This warning light will illuminate to
indicate a problem with the Electronic
Throttle Control (ETC) system. If a
problem is detected while the vehicle
is running, the light will either stay on or flash
depending on the nature of the problem. Cycle
the ignition when the vehicle is safely and
completely stopped and the transmission is
placed in the PARK (P) position. The light should
turn off. If the light remains on with the vehicle
running, your vehicle will usually be drivable;
however, see an authorized dealer for service
as soon as possible.
NOTE:
This light may turn on if the accelerator and
brake pedals are pressed at the same time.
WARNING!
Continued operation with reduced assist
could pose a safety risk to yourself and
others. Service should be obtained as soon
as possible.
3
20_WD_OM_EN_USC_t.book Page 111
Page 130 of 464
128SAFETY
NOTE:
The “ESC Activation/Malfunction Indicator
Light” and the “ESC OFF Indicator Light”
come on momentarily each time the ignition
is turned to the ON/RUN mode.
Each time the ignition is turned to ON/RUN
mode, the ESC system will be on even if it was
turned off previously.
The ESC system will make buzzing or clicking
sounds when it is active. This is normal; the
sounds will stop when ESC becomes inactive
following the maneuver that caused the ESC
activation.
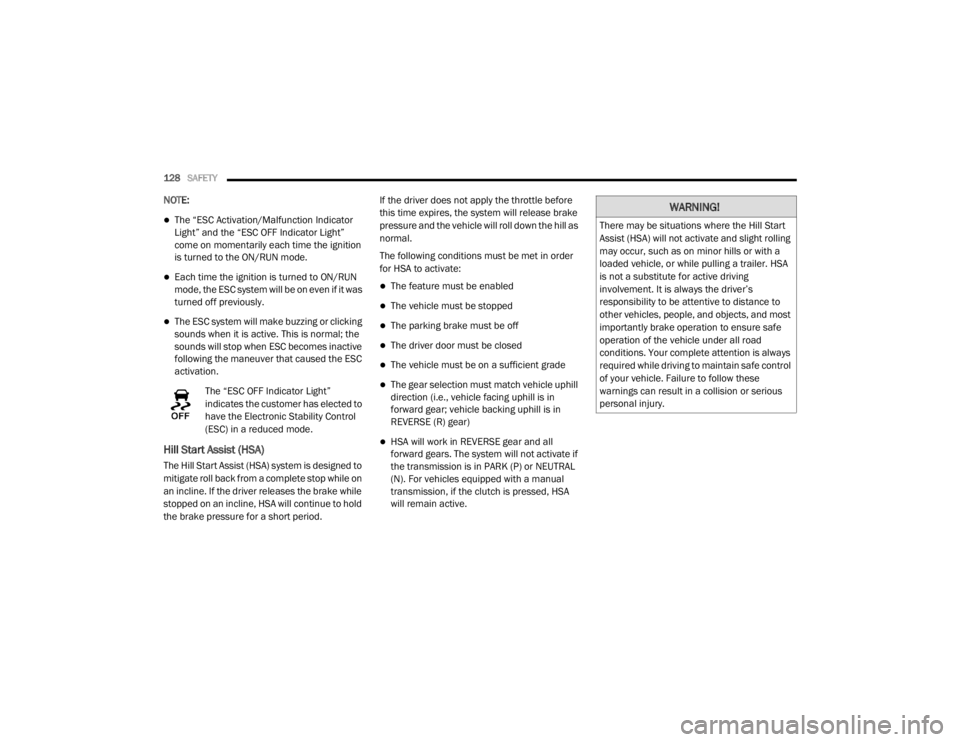
The “ESC OFF Indicator Light”
indicates the customer has elected to
have the Electronic Stability Control
(ESC) in a reduced mode.
Hill Start Assist (HSA)
The Hill Start Assist (HSA) system is designed to
mitigate roll back from a complete stop while on
an incline. If the driver releases the brake while
stopped on an incline, HSA will continue to hold
the brake pressure for a short period. If the driver does not apply the throttle before
this time expires, the system will release brake
pressure and the vehicle will roll down the hill as
normal.
The following conditions must be met in order
for HSA to activate:
The feature must be enabled
The vehicle must be stopped
The parking brake must be off
The driver door must be closed
The vehicle must be on a sufficient grade
The gear selection must match vehicle uphill
direction (i.e., vehicle facing uphill is in
forward gear; vehicle backing uphill is in
REVERSE (R) gear)
HSA will work in REVERSE gear and all
forward gears. The system will not activate if
the transmission is in PARK (P) or NEUTRAL
(N). For vehicles equipped with a manual
transmission, if the clutch is pressed, HSA
will remain active.
WARNING!
There may be situations where the Hill Start
Assist (HSA) will not activate and slight rolling
may occur, such as on minor hills or with a
loaded vehicle, or while pulling a trailer. HSA
is not a substitute for active driving
involvement. It is always the driver’s
responsibility to be attentive to distance to
other vehicles, people, and objects, and most
importantly brake operation to ensure safe
operation of the vehicle under all road
conditions. Your complete attention is always
required while driving to maintain safe control
of your vehicle. Failure to follow these
warnings can result in a collision or serious
personal injury.
20_WD_OM_EN_USC_t.book Page 128
Page 131 of 464
SAFETY129
Disabling And Enabling HSA
This feature can be turned on or turned off. To
change the current setting, proceed as follows:
If disabling HSA using your instrument cluster
display, refer to “Instrument Cluster Display”
in “Getting To Know Your Instrument Panel”
for further information.
If disabling HSA using Uconnect Settings,
refer to “Uconnect Settings” in “Multimedia”
for further information.
For vehicles not equipped with an instrument
cluster display, perform the following steps:
1. Center the steering wheel (front wheels pointing straight forward).
2. Shift the transmission into PARK.
3. Apply the parking brake.
4. Start the engine.
5. Rotate the steering wheel slightly more than one-half turn to the left. 6. Push the “ESC OFF” switch located in the
lower switch bank below the climate control
four times within 20 seconds. The “ESC Off
Indicator Light” should turn on and turn off
two times.
7. Rotate the steering wheel back to center and then an additional slightly more than
one-half turn to the right.
8. Turn the ignition to the OFF mode and then back to the ON/RUN mode. If the sequence
was completed properly, the “ESC OFF
Indicator Light” will blink several times to
confirm HSA is disabled.
9. Repeat these steps if you want to return this feature to its previous setting.
Towing With HSA
HSA will also provide assistance to Mitigate roll
back while towing a trailer.
WARNING!
If you use a trailer brake controller with your
trailer, the trailer brakes may be activated
and deactivated with the brake switch. If
so, there may not be enough brake pres -
sure to hold both the vehicle and the trailer
on a hill when the brake pedal is released.
In order to avoid rolling down an incline
while resuming acceleration, manually acti -
vate the trailer brake or apply more vehicle
brake pressure prior to releasing the brake
pedal.
HSA is not a parking brake. Always apply
the parking brake fully when exiting your
vehicle. Also, be certain to place the trans -
mission in PARK.
Failure to follow these warnings can result
in a collision or serious personal injury.
4
20_WD_OM_EN_USC_t.book Page 129
Page 185 of 464
SAFETY183
PERIODIC SAFETY CHECKS YOU SHOULD
M
AKE OUTSIDE THE VEHICLE
Tires
Examine tires for excessive tread wear and
uneven wear patterns. Check for stones, nails,
glass, or other objects lodged in the tread or
sidewall. Inspect the tread for cuts and cracks.
Inspect sidewalls for cuts, cracks, and bulges.
Check the wheel nuts for tightness. Check the
tires (including spare) for proper cold inflation
pressure.
Lights
Have someone observe the operation of brake
lights and exterior lights while you work the
controls. Check turn signal and high beam
indicator lights on the instrument panel.
Door Latches
Check for proper closing, latching, and locking.
Fluid Leaks
Check area under the vehicle after overnight
parking for fuel, coolant, oil, or other fluid leaks.
Also, if gasoline fumes are detected or if fuel, or
brake fluid leaks are suspected, the cause
should be located and corrected immediately.
WARNING!
To prevent SERIOUS INJURY or DEATH when
using “Track-Use” parts and equipment:
NEVER use any “Track-Use” equipment on
public roads. FCA US LLC does not autho -
rize the use of “Track-Use” equipment on
public roads.
The intended use of “Track-Use” parts is for
race vehicles on race tracks. To help
ensure the safety of the race driver, engi -
neers should supervise the installation of
“Track-Use” parts.
FCA US LLC does not authorize the installa -
tion or use of any part noted as “Track-Use”
on any new vehicle prior to its first retail
sale.
WARNING!
To prevent SERIOUS INJURY or DEATH:
ALWAYS remove any “Track-Use” equip -
ment before driving on public roads.
ALWAYS properly use your three-point seat
belts when driving on public roads.
In a collision, you and your passengers can
suffer much greater injuries if you are not
properly buckled up. You can strike the inte -
rior of your vehicle or other passengers, or
you can be thrown out of the vehicle.
4
20_WD_OM_EN_USC_t.book Page 183
Page 186 of 464
184 (Continued)
(Continued)
STARTING AND OPERATING
STARTING THE ENGINE
Before starting your vehicle, adjust your seat,
adjust the inside and outside mirrors, fasten
your seat belt, and if present, instruct all other
occupants to buckle their seat belts.
AUTOMATIC TRANSMISSION
The gear selector must be in the NEUTRAL (N) or
PARK (P) position before you can start the
engine. Apply the brakes before shifting into any
driving gear.
KEYLESS ENTER-N-GO — IGNITION
This feature allows the driver to operate the
ignition switch with the push of a button, as long
as the Remote Start/Keyless Enter-N-Go key
fob is in the passenger compartment.
WARNING!
Before exiting a vehicle, always come to a
complete stop, then shift the automatic
transmission into PARK and apply the
parking brake.
Always make sure the keyless ignition node
is in the OFF mode, key fob is removed from
the vehicle and vehicle is locked.
Never leave children alone in a vehicle, or
with access to an unlocked vehicle. Leaving
children in a vehicle unattended is
dangerous for a number of reasons. A child
or others could be seriously or fatally
injured. Children should be warned not to
touch the parking brake, brake pedal or the
gear selector.
Do not leave the key fob in or near the
vehicle, or in a location accessible to chil-
dren, and do not leave the ignition of a
vehicle equipped with Keyless Enter-N-Go
in the ACC or ON/RUN mode. A child could
operate power windows, other controls, or
move the vehicle.
Do not leave children or animals inside
parked vehicles in hot weather. Interior
heat build-up may cause serious injury or
death.
CAUTION!
Damage to the transmission may occur if the
following precautions are not observed:
WARNING!
(Continued)
Do not shift from REVERSE (R), PARK, or
NEUTRAL into any forward gear when the
engine is above idle speed.
Shift into PARK only after the vehicle has
come to a complete stop.
Shift into or out of REVERSE only after the
vehicle has come to a complete stop and
the engine is at idle speed.
Before shifting into any gear, make sure
your foot is firmly on the brake pedal.
CAUTION! (Continued)
20_WD_OM_EN_USC_t.book Page 184