steering DODGE DURANGO 2022 Owner's Manual
[x] Cancel search | Manufacturer: DODGE, Model Year: 2022, Model line: DURANGO, Model: DODGE DURANGO 2022Pages: 332, PDF Size: 19.82 MB
Page 93 of 332
GETTING TO KNOW YOUR INSTRUMENT PANEL91
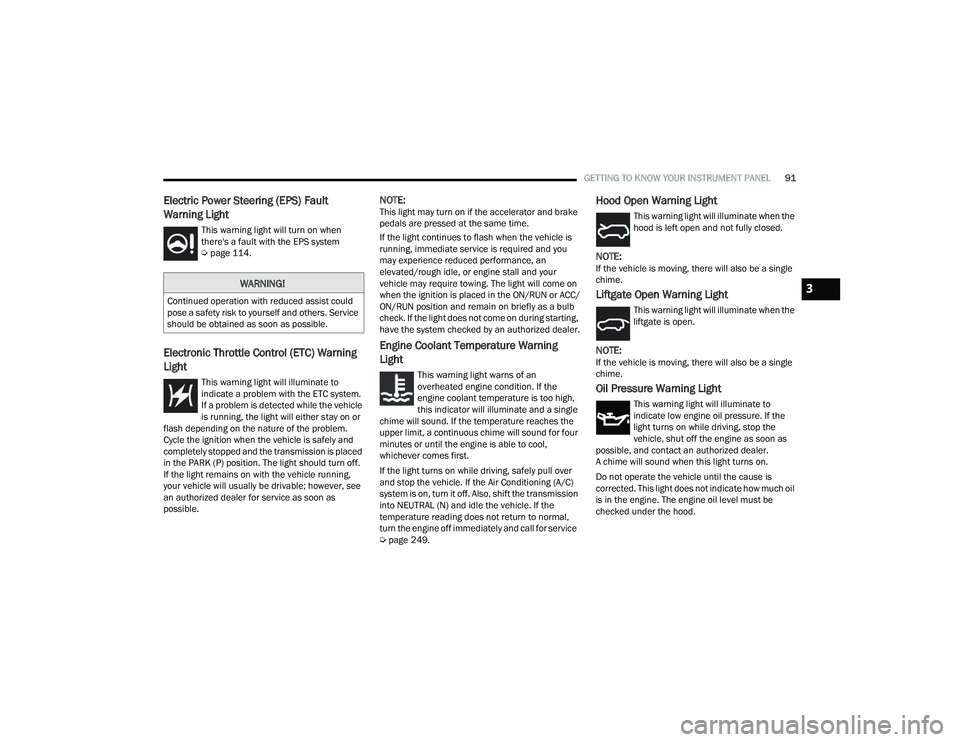
Electric Power Steering (EPS) Fault
Warning Light
This warning light will turn on when
there's a fault with the EPS system
Úpage 114.
Electronic Throttle Control (ETC) Warning
Light
This warning light will illuminate to
indicate a problem with the ETC system.
If a problem is detected while the vehicle
is running, the light will either stay on or
flash depending on the nature of the problem.
Cycle the ignition when the vehicle is safely and
completely stopped and the transmission is placed
in the PARK (P) position. The light should turn off.
If the light remains on with the vehicle running,
your vehicle will usually be drivable; however, see
an authorized dealer for service as soon as
possible.
NOTE:This light may turn on if the accelerator and brake
pedals are pressed at the same time.
If the light continues to flash when the vehicle is
running, immediate service is required and you
may experience reduced performance, an
elevated/rough idle, or engine stall and your
vehicle may require towing. The light will come on
when the ignition is placed in the ON/RUN or ACC/
ON/RUN position and remain on briefly as a bulb
check. If the light does not come on during starting,
have the system checked by an authorized dealer.
Engine Coolant Temperature Warning
Light
This warning light warns of an
overheated engine condition. If the
engine coolant temperature is too high,
this indicator will illuminate and a single
chime will sound. If the temperature reaches the
upper limit, a continuous chime will sound for four
minutes or until the engine is able to cool,
whichever comes first.
If the light turns on while driving, safely pull over
and stop the vehicle. If the Air Conditioning (A/C)
system is on, turn it off. Also, shift the transmission
into NEUTRAL (N) and idle the vehicle. If the
temperature reading does not return to normal,
turn the engine off immediately and call for service
Ú page 249.
Hood Open Warning Light
This warning light will illuminate when the
hood is left open and not fully closed.
NOTE:If the vehicle is moving, there will also be a single
chime.
Liftgate Open Warning Light
This warning light will illuminate when the
liftgate is open.
NOTE:If the vehicle is moving, there will also be a single
chime.
Oil Pressure Warning Light
This warning light will illuminate to
indicate low engine oil pressure. If the
light turns on while driving, stop the
vehicle, shut off the engine as soon as
possible, and contact an authorized dealer.
A chime will sound when this light turns on.
Do not operate the vehicle until the cause is
corrected. This light does not indicate how much oil
is in the engine. The engine oil level must be
checked under the hood.
WARNING!
Continued operation with reduced assist could
pose a safety risk to yourself and others. Service
should be obtained as soon as possible.3
22_WD_OM_EN_USC_t.book Page 91
Page 96 of 332
94GETTING TO KNOW YOUR INSTRUMENT PANEL
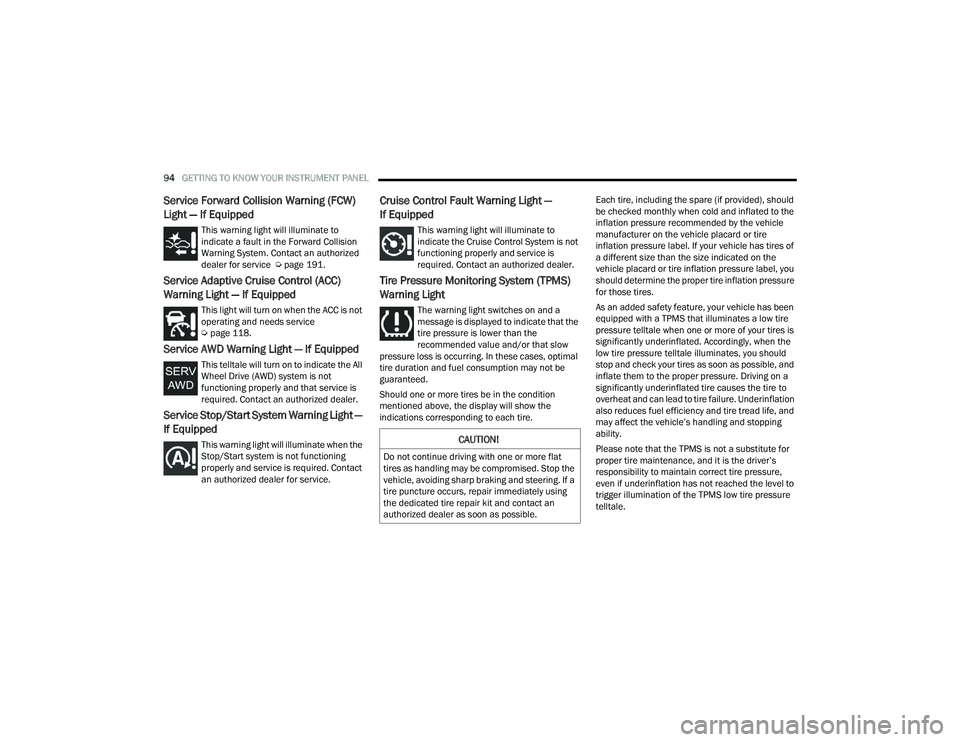
Service Forward Collision Warning (FCW)
Light — If Equipped
This warning light will illuminate to
indicate a fault in the Forward Collision
Warning System. Contact an authorized
dealer for service Úpage 191.
Service Adaptive Cruise Control (ACC)
Warning Light — If Equipped
This light will turn on when the ACC is not
operating and needs service
Úpage 118.
Service AWD Warning Light — If Equipped
This telltale will turn on to indicate the All
Wheel Drive (AWD) system is not
functioning properly and that service is
required. Contact an authorized dealer.
Service Stop/Start System Warning Light —
If Equipped
This warning light will illuminate when the
Stop/Start system is not functioning
properly and service is required. Contact
an authorized dealer for service.
Cruise Control Fault Warning Light —
If Equipped
This warning light will illuminate to
indicate the Cruise Control System is not
functioning properly and service is
required. Contact an authorized dealer.
Tire Pressure Monitoring System (TPMS)
Warning Light
The warning light switches on and a
message is displayed to indicate that the
tire pressure is lower than the
recommended value and/or that slow
pressure loss is occurring. In these cases, optimal
tire duration and fuel consumption may not be
guaranteed.
Should one or more tires be in the condition
mentioned above, the display will show the
indications corresponding to each tire. Each tire, including the spare (if provided), should
be checked monthly when cold and inflated to the
inflation pressure recommended by the vehicle
manufacturer on the vehicle placard or tire
inflation pressure label. If your vehicle has tires of
a different size than the size indicated on the
vehicle placard or tire inflation pressure label, you
should determine the proper tire inflation pressure
for those tires.
As an added safety feature, your vehicle has been
equipped with a TPMS that illuminates a low tire
pressure telltale when one or more of your tires is
significantly underinflated. Accordingly, when the
low tire pressure telltale illuminates, you should
stop and check your tires as soon as possible, and
inflate them to the proper pressure. Driving on a
significantly underinflated tire causes the tire to
overheat and can lead to tire failure. Underinflation
also reduces fuel efficiency and tire tread life, and
may affect the vehicle’s handling and stopping
ability.
Please note that the TPMS is not a substitute for
proper tire maintenance, and it is the driver’s
responsibility to maintain correct tire pressure,
even if underinflation has not reached the level to
trigger illumination of the TPMS low tire pressure
telltale.
CAUTION!
Do not continue driving with one or more flat
tires as handling may be compromised. Stop the
vehicle, avoiding sharp braking and steering. If a
tire puncture occurs, repair immediately using
the dedicated tire repair kit and contact an
authorized dealer as soon as possible.
22_WD_OM_EN_USC_t.book Page 94
Page 110 of 332
108STARTING AND OPERATING
Manual (M)
The MANUAL (M, +/-) position (beside the DRIVE
position) enables full manual control of
transmission shifting (also known as AutoStick
mode Ú page 108). Toggling the gear selector
forward (-) or rearward (+) while in the MANUAL
(AutoStick) position will manually select the
transmission gear, and will display the current gear
in the instrument cluster as 1, 2, 3, etc.
Transmission Limp Home Mode
Transmission function is monitored electronically
for abnormal conditions. If a condition is detected
that could result in transmission damage,
Transmission Limp Home Mode is activated. In this
mode, the transmission may operate only in
certain gears, or may not shift at all. Vehicle
performance may be severely degraded and the
engine may stall. In some situations, the
transmission may not re-engage if the engine is
turned off and restarted. The Malfunction Indicator
Light (MIL) may be illuminated. A message in the
instrument cluster will inform the driver of the
more serious conditions, and indicate what actions
may be necessary.
In the event of a momentary problem, the
transmission can be reset to regain all forward
gears by performing the following steps:
NOTE:In cases where the instrument cluster message
indicates the transmission may not re-engage after
engine shutdown, perform this procedure only in a
desired location (preferably, at an authorized
dealer):
1. Stop the vehicle.
2. Shift the transmission into PARK (P), if possible. If not, shift the transmission to
NEUTRAL (N).
3. Push and hold the ignition switch until the engine turns off.
4. Wait approximately 30 seconds.
5. Restart the engine.
6. Shift into the desired gear range. If the problem is no longer detected, the
transmission will return to normal operation.
NOTE:Even if the transmission can be reset, we
recommend that you visit an authorized dealer at
your earliest possible convenience. An authorized
dealer has diagnostic equipment to assess the
condition of your transmission. If the transmission
cannot be reset, authorized dealer service is
required.
AutoStick — If Equipped
AutoStick is a driver-interactive transmission
feature providing manual shift control, giving you
more control of the vehicle. AutoStick allows you to
maximize engine braking, eliminate undesirable
upshifts and downshifts, and improve overall
vehicle performance. This feature can also provide
you with more control during passing, city driving,
cold slippery conditions, mountain driving, trailer
towing, and many other situations.
Operation
In AutoStick mode, you can use the gear selector
(in the MANUAL position), or the paddle shifters to
the MANUAL (M) position (beside the DRIVE (D)
position), or tap one of the paddle shifters on the
steering wheel. Tapping the (-) paddle shifter to
enter AutoStick mode will downshift the
transmission to the next lower gear, while
tapping (+) to enter AutoStick mode will retain the
current gear. The current transmission gear will be
displayed in the instrument cluster.
NOTE:The paddle shifters (if equipped) may be disabled
using the Uconnect Personal Settings.
22_WD_OM_EN_USC_t.book Page 108
Page 111 of 332
STARTING AND OPERATING109
AutoStick mode has the following operational
benefits:
The transmission will automatically downshift
as the vehicle slows (to prevent engine lugging)
and will display the current gear.
The transmission will automatically downshift to
FIRST gear when coming to a stop. After a stop,
the driver should manually upshift (+) the trans -
mission as the vehicle is accelerated.
You can start out, from a stop, in FIRST or
SECOND gear. Tapping (+) at a stop will allow
starting in SECOND gear. Starting out in
SECOND gear can be helpful in snowy or icy
conditions.
If a requested downshift would cause the
engine to over-speed, that shift will not occur.
The system will ignore attempts to upshift at too
low of a vehicle speed.
Holding the (-) paddle pressed, or holding the
gear selector in the (-) position, will downshift
the transmission to the lowest gear possible at
the current speed.
Transmission shifting will be more noticeable
when AutoStick is enabled.
The system may revert to automatic shift mode
if a fault or overheat condition is detected. To disengage AutoStick mode, return the gear
selector to the DRIVE (D) position, or press and
hold the (+) paddle shifter until "D" is indicated in
the instrument cluster. You can shift in or out of
AutoStick mode at any time without taking your
foot off the accelerator pedal.
SPORT MODE — IF EQUIPPED
Your vehicle is equipped with a SPORT Mode
feature. The engine, transmission, and steering
systems are all set to their SPORT settings. SPORT
Mode will provide improved throttle response and
modified transmission shift points for an enhanced
driving experience, as well as greater amount of
steering feel. This mode may be activated and
deactivated by pushing the SPORT button on the
instrument panel switch bank.
ALL-WHEEL DRIVE OPERATION
SINGLE-SPEED OPERATING
I
NSTRUCTIONS/PRECAUTIONS —
I
F EQUIPPED
This system contains a single-speed (HI range only)
transfer case, which provides convenient full-time
All-Wheel Drive (AWD). No driver interaction is
required. The Brake Traction Control (BTC) System,
which combines standard ABS and Traction
Control, provides resistance to any wheel that is
slipping to allow additional torque transfer to
wheels with traction.
NOTE:This system is not appropriate for conditions where
AWD LOW is recommended Ú page 153.
ELECTRONICALLY SHIFTED TRANSFER
C
ASE — IF EQUIPPED
This is an electronically shifted transfer case and it
is operated by the AWD control switch, which is
located on the center console.
WARNING!
Do not downshift for additional engine braking
on a slippery surface. The drive wheels could
lose their grip and the vehicle could skid,
causing a collision or personal injury.
4
22_WD_OM_EN_USC_t.book Page 109
Page 114 of 332
112STARTING AND OPERATING
Alternate Procedure
1. Bring the vehicle to complete stop.
2. With the ignition in ON/RUN position and engine running, shift the transmission to
NEUTRAL.
3. Push the AWD LOW control switch.
4. After the AWD LOW position indicator light is on (not flashing), shift the transmission back
into gear.
NOTE:
If steps 1 or 2 of either the “Preferred” or
“Alternate Procedure” are not satisfied prior to
attempting the shift or if they no longer are
being met while the shift attempt is in process,
the desired position indicator light will flash
continuously while the original position indicator
light is on, until all requirements have been met.
The ignition switch must be in the ON/RUN posi -
tion for a shift to take place and for the position
indicator lights to be operable. If the ignition
switch is not in the ON/RUN position, then the
shift will not take place and no position indicator
lights will be on or flashing.
N (Neutral) Shift Procedure
For information regarding the transfer case N
(Neutral) shift procedure Ú page 151.
TOW N GO — IF EQUIPPED
Tow N Go combines the capabilities of the vehicle
control systems, along with driver input, to provide
optimum performance for road conditions.
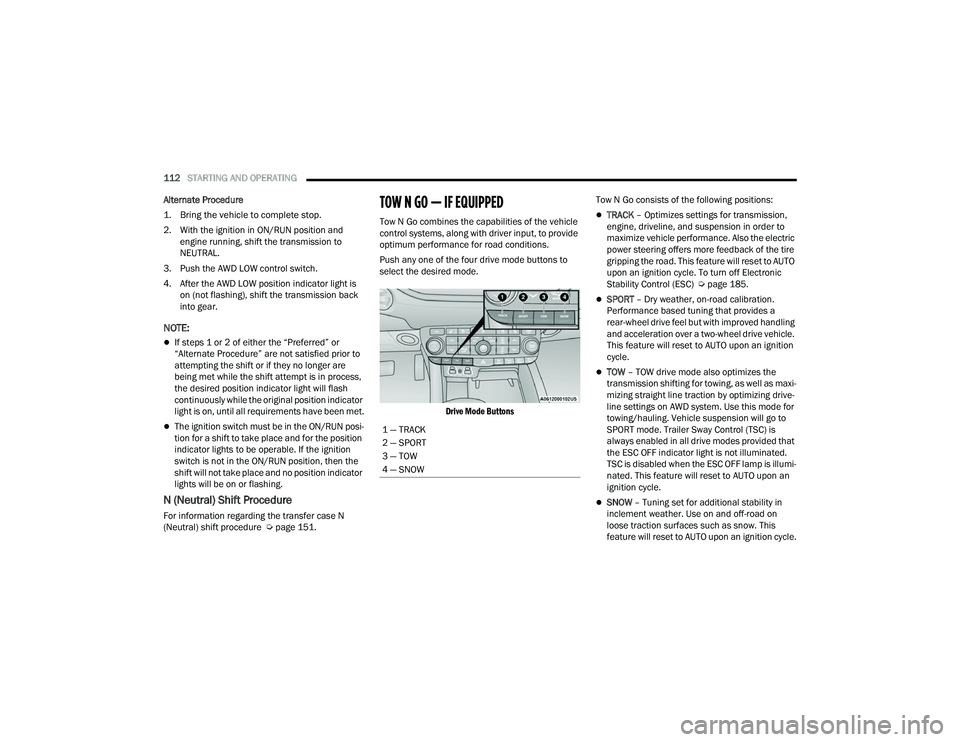
Push any one of the four drive mode buttons to
select the desired mode.
Drive Mode Buttons
Tow N Go consists of the following positions:TRACK
– Optimizes settings for transmission,
engine, driveline, and suspension in order to
maximize vehicle performance. Also the electric
power steering offers more feedback of the tire
gripping the road. This feature will reset to AUTO
upon an ignition cycle. To turn off Electronic
Stability Control (ESC) Ú page 185.
SPORT – Dry weather, on-road calibration.
Performance based tuning that provides a
rear-wheel drive feel but with improved handling
and acceleration over a two-wheel drive vehicle.
This feature will reset to AUTO upon an ignition
cycle.
TOW – TOW drive mode also optimizes the
transmission shifting for towing, as well as maxi -
mizing straight line traction by optimizing drive -
line settings on AWD system. Use this mode for
towing/hauling. Vehicle suspension will go to
SPORT mode. Trailer Sway Control (TSC) is
always enabled in all drive modes provided that
the ESC OFF indicator light is not illuminated.
TSC is disabled when the ESC OFF lamp is illumi -
nated. This feature will reset to AUTO upon an
ignition cycle.
SNOW – Tuning set for additional stability in
inclement weather. Use on and off-road on
loose traction surfaces such as snow. This
feature will reset to AUTO upon an ignition cycle.
1 — TRACK
2 — SPORT
3 — TOW
4 — SNOW
22_WD_OM_EN_USC_t.book Page 112
Page 116 of 332
114STARTING AND OPERATING
7. New brake pads installed on old rotors require a burnish. New rotors installed with old brake
pads should be burnished at the track or
driven for 300 miles (485 km) of city driving to
develop an adequate lining transfer layer on
the rotor surface prior to track use.
8. Rotors that pulsate during track use should be replaced.
NOTE:Resurfacing of the rotors is not recommended, as
it removes mass from the rotor, reducing its
thermal capacity. Resurfacing also thins the rotor
cheek, making it less robust and increasing the
likelihood of pulsation in further track use.
FUEL SAVER TECHNOLOGY 5.7L ONLY —
IF EQUIPPED
This feature offers improved fuel economy by
shutting off four of the engine's eight cylinders
during light load and cruise conditions. The system
is automatic with no driver inputs.
NOTE:This system may take some time to return to full
functionality after a battery disconnect.
POWER STEERING
The electric power steering system will provide
increased vehicle response and ease of
maneuverability. The power steering system
adapts to different driving conditions and adjusts
accordingly.
Alternate electric power steering efforts can be
selected through the Uconnect System
Úpage 156.
If the Electric Power Steering warning icon is
displayed and the “SERVICE POWER STEERING” or
the “POWER STEERING ASSIST OFF – SERVICE
SYSTEM” message is displayed within the
instrument cluster display, this indicates the
vehicle needs to be taken to the dealer for service
Ú page 89.
NOTE:
Even if the power steering assistance is no
longer operational, it is still possible to steer the
vehicle. Under these conditions there will be a
substantial increase in steering effort, espe -
cially at low speeds and during parking maneu -
vers.
If the condition persists, see an authorized
dealer for service.
If the Steering icon is displayed and the “POWER
STEERING SYSTEM OVER TEMP” message is
displayed on the instrument cluster screen, this
indicates an over temperature condition in the
power steering system. Once driving conditions are
safe, pull over and let the vehicle idle for a few
moments until the icon and message turn off.
STOP/START SYSTEM — IF EQUIPPED
The Stop/Start function is developed to reduce
fuel consumption. The system will stop the engine
automatically during a vehicle stop if the required
conditions are met. Releasing the brake pedal or
pressing the accelerator pedal will automatically
re-start the engine.
This vehicle has been upgraded with a heavy duty
starter, enhanced battery, and other upgraded
engine parts, to handle the additional engine
starts.
WARNING!
Continued operation with reduced assist could
pose a safety risk to yourself and others. Service
should be obtained as soon as possible.
22_WD_OM_EN_USC_t.book Page 114
Page 117 of 332
STARTING AND OPERATING115
AUTOSTOP MODE
The Stop/Start feature is enabled after every
normal customer engine start. At that time, the
system will go into STOP/START READY.
To Activate The Autostop Mode, The Following
Must Occur:
The system must be in STOP/START READY
state. A STOP/START READY message will be
displayed in the instrument cluster display
within the Stop/Start section Ú page 81.
The vehicle must be completely stopped.
The gear selector must be in a forward gear and
the brake pedal pressed.
The engine will shut down, the tachometer will
move to the zero position and the Stop/Start
telltale will illuminate indicating you are in
Autostop. Customer settings will be maintained
upon return to an engine running condition.
POSSIBLE REASONS THE ENGINE DOES
N
OT AUTOSTOP
Prior to engine shut down, the system will check
many safety and comfort conditions to see if they
are fulfilled. Detailed information about the
operation of the Stop/Start system may be viewed
in the instrument cluster display Stop/Start Screen. In the following situations, the engine will
not stop:
Driver’s seat belt is not buckled.
Driver’s door is not closed.
Battery temperature is too warm or cold.
Battery charge is low.
The vehicle is on a steep grade.
Cabin heating or cooling is in process and an
acceptable cabin temperature has not been
achieved.
HVAC is set to full defrost mode at a high blower
speed.
HVAC is set to MAX A/C.
Engine has not reached normal operating
temperature.
The transmission is not in a forward gear.
Hood is open.
Brake pedal is not pressed with sufficient pres
-
sure.
Accelerator pedal input.
Engine temp is too high.
5 mph (8 km/h) threshold has not been
achieved from previous Autostop.
Steering angle is beyond threshold.
ACC is on and speed is set.
It may be possible for the vehicle to be driven
several times without the Stop/Start system going
into a STOP/START READY state under more
extreme conditions of the items listed above.
TO START THE ENGINE WHILE IN
A
UTOSTOP MODE
While in a forward gear, the engine will start when
the brake pedal is released or the throttle pedal is
pressed. The transmission will automatically
re-engage upon engine restart.
Conditions That Will Cause The Engine To Start
Automatically While In Autostop Mode:
The transmission selector is moved out of
DRIVE.
To maintain cabin temperature comfort.
HVAC is set to full defrost mode.
HVAC system temperature or fan speed is
manually adjusted.
Battery voltage drops too low.
Stop/Start OFF switch is pushed.
A Stop/Start system error occurs.
Steering angle is beyond threshold.
4
22_WD_OM_EN_USC_t.book Page 115
Page 118 of 332
116STARTING AND OPERATING
TO MANUALLY TURN OFF THE STOP/
S
TART SYSTEM
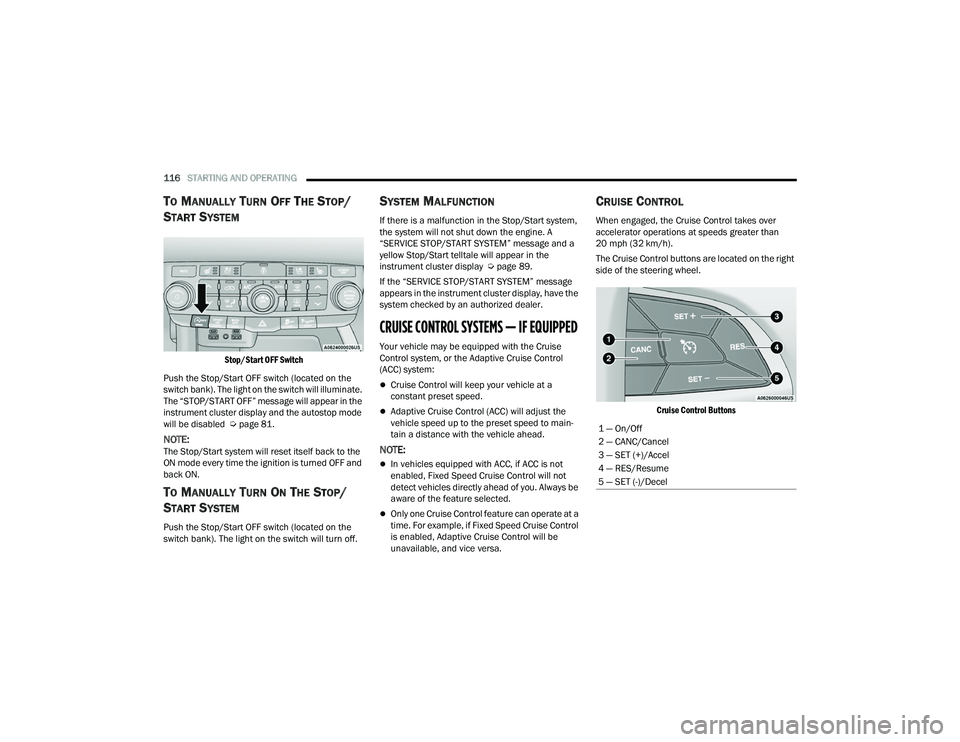
Stop/Start OFF Switch
Push the Stop/Start OFF switch (located on the
switch bank). The light on the switch will illuminate.
The “STOP/START OFF” message will appear in the
instrument cluster display and the autostop mode
will be disabled Ú page 81.
NOTE:The Stop/Start system will reset itself back to the
ON mode every time the ignition is turned OFF and
back ON.
TO MANUALLY TURN ON THE STOP/
S
TART SYSTEM
Push the Stop/Start OFF switch (located on the
switch bank). The light on the switch will turn off.
SYSTEM MALFUNCTION
If there is a malfunction in the Stop/Start system,
the system will not shut down the engine. A
“SERVICE STOP/START SYSTEM” message and a
yellow Stop/Start telltale will appear in the
instrument cluster display Ú page 89.
If the “SERVICE STOP/START SYSTEM” message
appears in the instrument cluster display, have the
system checked by an authorized dealer.
CRUISE CONTROL SYSTEMS — IF EQUIPPED
Your vehicle may be equipped with the Cruise
Control system, or the Adaptive Cruise Control
(ACC) system:
Cruise Control will keep your vehicle at a
constant preset speed.
Adaptive Cruise Control (ACC) will adjust the
vehicle speed up to the preset speed to main -
tain a distance with the vehicle ahead.
NOTE:
In vehicles equipped with ACC, if ACC is not
enabled, Fixed Speed Cruise Control will not
detect vehicles directly ahead of you. Always be
aware of the feature selected.
Only one Cruise Control feature can operate at a
time. For example, if Fixed Speed Cruise Control
is enabled, Adaptive Cruise Control will be
unavailable, and vice versa.
CRUISE CONTROL
When engaged, the Cruise Control takes over
accelerator operations at speeds greater than
20 mph (32 km/h).
The Cruise Control buttons are located on the right
side of the steering wheel.
Cruise Control Buttons
1 — On/Off
2 — CANC/Cancel
3 — SET (+)/Accel
4 — RES/Resume
5 — SET (-)/Decel
22_WD_OM_EN_USC_t.book Page 116
Page 121 of 332
STARTING AND OPERATING119
Adaptive Cruise Control (ACC) Operation
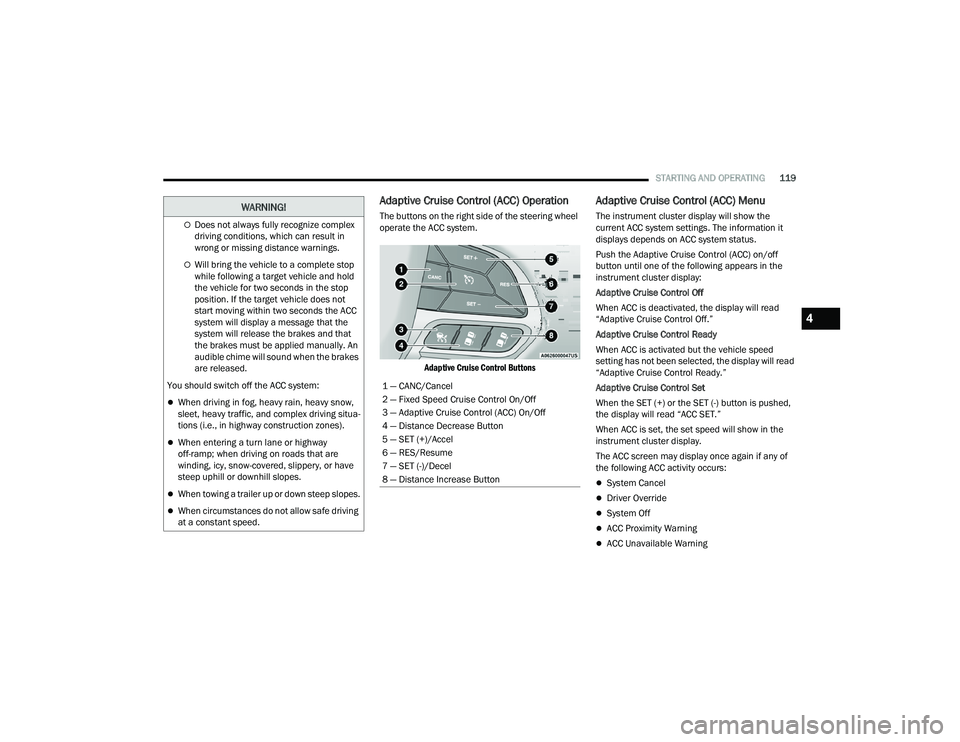
The buttons on the right side of the steering wheel
operate the ACC system.
Adaptive Cruise Control Buttons
Adaptive Cruise Control (ACC) Menu
The instrument cluster display will show the
current ACC system settings. The information it
displays depends on ACC system status.
Push the Adaptive Cruise Control (ACC) on/off
button until one of the following appears in the
instrument cluster display:
Adaptive Cruise Control Off
When ACC is deactivated, the display will read
“Adaptive Cruise Control Off.”
Adaptive Cruise Control Ready
When ACC is activated but the vehicle speed
setting has not been selected, the display will read
“Adaptive Cruise Control Ready.”
Adaptive Cruise Control Set
When the SET (+) or the SET (-) button is pushed,
the display will read “ACC SET.”
When ACC is set, the set speed will show in the
instrument cluster display.
The ACC screen may display once again if any of
the following ACC activity occurs:
System Cancel
Driver Override
System Off
ACC Proximity Warning
ACC Unavailable Warning
Does not always fully recognize complex
driving conditions, which can result in
wrong or missing distance warnings.
Will bring the vehicle to a complete stop
while following a target vehicle and hold
the vehicle for two seconds in the stop
position. If the target vehicle does not
start moving within two seconds the ACC
system will display a message that the
system will release the brakes and that
the brakes must be applied manually. An
audible chime will sound when the brakes
are released.
You should switch off the ACC system:
When driving in fog, heavy rain, heavy snow,
sleet, heavy traffic, and complex driving situa -
tions (i.e., in highway construction zones).
When entering a turn lane or highway
off-ramp; when driving on roads that are
winding, icy, snow-covered, slippery, or have
steep uphill or downhill slopes.
When towing a trailer up or down steep slopes.
When circumstances do not allow safe driving
at a constant speed.
WARNING!
1 — CANC/Cancel
2 — Fixed Speed Cruise Control On/Off
3 — Adaptive Cruise Control (ACC) On/Off
4 — Distance Decrease Button
5 — SET (+)/Accel
6 — RES/Resume
7 — SET (-)/Decel
8 — Distance Increase Button
4
22_WD_OM_EN_USC_t.book Page 119
Page 136 of 332
134STARTING AND OPERATING
When both lane markings are detected and the
driver drifts out of the lane (no turn signal applied),
the LaneSense system provides a haptic warning
in the form of torque applied to the steering wheel
to prompt the driver to remain within the lane
boundaries. If the driver continues to drift out of
the lane, the LaneSense system provides a visual
warning through the instrument cluster display to
prompt the driver to remain within the lane
boundaries.
The driver may manually override the haptic
warning by applying force to the steering wheel at
any time.
When only a single lane marking is detected and
the driver drifts across the lane marking (no turn
signal applied), the LaneSense system provides
visual warnings through the instrument cluster
display to prompt the driver to remain within the
lane. When only a single lane marking is detected,
a haptic or a torque warning will not be provided.
NOTE:When operating conditions have been met, the
LaneSense system will monitor if the driver’s
hands are on the steering wheel and provide an
audible warning to the driver if removed. The
system will cancel if the driver does not return their
hands to the wheel.
TURNING LANESENSE ON OR OFF
The LaneSense button is located on the
switch panel below the Uconnect display.
To turn the LaneSense system on, push the
LaneSense button (LED turns off). A “LaneSense
On” message is shown in the instrument cluster
display.
To turn the LaneSense system off, push the
LaneSense button once (LED turns on).
NOTE:The LaneSense system will retain the last system
state on or off from the last ignition cycle when the
ignition is placed in the ON/RUN position.
LANESENSE WARNING MESSAGE
The LaneSense system will indicate the current
lane drift condition through the instrument cluster
display.
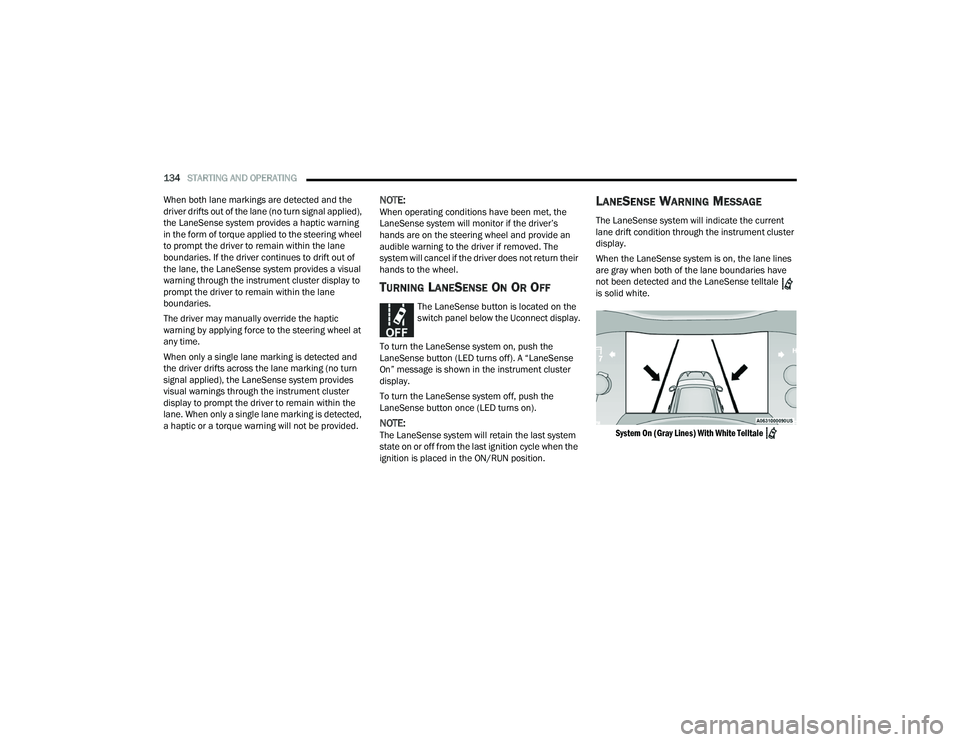
When the LaneSense system is on, the lane lines
are gray when both of the lane boundaries have
not been detected and the LaneSense telltale
is solid white.
System On (Gray Lines) With White Telltale
22_WD_OM_EN_USC_t.book Page 134