keyless DODGE DURANGO 2023 User Guide
[x] Cancel search | Manufacturer: DODGE, Model Year: 2023, Model line: DURANGO, Model: DODGE DURANGO 2023Pages: 328, PDF Size: 13.82 MB
Page 71 of 328
GETTING TO KNOW YOUR VEHICLE69
Automatic Window Features
Auto-Down Feature
Both the driver and front passenger window
switches have an Auto-Down feature. Push the
window switch past the first detent, release, and
the window will go down automatically.
To cancel the Auto-Down movement, operate the
switch in either the up or down direction and
release the switch.
Auto-Up Feature With Anti-Pinch Protection —
Driver And Front Passenger Door Only
Lift the window switch fully upward to the second
detent, release, and the window will go up
automatically. To stop the window from going all the way up
during the Auto-Up operation, push down on the
switch briefly.
If the window runs into any obstacle during
Auto-Up, it will reverse direction and then go back
down. Remove the obstacle and use the window
switch again to close the window.
NOTE:Any impact due to rough road conditions may
trigger the auto reverse function unexpectedly
during Auto-Up. If this happens, pull the switch
lightly to the first detent and hold it to close the
window manually.
Reset Auto-Up
Should the Auto-Up feature stop working, the
window may need to be reset. To reset Auto-Up:
1. Make sure the door is fully closed.
2. Pull the window switch up to close the window
completely and continue to hold the switch up
for an additional two seconds after the window
is closed. 3. Push the window switch down firmly to the
second detent to open the window completely
and continue to hold the switch down for an
additional two seconds after the window is
fully open.
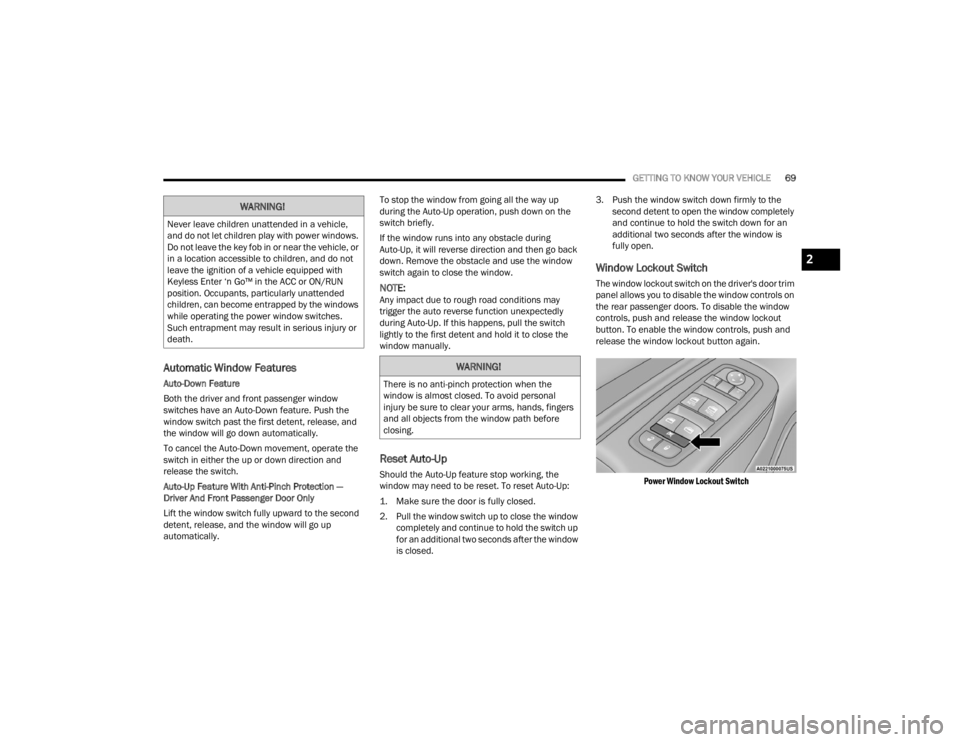
Window Lockout Switch
The window lockout switch on the driver's door trim
panel allows you to disable the window controls on
the rear passenger doors. To disable the window
controls, push and release the window lockout
button. To enable the window controls, push and
release the window lockout button again.
Power Window Lockout Switch
WARNING!
Never leave children unattended in a vehicle,
and do not let children play with power windows.
Do not leave the key fob in or near the vehicle, or
in a location accessible to children, and do not
leave the ignition of a vehicle equipped with
Keyless Enter ‘n Go™ in the ACC or ON/RUN
position. Occupants, particularly unattended
children, can become entrapped by the windows
while operating the power window switches.
Such entrapment may result in serious injury or
death.
WARNING!
There is no anti-pinch protection when the
window is almost closed. To avoid personal
injury be sure to clear your arms, hands, fingers
and all objects from the window path before
closing.
2
23_WD_OM_EN_USC_t.book Page 69
Page 72 of 328
70GETTING TO KNOW YOUR VEHICLE
WIND BUFFETING
Wind buffeting can be described as the perception
of pressure on the ears or a helicopter-type sound
in the ears. Your vehicle may exhibit wind buffeting
with the windows down, or the sunroof (if
equipped) in certain open or partially open
positions. This is a normal occurrence and can be
minimized. If the buffeting occurs with the rear
windows open, open the front and rear windows
together to minimize the buffeting. If the buffeting
occurs with the sunroof open, adjust the sunroof
opening to minimize the buffeting or open any
window.
POWER SUNROOF — IF EQUIPPED
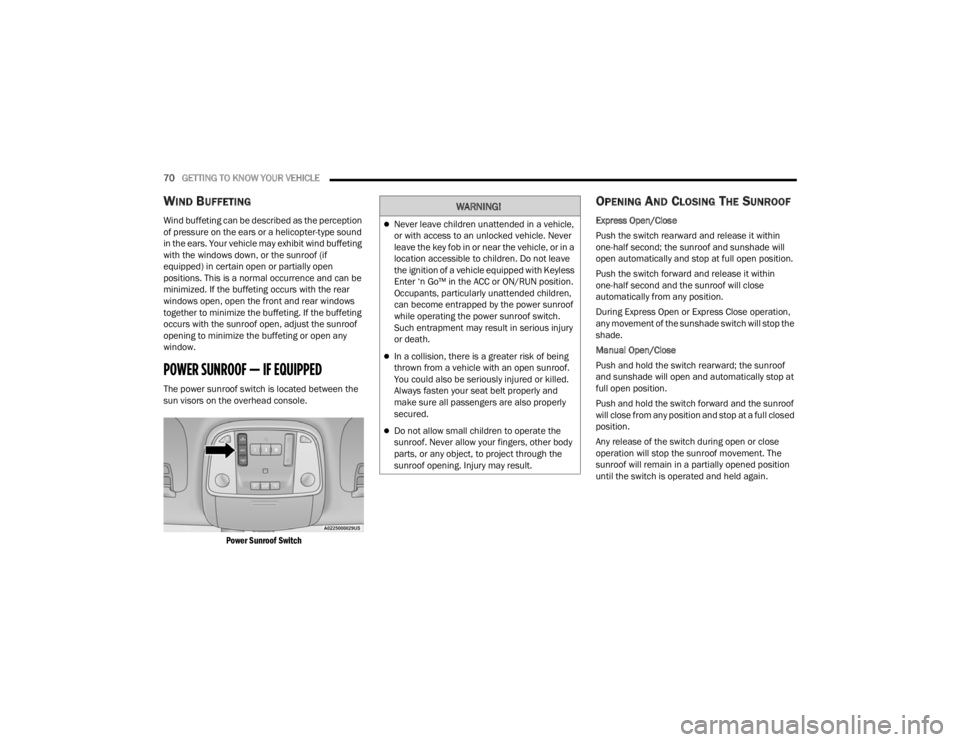
The power sunroof switch is located between the
sun visors on the overhead console.
Power Sunroof Switch
OPENING AND CLOSING THE SUNROOF
Express Open/Close
Push the switch rearward and release it within
one-half second; the sunroof and sunshade will
open automatically and stop at full open position.
Push the switch forward and release it within
one-half second and the sunroof will close
automatically from any position.
During Express Open or Express Close operation,
any movement of the sunshade switch will stop the
shade.
Manual Open/Close
Push and hold the switch rearward; the sunroof
and sunshade will open and automatically stop at
full open position.
Push and hold the switch forward and the sunroof
will close from any position and stop at a full closed
position.
Any release of the switch during open or close
operation will stop the sunroof movement. The
sunroof will remain in a partially opened position
until the switch is operated and held again.
WARNING!
Never leave children unattended in a vehicle,
or with access to an unlocked vehicle. Never
leave the key fob in or near the vehicle, or in a
location accessible to children. Do not leave
the ignition of a vehicle equipped with Keyless
Enter ‘n Go™ in the ACC or ON/RUN position.
Occupants, particularly unattended children,
can become entrapped by the power sunroof
while operating the power sunroof switch.
Such entrapment may result in serious injury
or death.
In a collision, there is a greater risk of being
thrown from a vehicle with an open sunroof.
You could also be seriously injured or killed.
Always fasten your seat belt properly and
make sure all passengers are also properly
secured.
Do not allow small children to operate the
sunroof. Never allow your fingers, other body
parts, or any object, to project through the
sunroof opening. Injury may result.
23_WD_OM_EN_USC_t.book Page 70
Page 81 of 328
GETTING TO KNOW YOUR INSTRUMENT PANEL79
Use this QR code to access your
digital experience.
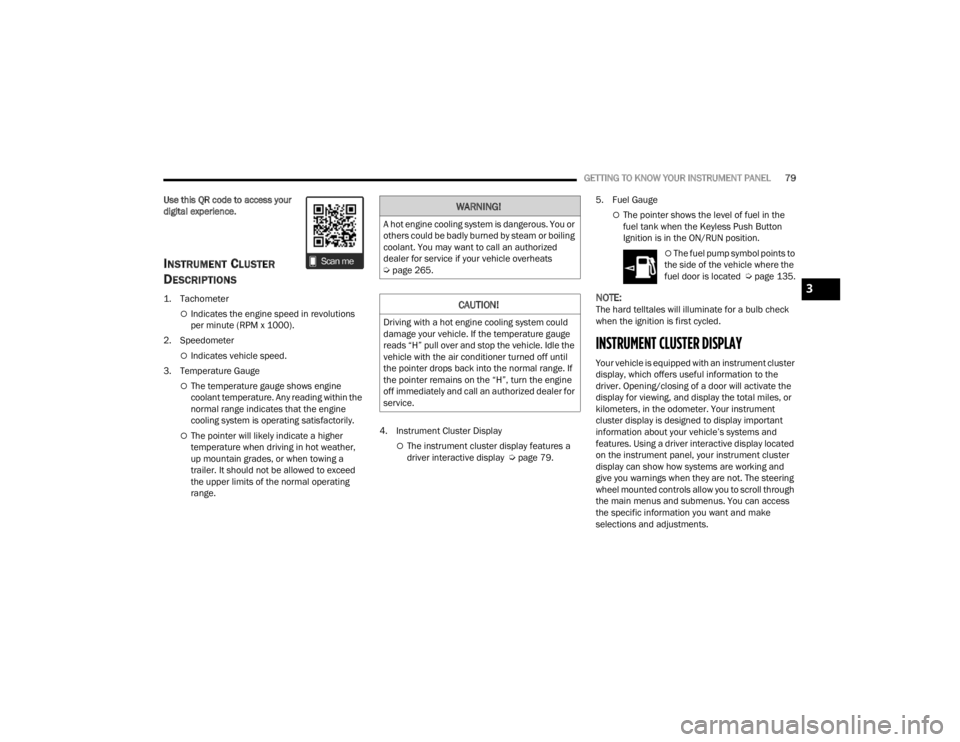
INSTRUMENT CLUSTER
D
ESCRIPTIONS
1. Tachometer
Indicates the engine speed in revolutions
per minute (RPM x 1000).
2. Speedometer
Indicates vehicle speed.
3. Temperature Gauge
The temperature gauge shows engine
coolant temperature. Any reading within the
normal range indicates that the engine
cooling system is operating satisfactorily.
The pointer will likely indicate a higher
temperature when driving in hot weather,
up mountain grades, or when towing a
trailer. It should not be allowed to exceed
the upper limits of the normal operating
range. 4. Instrument Cluster DisplayThe instrument cluster display features a
driver interactive display Ú
page 79.5. Fuel Gauge
The pointer shows the level of fuel in the
fuel tank when the Keyless Push Button
Ignition is in the ON/RUN position.
The fuel pump symbol points to
the side of the vehicle where the
fuel door is located Ú page 135.
NOTE:The hard telltales will illuminate for a bulb check
when the ignition is first cycled.
INSTRUMENT CLUSTER DISPLAY
Your vehicle is equipped with an instrument cluster
display, which offers useful information to the
driver. Opening/closing of a door will activate the
display for viewing, and display the total miles, or
kilometers, in the odometer. Your instrument
cluster display is designed to display important
information about your vehicle’s systems and
features. Using a driver interactive display located
on the instrument panel, your instrument cluster
display can show how systems are working and
give you warnings when they are not. The steering
wheel mounted controls allow you to scroll through
the main menus and submenus. You can access
the specific information you want and make
selections and adjustments.
WARNING!
A hot engine cooling system is dangerous. You or
others could be badly burned by steam or boiling
coolant. You may want to call an authorized
dealer for service if your vehicle overheats
Úpage 265.
CAUTION!
Driving with a hot engine cooling system could
damage your vehicle. If the temperature gauge
reads “H” pull over and stop the vehicle. Idle the
vehicle with the air conditioner turned off until
the pointer drops back into the normal range. If
the pointer remains on the “H”, turn the engine
off immediately and call an authorized dealer for
service.
3
23_WD_OM_EN_USC_t.book Page 79
Page 84 of 328
82GETTING TO KNOW YOUR INSTRUMENT PANEL
ENGINE OIL LIFE RESET
Use this QR code to access your
digital experience.
Oil Change Required
Your vehicle is equipped with an
engine oil change indicator
system. The “Oil Change
Required” message will display in
the instrument cluster display for five seconds
after a single chime has sounded, to indicate the
next scheduled oil change interval. The engine oil
change indicator system is duty cycle based, which
means the engine oil change interval may
fluctuate, dependent upon your personal driving
style.
Unless reset, this message will continue to display
each time the ignition is placed in the ON/RUN
position. To turn off the message temporarily, push
and release the OK or arrow buttons. To reset the
oil change indicator system (after performing the
scheduled maintenance), refer to the following
procedure. Vehicles Equipped With Keyless Enter ‘n Go™ —
Ignition
Use the steering wheel instrument cluster display
controls for the following procedure(s):
1. Without pressing the brake pedal, push the
ENGINE START/STOP button and place the
ignition in the ON/RUN position (do not start
the engine).
2. Push and release the down arrow button to
scroll downward through the main menu to
“Vehicle Info.”
3. Push and release the right arrow button to
access the ”Oil Life” screen.
4. Push and hold the OK button to reset oil life. If
conditions are met, the gauge and numeric
display will update to show 100%. If conditions
are not met a pop-up message of “To reset oil
life engine must be off with ignition in run” will
be displayed (for five seconds), and the user
will remain at the Oil Life screen.
5. Push and release the up or down arrow
button to exit the submenu screen.
NOTE:If the indicator message illuminates when you start
the vehicle, the oil change indicator system did not
reset. If necessary, repeat this procedure.
Secondary Method Of Resetting Engine Oil Life
1. Without pressing the brake pedal, push the ENGINE START/STOP button and place the
ignition to the ON/RUN position (do not start
the engine).
2. Fully press the accelerator pedal, slowly, three times within 10 seconds.
3. Without pushing the brake pedal, push the ENGINE START/STOP button once to return the
ignition to the OFF position.
NOTE:If the indicator message illuminates when you start
the vehicle, the oil change indicator system did not
reset. If necessary, repeat this procedure.
23_WD_OM_EN_USC_t.book Page 82
Page 100 of 328
98 (Continued)
(Continued)
STARTING AND OPERATING
STARTING THE ENGINE
Before starting your vehicle, adjust your seat,
adjust the inside and outside mirrors, fasten your
seat belt, and if present, instruct all other
occupants to buckle their seat belts.
AUTOMATIC TRANSMISSION
The gear selector must be in the NEUTRAL (N) or
PARK (P) position before you can start the engine.
Apply the brakes before shifting into any driving
gear.
NORMAL STARTING
To Turn On The Engine Using The ENGINE START/
STOP Button
1. The transmission must be in PARK (P).
2. Press and hold the brake pedal while pushing
the ENGINE START/STOP button once.
3. The system starts the vehicle. If the vehicle fails to start, the starter will disengage
automatically after 10 seconds.
4. If you wish to stop the cranking of the engine prior to the engine starting, push the ENGINE
START/STOP button again.
WARNING!
Before exiting a vehicle, always come to a
complete stop, then shift the automatic trans -
mission into PARK and apply the parking
brake.
Always make sure the keyless ignition node is
in the OFF position, key fob is removed from
the vehicle and vehicle is locked.
Never leave children alone in a vehicle, or with
access to an unlocked vehicle. Leaving chil -
dren in a vehicle unattended is dangerous for
a number of reasons. A child or others could
be seriously or fatally injured. Children should
be warned not to touch the parking brake,
brake pedal or the gear selector.
Do not leave the key fob in or near the vehicle,
or in a location accessible to children, and do
not leave the ignition of a vehicle equipped
with Keyless Enter ‘n Go™ in the ACC or ON/
RUN position. A child could operate power
windows, other controls, or move the vehicle.
Do not leave children or animals inside parked
vehicles in hot weather. Interior heat build-up
may cause serious injury or death.
CAUTION!
Damage to the transmission may occur if the
following precautions are not observed:
Do not shift from REVERSE (R), PARK, or
NEUTRAL into any forward gear when the
engine is above idle speed.
WARNING!
Shift into or out of PARK or REVERSE only after
the vehicle has come to a complete stop and
the engine is at idle speed.
Before shifting into any gear, make sure your
foot is firmly on the brake pedal.
CAUTION!
23_WD_OM_EN_USC_t.book Page 98
Page 102 of 328
100STARTING AND OPERATING
If the vehicle is not in PARK and the driver turns off
the engine, the vehicle may AutoPark.
AutoPark will engage when all of these conditions
are met:
Vehicle is equipped with an 8-speed transmis -
sion
Vehicle is not in PARK
Vehicle speed is 1.2 mph (1.9 km/h) or less
Ignition switched from ON/RUN to ACC
NOTE:For Keyless Enter ‘n Go™ equipped vehicles, the
engine will turn off and the ignition switch will
change to the ACC position. After 60 seconds, the
ignition switches to OFF automatically, unless the
driver turns the ignition switch OFF.
If the vehicle is not in PARK and the driver exits the
vehicle with the engine running, the vehicle may
AutoPark.
AutoPark will engage when all of these conditions
are met:
Vehicle is equipped with an 8-speed transmis -
sion
Vehicle is not in PARK
Vehicle speed is 1.2 mph (1.9 km/h) or less
Driver’s seat belt is unbuckled
Driver’s door is ajar
Brake pedal is not pressed The message “
AutoPark Engaged Shift To P Then
Shift To Gear ” will display in the instrument cluster.
NOTE:In some cases the ParkSense graphic will be
displayed in the instrument cluster. In these cases,
the gear selector must be returned to “P” to select
desired gear.
If the driver shifts into PARK while moving, the
vehicle may AutoPark.
AutoPark will engage ONLY when vehicle speed is
1.2 mph (1.9 km/h) or less.
The message “ Vehicle Speed Is Too High To Shift
To P ” will be displayed in the instrument cluster if
vehicle speed is above 1.2 mph (1.9 km/h).
4WD LOW — If Equipped
AutoPark will be disabled when operating the
vehicle in 4WD LOW.
The message “ AutoPark Disabled ” will be
displayed in the instrument cluster. Additional customer warnings will be given when
both of these conditions are met:Vehicle is not in PARK
Driver’s door is ajar
The message “ AutoPark Not Engaged” will be
displayed in the instrument cluster. A warning
chime will continue until you shift the vehicle into
PARK or the driver’s door is closed.
ALWAYS DO A VISUAL CHECK
that your vehicle is in
PARK by looking for the "P" in the instrument
cluster display and on the gear selector. As an
added precaution, always apply the parking brake
when exiting the vehicle.
EXTENDED PARK STARTING
NOTE:Extended Park condition occurs when the vehicle
has not been started or driven for at least 30 days.
1. Install a battery charger or jumper cables to the battery to ensure a full battery charge
during the crank cycle.
2. Press and hold the brake pedal while pushing the ENGINE START/STOP button once.
3. If the engine fails to start within 10 seconds, place the ignition in the OFF position, wait 10
to 15 seconds to allow the starter to cool, then
repeat the “Extended Park Starting”
procedure.
WARNING!
If vehicle speed is above 1.2 mph (1.9 km/h),
the transmission will default to NEUTRAL until
the vehicle speed drops below 1.2 mph
(1.9 km/h). A vehicle left in the NEUTRAL
position can roll. As an added precaution, always
apply the parking brake when exiting the vehicle.
23_WD_OM_EN_USC_t.book Page 100
Page 104 of 328
102STARTING AND OPERATING
(Continued)
(Continued)
NOTE:A new engine may consume some oil during its first
few thousand miles (kilometers) of operation. This
should be considered a normal part of the break-in
and not interpreted as a problem. Please check
your oil level with the engine oil indicator often
during the break-in period. Add oil as required.
PARKING BRAKE
Before leaving the vehicle, make sure that the
parking brake is fully applied and place the gear
selector in the PARK (P) position.
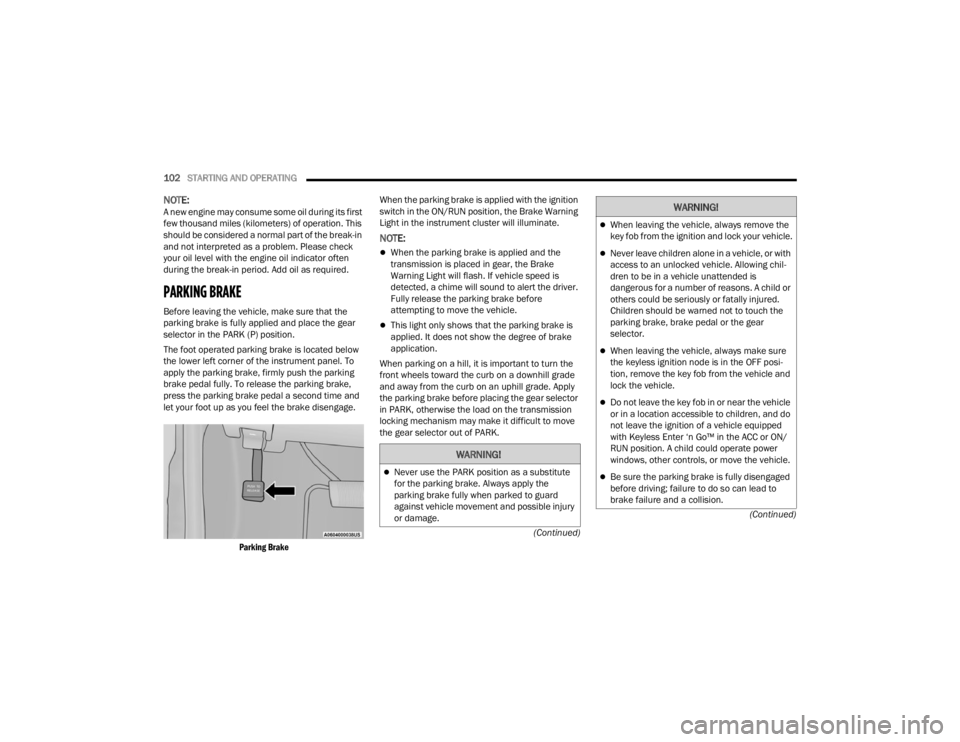
The foot operated parking brake is located below
the lower left corner of the instrument panel. To
apply the parking brake, firmly push the parking
brake pedal fully. To release the parking brake,
press the parking brake pedal a second time and
let your foot up as you feel the brake disengage.
Parking Brake
When the parking brake is applied with the ignition
switch in the ON/RUN position, the Brake Warning
Light in the instrument cluster will illuminate.
NOTE:
When the parking brake is applied and the
transmission is placed in gear, the Brake
Warning Light will flash. If vehicle speed is
detected, a chime will sound to alert the driver.
Fully release the parking brake before
attempting to move the vehicle.
This light only shows that the parking brake is
applied. It does not show the degree of brake
application.
When parking on a hill, it is important to turn the
front wheels toward the curb on a downhill grade
and away from the curb on an uphill grade. Apply
the parking brake before placing the gear selector
in PARK, otherwise the load on the transmission
locking mechanism may make it difficult to move
the gear selector out of PARK.
WARNING!
Never use the PARK position as a substitute
for the parking brake. Always apply the
parking brake fully when parked to guard
against vehicle movement and possible injury
or damage.
When leaving the vehicle, always remove the
key fob from the ignition and lock your vehicle.
Never leave children alone in a vehicle, or with
access to an unlocked vehicle. Allowing chil -
dren to be in a vehicle unattended is
dangerous for a number of reasons. A child or
others could be seriously or fatally injured.
Children should be warned not to touch the
parking brake, brake pedal or the gear
selector.
When leaving the vehicle, always make sure
the keyless ignition node is in the OFF posi -
tion, remove the key fob from the vehicle and
lock the vehicle.
Do not leave the key fob in or near the vehicle
or in a location accessible to children, and do
not leave the ignition of a vehicle equipped
with Keyless Enter ‘n Go™ in the ACC or ON/
RUN position. A child could operate power
windows, other controls, or move the vehicle.
Be sure the parking brake is fully disengaged
before driving; failure to do so can lead to
brake failure and a collision.
WARNING!
23_WD_OM_EN_USC_t.book Page 102
Page 171 of 328

MULTIMEDIA169
Seats & Comfort/Auto-On Comfort — If Equipped
Remote Door Unlock This setting will change how many pushes of the Unlock button on the key fob
are needed to unlock all the doors. The “Driver Door” setting will only unlock
the driver door on the first push on the Unlock button. The “All Doors” setting
will unlock all doors with only one push of the Unlock button.
Passive Entry This setting will allow you to turn the Passive Entry feature
(Keyless Enter ‘n Go™) on or off.
Personal Settings Linked to Key Fob This setting will recall preset radio stations and driver seat position that have
been linked to the key fob.
Power Liftgate Alert This setting will chime an audible alert when the power liftgate is raising or
lowering. Selectable settings are “On” and “Off”.
When Seats & Comfort/Auto-On Comfort button is pressed on the touchscreen, the system displays the options related to the vehicle’s comfort systems when
remote start has been activated or the vehicle has been started.
NOTE:Depending on the vehicle’s options, feature settings may vary.
Setting Name Description
Easy Exit SeatsThis setting will automatically move the driver seat rearward when the engine
is shut off. The available settings are “On” and “Off”.
Auto-On Driver Heated/Ventilated Seat & Heated Steering Wheel With Vehicle Start This setting will activate the vehicle’s comfort systems and heated seats or
heated steering wheel when the vehicle is remote started or ignition is
started. The “Off” setting will not activate the comfort systems. The “Remote
Start” setting will only activate the comfort systems when using Remote Start.
The “All Start” setting will activate the comfort systems whenever the vehicle
is started. If equipped, the only selectable option will be “With Vehicle Start”.
Setting Name
Description
5
23_WD_OM_EN_USC_t.book Page 169
Page 180 of 328
178SAFETY
(Continued)
If the ABS Warning Light is on, the brake system
should be serviced as soon as possible to restore
the benefits of Anti-Lock Brakes. If the ABS
Warning Light does not come on when the ignition
is placed in the ON/RUN mode, have the light
repaired as soon as possible.
REAR SEAT REMINDER ALERT (RSRA)
RSRA alerts you through a visual and auditory
notification of the possible presence of an object,
passenger, or pet in the rear seats if a rear door
was opened up to 10 minutes before the ignition
was placed in the ON/RUN position. RSRA does not
directly detect objects, passengers, or pets in the
rear seats. When the previous conditions are met,
RSRA displays the message “Check Rear Seat” on
the instrument cluster display and sounds an
auditory alert upon the driver placing the ignition in
the OFF position to exit the vehicle.
To enable or disable RSRA, see Ú
page 153.
ELECTRONIC BRAKE CONTROL (EBC)
S
YSTEM
Your vehicle is equipped with an advanced
Electronic Brake Control (EBC) system. This system
includes Anti-Lock Brake System (ABS), Brake
Assist System (BAS), Electronic Brake Force
Distribution (EBD), Electronic Roll Mitigation
(ERM), Electronic Stability Control (ESC), Hill Start
Assist (HSA), and Traction Control System (TCS).
These systems work together to enhance both
vehicle stability and control in various driving
conditions. Your vehicle may also be equipped with Dynamic
Steering Torque (DST), Rain Brake Support (RBS),
Ready Alert Braking (RAB), and Trailer Sway
Control (TSC).
Brake Assist System (BAS)
The BAS is designed to optimize the vehicle’s
braking capability during emergency braking
maneuvers. The system detects an emergency
braking situation by sensing the rate and amount
of brake application and then applies optimum
pressure to the brakes. This can help reduce
braking distances. The BAS complements the
Anti-Lock Brake System (ABS). Applying the brakes
very quickly results in the best BAS assistance. To
receive the benefit of the system, you must apply
continuous braking pressure during the stopping
sequence (do not “pump” the brakes). Do not
reduce brake pedal pressure unless braking is no
longer desired. Once the brake pedal is released,
the BAS is deactivated.
WARNING!
Before exiting a vehicle, always come to a
complete stop, then shift the automatic trans
-
mission into PARK and apply the parking
brake.
Always make sure the keyless ignition node is
in the OFF position, key fob is removed from
the vehicle and vehicle is locked.
Never leave children alone in a vehicle, or with
access to an unlocked vehicle. Leaving chil -
dren in a vehicle unattended is dangerous for
a number of reasons. A child or others could
be seriously or fatally injured. Children should
be warned not to touch the parking brake,
brake pedal or the gear selector.
Do not leave children or animals inside parked
vehicles in hot weather. Interior heat buildup
may cause serious injury or death.
WARNING!
23_WD_OM_EN_USC_t.book Page 178
Page 315 of 328

313
INDEX
A
About Your Brakes......................................... 302Adaptive Cruise Control (ACC)
(Cruise Control).................................... 115, 117Adding Engine Coolant (Antifreeze)............... 266Adding Fuel.................................................... 135Additives, Fuel............................................... 304AdjustDown........................................................... 34Forward....................................................... 34Rearward..................................................... 34Up................................................................ 34Air BagAir Bag Operation...................................... 201Air Bag Warning Light...................... 199, 201Driver Knee Air Bag................................... 205Enhanced Accident Response......... 209, 248Event Data Recorder (EDR)....................... 248Front Air Bag............................................. 201If Deployment Occurs................................ 208Knee Impact Bolsters................................ 205Maintaining Your Air Bag System.............. 210Maintenance............................................. 210Redundant Air Bag Warning Light.............200Side Air Bags............................................. 206Transporting Pets...................................... 225
Air Bag Light.................................. 88, 199, 226
Air Cleaner, Engine (Engine Air Cleaner Filter)... 257
Air Conditioner Maintenance........................ 258Air Conditioner Refrigerant.................. 258, 259Air Conditioner System................................. 258Air ConditioningRear............................................................. 58Air Conditioning Filter.................... 60, 257, 259Air Conditioning System................................... 59Air Conditioning, Operating Tips....................... 60Air Filter........................................................ 257Air PressureTires......................................................... 289AlarmArm The System................................... 20, 21Disarm The System..................................... 20Rearm The System...................................... 21Security Alarm............................................. 91Alarm SystemSecurity Alarm............................................. 20All Wheel Drive (AWD)................................... 108Alterations/ModificationsVehicle........................................................... 9Antifreeze (Engine Coolant)................. 266, 306Disposal................................................... 267Anti-Lock Brake System (ABS)...................... 177
Anti-Lock Warning Light...................................91Assist, Hill Start............................................. 181Audio Systems (Radio).................................. 153Auto Down Power Windows..............................69Automatic Headlights.......................................47Automatic High Beams.....................................47Automatic Temperature Control (ATC)..............59Automatic Transmission......................... 98, 104Adding Fluid.............................................. 269Fluid And Filter Change............................. 269Fluid Change............................................. 269Fluid Level Check...................................... 269Fluid Type........................................ 269, 307Special Additives...................................... 269Automatic Transmission Limp Home Mode... 107Auxiliary Driving Systems.............................. 183Auxiliary Electrical Outlet (Power Outlet)..........65Auxiliary Power Outlet......................................65Axle Fluid....................................................... 307
B
Battery................................................... 89, 255Charging System Light.................................89Keyless Key Fob Replacement....................14Battery Saver Feature......................................49Belts, Seat.................................................... 226
11
23_WD_OM_EN_USC_t.book Page 313