radio controls DODGE DURANGO 2023 Owners Manual
[x] Cancel search | Manufacturer: DODGE, Model Year: 2023, Model line: DURANGO, Model: DODGE DURANGO 2023Pages: 328, PDF Size: 13.82 MB
Page 7 of 328
5
MULTIMEDIA
UCONNECT SYSTEMS ......................................... 153
CYBERSECURITY ................................................. 153
UCONNECT SETTINGS ......................................... 153Customer Programmable Features .............. 154
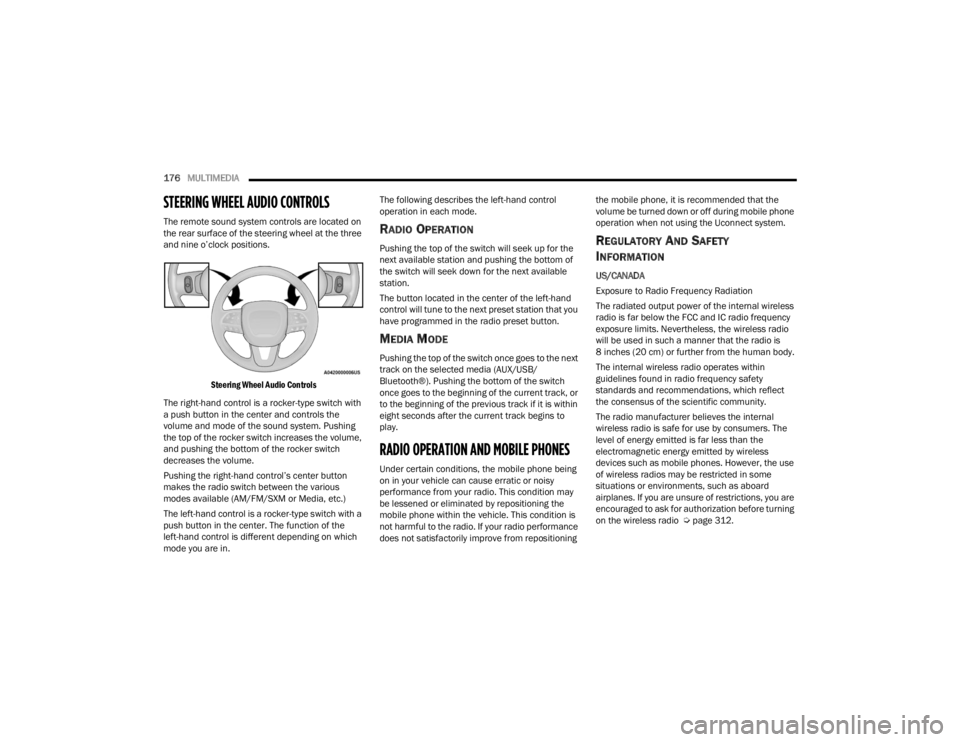
STEERING WHEEL AUDIO CONTROLS .............. 176
Radio Operation ............................................ 176
Media Mode................................................... 176
RADIO OPERATION AND MOBILE PHONES...... 176
Regulatory And Safety Information .............. 176
SAFETY
SAFETY FEATURES .............................................. 177 Anti-Lock Brake System (ABS) ..................... 177
Rear Seat Reminder Alert (RSRA) ................ 178
Electronic Brake Control (EBC) System ...... 178
AUXILIARY DRIVING SYSTEMS .......................... 183
Blind Spot Monitoring (BSM) —
If Equipped..................................................... 183
Forward Collision Warning (FCW) With
Mitigation ....................................................... 186
Tire Pressure Monitoring System (TPMS) .... 188
OCCUPANT RESTRAINT SYSTEMS .................... 191
Occupant Restraint Systems Features ........ 191
Important Safety Precautions....................... 191
Seat Belt Systems ........................................ 192
Supplemental Restraint Systems (SRS) ...... 198
Child Restraints ............................................. 210 SAFETY TIPS ....................................................... 225
Transporting Passengers .............................. 225Transporting Pets ......................................... 225
Connected Vehicles ...................................... 225
Safety Checks You Should Make Inside
The Vehicle ................................................... 226
Periodic Safety Checks You Should Make
Outside The Vehicle ...................................... 227
Exhaust Gas................................................... 228
Carbon Monoxide Warnings ......................... 228
IN CASE OF EMERGENCY
HAZARD WARNING FLASHERS ........................ 229
SOS AND ASSIST MIRROR — IF EQUIPPED ..... 229
JACKING AND TIRE CHANGING ........................ 232 Preparations For Jacking .............................. 232Jack Location ................................................. 233
Spare Tire Stowage ....................................... 234
Spare Tire Removal ....................................... 234
Jacking Instructions ..................................... 236
JUMP STARTING ................................................. 239
Preparations For Jump Start ........................ 240
Jump Starting Procedure .............................. 240
REFUELING IN EMERGENCY – IF EQUIPPED .. 242
IF YOUR ENGINE OVERHEATS ........................... 243
MANUAL PARK RELEASE ................................... 243
FREEING A STUCK VEHICLE .............................. 245
TOWING A DISABLED VEHICLE ........................ 246
Rear-Wheel Drive Models ............................. 247
All-Wheel Drive Models ................................. 247 ENHANCED ACCIDENT RESPONSE SYSTEM
(EARS) .................................................................. 248
EVENT DATA RECORDER (EDR) ......................... 248
SERVICING AND MAINTENANCE
SCHEDULED SERVICING .................................... 249
Maintenance Plan ......................................... 250
ENGINE COMPARTMENT .................................... 253
3.6L Engine ................................................... 253
5.7L Engine ................................................... 254
Checking Oil Level ......................................... 255
Adding Washer Fluid .................................... 255
Maintenance-Free Battery ........................... 255
Pressure Washing ......................................... 256
VEHICLE MAINTENANCE ..................................... 256
Engine Oil ...................................................... 256
Engine Oil Filter ............................................. 257Engine Air Cleaner Filter .............................. 257
Air Conditioner Maintenance ....................... 258
Accessory Drive Belt Inspection ................... 260Body Lubrication ........................................... 261
Windshield Wiper Blades.............................. 261
Exhaust System ............................................ 264
Cooling System.............................................. 265
Brake System ............................................... 268Automatic Transmission ............................... 269
Front/Rear Axle Fluid ................................... 269
Transfer Case ............................................... 270Fuses.............................................................. 270
Bulb Replacement ........................................ 278
23_WD_OM_EN_USC_t.book Page 5
Page 28 of 328
26GETTING TO KNOW YOUR VEHICLE
POWER TILT/TELESCOPING STEERING
C
OLUMN — IF EQUIPPED
This feature allows you to tilt the steering column
upward or downward. It also allows you to lengthen
or shorten the steering column. The power tilt/
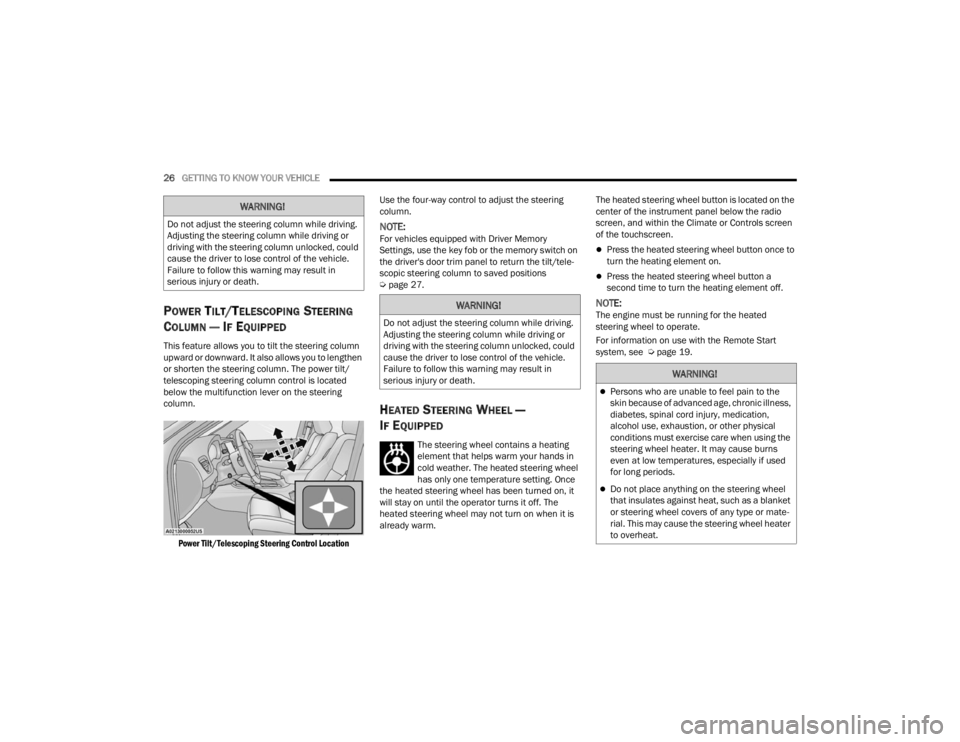
telescoping steering column control is located
below the multifunction lever on the steering
column.
Power Tilt/Telescoping Steering Control Location
Use the four-way control to adjust the steering
column.
NOTE:For vehicles equipped with Driver Memory
Settings, use the key fob or the memory switch on
the driver's door trim panel to return the tilt/tele
-
scopic steering column to saved positions
Ú page 27.
HEATED STEERING WHEEL —
I
F EQUIPPED
The steering wheel contains a heating
element that helps warm your hands in
cold weather. The heated steering wheel
has only one temperature setting. Once
the heated steering wheel has been turned on, it
will stay on until the operator turns it off. The
heated steering wheel may not turn on when it is
already warm. The heated steering wheel button is located on the
center of the instrument panel below the radio
screen, and within the Climate or Controls screen
of the touchscreen.
Press the heated steering wheel button once to
turn the heating element on.
Press the heated steering wheel button a
second time to turn the heating element off.
NOTE:The engine must be running for the heated
steering wheel to operate.
For information on use with the Remote Start
system, see Ú
page 19.
WARNING!
Do not adjust the steering column while driving.
Adjusting the steering column while driving or
driving with the steering column unlocked, could
cause the driver to lose control of the vehicle.
Failure to follow this warning may result in
serious injury or death.
WARNING!
Do not adjust the steering column while driving.
Adjusting the steering column while driving or
driving with the steering column unlocked, could
cause the driver to lose control of the vehicle.
Failure to follow this warning may result in
serious injury or death.
WARNING!
Persons who are unable to feel pain to the
skin because of advanced age, chronic illness,
diabetes, spinal cord injury, medication,
alcohol use, exhaustion, or other physical
conditions must exercise care when using the
steering wheel heater. It may cause burns
even at low temperatures, especially if used
for long periods.
Do not place anything on the steering wheel
that insulates against heat, such as a blanket
or steering wheel covers of any type or mate -
rial. This may cause the steering wheel heater
to overheat.
23_WD_OM_EN_USC_t.book Page 26
Page 55 of 328
GETTING TO KNOW YOUR VEHICLE53
REAR WINDOW WIPER/WASHER
The rear wiper/washer controls are located on the
multifunction lever on the left side of the steering
column. The rear wiper/washer is operated by
rotating a switch, located at the middle of the lever.
Rotate the center portion of the lever
upward to the first detent for
intermittent operation and to the
second detent for continuous rear wiper
operation.
Rotate the center portion of the lever
upward to the third detent to activate
the washer. The washer will continue to
operate as long as the switch is held.
Rotate the center portion downward from the OFF
position to activate the rear washer. The washer
will continue to operate as long as the switch is
held.
NOTE:As a protective measure, the pump will stop if the
switch is held for more than 20 seconds. Once the
switch is released the pump will resume normal
operation.
If the rear wiper is operating when the ignition is
placed in the OFF position, the wiper will
automatically return to the “park” position.
CLIMATE CONTROLS
The Climate Control system allows you to regulate
the temperature, air flow, and direction of air
circulating throughout the vehicle. The controls are
located on the touchscreen and on the instrument
panel below the radio.
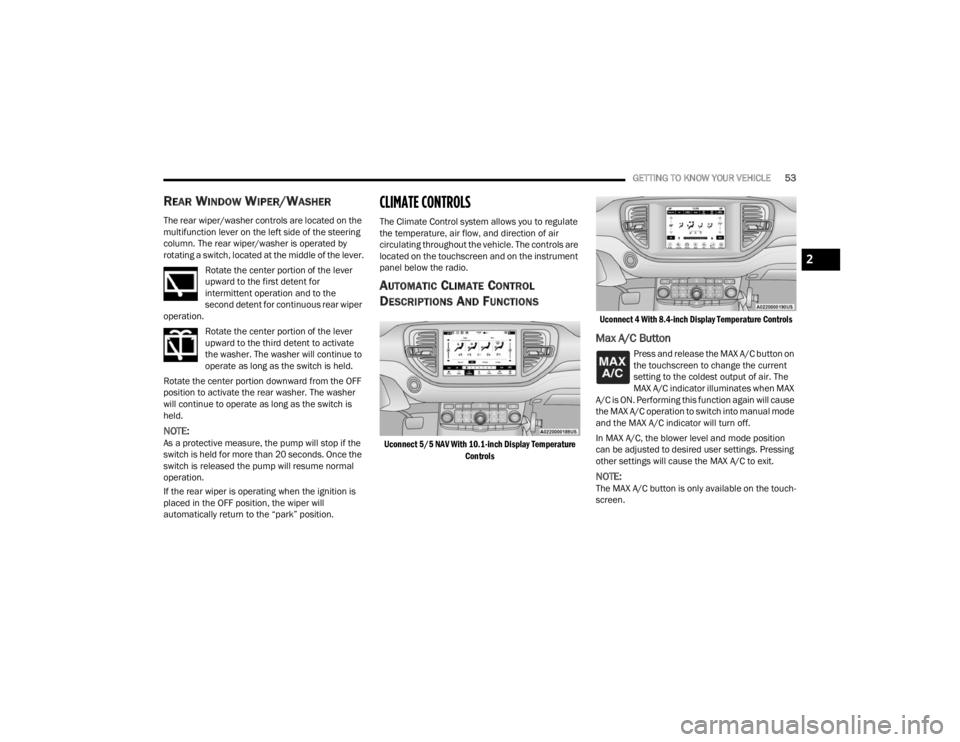
AUTOMATIC CLIMATE CONTROL
D
ESCRIPTIONS AND FUNCTIONS
Uconnect 5/5 NAV With 10.1-inch Display Temperature
Controls Uconnect 4 With 8.4-inch Display Temperature Controls
Max A/C Button
Press and release the MAX A/C button on
the touchscreen to change the current
setting to the coldest output of air. The
MAX A/C indicator illuminates when MAX
A/C is ON. Performing this function again will cause
the MAX A/C operation to switch into manual mode
and the MAX A/C indicator will turn off.
In MAX A/C, the blower level and mode position
can be adjusted to desired user settings. Pressing
other settings will cause the MAX A/C to exit.
NOTE:The MAX A/C button is only available on the touch -
screen.
2
23_WD_OM_EN_USC_t.book Page 53
Page 136 of 328
134STARTING AND OPERATING
CHANGING LANESENSE STATUS
The LaneSense system has settings to adjust the
intensity of the torque warning and the warning
zone sensitivity (early/late) that you can configure
through the Uconnect system Ú page 153.
NOTE:
When enabled the system operates above
37 mph (60 km/h) and below 112 mph
(180 km/h).
The warnings are disabled with use of the turn
signal.
The system will not apply torque to the steering
wheel whenever a safety system engages
(Anti-Lock Brakes, Traction Control System,
Electronic Stability Control, Forward Collision
Warning, etc.).
PARKVIEW REAR BACK UP CAMERA
Your vehicle is equipped with the ParkView Rear
Back Up Camera that allows you to see an on-screen
image of the rear surroundings of your vehicle
whenever the gear selector is put into REVERSE. The
image will be displayed on the Navigation/
Multimedia radio display screen along with a caution
note to “Check Entire Surroundings” across the top
of the screen. After five seconds this note will
disappear. The ParkView camera is located on the
rear of the vehicle above the rear license plate.
When the vehicle is shifted out of REVERSE with
camera delay turned off, the rear camera mode is
exited and the previous screen appears.
Manual Activation Of The Back Up Camera
1. Press the Vehicle Menu button located at the
bottom of the Uconnect display. Then select
the Controls tab.
2. Press the Rear View Camera button to turn the Rear View Camera system on.
3. Alternatively, the Rear View Camera feature can be enabled by pressing the Rear View
Camera button in the App Drawer.
NOTE:The ParkView Rear Back Up Camera has program -
mable modes of operation that may be selected
through the Uconnect system Ú page 153. In
certain radio configurations, these modes of oper -
ation will be found in the Camera section of the
vehicle settings menu.
When the vehicle is shifted out of REVERSE with
camera delay turned off, the rear camera mode is
exited and the previous screen appears. When the
vehicle is shifted out of REVERSE with camera
delay turned on, the camera image will continue to
be displayed for up to 10 seconds after shifting out
of REVERSE unless the following conditions occur:
the vehicle speed exceeds 8 mph (13 km/h), the
vehicle is shifted into PARK, the vehicle’s ignition is
placed in the OFF position, or the touchscreen X button to disable the display of the Rear View
Camera is pressed.
When enabled, active guidelines are overlaid on
the image to illustrate the width of the vehicle and
its projected back up path based on the steering
wheel position. A dashed center line overlay
indicates the center of the vehicle to assist with
parking or aligning to a hitch/receiver. Different
colored zones indicate the distance to the rear of
the vehicle.
The following table shows the approximate
distances for each zone:
Rear View Camera — Viewing At Speed
When the vehicle is in PARK, NEUTRAL or
DRIVE, the Rear View Camera can be
activated with the Rear View Camera
button in the Controls tab of the Vehicle
Menu. This feature allows the customer to monitor
the area directly behind the vehicle (or trailer, if
equipped) for up to 10 seconds while driving. If the
vehicle speed remains below 8 mph (13 km/h), Zone
Distance To The Rear Of
The Vehicle
Red 0 - 1 ft (0 - 30 cm)
Yellow 1 ft - 6.5 ft (30 cm - 2 m)
Green 6.5 ft or greater
(2 m or greater)
23_WD_OM_EN_USC_t.book Page 134
Page 178 of 328
176MULTIMEDIA
STEERING WHEEL AUDIO CONTROLS
The remote sound system controls are located on
the rear surface of the steering wheel at the three
and nine o’clock positions.
Steering Wheel Audio Controls
The right-hand control is a rocker-type switch with
a push button in the center and controls the
volume and mode of the sound system. Pushing
the top of the rocker switch increases the volume,
and pushing the bottom of the rocker switch
decreases the volume.
Pushing the right-hand control’s center button
makes the radio switch between the various
modes available (AM/FM/SXM or Media, etc.)
The left-hand control is a rocker-type switch with a
push button in the center. The function of the
left-hand control is different depending on which
mode you are in. The following describes the left-hand control
operation in each mode.RADIO OPERATION
Pushing the top of the switch will seek up for the
next available station and pushing the bottom of
the switch will seek down for the next available
station.
The button located in the center of the left-hand
control will tune to the next preset station that you
have programmed in the radio preset button.
MEDIA MODE
Pushing the top of the switch once goes to the next
track on the selected media (AUX/USB/
Bluetooth®). Pushing the bottom of the switch
once goes to the beginning of the current track, or
to the beginning of the previous track if it is within
eight seconds after the current track begins to
play.
RADIO OPERATION AND MOBILE PHONES
Under certain conditions, the mobile phone being
on in your vehicle can cause erratic or noisy
performance from your radio. This condition may
be lessened or eliminated by repositioning the
mobile phone within the vehicle. This condition is
not harmful to the radio. If your radio performance
does not satisfactorily improve from repositioning
the mobile phone, it is recommended that the
volume be turned down or off during mobile phone
operation when not using the Uconnect system.
REGULATORY AND SAFETY
I
NFORMATION
US/CANADA
Exposure to Radio Frequency Radiation
The radiated output power of the internal wireless
radio is far below the FCC and IC radio frequency
exposure limits. Nevertheless, the wireless radio
will be used in such a manner that the radio is
8 inches (20 cm) or further from the human body.
The internal wireless radio operates within
guidelines found in radio frequency safety
standards and recommendations, which reflect
the consensus of the scientific community.
The radio manufacturer believes the internal
wireless radio is safe for use by consumers. The
level of energy emitted is far less than the
electromagnetic energy emitted by wireless
devices such as mobile phones. However, the use
of wireless radios may be restricted in some
situations or environments, such as aboard
airplanes. If you are unsure of restrictions, you are
encouraged to ask for authorization before turning
on the wireless radio Ú page 312.
23_WD_OM_EN_USC_t.book Page 176
Page 321 of 328

319
Power Seats Down
........................................................... 34Forward....................................................... 34Rearward..................................................... 34Up................................................................ 34Pregnant Women And Seat Belts...................197Preparation For Jacking................................. 232PretensionersSeat Belts.................................................. 197
R
Radial Ply Tires.............................................. 290Radiator Cap (Coolant Pressure Cap)............ 267Radio Operation............................................ 176Radio Remote Controls.................................. 176Rain Sensitive Wiper System........................... 52Rear Air Conditioning....................................... 58Rear Axle (Differential)................................... 269Rear Camera................................................. 134Rear Cross Path............................................. 185Rear ParkSense System................................ 125Rear Seat Reminder Alert.............................. 178Rear Seats, Folding......................................... 30Rear Wiper/Washer......................................... 53Reclining Front Seats...................................... 29Recreational Towing...................................... 146Shifting Into Transfer Case Neutral (N)..... 148Shifting Out Of Transfer Case Neutral (N).. 149
Reformulated Gasoline................................. 304Refrigerant........................................... 258, 259Release, Hood................................................. 71Reminder, Seat Belt...................................... 192Remote ControlStarting System........................................... 17Remote Keyless Entry...................................... 13Arm The Alarm............................................. 20Disarm The Alarm........................................ 20Programming Additional Key Fobs............... 15Remote Sound System (Radio) Control......... 176Remote StartingExit Remote Start Mode.............................. 19Remote Starting System.................................. 17Replacement Bulbs...................................... 278Replacement Keys........................................... 15Replacement Tires........................................ 292Reporting Safety Defects.............................. 311Restraints, Child........................................... 210Restraints, Head.............................................. 36Retractable Cargo Area Cover.......................... 73Roll Over Warning.............................................. 8Roof Type Carrier............................................. 74Rotation, Tires.............................................. 297
S
Safety Checks Inside Vehicle........................ 226Safety Checks Outside Vehicle..................... 227Safety Defects, Reporting............................. 311
Safety Information, Tire................................. 281Safety Tips.................................................... 225Safety, Exhaust Gas...................................... 228Schedule, Maintenance................................ 249Seat Belt Reminder..........................................88Seat Belts............................................ 192, 226Adjustable Shoulder Belt.......................... 196Adjustable Upper Shoulder Anchorage..... 196
Adjustable Upper Shoulder Belt Anchorage.. 196
Automatic Locking Retractor (ALR)........... 197Child Restraints........................................ 210Energy Management Feature................... 197Extender................................................... 196Front Seat............................... 192, 193, 195Inspection................................................. 226Lap/Shoulder Belt Operation.................... 195Lap/Shoulder Belt Untwisting................... 195Lap/Shoulder Belts................................... 193Operating Instructions.............................. 195Pregnant Women...................................... 197Pretensioners........................................... 197Rear Seat.................................................. 193Reminder.................................................. 192Seat Belt Extender.................................... 196Seat Belt Pretensioner.............................. 197Untwisting Procedure................................ 195Seat Belts Maintenance................................ 30011
23_WD_OM_EN_USC_t.book Page 319