center console DODGE DURANGO SRT 2019 Owners Manual
[x] Cancel search | Manufacturer: DODGE, Model Year: 2019, Model line: DURANGO SRT, Model: DODGE DURANGO SRT 2019Pages: 572, PDF Size: 6.59 MB
Page 59 of 572
NOTE:
•Once a heat setting is selected, heat will be felt within
two to five minutes.
• The engine must be running for the heated seats to
operate.
• The level of heat selected will stay on until the operator
changes it.
Vehicles Equipped With Remote Start
On models that are equipped with remote start, the heated
seats can be programmed to come on during a remote start.
This feature can be programmed through the Uconnect
system. Refer to “Uconnect Settings” in “Multimedia” for
further information.
WARNING!
• Persons who are unable to feel pain to the skin
because of advanced age, chronic illness, diabetes,
spinal cord injury, medication, alcohol use, exhaus-
tion or other physical condition must exercise care
when using the seat heater. It may cause burns even
(Continued)
WARNING! (Continued)
at low temperatures, especially if used for long
periods of time.
• Do not place anything on the seat or seatback that
insulates against heat, such as a blanket or cushion.
This may cause the seat heater to overheat. Sitting in
a seat that has been overheated could cause serious
burns due to the increased surface temperature of the
seat.
Rear Heated Seats — If Equipped
On some models, the two rear outboard seats may be
equipped with heated seats. There are two heated seat
switches that allow the rear passengers to operate the seats
independently. The heated seat switches for each heater are
located on the rear of the center console.
3
GETTING TO KNOW YOUR VEHICLE 57
Page 79 of 572
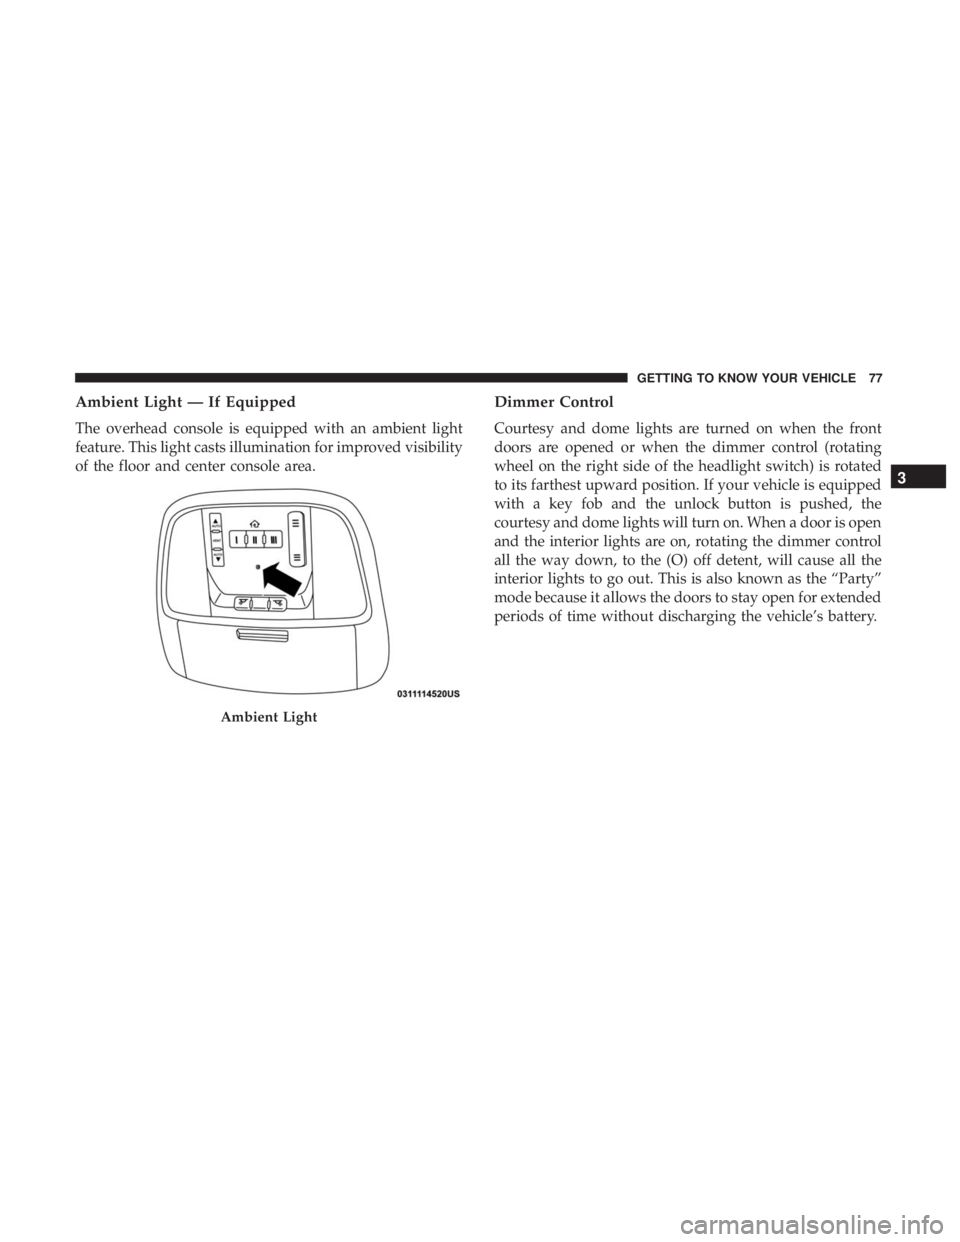
Ambient Light — If Equipped
The overhead console is equipped with an ambient light
feature. This light casts illumination for improved visibility
of the floor and center console area.
Dimmer Control
Courtesy and dome lights are turned on when the front
doors are opened or when the dimmer control (rotating
wheel on the right side of the headlight switch) is rotated
to its farthest upward position. If your vehicle is equipped
with a key fob and the unlock button is pushed, the
courtesy and dome lights will turn on. When a door is open
and the interior lights are on, rotating the dimmer control
all the way down, to the (O) off detent, will cause all the
interior lights to go out. This is also known as the “Party”
mode because it allows the doors to stay open for extended
periods of time without discharging the vehicle’s battery.
Ambient Light
3
GETTING TO KNOW YOUR VEHICLE 77
Page 111 of 572
GARAGE DOOR OPENER — IF EQUIPPED
HomeLink replaces up to three remote controls (handheld
transmitters) that operate devices such as garage door
openers, motorized gates, lighting or home security sys-
tems. The HomeLink unit operates off your vehicle’s
battery.
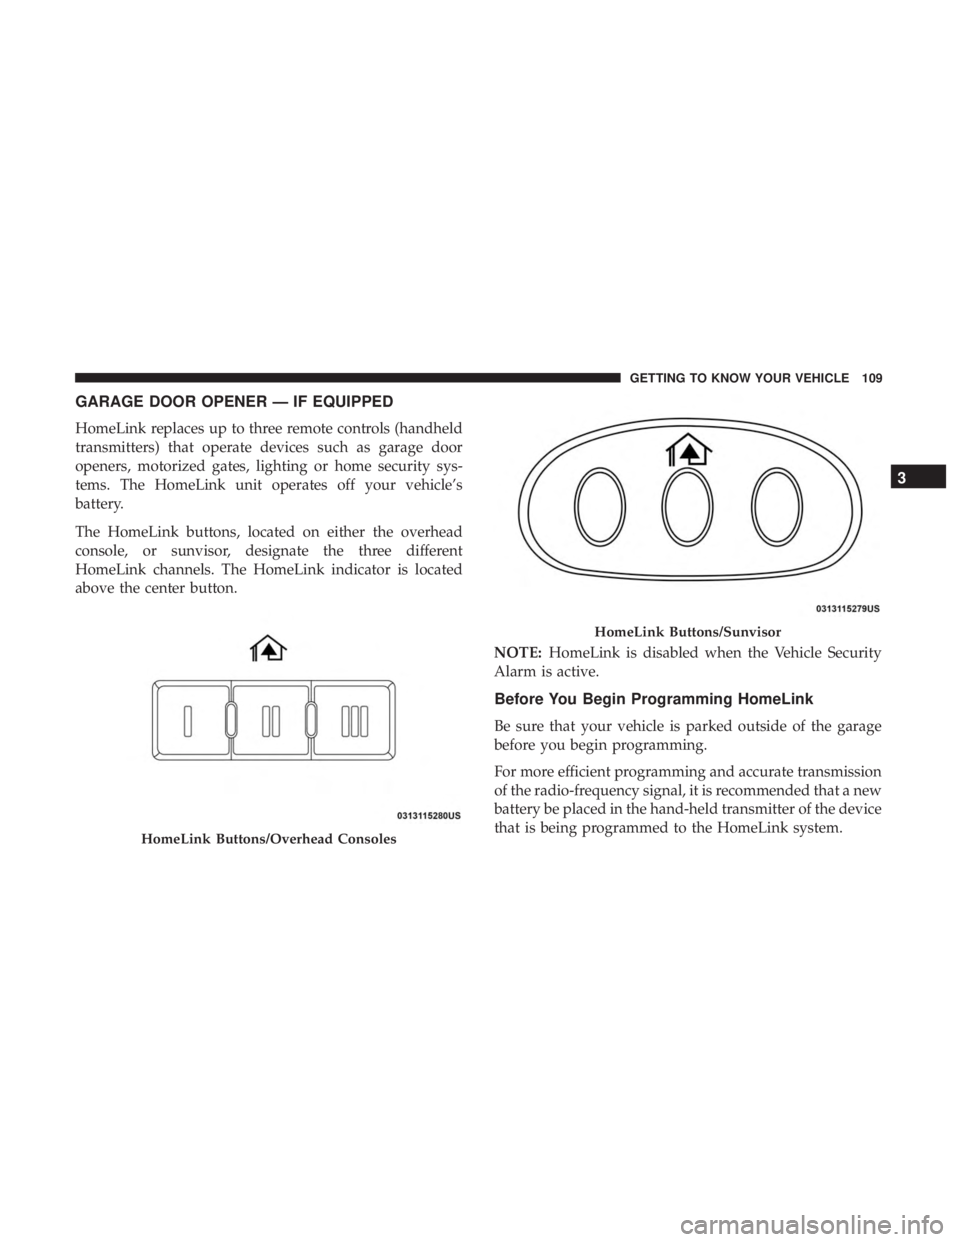
The HomeLink buttons, located on either the overhead
console, or sunvisor, designate the three different
HomeLink channels. The HomeLink indicator is located
above the center button.NOTE:HomeLink is disabled when the Vehicle Security
Alarm is active.
Before You Begin Programming HomeLink
Be sure that your vehicle is parked outside of the garage
before you begin programming.
For more efficient programming and accurate transmission
of the radio-frequency signal, it is recommended that a new
battery be placed in the hand-held transmitter of the device
that is being programmed to the HomeLink system.
HomeLink Buttons/Overhead Consoles
HomeLink Buttons/Sunvisor
3
GETTING TO KNOW YOUR VEHICLE 109
Page 118 of 572
Front Center Console
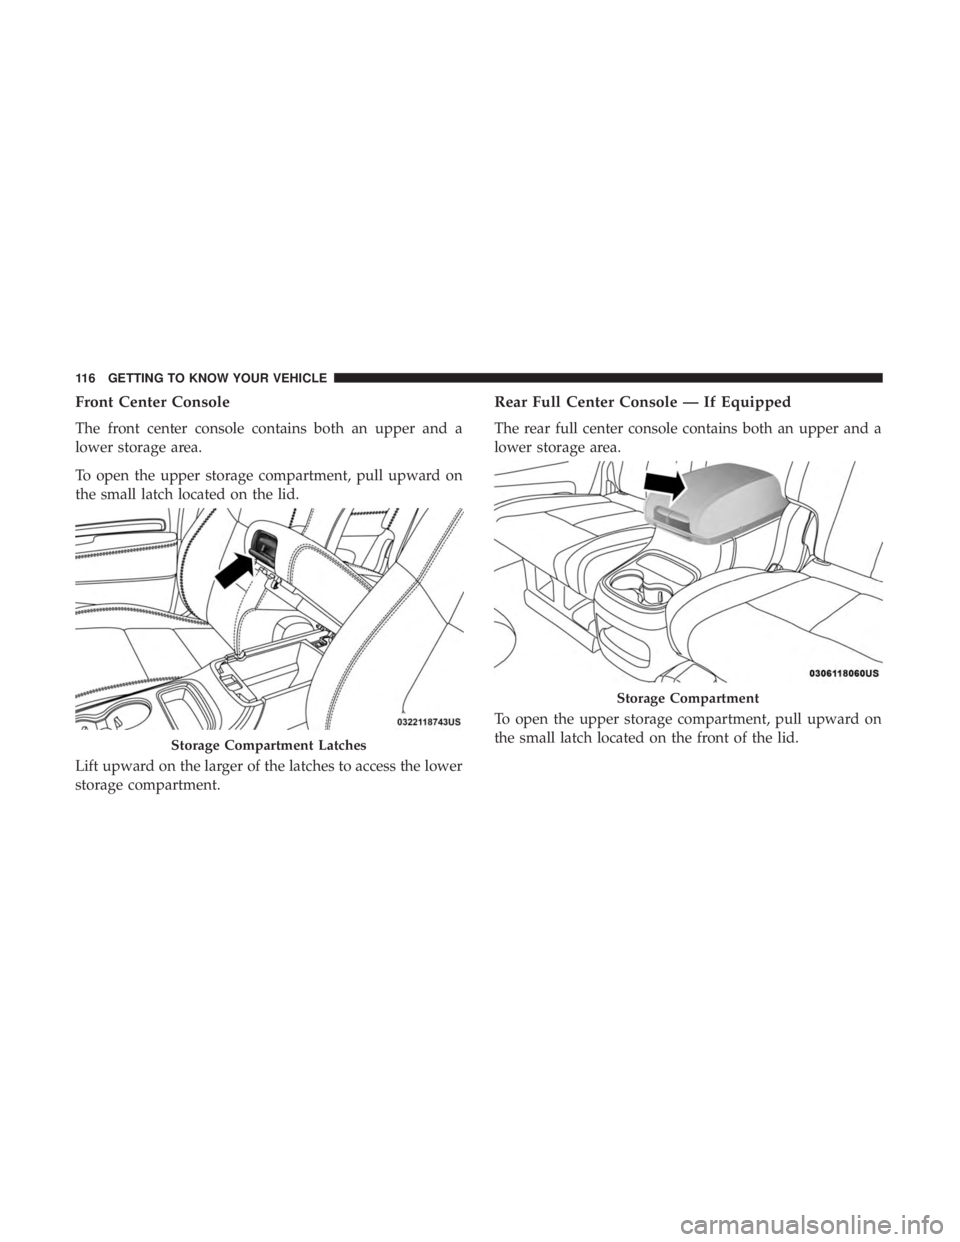
The front center console contains both an upper and a
lower storage area.
To open the upper storage compartment, pull upward on
the small latch located on the lid.
Lift upward on the larger of the latches to access the lower
storage compartment.
Rear Full Center Console — If Equipped
The rear full center console contains both an upper and a
lower storage area.
To open the upper storage compartment, pull upward on
the small latch located on the front of the lid.
Storage Compartment Latches
Storage Compartment
116 GETTING TO KNOW YOUR VEHICLE
Page 122 of 572
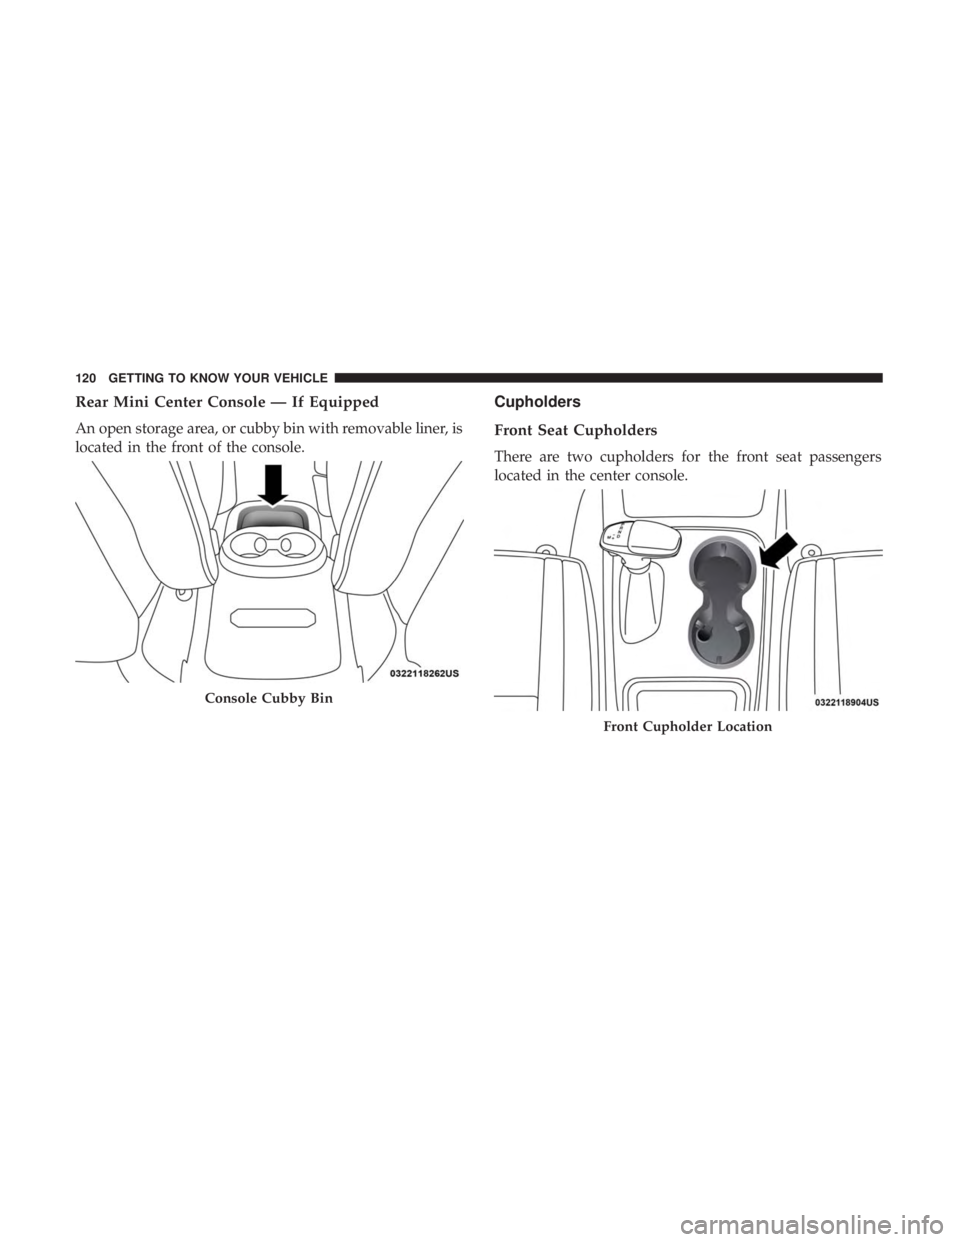
Rear Mini Center Console — If Equipped
An open storage area, or cubby bin with removable liner, is
located in the front of the console.
Cupholders
Front Seat Cupholders
There are two cupholders for the front seat passengers
located in the center console.
Console Cubby Bin
Front Cupholder Location
120 GETTING TO KNOW YOUR VEHICLE
Page 123 of 572
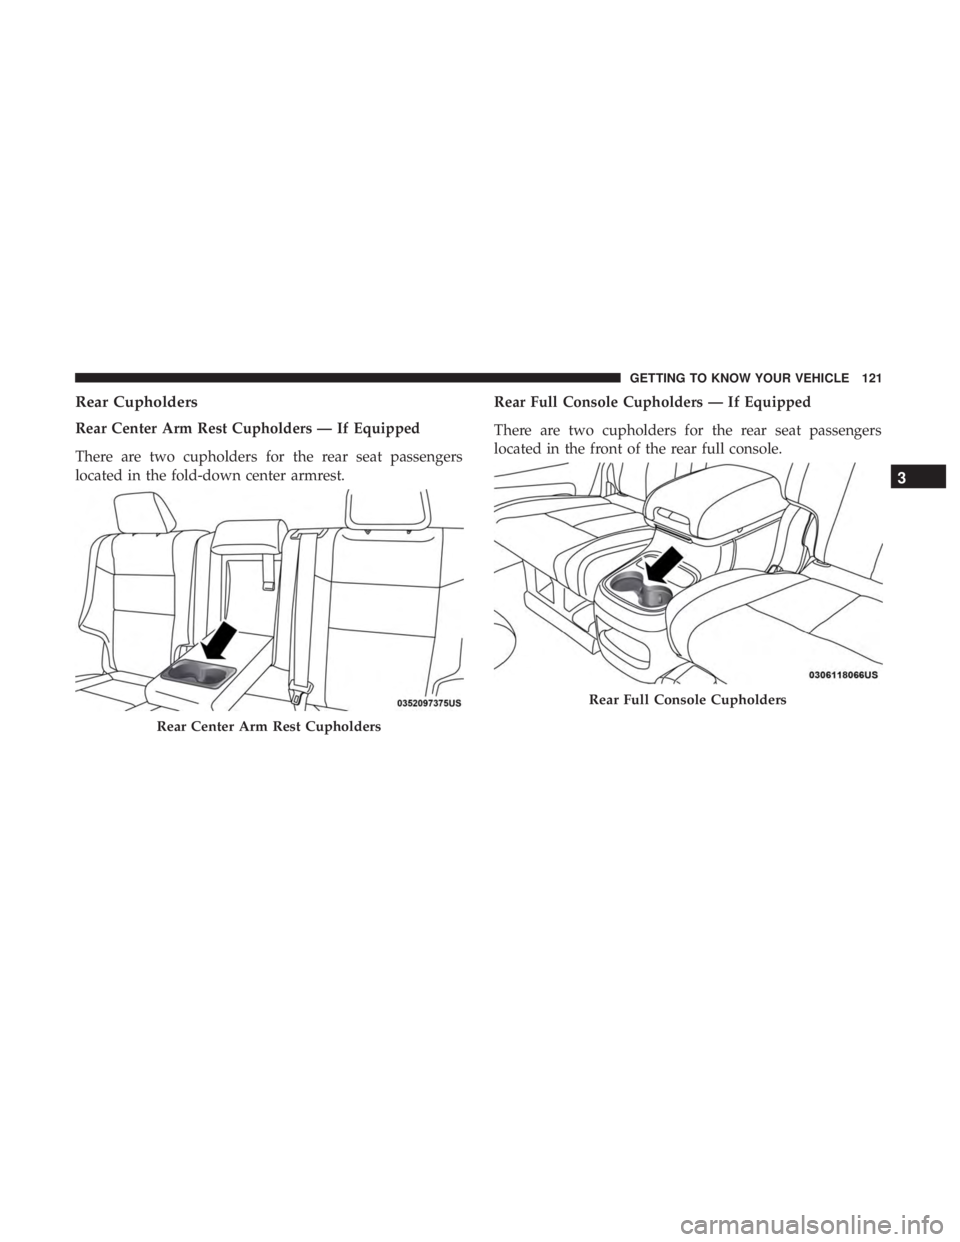
Rear Cupholders
Rear Center Arm Rest Cupholders — If Equipped
There are two cupholders for the rear seat passengers
located in the fold-down center armrest.Rear Full Console Cupholders — If Equipped
There are two cupholders for the rear seat passengers
located in the front of the rear full console.
Rear Center Arm Rest Cupholders
Rear Full Console Cupholders
3
GETTING TO KNOW YOUR VEHICLE 121
Page 126 of 572
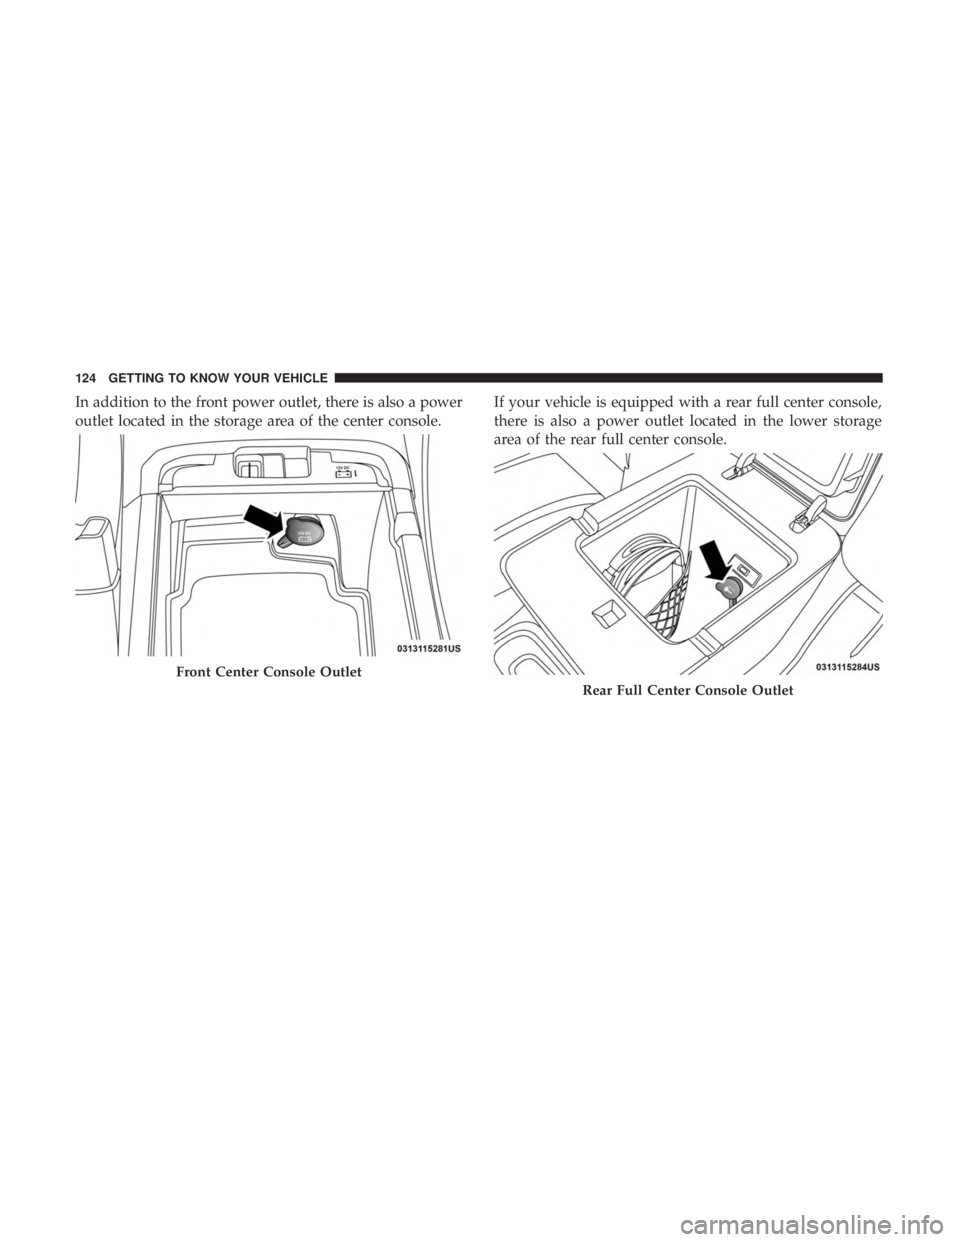
In addition to the front power outlet, there is also a power
outlet located in the storage area of the center console.If your vehicle is equipped with a rear full center console,
there is also a power outlet located in the lower storage
area of the rear full center console.
Front Center Console Outlet
Rear Full Center Console Outlet
124 GETTING TO KNOW YOUR VEHICLE
Page 129 of 572
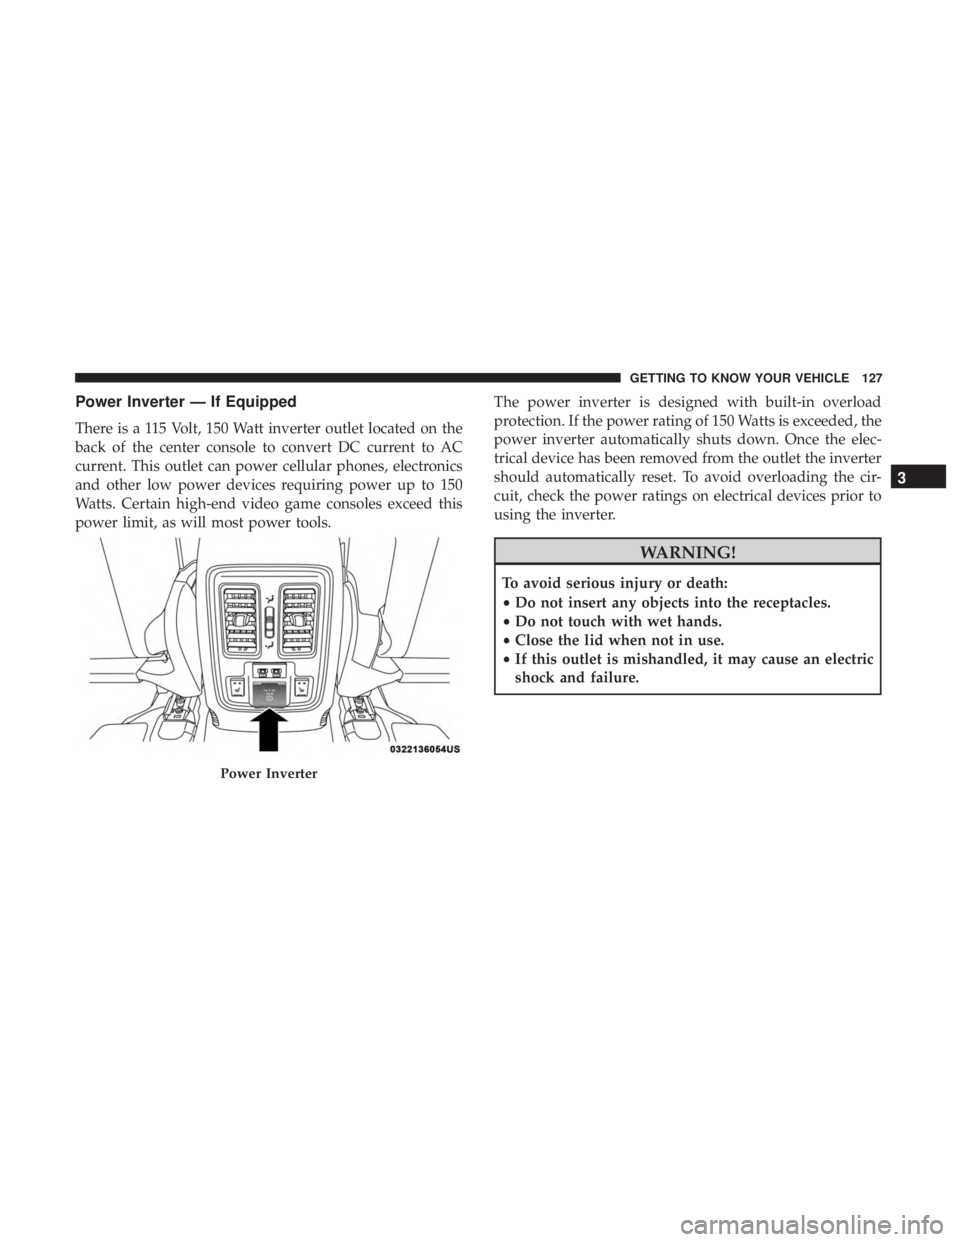
Power Inverter — If Equipped
There is a 115 Volt, 150 Watt inverter outlet located on the
back of the center console to convert DC current to AC
current. This outlet can power cellular phones, electronics
and other low power devices requiring power up to 150
Watts. Certain high-end video game consoles exceed this
power limit, as will most power tools.The power inverter is designed with built-in overload
protection. If the power rating of 150 Watts is exceeded, the
power inverter automatically shuts down. Once the elec-
trical device has been removed from the outlet the inverter
should automatically reset. To avoid overloading the cir-
cuit, check the power ratings on electrical devices prior to
using the inverter.
WARNING!
To avoid serious injury or death:
•
Do not insert any objects into the receptacles.
• Do not touch with wet hands.
• Close the lid when not in use.
• If this outlet is mishandled, it may cause an electric
shock and failure.
Power Inverter
3
GETTING TO KNOW YOUR VEHICLE 127
Page 277 of 572
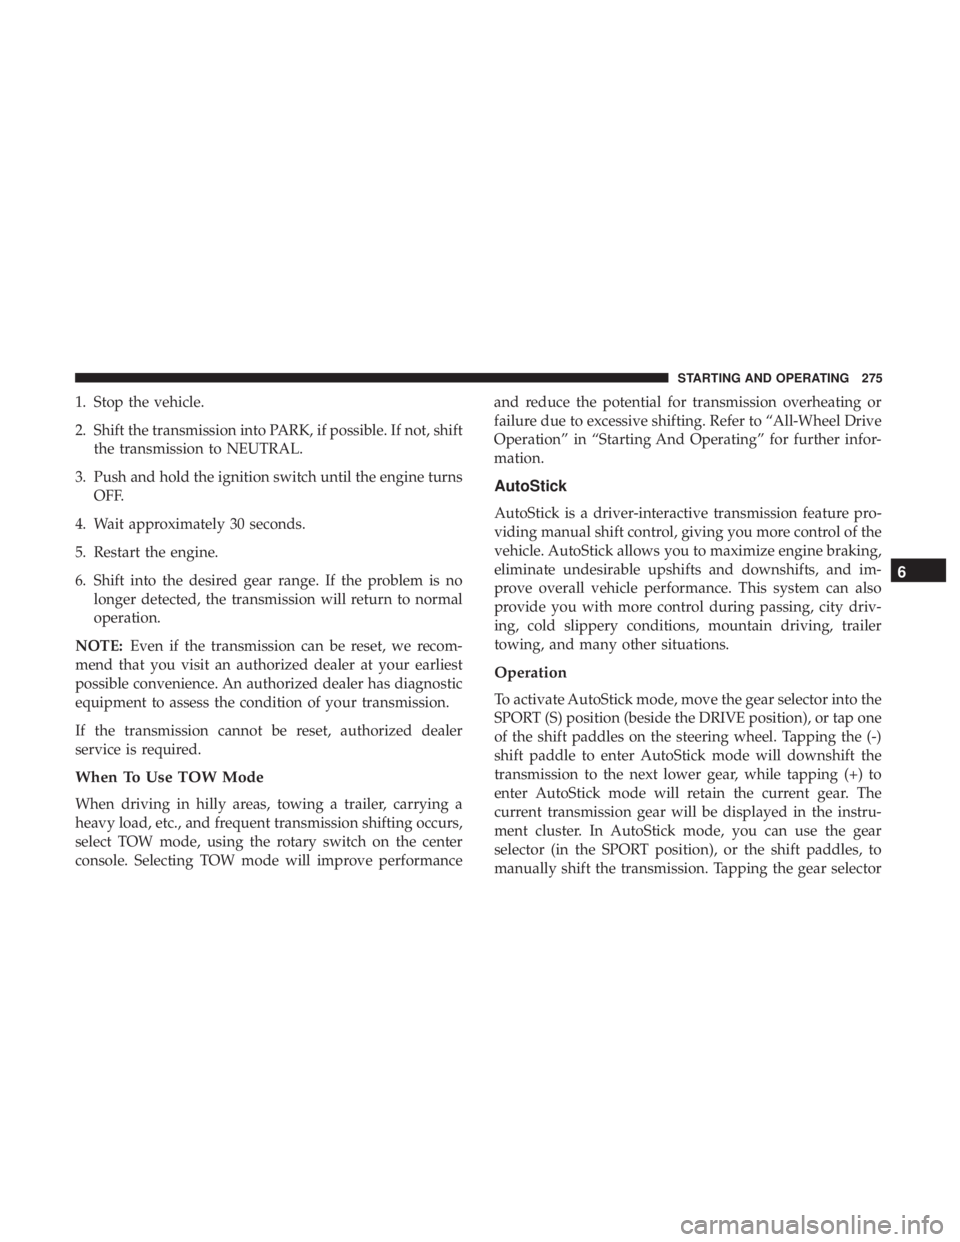
1. Stop the vehicle.
2. Shift the transmission into PARK, if possible. If not, shiftthe transmission to NEUTRAL.
3. Push and hold the ignition switch until the engine turns OFF.
4. Wait approximately 30 seconds.
5. Restart the engine.
6. Shift into the desired gear range. If the problem is no longer detected, the transmission will return to normal
operation.
NOTE: Even if the transmission can be reset, we recom-
mend that you visit an authorized dealer at your earliest
possible convenience. An authorized dealer has diagnostic
equipment to assess the condition of your transmission.
If the transmission cannot be reset, authorized dealer
service is required.
When To Use TOW Mode
When driving in hilly areas, towing a trailer, carrying a
heavy load, etc., and frequent transmission shifting occurs,
select TOW mode, using the rotary switch on the center
console. Selecting TOW mode will improve performance and reduce the potential for transmission overheating or
failure due to excessive shifting. Refer to “All-Wheel Drive
Operation” in “Starting And Operating” for further infor-
mation.
AutoStick
AutoStick is a driver-interactive transmission feature pro-
viding manual shift control, giving you more control of the
vehicle. AutoStick allows you to maximize engine braking,
eliminate undesirable upshifts and downshifts, and im-
prove overall vehicle performance. This system can also
provide you with more control during passing, city driv-
ing, cold slippery conditions, mountain driving, trailer
towing, and many other situations.
Operation
To activate AutoStick mode, move the gear selector into the
SPORT (S) position (beside the DRIVE position), or tap one
of the shift paddles on the steering wheel. Tapping the (-)
shift paddle to enter AutoStick mode will downshift the
transmission to the next lower gear, while tapping (+) to
enter AutoStick mode will retain the current gear. The
current transmission gear will be displayed in the instru-
ment cluster. In AutoStick mode, you can use the gear
selector (in the SPORT position), or the shift paddles, to
manually shift the transmission. Tapping the gear selector
6
STARTING AND OPERATING 275
Page 372 of 572
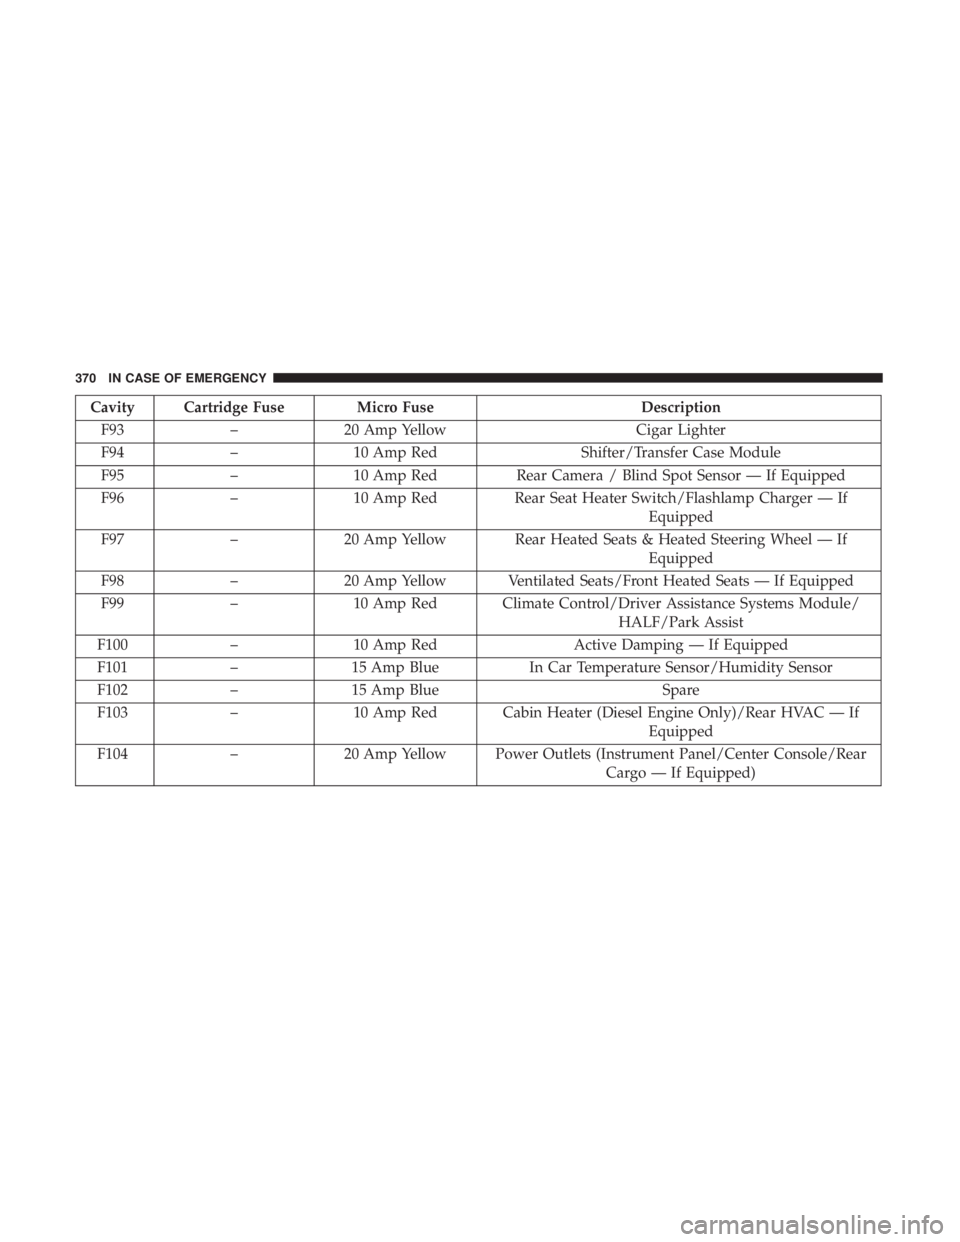
Cavity Cartridge Fuse Micro FuseDescription
F93 –20 Amp Yellow Cigar Lighter
F94 –10 Amp Red Shifter/Transfer Case Module
F95 –10 Amp Red Rear Camera / Blind Spot Sensor — If Equipped
F96 –10 Amp Red Rear Seat Heater Switch/Flashlamp Charger — If
Equipped
F97 –20 Amp Yellow Rear Heated Seats & Heated Steering Wheel — If
Equipped
F98 –20 Amp Yellow Ventilated Seats/Front Heated Seats — If Equipped
F99 –10 Amp Red Climate Control/Driver Assistance Systems Module/
HALF/Park Assist
F100 –10 Amp Red Active Damping — If Equipped
F101 –15 Amp Blue In Car Temperature Sensor/Humidity Sensor
F102 –15 Amp Blue Spare
F103 –10 Amp Red Cabin Heater (Diesel Engine Only)/Rear HVAC — If
Equipped
F104 –20 Amp Yellow Power Outlets (Instrument Panel/Center Console/Rear
Cargo — If Equipped)
370 IN CASE OF EMERGENCY