warning DODGE GRAND CARAVAN 2004 Owner's Guide
[x] Cancel search | Manufacturer: DODGE, Model Year: 2004, Model line: GRAND CARAVAN, Model: DODGE GRAND CARAVAN 2004Pages: 397, PDF Size: 7.59 MB
Page 79 of 397
WARNING!Vehicles and other objects seen in the right side
convex mirror will look smaller and farther away
than they really are. Relying too much on your right
side mirror could cause you to collide with another
vehicle or other object.
Use your inside mirror when judging the size or
distance of a vehicle seen in this convex mirror.
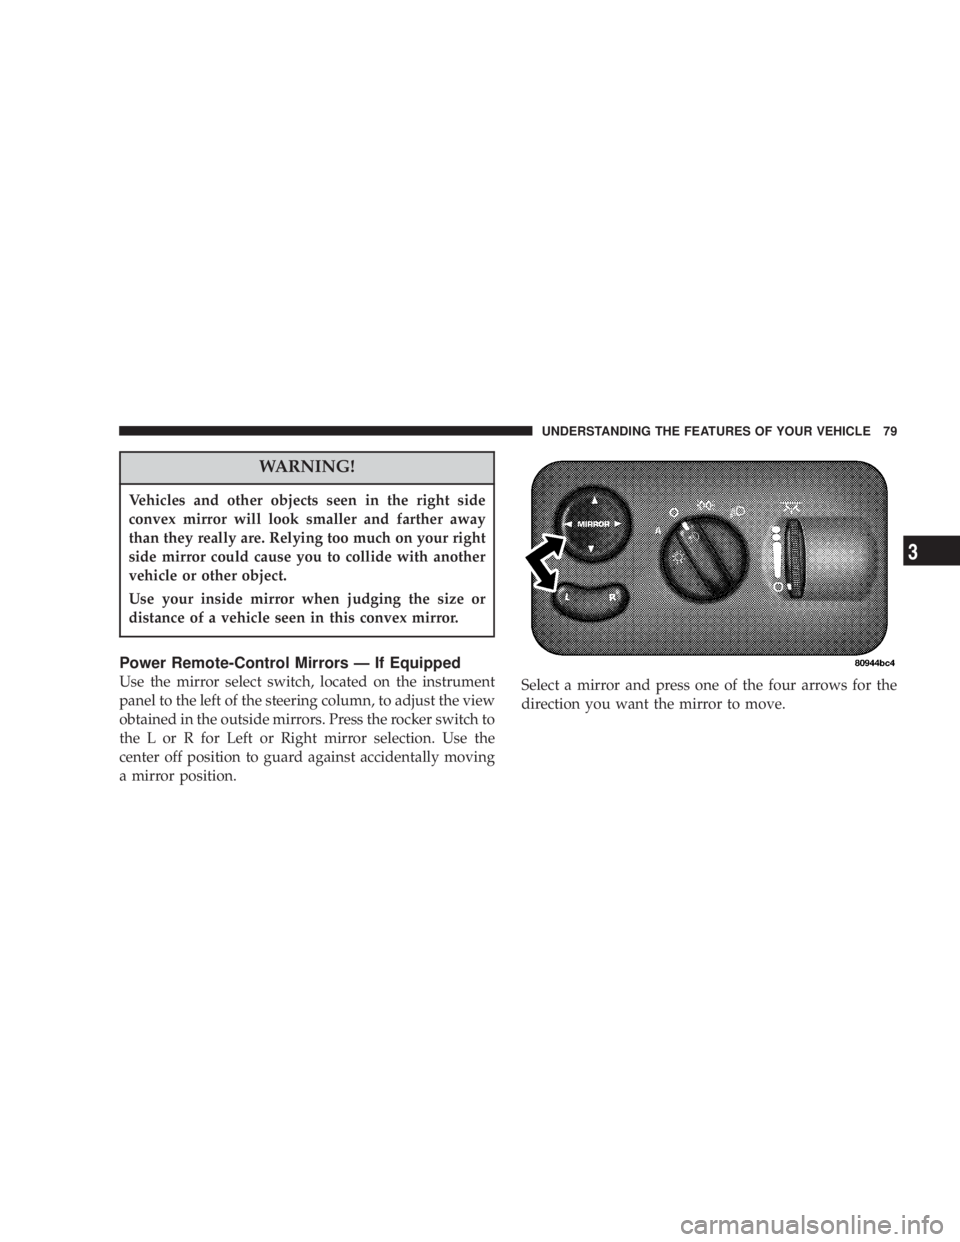
Power Remote-Control Mirrors Ð If Equipped
Use the mirror select switch, located on the instrument
panel to the left of the steering column, to adjust the view
obtained in the outside mirrors. Press the rocker switch to
the L or R for Left or Right mirror selection. Use the
center off position to guard against accidentally moving
a mirror position. Select a mirror and press one of the four arrows for the
direction you want the mirror to move. UNDERSTANDING THE FEATURES OF YOUR VEHICLE 79
3
Page 81 of 397
WARNING!Adjust the seat only while the vehicle is parked.
Adjusting a seat while the vehicle is moving is
dangerous. The sudden movement of the seat could
cause you to lose control. The seat belt might not be
properly adjusted and you could be injured.
Your vehicle may be equipped with side airbags.
Refer to section 2 ( Occupant Restraints -- Side Air-
bags ( for more information.
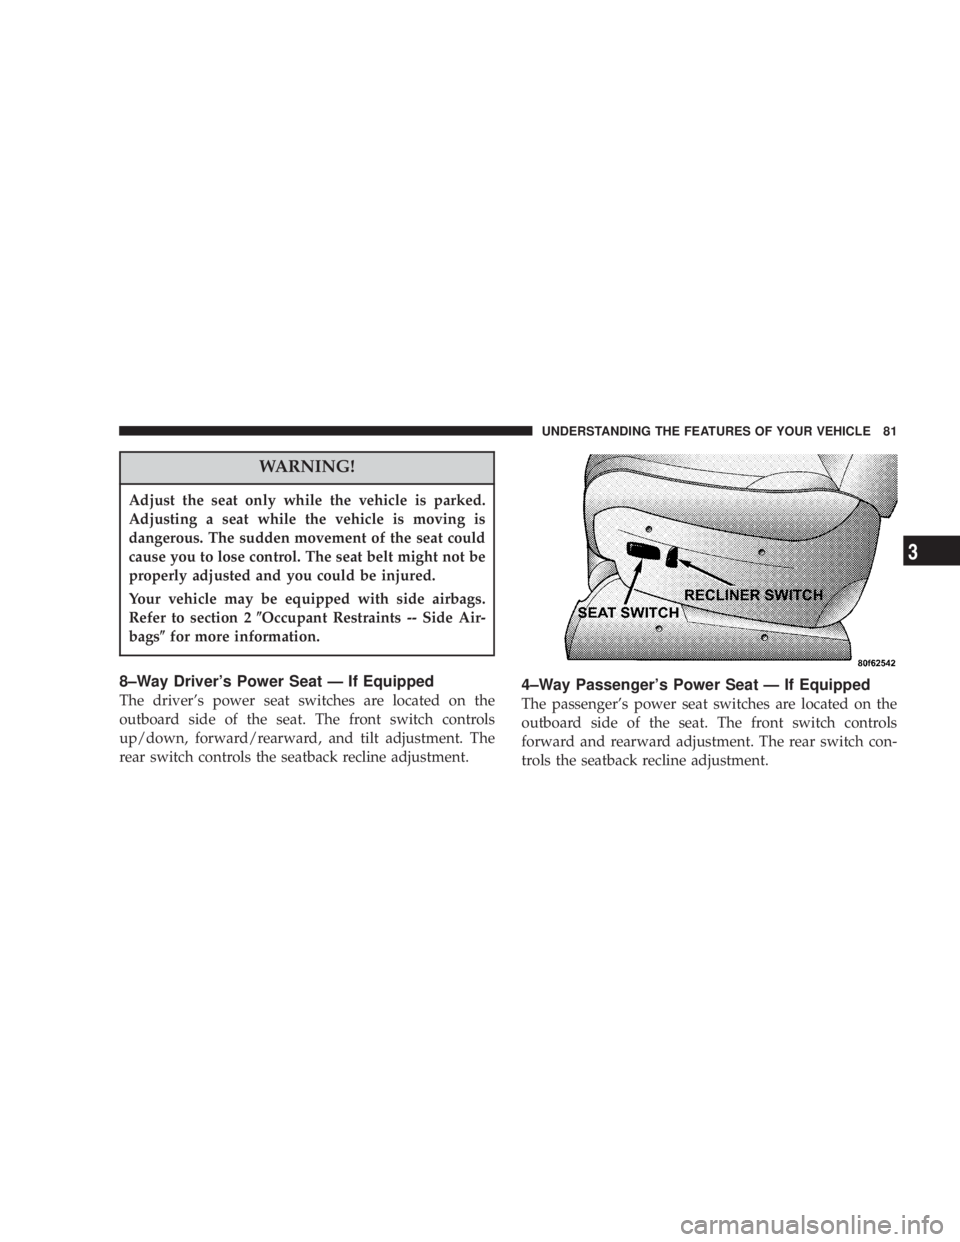
8±Way Driver's Power Seat Ð If Equipped
The driver's power seat switches are located on the
outboard side of the seat. The front switch controls
up/down, forward/rearward, and tilt adjustment. The
rear switch controls the seatback recline adjustment. 4±Way Passenger's Power Seat Ð If Equipped
The passenger's power seat switches are located on the
outboard side of the seat. The front switch controls
forward and rearward adjustment. The rear switch con-
trols the seatback recline adjustment. UNDERSTANDING THE FEATURES OF YOUR VEHICLE 81
3
Page 84 of 397
WARNING!Do not ride with the seatback reclined so that the
shoulder belt is no longer resting against your chest.
In a collision you could slide under the seat belt and
be seriously or fatally injured. Use the recliner only
when the vehicle is parked.
Manual Lumbar Ð If Equipped
The lumbar adjustment handle is located inboard under
the armrest. To increase the support, rotate the handle
down.
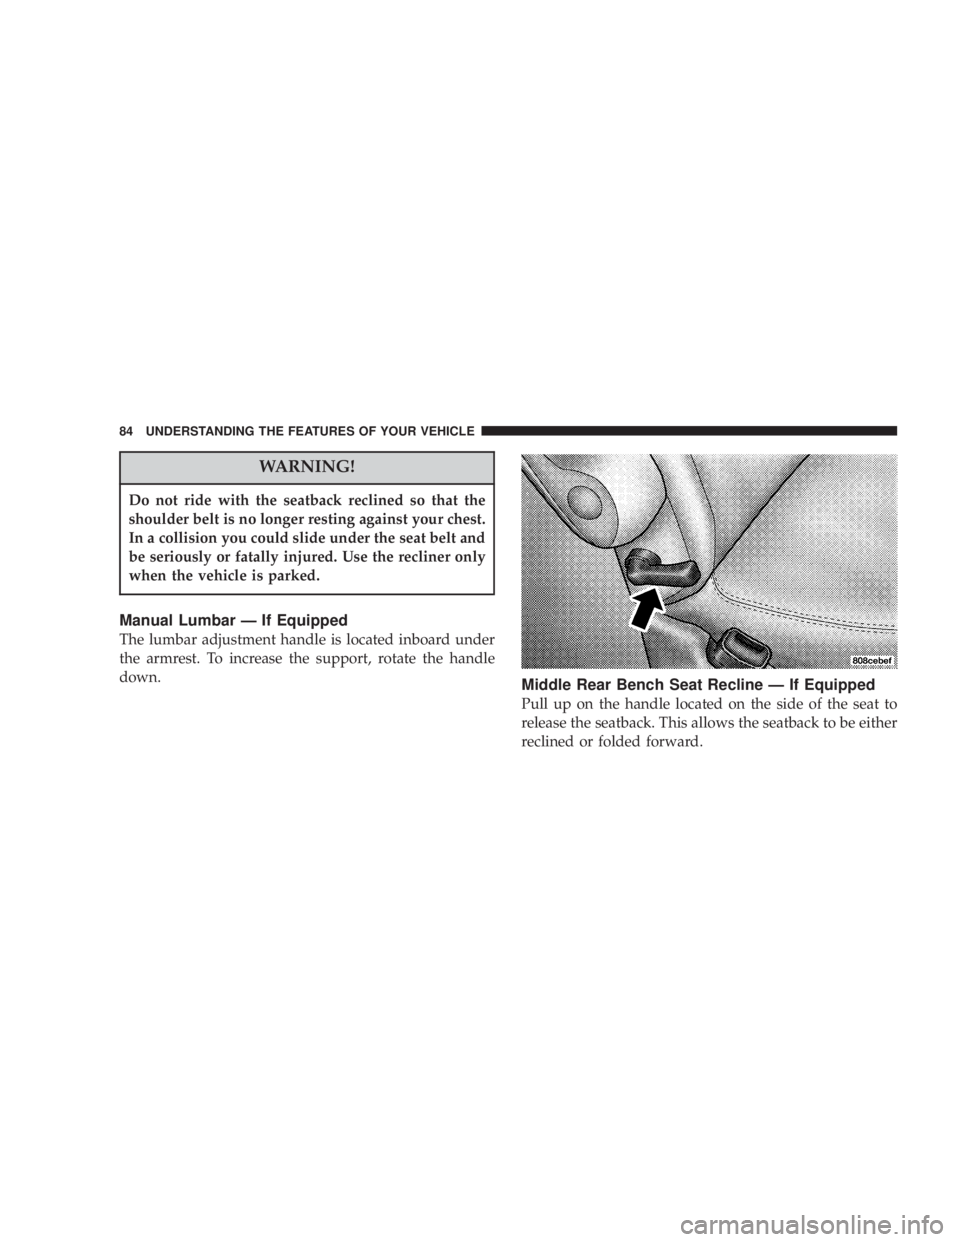
Middle Rear Bench Seat Recline Ð If Equipped
Pull up on the handle located on the side of the seat to
release the seatback. This allows the seatback to be either
reclined or folded forward.84 UNDERSTANDING THE FEATURES OF YOUR VEHICLE
Page 86 of 397
WARNING!In the event of a collision you could be injured if the
seat is not fully latched.
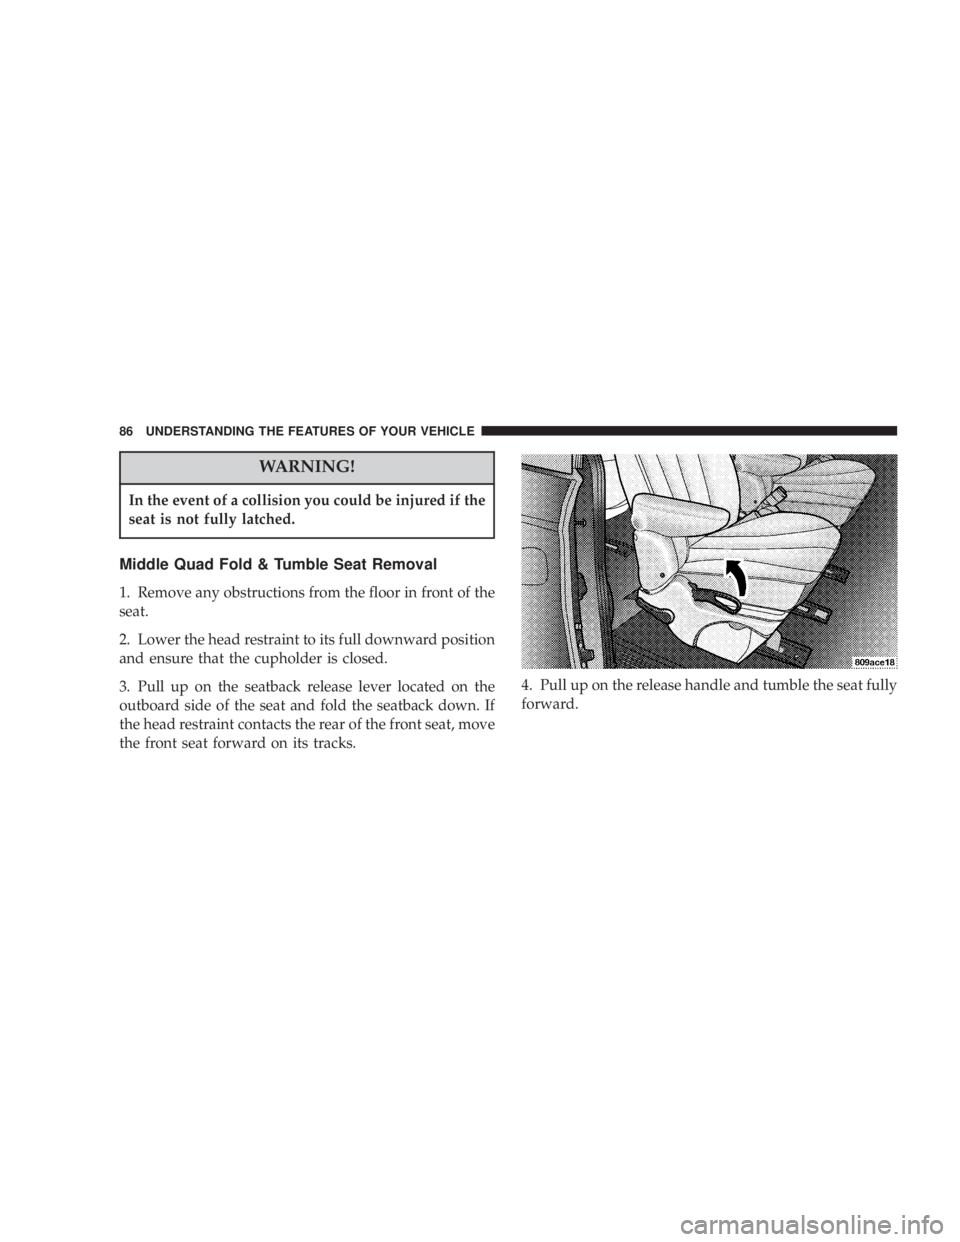
Middle Quad Fold & Tumble Seat Removal
1. Remove any obstructions from the floor in front of the
seat.
2. Lower the head restraint to its full downward position
and ensure that the cupholder is closed.
3. Pull up on the seatback release lever located on the
outboard side of the seat and fold the seatback down. If
the head restraint contacts the rear of the front seat, move
the front seat forward on its tracks. 4. Pull up on the release handle and tumble the seat fully
forward.86 UNDERSTANDING THE FEATURES OF YOUR VEHICLE
Page 88 of 397
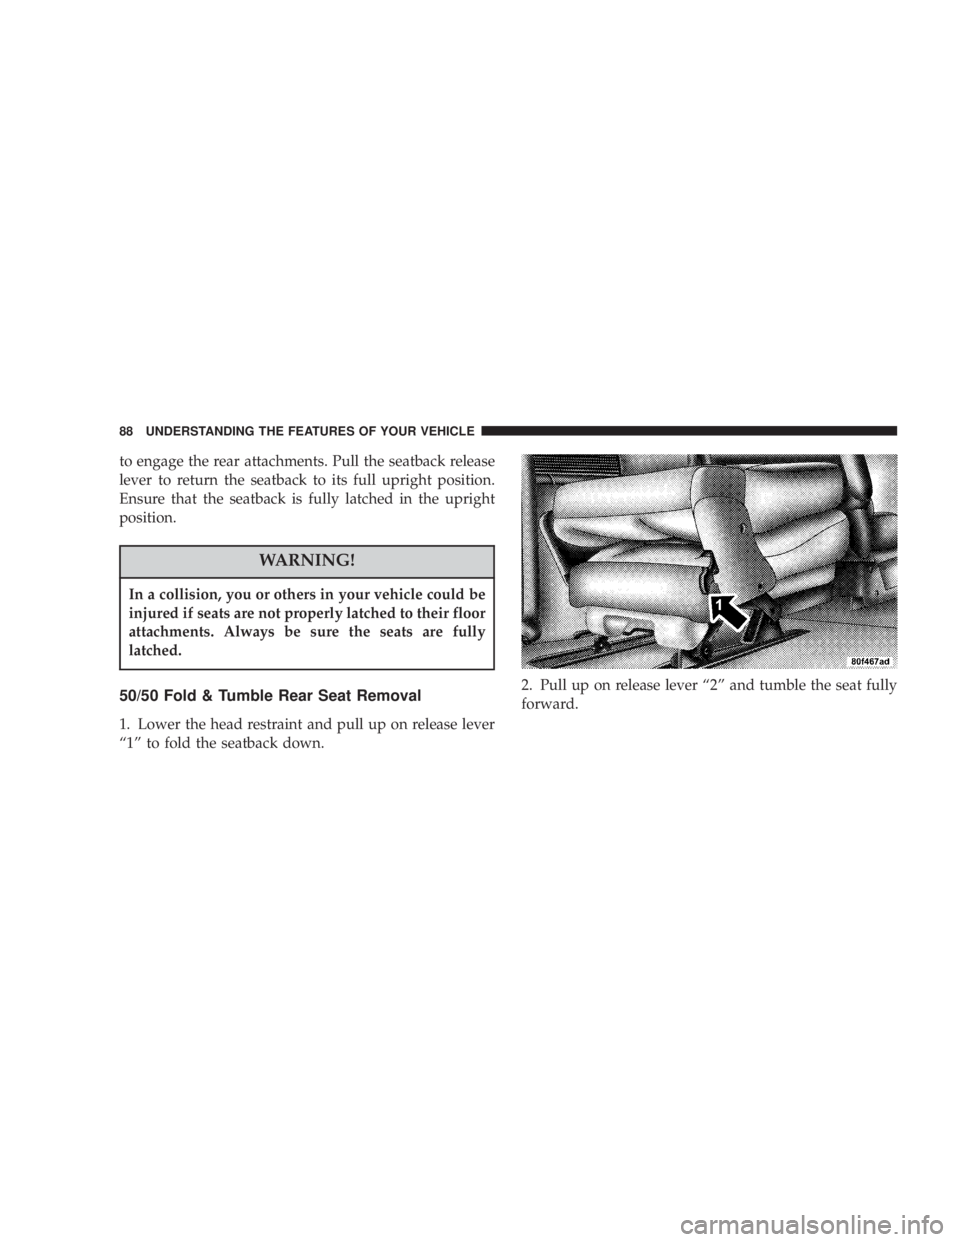
to engage the rear attachments. Pull the seatback release
lever to return the seatback to its full upright position.
Ensure that the seatback is fully latched in the upright
position.
WARNING!In a collision, you or others in your vehicle could be
injured if seats are not properly latched to their floor
attachments. Always be sure the seats are fully
latched.
50/50 Fold & Tumble Rear Seat Removal
1. Lower the head restraint and pull up on release lever
ª1º to fold the seatback down. 2. Pull up on release lever ª2º and tumble the seat fully
forward.88 UNDERSTANDING THE FEATURES OF YOUR VEHICLE
Page 90 of 397
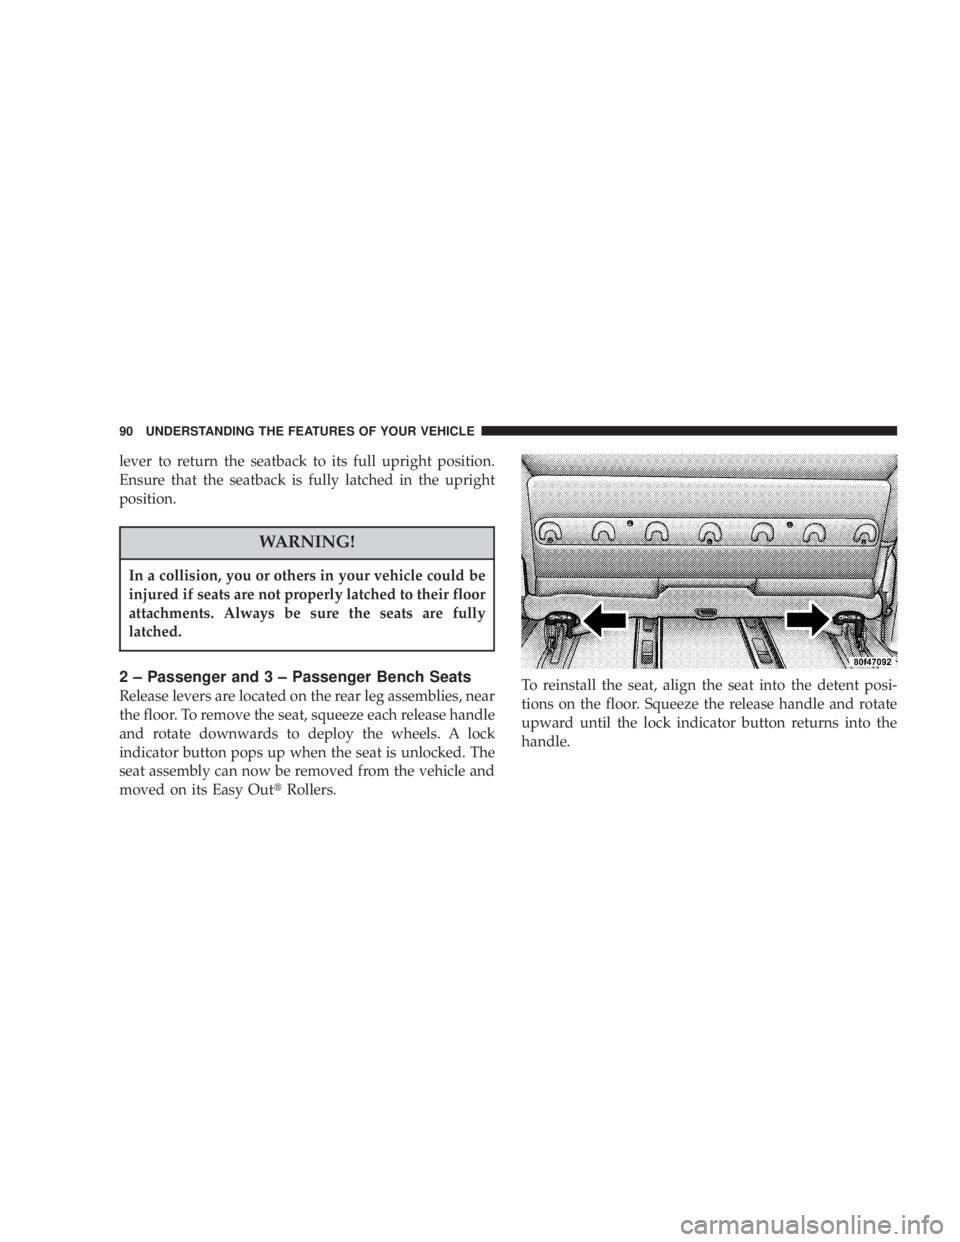
lever to return the seatback to its full upright position.
Ensure that the seatback is fully latched in the upright
position.
WARNING!In a collision, you or others in your vehicle could be
injured if seats are not properly latched to their floor
attachments. Always be sure the seats are fully
latched.
2 ± Passenger and 3 ± Passenger Bench Seats
Release levers are located on the rear leg assemblies, near
the floor. To remove the seat, squeeze each release handle
and rotate downwards to deploy the wheels. A lock
indicator button pops up when the seat is unlocked. The
seat assembly can now be removed from the vehicle and
moved on its Easy Out t Rollers. To reinstall the seat, align the seat into the detent posi-
tions on the floor. Squeeze the release handle and rotate
upward until the lock indicator button returns into the
handle.90 UNDERSTANDING THE FEATURES OF YOUR VEHICLE
Page 91 of 397
WARNING!If not properly latched, the bench seats could be-
come loose. Personal injuries could result. After
reinstalling these seats, be sure the red indicator
button on the release handles return into the
handles.
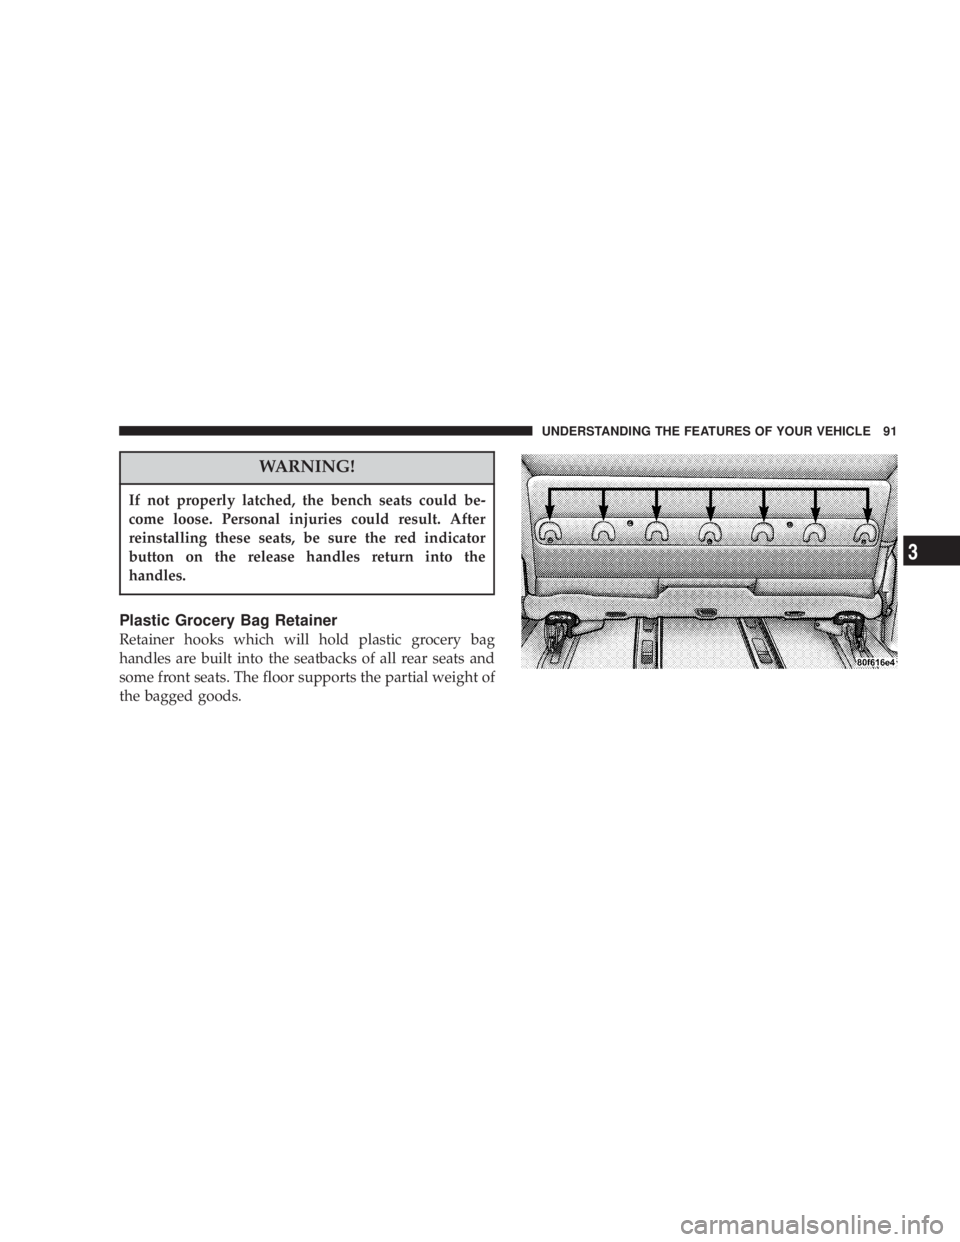
Plastic Grocery Bag Retainer
Retainer hooks which will hold plastic grocery bag
handles are built into the seatbacks of all rear seats and
some front seats. The floor supports the partial weight of
the bagged goods. UNDERSTANDING THE FEATURES OF YOUR VEHICLE 91
3
Page 96 of 397
WARNING!² Not all head restraints in this vehicle are the same.
Head restraints from one seating position should
not be removed and installed in any other seating
position. In a collision, serious injury or death may
result if the proper head restraint is not installed on
each seat.
² The cargo area in the rear of the vehicle should not
be used as a play area by children. They could be
seriously injured in a collision. Children should be
seated and using the proper restraint system.
² It is extremely dangerous to ride in a cargo area,
inside or outside of a vehicle. In a collision, people
riding in these areas are more likely to be seriously
injured or killed.
² Do not allow people to ride in any area of your
vehicle that is not equipped with seats and seat belts.
² Be sure everyone in your vehicle is in a seat and
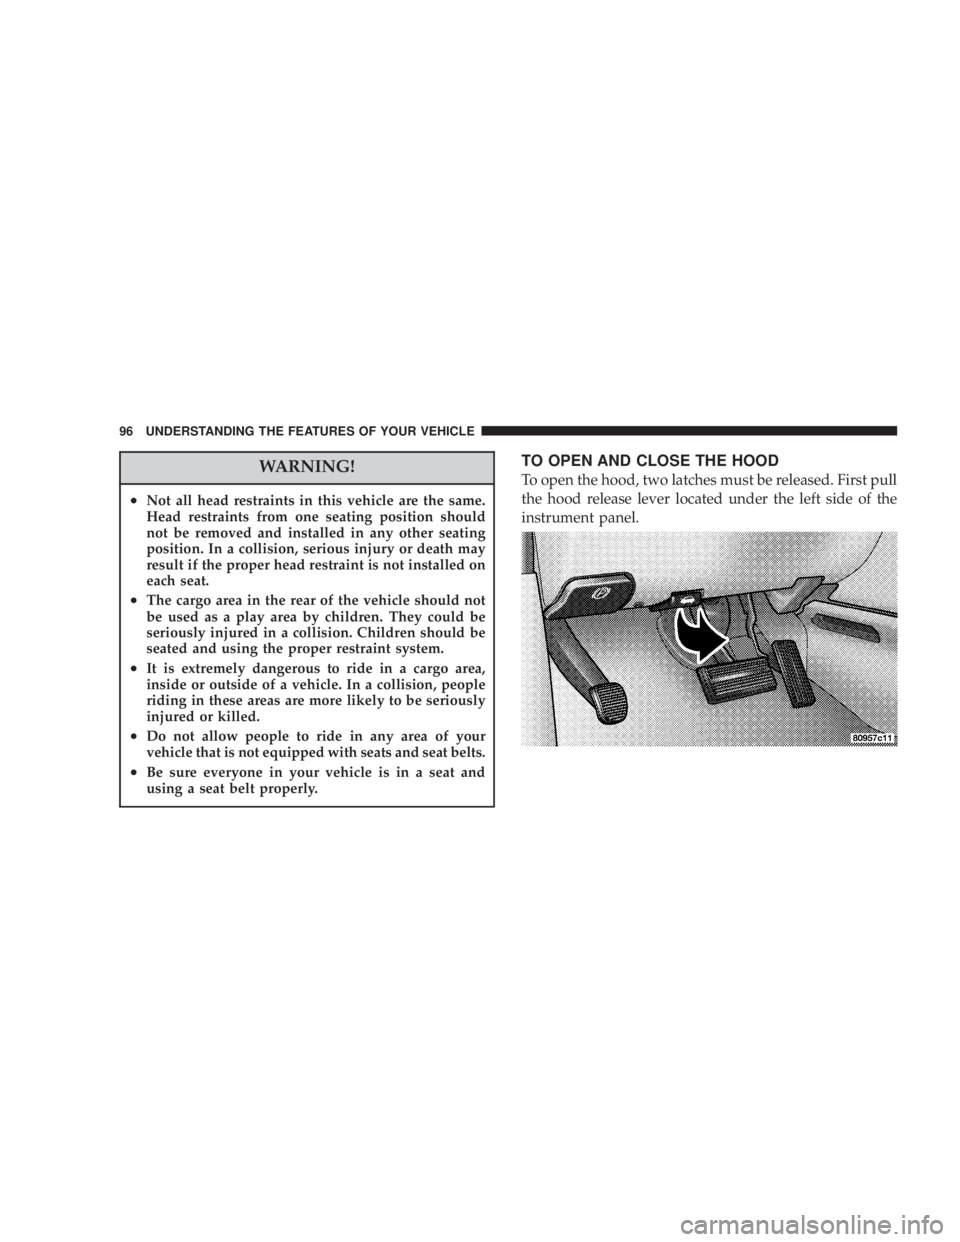
using a seat belt properly. TO OPEN AND CLOSE THE HOOD
To open the hood, two latches must be released. First pull
the hood release lever located under the left side of the
instrument panel.96 UNDERSTANDING THE FEATURES OF YOUR VEHICLE
Page 97 of 397
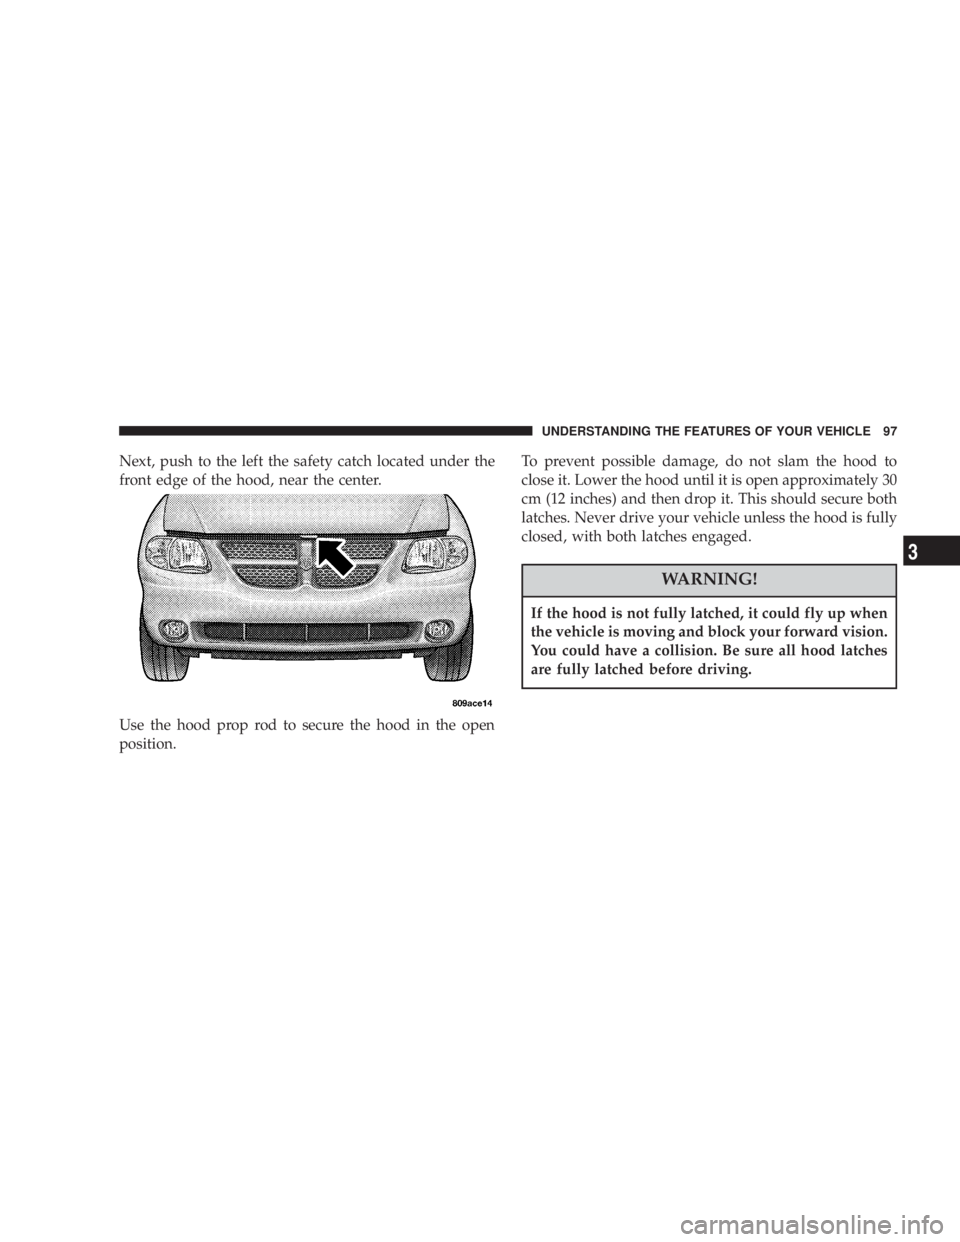
Next, push to the left the safety catch located under the
front edge of the hood, near the center.
Use the hood prop rod to secure the hood in the open
position. To prevent possible damage, do not slam the hood to
close it. Lower the hood until it is open approximately 30
cm (12 inches) and then drop it. This should secure both
latches. Never drive your vehicle unless the hood is fully
closed, with both latches engaged.
WARNING!If the hood is not fully latched, it could fly up when
the vehicle is moving and block your forward vision.
You could have a collision. Be sure all hood latches
are fully latched before driving. UNDERSTANDING THE FEATURES OF YOUR VEHICLE 97
3
Page 98 of 397
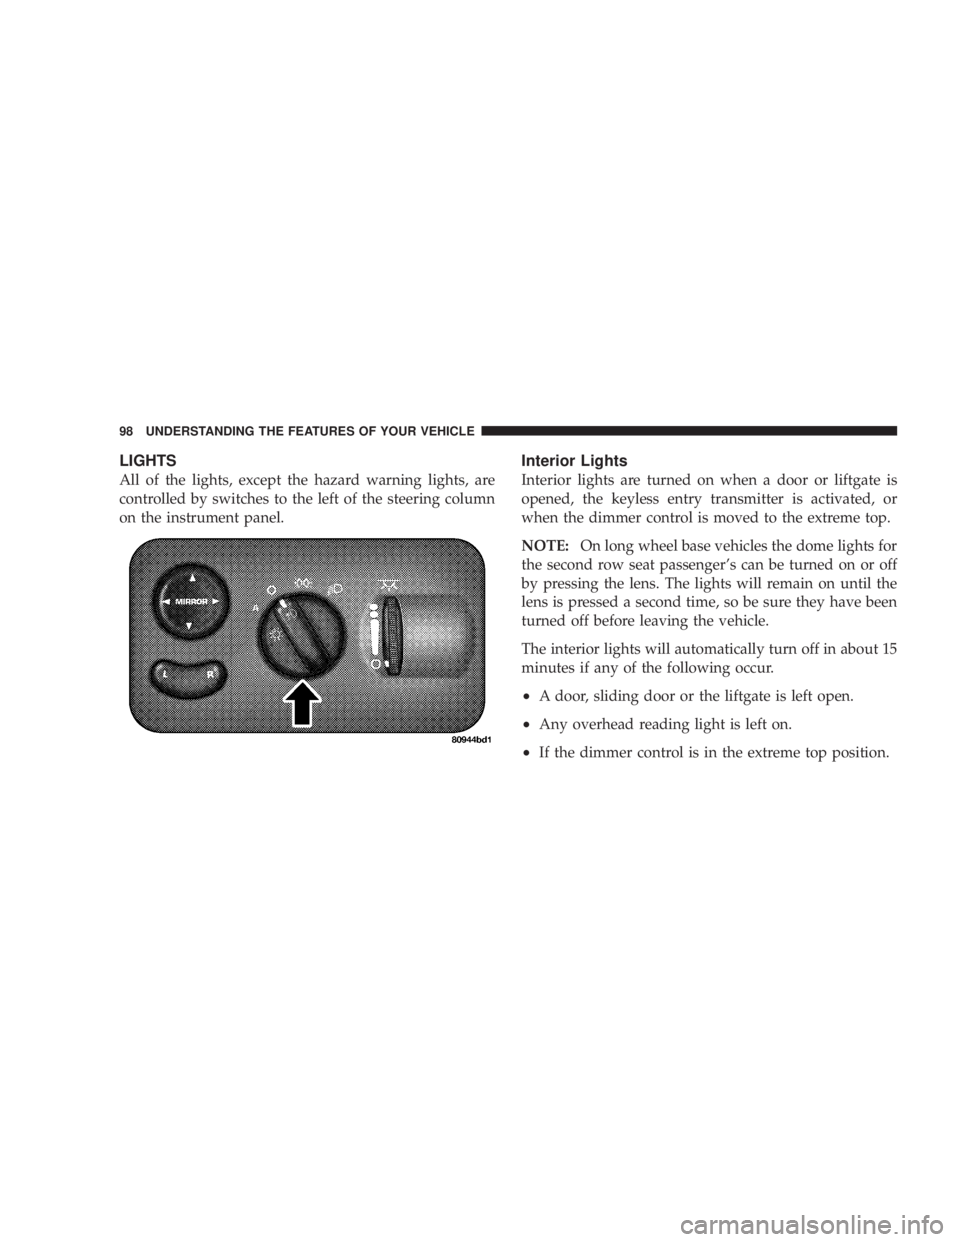
LIGHTS
All of the lights, except the hazard warning lights, are
controlled by switches to the left of the steering column
on the instrument panel. Interior Lights
Interior lights are turned on when a door or liftgate is
opened, the keyless entry transmitter is activated, or
when the dimmer control is moved to the extreme top.
NOTE: On long wheel base vehicles the dome lights for
the second row seat passenger's can be turned on or off
by pressing the lens. The lights will remain on until the
lens is pressed a second time, so be sure they have been
turned off before leaving the vehicle.
The interior lights will automatically turn off in about 15
minutes if any of the following occur.
² A door, sliding door or the liftgate is left open.
² Any overhead reading light is left on.
² If the dimmer control is in the extreme top position.98 UNDERSTANDING THE FEATURES OF YOUR VEHICLE