bulb DODGE GRAND CARAVAN 2008 5.G Owners Manual
[x] Cancel search | Manufacturer: DODGE, Model Year: 2008, Model line: GRAND CARAVAN, Model: DODGE GRAND CARAVAN 2008 5.GPages: 531, PDF Size: 7.72 MB
Page 17 of 531
Key-In-Ignition Reminder
If you open the driver's door with the integrated ignition
key in the ignition, a chime will sound to remind you to
remove the key.
NOTE:The Key-In-Ignition reminder only sounds
when the integrated ignition key is placed in the OFF or
ACC position.
SENTRY KEYTIMMOBILIZER SYSTEM
The Sentry KeytImmobilizer system prevents unautho-
rized vehicle operation by disabling the engine. The
system does not need to be armed or activated. Operation
is automatic, regardless of whether the vehicle is locked
or unlocked.
The system uses the factory-mated Remote Keyless Entry
(RKE) transmitter with integrated key and Wireless Igni-
tion Node (WIN) to prevent unauthorized vehicle opera-
tion. Therefore, only RKE transmitters that are pro-
grammed to the vehicle can be used to start and operatethe vehicle. The system will not allow the engine to crank
if an invalid RKE transmitter is used to operate the
ignition switch.
After turning the ignition switch to the ON position, the
Vehicle Security Alarm Indicator Light located on the
instrument cluster will turn on for three seconds for a
bulb check. If the light remains on after the bulb check, it
indicates that there is a problem with the electronics. In
addition, if the light begins to flash after the bulb check,
it indicates that someone used an invalid RKE transmitter
to start the engine. Either of these conditions will result in
the engine being shut off after two seconds.
If the Vehicle Security Alarm Indicator Light, located on
the instrument cluster, turns on during normal vehicle
operation (vehicle running for longer than 10 seconds), it
indicates that there is a fault in the electronics. Should
this occur, have the vehicle serviced as soon as possible.
THINGS TO KNOW BEFORE STARTING YOUR VEHICLE 15
2
Page 96 of 531
Airbag Light
The light should come on and remain on for four seconds
as a bulb check when the ignition switch is first turned
ON. If the LED is not lit during starting and/or the light
stays on or comes ON while driving, have the system
checked by an authorized dealer.
Defroster
Check operation by selecting the defrost mode and place
the blower control on high speed. You should be able to
feel the air directed against the windshield.
NOTE:If the defroster is not working or you are unable
to feel air against the windshield in defrost mode, please
see your authorized dealer service center for repairs.
PERIODIC SAFETY CHECKS YOU SHOULD MAKE
OUTSIDE THE VEHICLE
Tires
Examine tires for excessive tread wear or uneven wear
patterns. Check for stones, nails, glass, or other objects
lodged in the tread. Inspect tread and sidewall for cuts or
cracks. Check wheel nuts for tightness, and tires (includ-
ing spare) for proper pressure.
Lights
Have someone observe the operation of exterior lights
while you work the controls. Check turn signal and high
beam indicator lights on the instrument panel.
Fluid Leaks
Check area under vehicle after overnight parking for fuel,
engine coolant, oil or other fluid leaks. Also, if gasoline
fumes are detected or fuel, power steering fluid, trans-
mission fluid or brake fluid leaks are suspected, the cause
should be located and corrected immediately.
94 THINGS TO KNOW BEFORE STARTING YOUR VEHICLE
Page 169 of 531
If either indicator flashes at a rapid rate, check for a
defective outside turn signal light bulb. If one of the
indicators fails to light when the lever is moved, it would
suggest that the indicator light is defective.
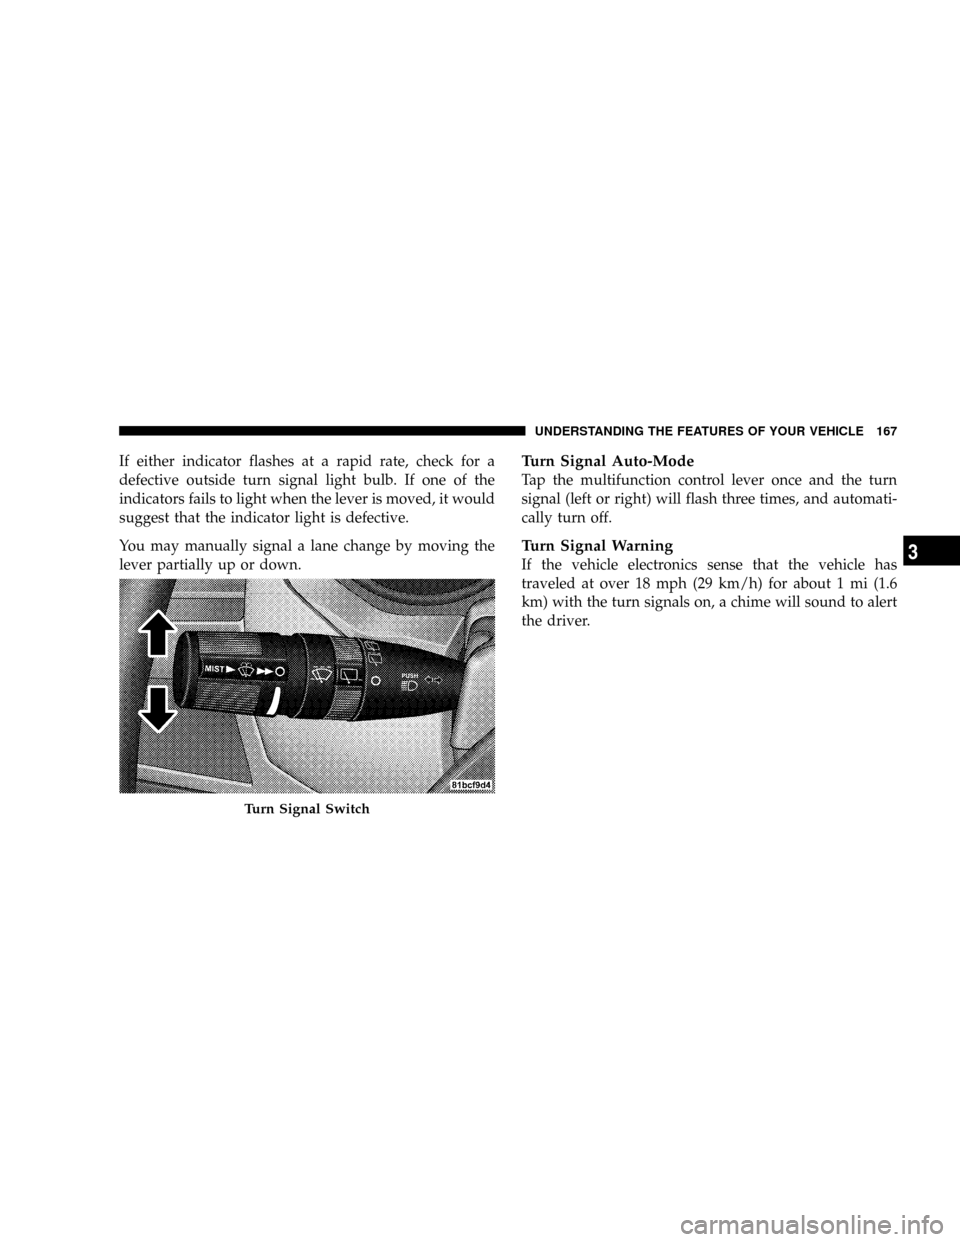
You may manually signal a lane change by moving the
lever partially up or down.Turn Signal Auto-Mode
Tap the multifunction control lever once and the turn
signal (left or right) will flash three times, and automati-
cally turn off.
Turn Signal Warning
If the vehicle electronics sense that the vehicle has
traveled at over 18 mph (29 km/h) for about 1 mi (1.6
km) with the turn signals on, a chime will sound to alert
the driver.
Turn Signal Switch
UNDERSTANDING THE FEATURES OF YOUR VEHICLE 167
3
Page 229 of 531
WARNING!
A hot engine cooling system is dangerous. You or
others could be badly burned by steam or boiling
coolant. You may want to call an authorized dealer if
your vehicle overheats. If you decide to look under
the hood yourself, see Section 7 of this manual.
Follow the warnings under the Cooling System Pres-
sure Cap paragraph.
4. Speedometer
Indicates vehicle speed.
5. Turn Signal Indicators
The arrow will flash with the exterior turn signal
when the turn signal lever is operated.
If the vehicle electronics sense that the vehicle has
traveled about one mile with the turn signals on, acontinuous chime will sound to alert you to turn the
signals off. If either indicator flashes at a rapid rate, check
for a defective outside light bulb.
6. High Beam Light
This light shows that the headlights are on high
beam. Pull the turn signal lever towards the
steering wheel to switch the headlights from high or low
beam.
7. Anti-Lock Brake System Light
This light monitors the Anti-Lock Brake Sys-
tem. The light will turn on when the ignition
switch is turned to the ON position and may
stay on for as long as four seconds.
If the ABS light remains on or turns on while driving, it
indicates that the Anti-Lock portion of the brake system
is not functioning and that service is required. However,
the conventional brake system will continue to operate
normally if the BRAKE warning light is not on.
UNDERSTANDING YOUR INSTRUMENT PANEL 227
4
Page 234 of 531
15. Malfunction Indicator Light
This light is part of an onboard diagnostic system
called OBD that monitors engine and automatic
transmission control systems. The light will illu-
minate when the key is in the ON position before engine
start. If the bulb does not come on when turning the key
from OFF to ON, have the condition checked promptly.
Certain conditions such as a loose or missing gas cap,
poor fuel quality, etc. may illuminate the light after
engine start. The vehicle should be serviced if the light
stays on through several of your typical driving cycles. In
most situations the vehicle will drive normally and will
not require towing.
The Malfunction Indicator Light flashes to alert to serious
conditions that could lead to immediate loss of power or
severe catalytic converter damage. The vehicle should be
serviced at an authorized dealer as soon as possible if this
occurs.16. Engine Temperature Warning Light
This light warns of an overheated engine condi-
tion. If the engine is critically hot, a continuous
chime will sound for four minutes. After the chime
turns off, the engine will still be critically hot until the
light turns off.
17. Electronic Throttle Control (ETC.) Light
This light informs you of a problem with the
Electronic Throttle Control system. If a prob-
lem is detected, the light will come on while the
engine is running. Cycle the ignition key when
the vehicle has completely stopped and the gear selector
is placed in the PARK position. The light should turn off.
If the light remains lit with the engine running your
vehicle will usually be drivable, however, see your dealer
for service as soon as possible. If the light is flashing
when the engine is running, immediate service is re-
quired and you may experience reduced performance, an
elevated/rough idle or engine stall and your vehicle may
232 UNDERSTANDING YOUR INSTRUMENT PANEL
Page 235 of 531
require towing. The light will come on when the ignition
is first turned ON and remain on briefly as a bulb check.
If the light does not come on during starting, have the
system checked by an authorized dealer.
18. Oil Pressure Warning Light
This light shows low engine oil pressure. The light
should turn on momentarily when the engine is
started. If the light turns on while driving, stop the
vehicle and shut off the engine as soon as possible. A
chime will sound for four minutes when this light turns
on.
Do not operate the vehicle until the cause is corrected.
This light does not show how much oil is in the engine.
The engine oil level must be checked under the hood.
19. Front Fog Light Indicator Ð If Equipped
This light shows when the front fog lights are ON.20. Seat Belt Reminder Light
When the ignition switch is first turned ON, this
light will turn on for five to eight seconds as a bulb
check. During the bulb check, if the driver's seat
belt is unbuckled, a chime will sound. After the bulb
check or when driving, if the driver's seat belt remains
unbuckled, the Seat Belt Reminder Light will illuminate
and the chime will sound. Refer to the Occupant Re-
straints section for more information.
21. Vehicle Theft Alarm Light Ð If Equipped
This light will flash for approximately 15 sec-
onds when the vehicle theft alarm is arming.
22. Airbag Light
This light turns on and remains on for four
seconds as a bulb check when the ignition
switch is first turned ON. If the light is not on
UNDERSTANDING YOUR INSTRUMENT PANEL 233
4
Page 341 of 531
WARNING!
²The Anti-Lock Brake System cannot prevent acci-
dents, including those resulting from excessive
speed in turns, following another vehicle too
closely, or hydroplaning. Only a safe, attentive,
and skillful driver can prevent accidents.
²The capabilities of an ABS-equipped vehicle must
never be exploited in a reckless or dangerous
manner which could jeopardize the user's safety
or the safety of others.
All vehicle wheels and tires must be the same size and
type, and tires must be properly inflated to produce
accurate signals for the computer.
Anti-Lock Brake Light
The ABS light monitors the Anti-Lock System.
The light will come on when the ignition
switch is turned to the ON position and may
stay on for as long as four seconds.
If the ABS light remains on or comes on while driving, it
indicates that the Anti-Lock portion of the brake system
is not functioning and that service is required. However,
the conventional brake system will continue to operate
normally if the BRAKE warning light is not on.
If the ABS light is on, the brake system should be serviced
as soon as possible to restore the benefits of anti-lock
brakes. If the ABS light does not come on when the
ignition switch is turned to the ON position, have the
bulb repaired as soon as possible.
If both the Brake Warning Light and the ABS Light
remain on, the ABS and Electronic Brake Force Distribu-
tion (EBD) systems are not functioning. Immediate repair
STARTING AND OPERATING 339
5
Page 434 of 531
NPower Steering Ð Fluid Check............452
NFront Suspension Ð Ball Joints............453
NSteering Shaft Seal....................453
NDrive Shaft Universal Joints..............454
NBody Lubrication.....................454
NWindshield Wiper Blades................454
NCooling System.......................456
NHoses And Vacuum/Vapor Harnesses.......461
NFuel System Connections................461
NBrakes.............................462
NAutomatic Transaxle...................464
NFront And Rear Wheel Bearings...........467NAppearance Care And Protection From
Corrosion...........................467
NCleaning The Instrument Panel Cup Holders . . 473
mFuses/Totally Integrated Power Module
(TIPM)..............................474
mVehicle Storage........................481
mReplacement Light Bulbs.................481
mBulb Replacement......................482
NHeadlights..........................482
NFront Park/Turn Signal And Side Marker
Lights.............................483
NFog Lights..........................483
NRear Tail, Stop, Turn Signal, Side Marker And
Backup Lights........................484
432 MAINTAINING YOUR VEHICLE
Page 441 of 531
This vehicle has a simple ignition key-actuated test,
which you can use prior to going to the test station. To
check if this vehicle's OBD II system is ready, you must
do the following:
1. Insert the ignition key into the ignition switch.
2. Turn the ignition to the ON position, but do not crank
or start the engine.
3. If you crank or start the engine, you will have to start
this test over.
4. As soon as you turn the ignition key to the ON
position, you will see the MIL symbol come on as part of
a normal bulb check.
5. Approximately 15 seconds later, one of two things will
happen:
a. The MIL will flash for about 10 seconds and then
return to being fully illuminated until you turn OFFthe ignition key or start the engine. This means that the
vehicle's OBD II system isnot readyand you should
notproceed to the I/M station.
b. The MIL will not flash at all and will remain fully
illuminated until you turn OFF the ignition key or start
the engine. This means that the vehicle's OBD II
system isready,and you can proceed to the I/M
station.
If the OBD II system isnot ready,you should see an
authorized dealer or repair facility. If this vehicle was
recently serviced or had a battery failure or replacement,
you may need to do nothing more than drive the vehicle
as you normally would in order for the OBD II system to
update. A recheck with the above test routine may then
indicate that the system is now ready.
Regardless of whether the vehicle's OBD II system is
ready or not ready, if the MIL is illuminated during
normal vehicle operation, you should have the vehicle
MAINTAINING YOUR VEHICLE 439
7
Page 483 of 531
The Heated Mirrors, Lower Instrument Panel Power
Outlet and Removable Floor Console, when in the front
position are fused with self-resetting fuses that are only
serviceable by an authorized dealer. The power seats are
fused by a 30 Amp circuit breaker located under the
driver's seat. The Power Windows are fused by a 25 Amp
circuit breaker located under the instrument panel near
the steering column. If you experience temporary or
permanent loss of these systems, see your authorized
dealer for service.
VEHICLE STORAGE
If you are leaving your vehicle dormant for more than 21
days you may want to take steps to protect your battery.
You may do the following:
²Remove the 20 Amp mini-fuse in the Integrated Power
Module labeled Ignition-Off Draw (IOD).
²Or, disconnect the negative cable from the battery.
²Anytime you store your vehicle, or keep it out of
service for two weeks or more, run the air conditioning
system at idle for about five minutes in the fresh air
and high blower setting. This will ensure adequate
system lubrication to minimize the possibility of com-
pressor damage when the system is started again.
REPLACEMENT LIGHT BULBS
LIGHT BULBS Ð Interior Bulb Number
Center & Rear Dome Light.................. 578
Center & Rear Reading Lights............... 578
Front Door Courtesy Light.................. 578
Front Header Reading Lights Ð If Equipped..... 578
Instrument Cluster Lights.................PC74
Liftgate Light(s).......................... 578
Overhead Console Reading Lights..........PC579
Removable Console Light Ð If Equipped....... 194
Visor Vanity Lights....................6501966
MAINTAINING YOUR VEHICLE 481
7