open hood DODGE GRAND CARAVAN 2008 5.G Owners Manual
[x] Cancel search | Manufacturer: DODGE, Model Year: 2008, Model line: GRAND CARAVAN, Model: DODGE GRAND CARAVAN 2008 5.GPages: 531, PDF Size: 7.72 MB
Page 32 of 531
To Enter the Vehicle After Remote Start
To enter the vehicle while the engine is running during a
Remote Start, you must first unlock the vehicle using the
UNLOCK button on the transmitter. After the vehicle is
unlocked, you have 60 seconds to enter the vehicle, insert
the key into the ignition switch and move it to the RUN
position, otherwise the engine will cancel Remote Start-
ing and automatically turn off.
To Exit Remote Start Mode and Drive the Vehicle
Before the end of the 15 minute cycle, press and release
the UNLOCK button on the RKE transmitter to unlock
the doors and disarm the Vehicle Security Alarm (if
equipped). Then, prior to the end of the 15 minute cycle,
insert the key into the ignition switch and turn the switch
to the ON position.
NOTE:
²The ignition switch must be in the ON position in
order to drive the vehicle.
²For vehicles equipped with the Electronic Vehicle
Information Center (EVIC), the message ªInsert Key/
Turn To Runº will flash in the EVIC until you insert
the key. Once inserted, the message ªTurn To Runº
will flash in the EVIC until you turn the key to run.
Cancel Remote Start
Remote Starting will also cancel if any of the following
occur:
²The engine stalls or RPM exceeds 2500.
²Any engine warning telltale lights come on.
²The hood is opened.
²The Hazard Switch is pressed.
²The transmission gear selector lever is moved out of
PARK.
²Pressing the brake pedal.
²Allow the engine to run for the entire 15 minute cycle.
30 THINGS TO KNOW BEFORE STARTING YOUR VEHICLE
Page 100 of 531
NSetting Memory Positions And Linking RKE
Transmitter To Memory.................156
mTo Open And Close The Hood.............158
NHood Safety Switch Ð If Equipped........159
mLights...............................160
NInterior Lighting......................160
NExterior Lights.......................162
mMultifunction Lever.....................166
NTurn Signals.........................166
mTilt Steering Column Ð If Equipped.........171
mRear Park Assist System Ð If Equipped.......171
NRear Park Assist Sensors................172
mAdjustable Pedals Ð If Equipped...........177mElectronic Speed Control Ð If Equipped......179
NActivating Electronic Speed Control........179
mOverhead Consoles.....................182
NFront Overhead Console Ð If Equipped.....182
mGarage Door Opener Ð If Equipped.........185
NProgramming HomeLinkt...............187
NGate Operator/Canadian Programming.....190
NSecurity............................191
NTroubleshooting Tips...................191
NGeneral Information...................191
mPower Sunroof Ð If Equipped.............192
NPower Sunroof Operation...............192
mElectrical Power Outlets Ð If Equipped.......195
98 UNDERSTANDING THE FEATURES OF YOUR VEHICLE
Page 160 of 531
2. Press and release Memory Button 1. The system will
recall any memory settings stored in position 1. Wait for
the system to complete the memory recall before continu-
ing to step 3.
3. Press and release the memory SET(S) button located
on the driver's door. A chime will sound signaling that
you are in the memory set mode.
4. Within five seconds, press and release Memory Button
1 on the driver's door. A chime will sound signaling to
you that the driver memory has been set.
5. Within five seconds, press and release the UNLOCK
button on the Remote Keyless Entry transmitter. A chime
will sound signaling to you that the transmitter link has
been successfully disabled.
To disable another transmitter linked to either Memory
Position, repeat steps 1 to 5 for each transmitter.NOTE:Once programmed, all transmitters linked to
memory can be easily enabled or disabled at one time.
Refer to the Remote Linked to Memory9Customer Pro-
grammable Features9in the Electronic Vehicle Informa-
tion Center (EVIC) for more information.
TO OPEN AND CLOSE THE HOOD
To open the hood, two latches must be released.
1. Pull the hood release lever located on the instrument
panel, below the steering column.
2. Move to the front of the vehicle and look inside the
center of the hood opening. Locate, then push the safety
catch lever to the right while raising the hood at the same
time.
158 UNDERSTANDING THE FEATURES OF YOUR VEHICLE
Page 161 of 531
Use the hood prop rod to secure the hood in the open
position.
To prevent possible damage, do not slam the hood to
close it. Lower the hood until it is open approximately 12inches (30 cm) and then drop it. This should secure both
latches. Never drive your vehicle unless the hood is fully
closed, with both latches engaged.
WARNING!
If the hood is not fully latched, it could fly up when
the vehicle is moving and block your forward vision.
You could have a collision. Be sure all hood latches
are fully latched before driving.
Hood Safety Switch Ð If Equipped
If the vehicle is equipped with the Electronic Vehicle
Information Center (EVIC), and the hood is not latched,
the EVIC will display ªHood Ajarº in the instrument
cluster EVIC display window.Hood Safety Catch
UNDERSTANDING THE FEATURES OF YOUR VEHICLE 159
3
Page 162 of 531
If the vehicle is equipped with the Compass Mini-Trip
Computer (CMTC) and the hood is not latched, a ªhoodº
will be displayed in the PRNDL/Odometer window of
the instrument cluster.
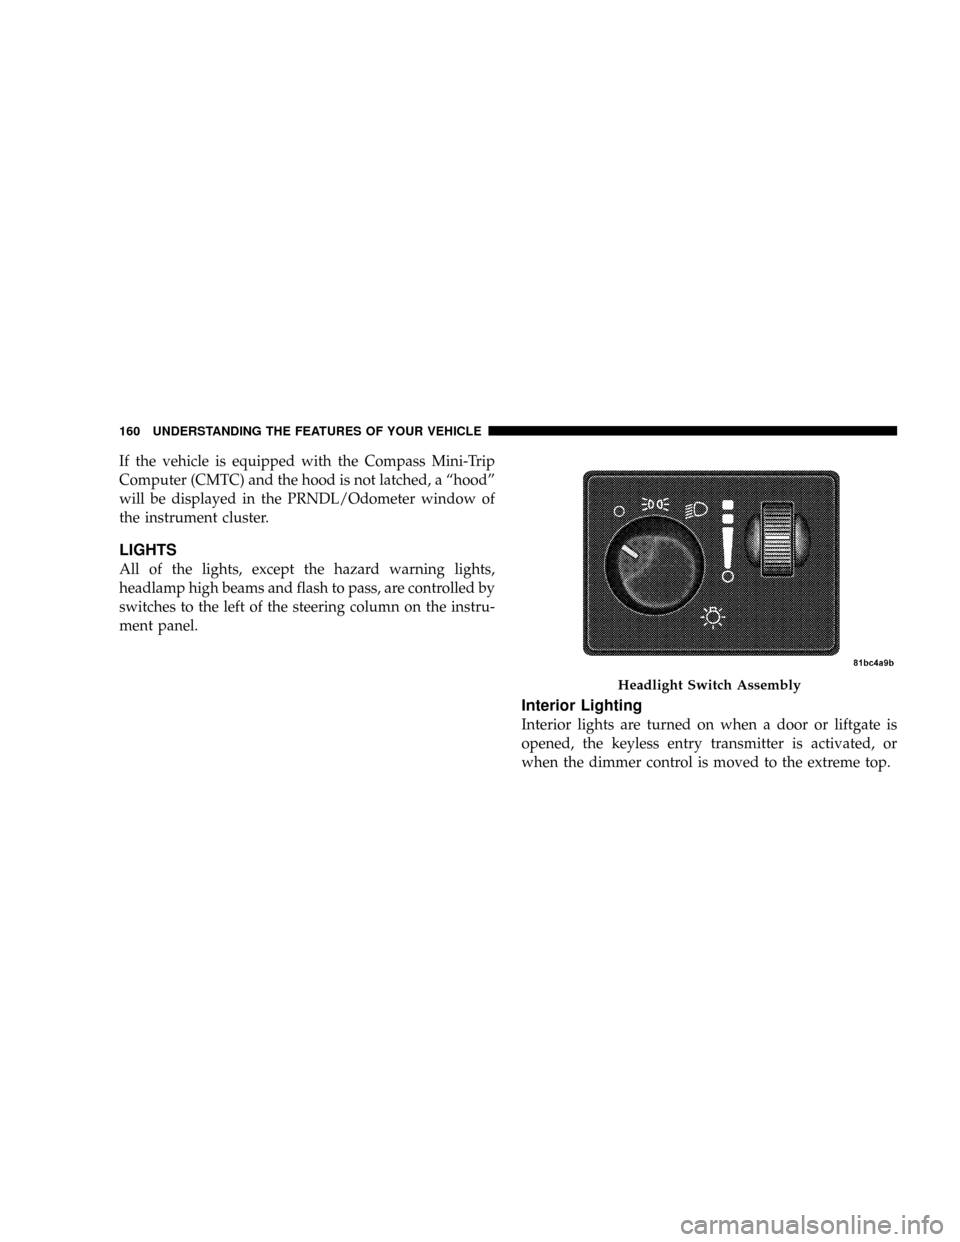
LIGHTS
All of the lights, except the hazard warning lights,
headlamp high beams and flash to pass, are controlled by
switches to the left of the steering column on the instru-
ment panel.
Interior Lighting
Interior lights are turned on when a door or liftgate is
opened, the keyless entry transmitter is activated, or
when the dimmer control is moved to the extreme top.
Headlight Switch Assembly
160 UNDERSTANDING THE FEATURES OF YOUR VEHICLE
Page 458 of 531
COOLING SYSTEM
WARNING!
²When working near the radiator cooling fan, dis-
connect the fan motor lead or turn the ignition
switch to the OFF position. The fan is temperature
controlled and can start at anytime the ignition
switch is in the ON position.
²You or others can be badly burned by hot coolant
or steam from your radiator. If you see or hear
steam coming from under the hood, don't open the
hood until the radiator has had time to cool. Never
try to open a cooling system pressure cap when the
radiator is hot.
Coolant Checks
Check the engine coolant (antifreeze) protection every 12
months (before the onset of freezing weather, where
applicable). If coolant is dirty or rusty in appearance, the
system should be drained, flushed and refilled with fresh
coolant. Check the front of the A/C condenser for any
accumulation of bugs, leaves, etc. If dirty, clean by gently
spraying water from a garden hose vertically down the
face of the condenser.
Check the coolant recovery bottle tubing for brittle rub-
ber, cracking, tears, cuts and tightness of the connection
at the bottle and radiator. Inspect the entire system for
leaks.
With the engine at normal operating temperature (but
not running), check the cooling system pressure cap for
proper vacuum sealing by draining a small amount of
coolant from the radiator drain cock. If the cap is sealing
properly, the engine coolant (antifreeze) will begin to
456 MAINTAINING YOUR VEHICLE
Page 478 of 531
FUSES/TIPM
CavityCartridge
FuseMini
FuseDescription
J21 20 Amp
YellowÐ Front/Rear Washer
J22 25 Amp
NaturalÐ Sunroof Module
M1 Ð 15 Amp
BlueCenter High Mounted
Stop Light (CHMSL)/
Brake Switch
M2 Ð 20 Amp
YellowTrailer Lighting
M3 Ð 20 Amp
YellowÐ
M4 Ð 10 Amp
RedTrailer Tow
M5 Ð 25 Amp
NaturalInverter
M6 Ð 20 Amp
YellowÐFUSES/TIPM
CavityCartridge
FuseMini
FuseDescription
M7 Ð 20 Amp
YellowPower Outlet #2 (BATT/
ACC SELECT)
M8 Ð 20 Amp
YellowFront Heated Seat (If
Equipped)
M9 Ð 20 Amp
YellowRear Heated Seat (If
Equipped)
M10 Ð 20 Amp
YellowIgnition Off Draw Ð Ve-
hicle Entertainment Sys-
tem (IOD-VES), Satellite
Digital Audio Receiver
(SDARS), DVD, Hands-
Free Module (HFM),
Universal Garage Door
Opener (UGDO), Vanity
Lamp (VANITY LP)
M11 Ð 10 Amp
Red(Ignition Off Draw) IOD-
HVAC/ATC, MW
SENSR, Underhood
Lamp (UH LMP)
476 MAINTAINING YOUR VEHICLE
Page 518 of 531
Passing............................. 170
Replacing............................ 482
Time Delay.......................... 164
Heated Seats........................... 135
Heater............................... 301
Heater, Engine Block..................... 327
High Beam/Low Beam Select (Dimmer) Switch . . 170
Hitches
Trailer Towing........................ 397
HomeLinkt(Garage Door Opener) Transmitter . . . 185
Hood Release.......................... 158
Hook, Coat............................ 214
Hoses................................ 461
Ignition............................... 14
Key ...............................12,14
Ignition Key Removal..................... 14
Illuminated Entry........................ 20
Immobilizer (Sentry Key)................... 15Infant Restraint........................81,83
Information Center, Vehicle................. 241
Inside Rearview Mirror................... 100
Instrument Cluster.................224,225,226
Instrument Panel and Controls.............. 223
Instrument Panel Cover................... 470
Instrument Panel Lens Cleaning............. 472
Integrated Power Module (Fuses)............ 474
Interior Appearance Care.................. 470
Interior Lights.......................160,162
Intermittent Wipers (Delay Wipers)........... 169
Introduction............................. 4
Jack Location........................... 413
Jack Operation.......................... 412
Jump Starting.......................... 425
Key, Programming........................ 17
Key, Replacement........................ 16
516 INDEX