ECO mode DODGE GRAND CARAVAN 2009 5.G User Guide
[x] Cancel search | Manufacturer: DODGE, Model Year: 2009, Model line: GRAND CARAVAN, Model: DODGE GRAND CARAVAN 2009 5.GPages: 535, PDF Size: 18.61 MB
Page 145 of 535
CommandsThe Voice Recognition (VR) system understands two
types of commands. Universal commands are available at
all times. Local commands are available if the supported
radio mode is active.
Changing the Volume
1. Start a dialogue by pressing the VR button.
2. Say a command (e.g., “Help”).
3. Use the ON/OFF VOLUME rotary knob to adjust the
volume to a comfortable level while the Voice Recogni-
tion (VR) system is speaking. Please note the volume
setting for VR is different than the audio system.
Main Menu
Start a dialogue by pressing the VR button. You may say
“Main Menu” to switch to the main menu.
In this mode, you can say the following commands:
“Radio” (to switch to the radio mode)
“Disc” (to switch to the disc mode)
“Memo” (to switch to the memo recorder)
“System Setup” (to switch to system setup)
Radio AM (or Radio Long Wave or Radio Medium
Wave — If Equipped)
To switch to the AM band, say “AM” or “Radio AM”. In
this mode, you may say the following commands:
“Frequency” (to change the frequency)
“Next Station” (to select the next station)
“Previous Station” (to select the previous station)
“Radio Menu” (to switch to the radio menu)
“Main Menu” (to switch to the main menu)
UNDERSTANDING THE FEATURES OF YOUR VEHICLE 143 3
Page 147 of 535
MemoTo switch to the voice recorder mode, say “Memo”. In
this mode, you may say the following commands:
“New Memo” (to record a new memo) — During the
recording, you may press the VR button to stop
recording. You proceed by saying one of the following
commands:
�“Save” (to save the memo)
�“Continue” (to continue recording)
�“Delete” (to delete the recording)
“Play Memos” (to play previously recorded memos)
— During the playback you may press the VR button
to stop playing memos. You proceed by saying one of
the following commands:
�“Repeat” (to repeat a memo)
�“Next” (to play the next memo)
�“Previous” (to play the previous memo)
�“Delete” (to delete a memo)
“Delete All” (to delete all memos)
System Setup
To switch to system setup, say “Setup”. In this mode, you
may say the following commands:
“Language German”
“Language Dutch”
“Language Italian”
“Language English”
“Language French”
“Language Spanish”
“Tutorial”
“Voice Training”
UNDERSTANDING THE FEATURES OF YOUR VEHICLE 145
3
Page 168 of 535
WARNING!If not properly latched, the bench seats could become
loose. Personal injuries could result. After reinstall-
ing these seats, be sure the red indicator button on
the release handles return into the handles.
Third Row Power Seat — If Equipped
The third row power seat offers the following features:
The seatbacks can be folded forward for additional
cargo space if needed.
Head restraints can be stowed with the seat.
Tailgate mode flips the seat rearward to face out the
tailgate.
The power recline feature, located on the side of the seat
cushion, adjusts the seatback angle forward/rearward
for occupant comfort.Third Row Power Seat Switch — If Equipped
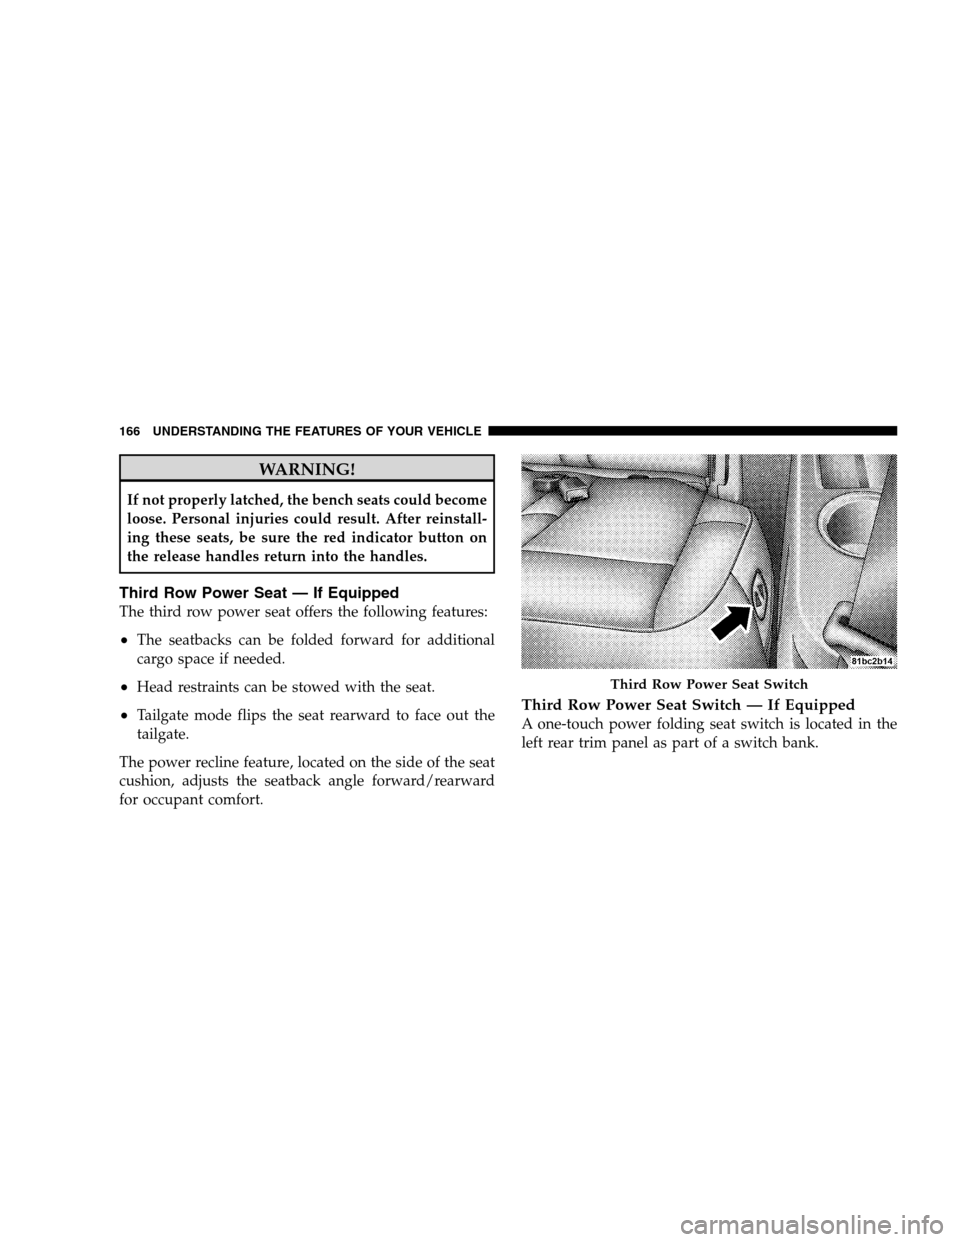
A one-touch power folding seat switch is located in the
left rear trim panel as part of a switch bank. Third Row Power Seat Switch
166 UNDERST
ANDING THE FEATURES OF YOUR VEHICLE
Page 175 of 535
3. Press and release the memory SET (S) button located
on the driver’s door. A chime will sound signaling that
you are in the memory set mode.
4. Within five seconds, press and release MEMORY
button 1 on the driver’s door. A chime will sound
signaling to you that the driver memory has been set.
5. Within five seconds, press and release the UNLOCK
button on the RKE transmitter. A chime will sound
signaling to you that the RKE transmitter link has been
successfully disabled.
To disable another RKE transmitter linked to either
Memory Position, repeat Steps 1 to 5 for each RKE
transmitter.
NOTE:Once programmed, all RKE transmitters linked
to memory can be easily enabled or disabled at one time. Refer to the Remote Linked to Memory
9Customer-
Programmable Features9 in the Electronic Vehicle Infor-
mation Center (EVIC) for more information.
Easy Entry/Exit Seat (Available with Memory Seat
ONLY)
This feature provides automatic driver seat positioning to
enhance driver mobility when entering and exiting the
vehicle.
The distance the driver seat moves depends on where
you have the driver seat positioned when you remove the
key from the ignition switch.
When you remove the key from the ignition switch,
the driver seat will move about 2.4 in (60 mm)
rearward if the driver seat position is greater than or
equal to 2.7 in (67.7 mm) forward of the rear stop. The
seat will return to its previously set position when you
insert the key into the ignition switch and turn it out of
the LOCK position.
UNDERSTANDING THE FEATURES OF YOUR VEHICLE 173 3
Page 180 of 535
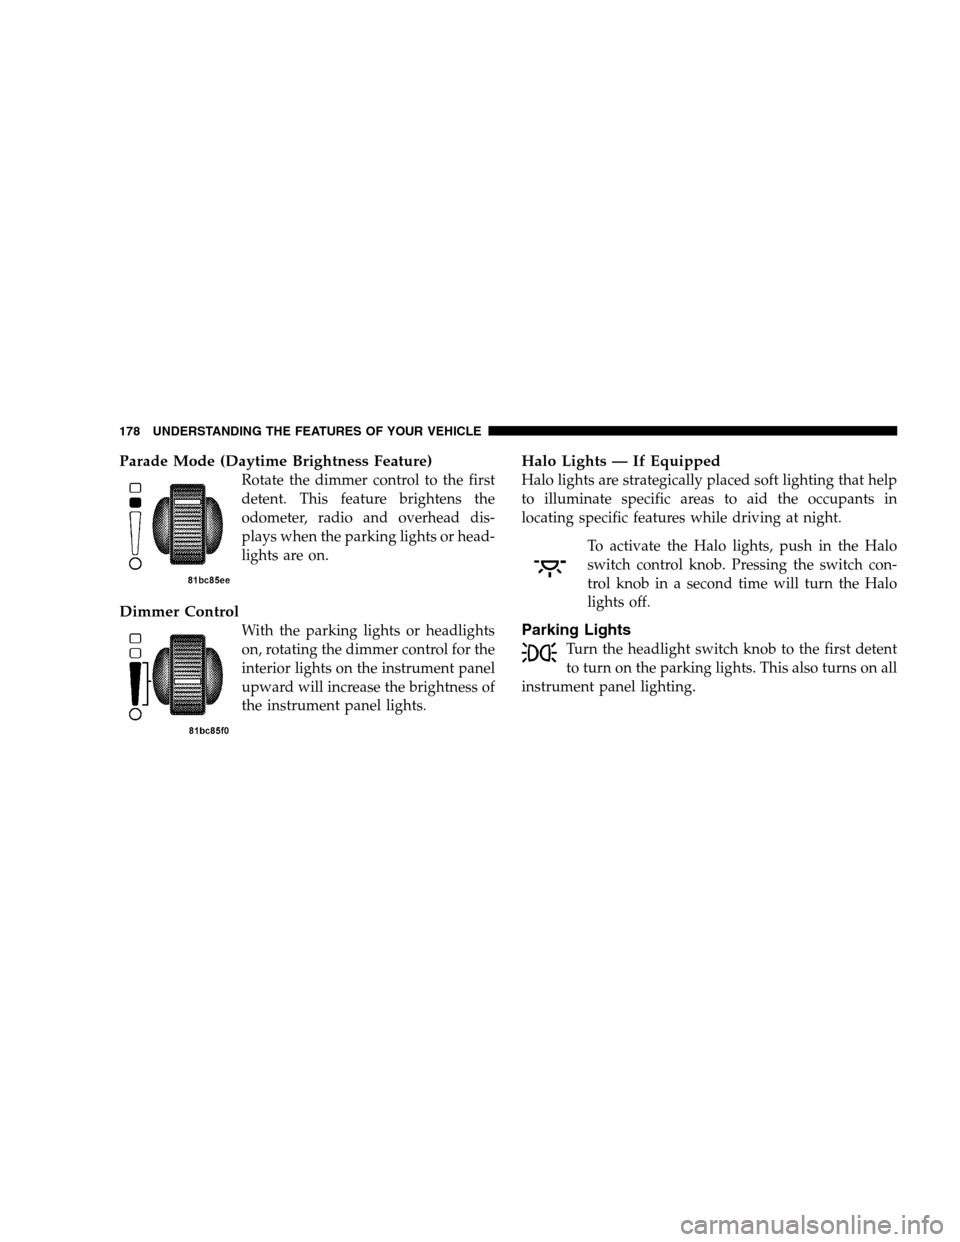
Parade Mode (Daytime Brightness Feature)Rotate the dimmer control to the first
detent. This feature brightens the
odometer, radio and overhead dis-
plays when the parking lights or head-
lights are on.
Dimmer Control
With the parking lights or headlights
on, rotating the dimmer control for the
interior lights on the instrument panel
upward will increase the brightness of
the instrument panel lights.
Halo Lights — If Equipped
Halo lights are strategically placed soft lighting that help
to illuminate specific areas to aid the occupants in
locating specific features while driving at night.
To activate the Halo lights, push in the Halo
switch control knob. Pressing the switch con-
trol knob in a second time will turn the Halo
lights off.
Parking Lights
Turn the headlight switch knob to the first detent
to turn on the parking lights. This also turns on all
instrument panel lighting. 178 UNDERSTANDING THE FEATURES OF YOUR VEHICLE
Page 181 of 535
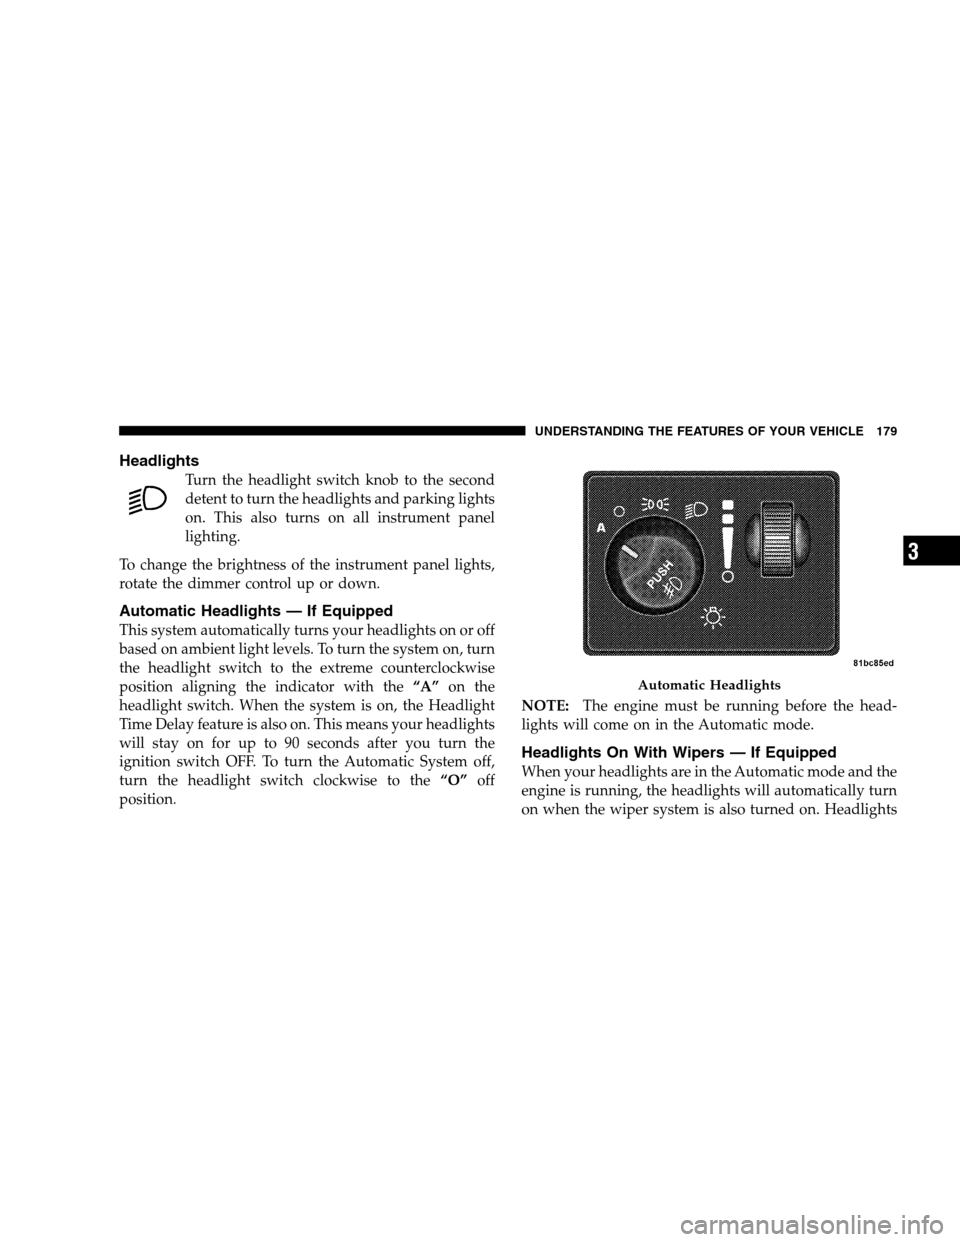
HeadlightsTurn the headlight switch knob to the second
detent to turn the headlights and parking lights
on. This also turns on all instrument panel
lighting.
To change the brightness of the instrument panel lights,
rotate the dimmer control up or down.
Automatic Headlights — If Equipped
This system automatically turns your headlights on or off
based on ambient light levels. To turn the system on, turn
the headlight switch to the extreme counterclockwise
position aligning the indicator with the “A”on the
headlight switch. When the system is on, the Headlight
Time Delay feature is also on. This means your headlights
will stay on for up to 90 seconds after you turn the
ignition switch OFF. To turn the Automatic System off,
turn the headlight switch clockwise to the “O”off
position. NOTE:
The engine must be running before the head-
lights will come on in the Automatic mode.
Headlights On With Wipers — If Equipped
When your headlights are in the Automatic mode and the
engine is running, the headlights will automatically turn
on when the wiper system is also turned on. Headlights Automatic Headlights
UNDERSTANDING
THE FEATURES OF YOUR VEHICLE 179 3
Page 200 of 535
4. Enable or disable the rear camera feature by selecting
9enable rear camera in reverse9soft key.
5. Press the “save” soft key.
6. When the vehicle is shifted into REVERSE, an image of
the rear of the vehicle will appear with a caution note to
9check entire surroundings9 displayed across the top of
the screen. After five seconds this note will disappear.
7. When the vehicle is shifted out of REVERSE, the rear
camera mode is exited and the navigation or audio screen
appears again.
Turning the Rear Camera On or Off — Without
Navigation Radio
1. Press the 9menu9hard key.
2. Select 9system setup9 soft key.
3. Enable or disable the rear camera feature by selecting
9enable rear camera in reverse9 soft key.4. When the vehicle is shifted into REVERSE, an image of
the rear of the vehicle will appear with a caution note to
9check entire surroundings9
displayed across the top of
the screen. After five seconds this note will disappear.
5.
When the vehicle is shifted out of REVERSE, the rear
camera mode is exited and the audio screen appears again.
OVERHEAD CONSOLES
Front Overhead Console
Two versions of the overhead console are available. The
base front overhead console model featured fixed incan-
descent courtesy/reading lights, flip-down sunglass stor-
age and conversation mirror. The premium front over-
head console model features a LED focused light that
illuminates the instrument panel cupholders, Infrared
Automatic Temperature Control Sensor (ATC equipped
only), two swiveling LED lights, flip-down sunglass
storage, conversation mirror, optional power sliding door
switches and an optional power liftgate switch.
198 UNDERSTANDING THE FEATURES OF YOUR VEHICLE
Page 201 of 535
NOTE:Premium sunroof console models include all of
above except sunglass storage.Courtesy/Interior Lighting
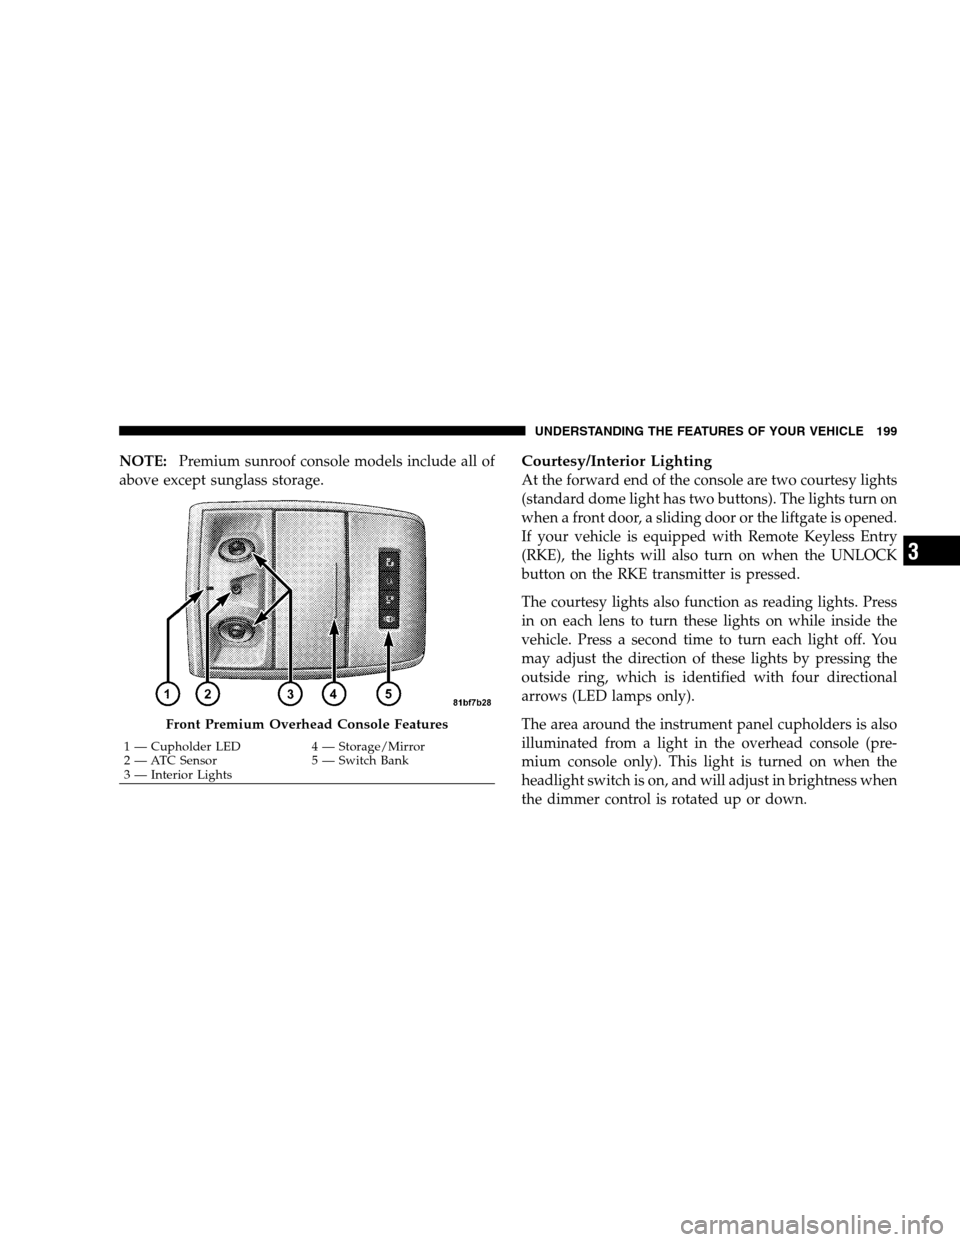
At the forward end of the console are two courtesy lights
(standard dome light has two buttons). The lights turn on
when a front door, a sliding door or the liftgate is opened.
If your vehicle is equipped with Remote Keyless Entry
(RKE), the lights will also turn on when the UNLOCK
button on the RKE transmitter is pressed.
The courtesy lights also function as reading lights. Press
in on each lens to turn these lights on while inside the
vehicle. Press a second time to turn each light off. You
may adjust the direction of these lights by pressing the
outside ring, which is identified with four directional
arrows (LED lamps only).
The area around the instrument panel cupholders is also
illuminated from a light in the overhead console (pre-
mium console only). This light is turned on when the
headlight switch is on, and will adjust in brightness when
the dimmer control is rotated up or down. Front Premium Overhead Console Features
1 — Cupholder LED
4 — Storage/Mirror
2 —
ATC Sensor 5 — Switch Bank
3 — Interior Lights UNDERSTANDING THE FEATURES OF YOUR VEHICLE 199 3
Page 220 of 535
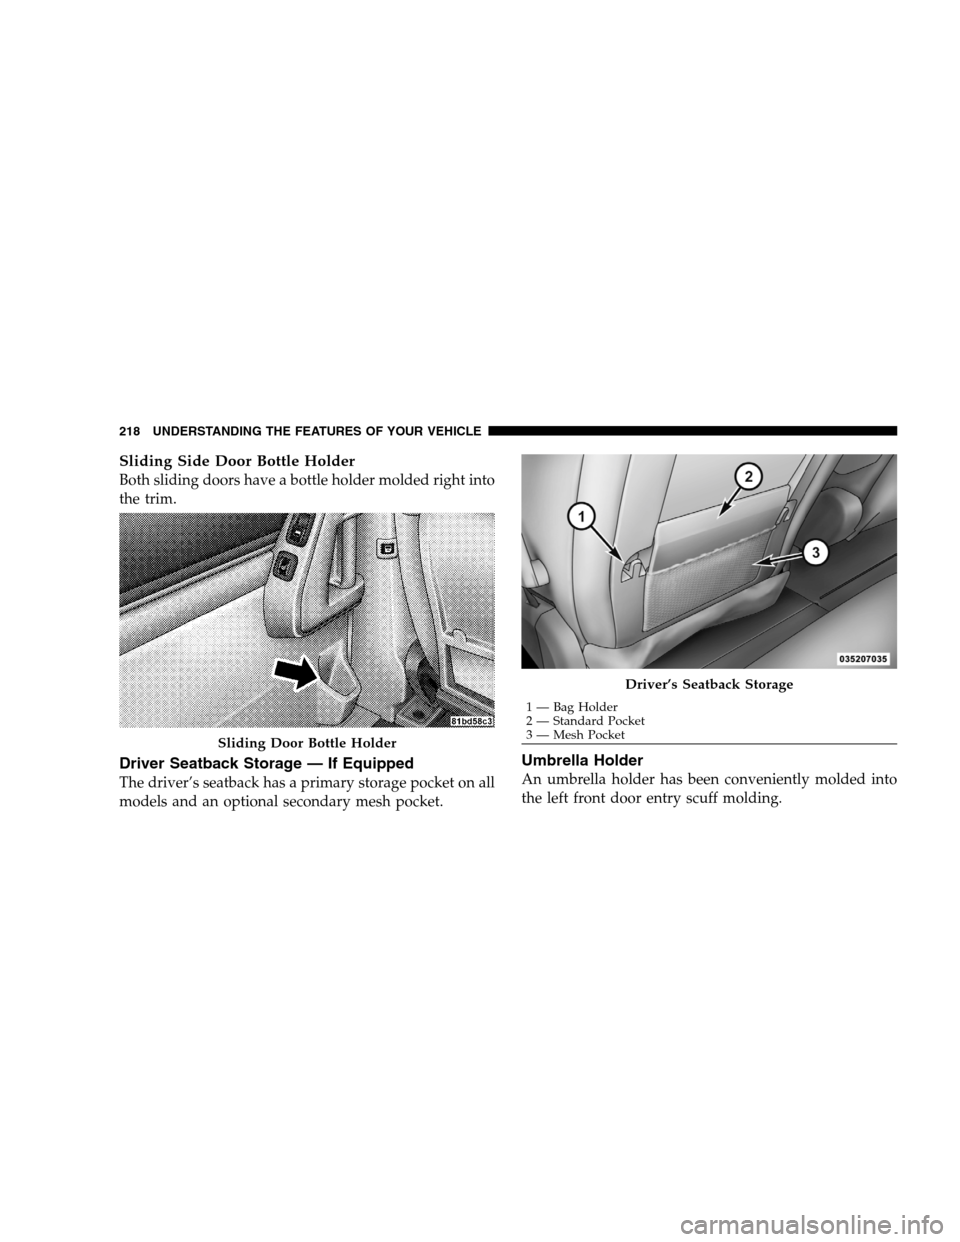
Sliding Side Door Bottle HolderBoth sliding doors have a bottle holder molded right into
the trim.
Driver Seatback Storage — If Equipped
The driver’s seatback has a primary storage pocket on all
models and an optional secondary mesh pocket.
Umbrella Holder
An umbrella holder has been conveniently molded into
the left front door entry scuff molding.
Sliding Door Bottle Holder Driver’s Seatback Storage
1 — Bag Holder
2 —
Standard Pocket
3 — Mesh Pocket
218 UNDERSTANDING THE FEATURES OF YOUR VEHICLE
Page 228 of 535
To Remove The Premium Floor Console1. Pull up on the bottom release handle in the front of the
console.
2. Lift the rear of the console up several inches/
centimeters.
3. Pull rearward to disengage from floor and remove
console.
To reinstall the console:
1. Position the console at a slight angle (rear slightly
higher than the front).
2. Slide the console forward into the floor bracket.
3. Rotate the rear of the console down until it is resting
on the floor bracket.
4. Push down on the rear of the console until it is seated
in the rear floor bracket.
5. Pull up on the console to be sure it is firmly latched. WARNING!
In an accident, serious injury could result if the
removable floor console is not properly installed.
Always be sure the removable floor console is fully
latched.
REAR WINDOW FEATURES
Rear Window Defroster
The rear window defroster button is located on the
climate control (Mode) knob. Press this button to
turn on the rear window defroster and the heated outside
mirrors (if equipped). An indicator in the button will
illuminate when the rear window defroster is on. The
rear window defroster automatically turns off after ap-
proximately 10 minutes. For an additional five minutes of
operation, press the button a second time. 226 UNDERSTANDING THE FEATURES OF YOUR VEHICLE