display DODGE GRAND CARAVAN 2011 5.G Owner's Manual
[x] Cancel search | Manufacturer: DODGE, Model Year: 2011, Model line: GRAND CARAVAN, Model: DODGE GRAND CARAVAN 2011 5.GPages: 100, PDF Size: 4.02 MB
Page 48 of 100

iPod®/USB/MP3 CONTROL
• There are many ways to play music from iPod®players or other portable devices
through your vehicle's speakers. Your choices depend on what radio your vehicle is
equipped with.
• The radio sales code is located on the lower right side of the radio faceplate.
If Equipped With Media Center 130 with Satellite Radio (Sales Code RES + RSC) Or
Media Center 430/430N (Sales Code RBZ/RHB)
• The USB port, located within the upper glove box, allows you to plug an iPod®into
the vehicle's sound system.
• To hear audio from devices connected to this port from a non-touch-screen radio, press the AUX button on the radio faceplate. From a touch-screen radio, press the
MEDIA hard-key, then touch the AUX or iPod
®soft-key.
• When connected to this feature: • The iPod
®can be controlled using the radio buttons to Play, Browse, and List
the iPod®or external devices contents. Refer to the Owner's Manual on the DVD
for details.
• The iPod
®battery charges when plugged into the USB port (if supported by the
specific audio device).
• Compatible iPod
®devices may also be controllable using voice commands. Refer
to the Owner's Manual on the DVD for details.
NOTE:
• The USB port supports certain Mini, Classic, Nano, Touch, and iPhone
®devices. The
USB port also supports playing music from compatible external USB Mass Storage
Class memory devices. For supported audio file formats, refer to the USB Port
section in the Owner's Manual on the DVD. Refer to www.chrysler.com/uconnect
website for a list of tested iPod
®s. Some iPod®software versions may not fully
support the USB port features. Please visit Apple’s website for iPod®software
updates.
Bluetooth®Streaming Audio
• If equipped with Uconnect™ Voice Command, your Bluetooth-equipped iPod®
devices, cell phones or other media players, may also be able to stream music to
your vehicle's speakers. Your connected device must be Bluetooth-compatible, and
paired with your Media Center radio (see Uconnect™ Phone for pairing
instructions). Press the AUX button on the radio faceplate until "BT" is displayed
on the radio screen.
WARNING!
Do not plug in or remove the iPod®or external device while driving. Failure to
follow this warning could result in a collision.
ELECTRONICS
46
Page 49 of 100

VIDEO ENTERTAINMENT SYSTEM (VES)™
System Operation
• The screen is located in the overhead compartment console. To lower the screen,press the release button located in the center of the console rear of the screen.
• The system may be controlled by the front seat occupants using either the radio or DVD player controls, or by the rear seat occupants using the remote control.
• The video screen displays information in a split screen format. The left side of the screen is referred to as Channel 1 and the right side of the screen is referred to as
Channel 2. All modes except video modes are displayed in a split screen format.
• To use the headphones, press the power button located on the right ear cup. Select the channel on the headphones (1 or 2) which corresponds to the channel selected
on the desired video screen.
• To receive VES™ audio through the vehicle's sound system, press the VES™ soft-key on the radio's touch-screen.
Operation Of The Touch-Screen Radio/DVD Player
• To view a DVD press the OPEN/CLOSE or LOAD hard-key on the touch-screen radioand insert the disc or insert the disc into the optional DVD player. Playback will
begin automatically after the DVD is recognized by the disc drive. If playback does
not begin automatically when the disc is inserted into the DVD player press the
PLAY button. If playback does not begin automatically after the disc is inserted
into the touch-screen radio follow these steps:
• Press the MENU hard-key, then touch the Rear VES™ soft-key. If a chapter list
appears on the right side of the screen, touch the HIDE LIST soft-key to display
the Rear VES™ control screen.
• Touch the 1 soft key to select an audio channel, then touch the DISC soft-key in the MEDIA column.
Operation Of The Remote Control
• The remote control operates similarly to any DVD remote you may have used beforeand allows the rear seat passengers to change stations, tracks, discs and
audio/video modes.
• The remote control is designed to control either channel by using the selector switch located on the right side of the remote.
• Connect the video game or other external media devises to the AUX jacks following the color coding for the VES™ jacks.
• Pressing the power button will turn the VES™ system ON/OFF.
• Pressing the mode button causes the MODE SELECTION menu to appear on the VES™ screen. Use the remote control arrow buttons to scroll through the available
modes, and then press ENTER to select the desired mode.
Auxiliary Audio/Video Input Jacks
• The AUX jacks are located on the drivers side rear trim panel behind the slidingdoor.
ELECTRONICS
47
Page 50 of 100

• Connect the video game or other external media devises to the AUX jacks followingthe color coding for the VES™ jacks.
• Using either the touch-screen radio or remote control, select AUX from the REAR VES™ CONTROL or the MODE SELECTION screen.
• Refer to the Uconnect™ Multimedia – Video Entertainment System (VES)™ section in the Uconnect™ User's Manual on the DVD for further details.
ELECTRONIC VEHICLE INFORMATION CENTER
(EVIC)
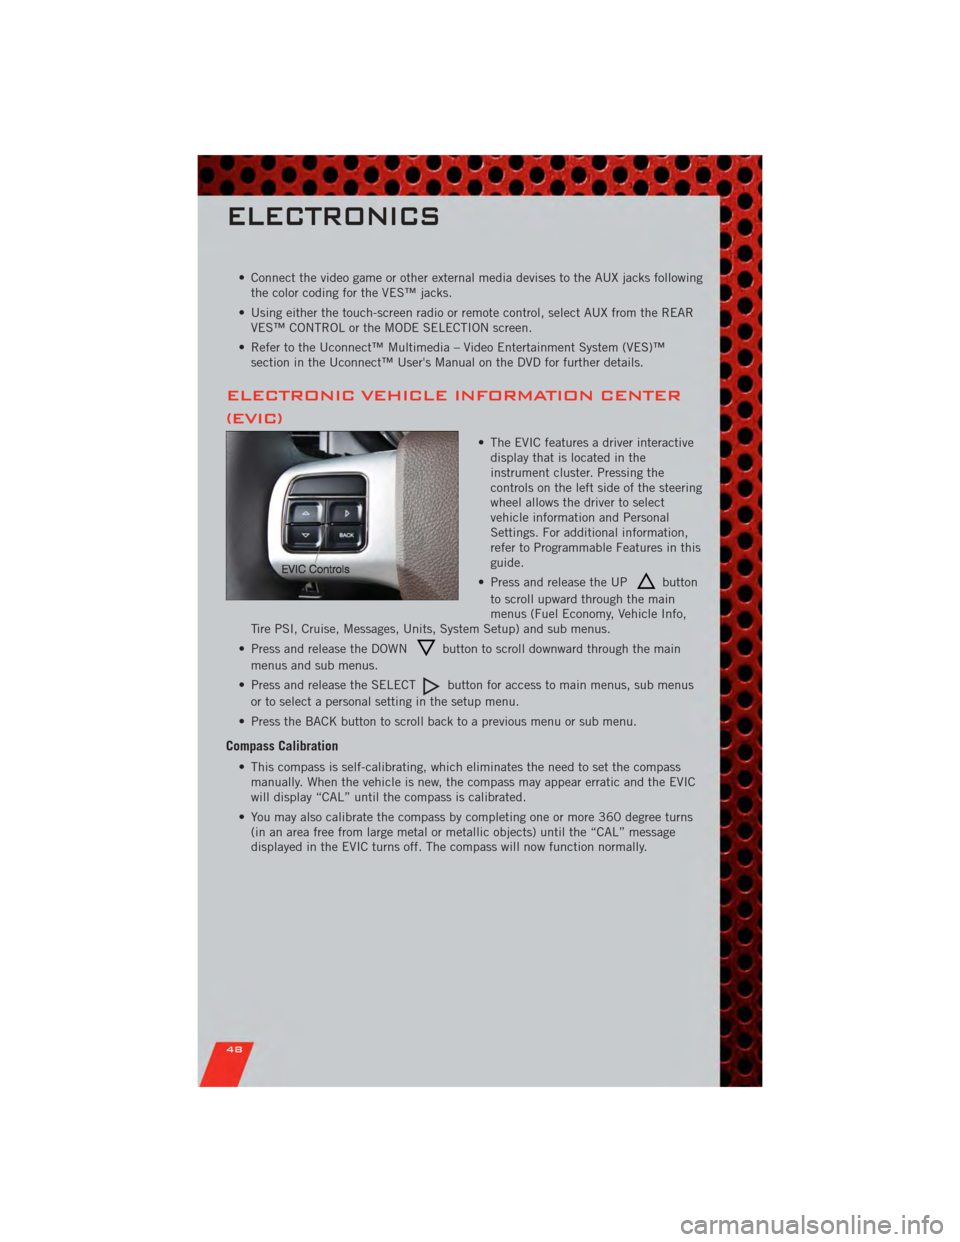
• The EVIC features a driver interactivedisplay that is located in the
instrument cluster. Pressing the
controls on the left side of the steering
wheel allows the driver to select
vehicle information and Personal
Settings. For additional information,
refer to Programmable Features in this
guide.
• Press and release the UP
button
to scroll upward through the main
menus (Fuel Economy, Vehicle Info,
Tire PSI, Cruise, Messages, Units, System Setup) and sub menus.
• Press and release the DOWN
button to scroll downward through the main
menus and sub menus.
• Press and release the SELECT
button for access to main menus, sub menus
or to select a personal setting in the setup menu.
• Press the BACK button to scroll back to a previous menu or sub menu.
Compass Calibration
• This compass is self-calibrating, which eliminates the need to set the compass manually. When the vehicle is new, the compass may appear erratic and the EVIC
will display “CAL” until the compass is calibrated.
• You may also calibrate the compass by completing one or more 360 degree turns (in an area free from large metal or metallic objects) until the “CAL” message
displayed in the EVIC turns off. The compass will now function normally.
ELECTRONICS
48
Page 51 of 100

PROGRAMMABLE FEATURES
Electronic Vehicle Information Center (EVIC) – If Equipped
• The EVIC can be used to program the following Personal Settings. Press andrelease the MENU button until Personal Settings displays, then press the DOWN
button
to scroll through the settings. Press the SELECT buttonto
change the setting.
• Language • Turn Headlamps On With Remote Key
Unlock
• Lock Door Automatically at 15 mph (24 km/h) • Confirmation of Voice Commands
• Auto Unlock On Exit • Illuminated Approach
• Remote Unlock Driver's Door 1st • Hill Start Assist (HSA)
• Sound Horn With Remote Key Lock • Display Units In
• Flash Lights With Remote Key Lock • Automatic Compass Calibration
• Delay Turning Headlights Off • Compass Variance
• Delay Power Off to Accessories until Exit • To Set the Variance
Key Fob Programmable Features
• The following features may also be programmed by using the Key Fob transmitter
or the ignition switch and driver's door lock switch.
NOTE: Pressing the LOCK button while you are inside the vehicle will activate the
Vehicle Security Alarm. Opening a door with the Vehicle Security Alarm activated will
cause the alarm to sound. Press the UNLOCK button to deactivate the Vehicle Security
Alarm.
Unlock On First Press• To unlock either the driver's side, or all doors, on the first press of the UNLOCK button:
• Press and hold the LOCK button for at least 4 seconds, but no longer than
10 seconds. Then, press and hold the UNLOCK button while still holding the
LOCK button.
• Release both buttons at the same time.
ELECTRONICS
49