reset DODGE GRAND CARAVAN 2015 5.G Owner's Guide
[x] Cancel search | Manufacturer: DODGE, Model Year: 2015, Model line: GRAND CARAVAN, Model: DODGE GRAND CARAVAN 2015 5.GPages: 703, PDF Size: 19.83 MB
Page 377 of 703
SCAN Button
Pushing the SCAN button causes the tuner to search for
the next channel, pausing for eight seconds before con-
tinuing to the next. To stop the search, push the SCAN
button a second time.
INFO Button
Pushing the INFO button will cycle the display informa-
tion between Artist, Song Title, and Composer (if avail-
able). Also, pushing and holding the INFO button for an
additional three seconds will make the radio display the
Song Title all of the time (push and hold again to return
to normal display).
RW/FF
Pushing the RW (Rewind) or FF (Fast Forward) buttons
causes the tuner to search for the next channel in the
direction of the arrows.
TUNE Control (Rotary)
Turn the rotary TUNE/SCROLL control knob clockwise
to increase or counterclockwise to decrease the channel.
MUSIC TYPE Button
Pushing this button once will turn on the Music Type
mode for five seconds. Pushing the MUSIC TYPE button
or turning the TUNE/SCROLL control knob within five
seconds will allow the program format type to be se-
lected.
Toggle the MUSIC TYPE button again to select the music
type.
By pushing the SEEK button when the Music Type
function is active, the radio will be tuned to the next
channel with the same selected Music Type name.
If a preset button is activated while in the Music Type
(Program Type) mode, the Music Type mode will be
exited and the radio will tune to the preset channel.
4
UNDERSTANDING YOUR INSTRUMENT PANEL 375
Page 378 of 703
SETUP Button
Pushing the SETUP button allows you to select the
following items:
•Display Sirius ID number — Push the AUDIO/
SELECT button to display the Sirius ID number. This
number is used to activate, deactivate, or change the
Sirius subscription.
SET Button — To Set The Pushbutton Memory
When you are receiving a channel that you wish to
commit to pushbutton memory, push the SET button. The
symbol SET 1 will now show in the display window.
Select the button (1-6) you wish to lock onto this channel
and push and release that button. If a button is not
selected within five seconds after pushing the SET but-
ton, the channel will continue to play but will not be
stored into pushbutton memory.
You may add a second channel to each pushbutton by
repeating the above procedure with this exception: Push
the SET button twice and SET 2 will show in the display
window. Each button can be set for SET 1 and SET 2. This
allows a total of 12 Satellite channels to be stored into
pushbutton memory. The channels stored in SET 2
memory can be selected by pushing the pushbutton
twice.
Every time a preset button is used, a corresponding
button number will display.
Buttons1-6
These buttons tune the radio to the channels that you
commit to pushbutton memory (12 Satellite stations).
376 UNDERSTANDING YOUR INSTRUMENT PANEL
Page 383 of 703
device, or push the VR button and say#Shuffle ON#or
#Shuffle Off.#If theRNDicon is showing on the radio
display, then the shuffle mode is ON.
List Or Browse Mode
During Play mode, pushing any of the buttons described
below, will bring up List mode. List mode enables
scrolling through the list of menus and tracks on the
audio device.
TUNEcontrol knob: TheTUNEcontrol knob functions in
a similar manner as the scroll wheel on the audio device
or external USB device.
•Turning it clockwise (forward) and counterclockwise
(backward) scrolls through the lists, displaying the
track detail on the radio display. Once the track to be
played is highlighted on the radio display, push the
TUNEcontrol knob to select and start playing the
track. Turning theTUNEcontrol knob fast will scroll
through the list faster. During fast scroll, a slight delay
in updating the information on the radio display may
be noticeable.
During all List modes, the iPod® displays all lists in
“wrap-around” mode. So if the track is at the bottom of
the list, just turn the wheel backward (counterclockwise)
to get to the track faster.
In List mode, the radioPRESETbuttons are used as
shortcuts to the following lists on the iPod® or external
USB device:
•Preset 1 – Playlists
•Preset 2 – Artists
•Preset 3 – Albums
•Preset 4 – Genres
•Preset 5 – Audiobooks
•Preset 6 – Podcasts
4
UNDERSTANDING YOUR INSTRUMENT PANEL 381
Page 384 of 703
Pushing a PRESET button will display the current list on
the top line and the first item in that list on the second
line.
To exit List mode without selecting a track, push the
samePRESETbutton again to go back toPlay mode.
LISTbutton: TheLISTbutton will display the top level
menu of the iPod® or external USB device.
•Turn theTUNEcontrol knob to list the top-menu item
to be selected and push theTUNEcontrol knob. This
will display the next sub-menu list item on the audio
device, then follow the same steps to go to the desired
track in that list. Not all iPod® or external USB device
sub-menu levels are available on this system.
MUSIC TYPEbutton: TheMUSIC TYPEbutton is
another shortcut button to the genre listing on your audio
device.
CAUTION!
•Leaving the iPod® or external USB device (or any
supported device) anywhere in the vehicle in ex-
treme heat or cold can alter the operation or dam-
age the device. Follow the device manufacturer ’s
guidelines.
•Placing items on the iPod® or external USB device,
or connections to the iPod® or external USB device
in the vehicle, can cause damage to the device
and/or to the connectors.
WARNING!
Do not plug in or remove the iPod® or external USB
device while driving. Failure to follow this warning
could result in an accident.
382 UNDERSTANDING YOUR INSTRUMENT PANEL
Page 414 of 703
visible on the radio’s display for that channel, and the
shared icon will be visible on the VES™ screen. When in
shared mode, the same audio source is heard in the
shared headphone channel 1 or channel 2.
If the radio functions (FM, AM, or SAT) are in the shared
mode with the VES™, only the radio is able to control the
radio functions. In this case, VES™ can share the radio
mode, but not change stations until the radio mode is
changed to a mode that is different from the VES™
selected radio mode. When shared, the radio has priority
over the VES™ or all radio modes (FM, AM, and SAT).
The VES™ has the ability to switch tuner (AM/FM),
SEEK, SCAN, TUNE, and recall presets in radio modes as
long as it is not in shared mode.
When in shared disc mode both the radio and the VES™
have control of the video functions. The VES™ has the
ability to control the following video modes:
1. CD: Ability to Fast Forward, Rewind, Scan, and Track
Up/Down.
2. CD Changer (in radio): Ability to Disk Up/Down and
program all listed CD controls (Fast Forward, Rewind,
Scan, and Track Up/Down).
The VES™ can even control radio modes or video modes
while the radio is turned off. The VES™ can access the
radio modes or disc modes by navigating to those modes
on the VES™ and activating a radio mode or disc mode.
412 UNDERSTANDING YOUR INSTRUMENT PANEL
Page 417 of 703
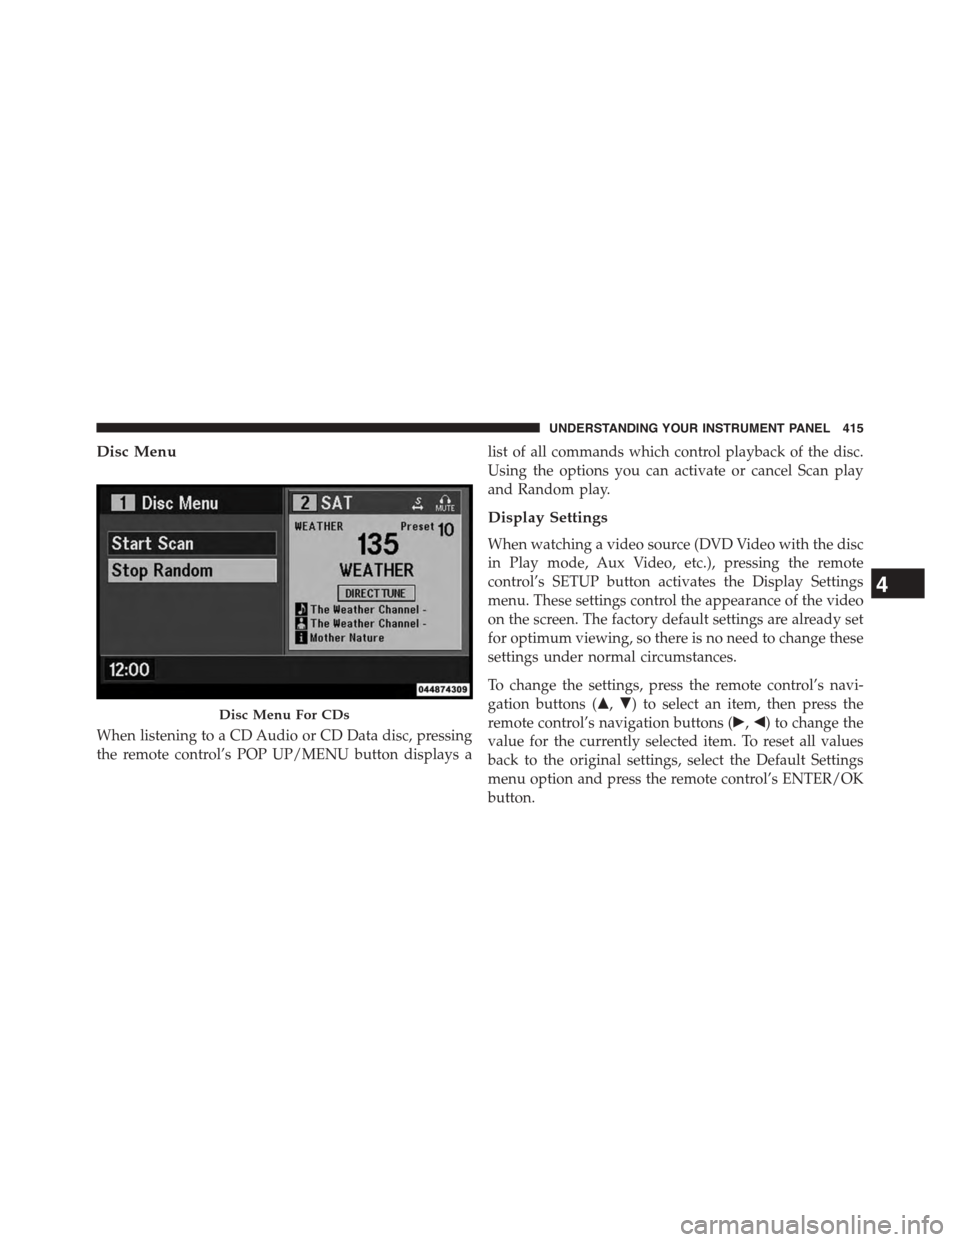
Disc Menu
When listening to a CD Audio or CD Data disc, pressing
the remote control’s POP UP/MENU button displays a
list of all commands which control playback of the disc.
Using the options you can activate or cancel Scan play
and Random play.
Display Settings
When watching a video source (DVD Video with the disc
in Play mode, Aux Video, etc.), pressing the remote
control’s SETUP button activates the Display Settings
menu. These settings control the appearance of the video
on the screen. The factory default settings are already set
for optimum viewing, so there is no need to change these
settings under normal circumstances.
To change the settings, press the remote control’s navi-
gation buttons ($,#) to select an item, then press the
remote control’s navigation buttons (!,") to change the
value for the currently selected item. To reset all values
back to the original settings, select the Default Settings
menu option and press the remote control’s ENTER/OK
button.
Disc Menu For CDs
4
UNDERSTANDING YOUR INSTRUMENT PANEL 415
Page 433 of 703
The button located in the center of the left-hand switch
will tune to the next preset station that you have pro-
grammed in the radio preset push-button.
CD Player
Pushing the top of the switch once will go to the next
track on the CD. Pushing the bottom of the switch once
will go to the beginning of the current track, or to the
beginning of the previous track if it is within one second
after the current track begins to play.
If you push the switch up or down twice it plays the
second track; three times, it will play the third, etc.
The button in the center of the left-hand switch has no
function in this mode.
CD/DVD/Blu-ray™ Disc MAINTENANCE
To keep a CD/DVD/Blu-ray™ Disc in good condition,
take the following precautions:
1. Handle the disc by its edge; avoid touching the
surface.
2. If the disc is stained, clean the surface with a soft cloth,
wiping from center to edge.
3. Do not apply paper or tape to the disc; avoid scratch-
ing the disc.
4. Do not use solvents such as benzene, thinner, cleaners,
or anti-static sprays.
5. Store the disc in its case after playing.
6. Do not expose the disc to direct sunlight.
7. Do not store the disc where temperatures may become
too high.
4
UNDERSTANDING YOUR INSTRUMENT PANEL 431
Page 474 of 703
Transmission Limp Home Mode
Transmission function is monitored electronically for
abnormal conditions. If a condition is detected that could
result in transmission damage, Transmission Limp Home
Mode is activated. In this mode, the transmission remains
in third gear regardless of which forward gear is selected.
PARK, REVERSE, and NEUTRAL will continue to oper-
ate. The Malfunction Indicator Light (MIL) may be illu-
minated. Limp Home Mode allows the vehicle to be
driven to an authorized dealer for service without dam-
aging the transmission.
In the event of a momentary problem, the transmission
can be reset to regain all forward gears by performing the
following steps:
1. Stop the vehicle.
2. Shift the transmission into PARK.
3. Turn the ignition switch to the OFF position.
4. Wait approximately 10 seconds.
5. Restart the engine.
6. Shift into the desired gear range. If the problem is no
longer detected, the transmission will return to normal
operation.
NOTE:Even if the transmission can be reset, we recom-
mend that you visit your authorized dealer at your
earliest possible convenience. Your authorized dealer has
diagnostic equipment to determine if the problem could
recur.
If the transmission cannot be reset, authorized dealer
service is required.
472 STARTING AND OPERATING
Page 535 of 703
E-85 Usage In Non-Flex Fuel Vehicles
Non-Flex Fuel Vehicles (FFV) are compatible with gaso-
line containing 10% ethanol (E10). Gasoline with higher
ethanol content may void the New Vehicle Limited
Warranty.
If a Non-FFV vehicle is inadvertently fueled with E-85
fuel, the engine will have some or all of these symptoms:
•Operate in a lean mode.
•OBD II “Malfunction Indicator Light” on.
•Poor engine performance.
•Poor cold start and cold drivability.
•Increased risk for fuel system component corrosion.
To fix a Non-FFV vehicle inadvertently fueled once with
E-85 perform the following:
•Drain the fuel tank (see your authorized dealer).
•Change the engine oil and oil filter.
•Disconnect and reconnect the battery to reset the
engine controller memory.
More extensive repairs will be required for prolonged
exposure to E-85 fuel.
MMT In Gasoline
Methylcyclopentadienyl Manganese Tricarbonyl (MMT)
is a manganese-containing metallic additive that is
blended into some gasoline to increase octane. Gasoline
blended with MMT provides no performance advantage
beyond gasoline of the same octane number without
MMT. Gasoline blended with MMT reduces spark plug
life and reduces emissions system performance in some
vehicles. The manufacturer recommends that gasoline
5
STARTING AND OPERATING 533
Page 611 of 703
“Electronic Vehicle Information Center (EVIC)” in ”Un-
derstanding Your Instrument Panel” for further informa-
tion. Tighten the gas cap until a#clicking#sound is heard.
This is an indication that the gas cap is properly tight-
ened.
Press the odometer reset button to turn the message off.
If the problem persists, the message will appear the next
time the vehicle is started. This might indicate a damaged
cap. If the problem is detected twice in a row, the system
will turn on the MIL. Resolving the problem will turn the
MIL light off.
EMISSIONS INSPECTION AND MAINTENANCE
PROGRAMS
In some localities, it may be a legal requirement to pass
an inspection of your vehicle’s emissions control system.
Failure to pass could prevent vehicle registration.
For states that require an Inspection and Mainte-
nance (I/M), this check verifies the “Malfunction
Indicator Light (MIL)” is functioning and is not
on when the engine is running, and that the OBD II
system is ready for testing.
Normally, the OBD II system will be ready. The OBD II
system maynotbe ready if your vehicle was recently
serviced, recently had a dead battery or a battery replace-
ment. If the OBD II system should be determined not
ready for the I/M test, your vehicle may fail the test.
7
MAINTAINING YOUR VEHICLE 609