warning light DODGE GRAND CARAVAN 2015 5.G Owners Manual
[x] Cancel search | Manufacturer: DODGE, Model Year: 2015, Model line: GRAND CARAVAN, Model: DODGE GRAND CARAVAN 2015 5.GPages: 703, PDF Size: 19.83 MB
Page 35 of 703
•The engine can be started two consecutive 15-minute
cycles with the RKE transmitter. However, the ignition
switch must be turned to the ON/RUN position.
To Enter The Vehicle After Remote Start
To enter the vehicle while the engine is running during a
Remote Start, you must first unlock the vehicle using the
UNLOCK button on the transmitter. After the vehicle is
unlocked, you can enter the vehicle, insert the Key Fob
into the ignition switch and turn it to the ON/RUN
position, otherwise the engine will shut off at the end of
15-minute cycle.
To Exit Remote Start Mode And Drive The Vehicle
Before the end of the 15-minute cycle, push and release
the UNLOCK button on the RKE transmitter to unlock
the doors and disarm the Vehicle Security Alarm (if
equipped). Then, prior to the end of the 15-minute cycle,
insert the Key Fob into the ignition switch and turn the
switch to the ON/RUN position.
NOTE:
•The ignition switch must be in the ON/RUN position
in order to drive the vehicle.
•The message “Remote Start Active — Key To Run” will
display in the EVIC until you insert and turn the key to
ON/RUN position. Refer to “Electronic Vehicle Infor-
mation Center (EVIC) in#Understanding Your Instru-
ment Panel” for further information.
Cancel Remote Start
Remote Starting will also cancel if any of the following
occur:
•The engine stalls or engine speed exceeds 2500 rpm
•Any engine warning lights come on
•Low Fuel Light turns on
•The hood is opened
2
THINGS TO KNOW BEFORE STARTING YOUR VEHICLE 33
Page 44 of 703

Auto Up Feature With Anti-Pinch Protection — If
Equipped
The front driver and front passenger switches may be
equipped with an Auto Up feature. Lift the window
switch fully upward to the second detent, release, and the
window will go up automatically.
To stop the window from going all the way up during the
Auto Up operation, push down on the switch briefly.
To close the window part way, lift the window switch to
the first detent and release when you want the window to
stop.
NOTE:
•If the window runs into any obstacle during auto-
closure, it will reverse direction and then go back
down. Remove the obstacle and use the window
switch again to close the window.
•Any impact due to rough road conditions may trigger
the auto reverse function unexpectedly during auto-
closure. If this happens, pull the switch lightly to the
first detent and hold to close window manually.
WARNING!
There is no anti-pinch protection when the window
is almost closed. To avoid personal injury be sure to
clear your arms, hands, fingers and all objects from
the window path before closing.
Auto Up Reset — If Equipped
To reactivate the Auto Up feature, perform the following
steps after vehicle power is restored:
1. Pull the window switch up to close the window
completely and continue to hold the switch up for an
additional two seconds after the window is closed.
42 THINGS TO KNOW BEFORE STARTING YOUR VEHICLE
Page 49 of 703
door switch is pushed. To close the door, wait until it
is fully open and then push the switch again.
•If the power sliding door encounters multiple obstruc-
tions within the same cycle, the system will automati-
cally stop, the power sliding door motor will make a
clicking sound until the door has no further move-
ment. This clicking sound can be stopped by pulling
the inside or outside handle. If this condition occurs,
no damage is done to the power sliding door motor.
The power sliding door must be opened or closed
manually.
WARNING!
You, or others, could be injured if caught in the path
of the sliding door. Make sure the door path is clear
before closing the door.
Power Sliding Side Door Open Flash
The left and right exterior hazard lights will flash for 12
seconds when either sliding door is opened. This will
alert other drivers in the area that passenger(s) could be
entering or exiting the vehicle.
The Sliding Side Door Open Flash can be enabled or
disabled by performing the following procedure:
1. Place the Key Fob in the ignition switch.
2. Cycle the ignition switch from ON/RUN to OFF five
times ending in the ON/RUN position(do not start
the engine).
3. Within 10 seconds of the final cycle, push the HAZ-
ARD switch ON.
4. A single chime will sound to signify that you have
successfully completed the programming.
2
THINGS TO KNOW BEFORE STARTING YOUR VEHICLE 47
Page 56 of 703
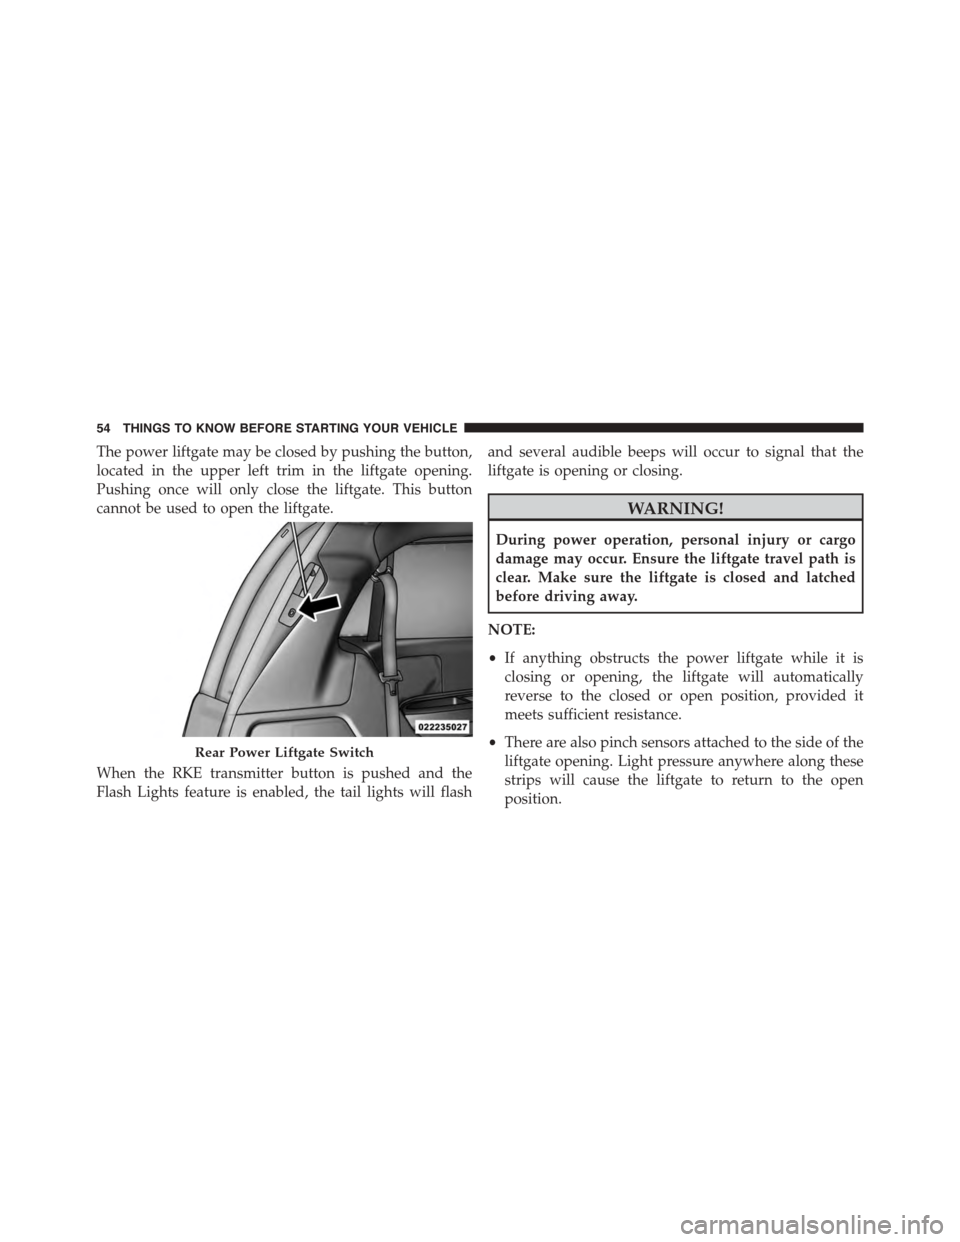
The power liftgate may be closed by pushing the button,
located in the upper left trim in the liftgate opening.
Pushing once will only close the liftgate. This button
cannot be used to open the liftgate.
When the RKE transmitter button is pushed and the
Flash Lights feature is enabled, the tail lights will flash
and several audible beeps will occur to signal that the
liftgate is opening or closing.
WARNING!
During power operation, personal injury or cargo
damage may occur. Ensure the liftgate travel path is
clear. Make sure the liftgate is closed and latched
before driving away.
NOTE:
•If anything obstructs the power liftgate while it is
closing or opening, the liftgate will automatically
reverse to the closed or open position, provided it
meets sufficient resistance.
•There are also pinch sensors attached to the side of the
liftgate opening. Light pressure anywhere along these
strips will cause the liftgate to return to the open
position.
Rear Power Liftgate Switch
54 THINGS TO KNOW BEFORE STARTING YOUR VEHICLE
Page 60 of 703
Seat Belt Systems
Buckle up even though you are an excellent driver, even
on short trips. Someone on the road may be a poor driver
and could cause a collision that includes you. This can
happen far away from home or on your own street.
Research has shown that seat belts save lives, and they
can reduce the seriousness of injuries in a collision. Some
of the worst injuries happen when people are thrown
from the vehicle. Seat belts reduce the possibility of
ejection and the risk of injury caused by striking the
inside of the vehicle. Everyone in a motor vehicle should
be belted at all times.
Enhanced Seat Belt Use Reminder System
(BeltAlert)
BeltAlert is a feature intended to remind the driver
and outboard front passenger (if equipped with out-
board front passenger BeltAlert) to buckle their seat
belts. The feature is active whenever the ignition
switch is in the START or ON/RUN position. If the
driver or outboard front seat passenger is unbelted,
the Seat Belt Reminder Light will turn on and remain
on until both outboard front seat belts are buckled.
The BeltAlert warning sequence begins after the vehicle
speed is over 5 MPH (8 km/h) by blinking the Seat Belt
Reminder Light and sounding an intermittent chime.
Once the sequence starts, it will continue for the entire
duration or until the respective seat belts are buckled.
After the sequence completes, the Seat Belt Reminder
Light remains illuminated until the respective seat belts
are buckled. The driver should instruct all other occu-
pants to buckle their seat belts. If an outboard front seat
belt is unbuckled while traveling at speeds greater than 5
MPH (8 km/h), BeltAlert will provide both audio and
visual notification.
The outboard front passenger seat BeltAlert is not active
when the outboard front passenger seat is unoccupied.
58 THINGS TO KNOW BEFORE STARTING YOUR VEHICLE
Page 61 of 703
BeltAlert may be triggered when an animal or heavy
object is on the outboard front passenger seat or when the
seat is folded flat (if equipped). It is recommended that
pets be restrained in the rear seat (if equipped) in pet
harnesses or pet carriers that are secured by seat belts,
and cargo is properly stowed.
BeltAlert can be activated or deactivated by your autho-
rized dealer. Chrysler Group LLC does not recommend
deactivating BeltAlert.
NOTE:If BeltAlert has been deactivated, the Seat Belt
Reminder Light will continue to illuminate while the
driver ’s or outboard front passenger ’s (if equipped with
BeltAlert) seat belt remains unbuckled.
Lap/Shoulder Belts
All seating positions in your vehicle are equipped with
lap/shoulder belts.
The seat belt webbing retractor will lock only during very
sudden stops or collisions. This feature allows the shoul-
der part of the seat belt to move freely with you under
normal conditions. However, in a collision the seat belt
will lock and reduce your risk of striking the inside of the
vehicle or being thrown out of the vehicle.
WARNING!
•Relying on the air bags alone could lead to more
severe injuries in a collision. The air bags work
with your seat belt to restrain you properly. In
some collisions, the air bags won’t deploy at all.
Always wear your seat belt even though you have
air bags.
(Continued)
2
THINGS TO KNOW BEFORE STARTING YOUR VEHICLE 59
Page 82 of 703
NOTE:
•If you have difficulties or problems resetting the Active
Head Restraints, see an authorized dealer.
•For safety reasons, have the Active Head Restraints
checked by a qualified specialist at an authorized
dealer.
Supplemental Restraint System (SRS)
Air Bag System Components
Your vehicle may be equipped with the following air bag
system components:
•Occupant Restraint Controller (ORC)
•Air Bag Warning Light
•Steering Wheel and Column
•Instrument Panel
•Knee Impact Bolsters
•Advanced Front Air Bags
•Supplemental Side Air Bags
•Supplemental Knee Air Bags
•Front and Side Impact Sensors
•Seat Belt Pretenioners
•Seat Belt Buckle Switch
•Seat Track Position Sensors
80 THINGS TO KNOW BEFORE STARTING YOUR VEHICLE
Page 86 of 703
On the other hand, depending on the type and location of
impact, Advanced Front Air Bags may deploy in crashes
with little vehicle front-end damage but that produce a
severe initial deceleration.
Because air bag sensors measure vehicle deceleration
over time, vehicle speed and damage by themselves are
not good indicators of whether or not an air bag should
have deployed.
Seat belts are necessary for your protection in all colli-
sions, and also are needed to help keep you in position,
away from an inflating air bag.
When the ORC detects a collision requiring the Ad-
vanced Front Air Bags, it signals the inflator units. A large
quantity of non-toxic gas is generated to inflate the
Advanced Front Air Bags.
The steering wheel hub trim cover and the upper right
side of the instrument panel separate and fold out of the
way as the air bags inflate to their full size. The Advanced
Front Air Bags fully inflate in less time than it takes to
blink your eyes. The air bags then quickly deflate while
helping to restrain the driver and front passenger.
Knee Impact Bolsters
The Knee Impact Bolsters help protect the knees of the
driver and front passenger, and position the front occu-
pants for improved interaction with the Advanced Front
Air Bags.
WARNING!
•Do not drill, cut, or tamper with the knee impact
bolsters in any way.
•Do not mount any accessories to the knee impact
bolsters such as alarm lights, stereos, citizen band
radios, etc.
84 THINGS TO KNOW BEFORE STARTING YOUR VEHICLE
Page 93 of 703
Do not drive your vehicle after the air bags have de-
ployed. If you are involved in another collision, the air
bags will not be in place to protect you.
WARNING!
Deployed air bags and seat belt pretensioners cannot
protect you in another collision. Have the air bags,
seat belt pretensioners, and the seat belt retractor
assemblies replaced by an authorized dealer imme-
diately. Also, have the Occupant Restraint Controller
System serviced as well.
NOTE:
•Air bag covers may not be obvious in the interior trim,
but they will open during air bag deployment.
•After any collision, the vehicle should be taken to an
authorized dealer immediately.
Enhanced Accident Response System
In the event of an impact, if the communication network
remains intact, and the power remains intact, depending
on the nature of the event, the ORC will determine
whether to have the Enhanced Accident Response Sys-
tem perform the following functions:
•Cut off fuel to the engine.
•Flash hazard lights as long as the battery has power or
until the ignition switch is turned to the “OFF” posi-
tion.
•Turn on the interior lights, which remain on as long as
the battery has power or until the ignition switch is
turned to the “OFF” position.
•Unlock the doors automatically.
2
THINGS TO KNOW BEFORE STARTING YOUR VEHICLE 91
Page 94 of 703
System Reset Procedure
In order to reset the Enhanced Accident Response System
functions after an event, the ignition switch must be
changed from ignition START or ON/RUN to ignition
OFF.
Air Bag Warning Light
The air bags must be ready to inflate for your protection
in a collision. The Occupant Restraint Control-
ler (ORC) monitors the internal circuits and
interconnecting wiring associated with air bag
system electrical components.
The ORC monitors the readiness of the electronic parts of
the air bag system whenever the ignition switch is in the
START or ON/RUN position. If the ignition switch is in
the OFF position or in the ACC position, the air bag
system is not on and the air bags will not inflate.
The ORC contains a backup power supply system that
may deploy the air bags even if the battery loses power or
it becomes disconnected prior to deployment.
The ORC turns on the Air Bag Warning Light in the
instrument panel for approximately four to eight seconds
for a self-check when the ignition switch is first turned to
the ON/RUN position. After the self-check, the Air Bag
Warning Light will turn off. If the ORC detects a mal-
function in any part of the system, it turns on the Air Bag
Warning Light, either momentarily or continuously. A
single chime will sound to alert you if the light comes on
again after initial startup.
The ORC also includes diagnostics that will illuminate
the instrument panel Air Bag Warning Light if a malfunc-
tion is detected that could affect the air bag system. The
diagnostics also record the nature of the malfunction.
While the air bag system is designed to be maintenance
92 THINGS TO KNOW BEFORE STARTING YOUR VEHICLE