remove seats DODGE GRAND CARAVAN 2015 5.G User Guide
[x] Cancel search | Manufacturer: DODGE, Model Year: 2015, Model line: GRAND CARAVAN, Model: DODGE GRAND CARAVAN 2015 5.GPages: 164, PDF Size: 22.27 MB
Page 27 of 164

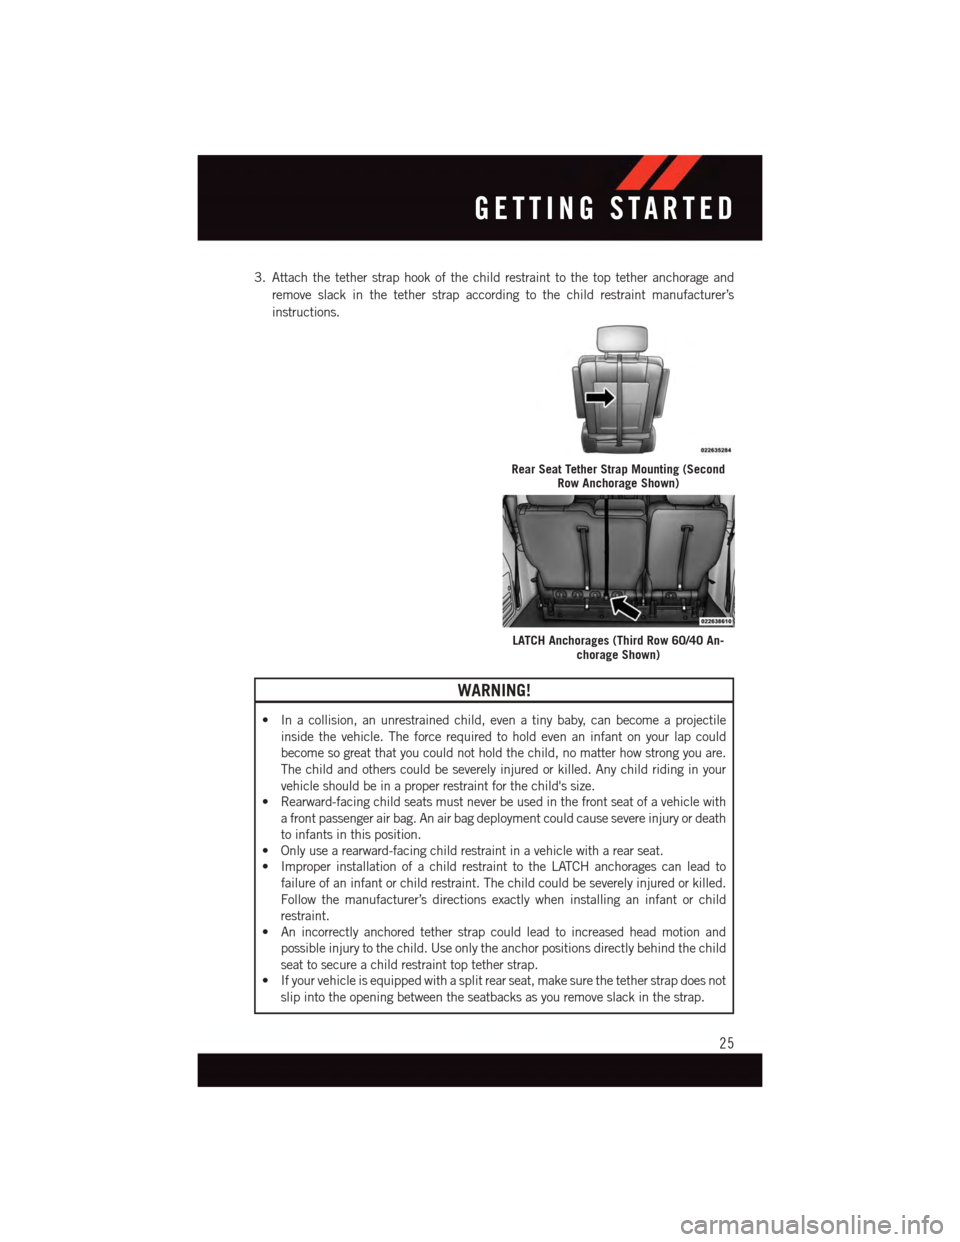
3. Attach the tether strap hook of the child restraint to the top tether anchorage and
remove slack in the tether strap according to the child restraint manufacturer’s
instructions.
WARNING!
•Inacollision,anunrestrainedchild,evenatinybaby,canbecomeaprojectile
inside the vehicle. The force required to hold even an infant on your lap could
become so great that you could not hold the child, no matter how strong you are.
The child and others could be severely injured or killed. Any child riding in your
vehicle should be in a proper restraint for the child's size.
•Rearward-facingchildseatsmustneverbeusedinthefrontseatofavehiclewith
afrontpassengerairbag.Anairbagdeploymentcouldcausesevereinjuryordeath
to infants in this position.
•Onlyusearearward-facingchildrestraintinavehiclewitharearseat.
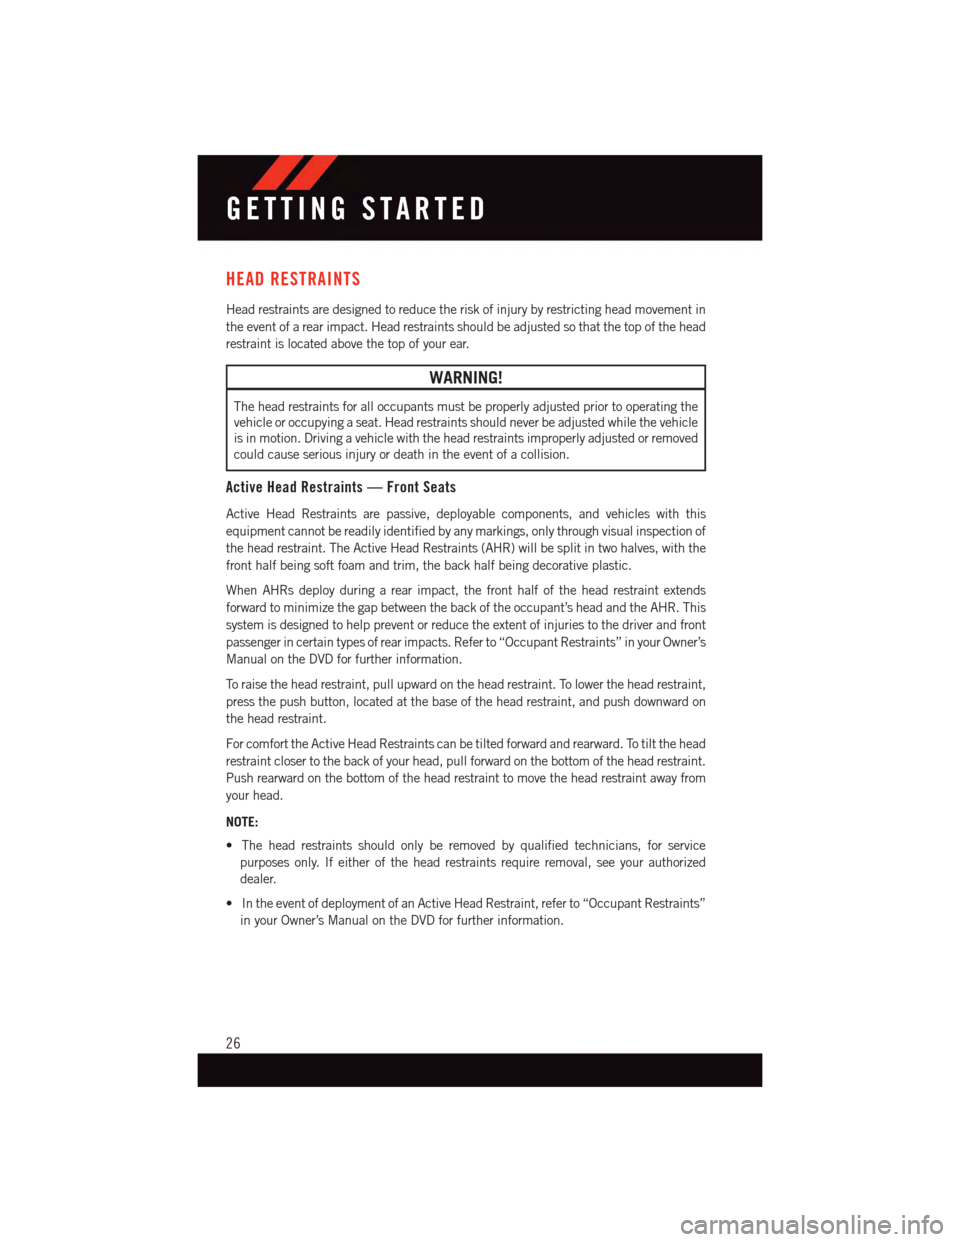
•ImproperinstallationofachildrestrainttotheLATCHanchoragescanleadto
failure of an infant or child restraint. The child could be severely injured or killed.
Follow the manufacturer’s directions exactly when installing an infant or child
restraint.
•Anincorrectlyanchoredtetherstrapcouldleadtoincreasedheadmotionand
possible injury to the child. Use only the anchor positions directly behind the child
seat to secure a child restraint top tether strap.
•Ifyourvehicleisequippedwithasplitrearseat,makesurethetetherstrapdoesnot
slip into the opening between the seatbacks as you remove slack in the strap.
Rear Seat Tether Strap Mounting (SecondRow Anchorage Shown)
LATCH Anchorages (Third Row 60/40 An-chorage Shown)
GETTING STARTED
25
Page 28 of 164

HEAD RESTRAINTS
Head restraints are designed to reduce the risk of injury by restricting head movement in
the event of a rear impact. Head restraints should be adjusted so that the top of the head
restraint is located above the top of your ear.
WARNING!
The head restraints for all occupants must be properly adjusted prior to operating the
vehicle or occupying a seat. Head restraints should never be adjusted while the vehicle
is in motion. Driving a vehicle with the head restraints improperly adjusted or removed
could cause serious injury or death in the event of a collision.
Active Head Restraints — Front Seats
Active Head Restraints are passive, deployable components, and vehicles with this
equipment cannot be readily identified by any markings, only through visual inspection of
the head restraint. The Active Head Restraints (AHR) will be split in two halves, with the
front half being soft foam and trim, the back half being decorative plastic.
When AHRs deploy during a rear impact, the front half of the head restraint extends
forward to minimize the gap between the back of the occupant’s head and the AHR. This
system is designed to help prevent or reduce the extent of injuries to the driver and front
passenger in certain types of rear impacts. Refer to “Occupant Restraints” in your Owner’s
Manual on the DVD for further information.
To r a i s e t h e h e a d r e s t r a i n t , p u l l u p w a r d o n t h e h e a d r e s t r a i n t . To l o w e r t h e h e a d r e s t r a i n t ,
press the push button, located at the base of the head restraint, and push downward on
the head restraint.
For comfort the Active Head Restraints can be tilted forward and rearward. To tilt the head
restraint closer to the back of your head, pull forward on the bottom of the head restraint.
Push rearward on the bottom of the head restraint to move the head restraint away from
your head.
NOTE:
•Theheadrestraintsshouldonlyberemovedbyqualifiedtechnicians,forservice
purposes only. If either of the head restraints require removal, see your authorized
dealer.
•IntheeventofdeploymentofanActiveHeadRestraint,referto“OccupantRestraints”
in your Owner’s Manual on the DVD for further information.
GETTING STARTED
26
Page 35 of 164

To Unstow Second Row Seats
1. Pull up on the storage bin latch to open the cover.
2. Pull up on the strap to lift the seat out of the storage bin and push the seat rearward
to latch the seat anchors.
3. Lift the seatback to the full upright position.
4. Return the head restraint to its upright position, close the storage bin cover and slide
the storage bin locking mechanism to the “UNLOCKED” position.
Third Row Seats
Third Row Power Recliner
The power recline feature, located on the side of the seat cushion, adjusts the seatback
angle forward/rearward for occupant comfort.
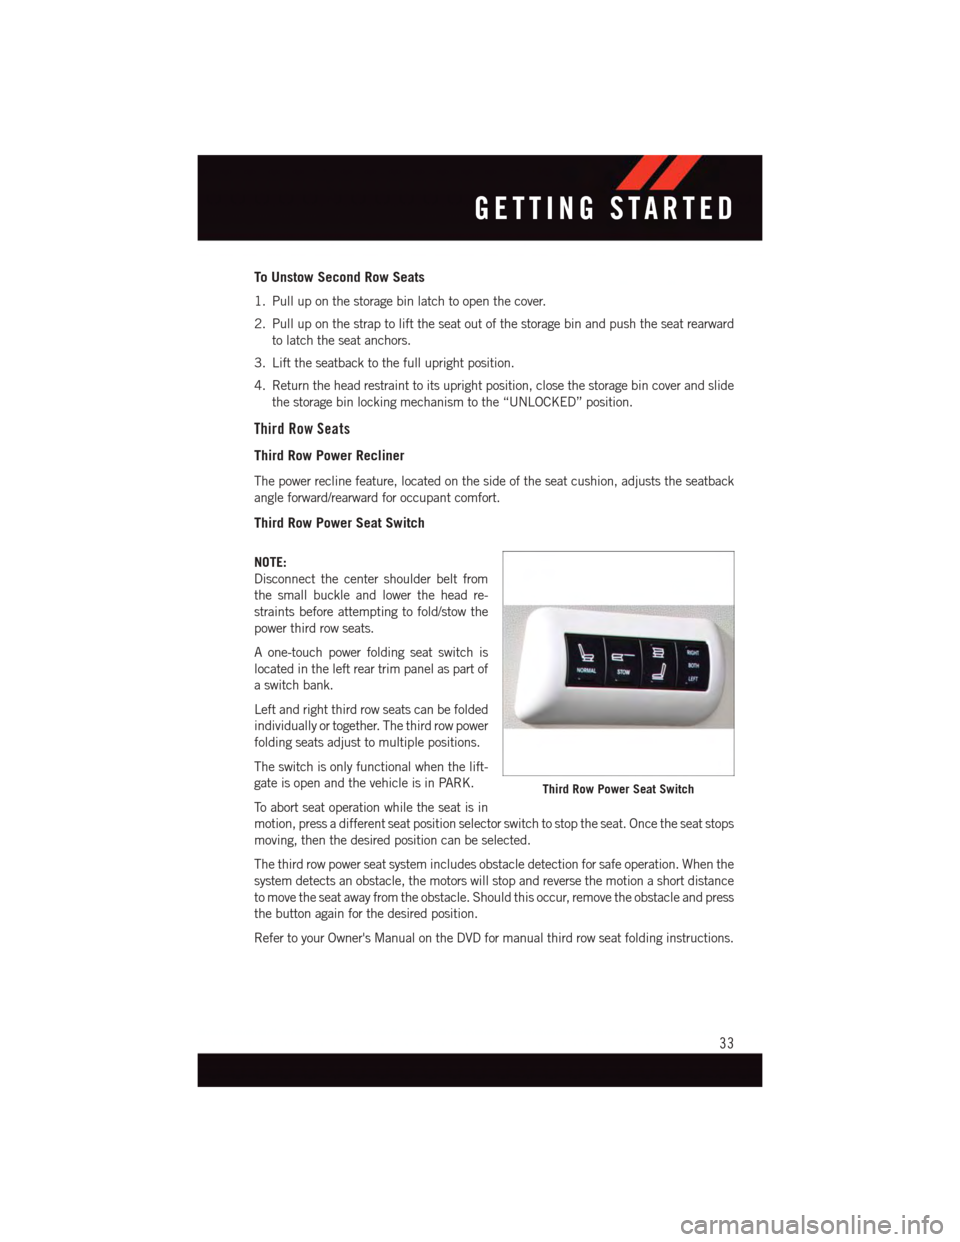
Third Row Power Seat Switch
NOTE:
Disconnect the center shoulder belt from
the small buckle and lower the head re-
straints before attempting to fold/stow the
power third row seats.
Aone-touchpowerfoldingseatswitchis
located in the left rear trim panel as part of
aswitchbank.
Left and right third row seats can be folded
individually or together. The third row power
folding seats adjust to multiple positions.
The switch is only functional when the lift-
gate is open and the vehicle is in PARK.
To a b o r t s e a t o p e r a t i o n w h i l e t h e s e a t i s i n
motion, press a different seat position selector switch to stop the seat. Once the seat stops
moving, then the desired position can be selected.
The third row power seat system includes obstacle detection for safe operation. When the
system detects an obstacle, the motors will stop and reverse the motion a short distance
to move the seat away from the obstacle. Should this occur, remove the obstacle and press
the button again for the desired position.
Refer to your Owner's Manual on the DVD for manual third row seat folding instructions.
Third Row Power Seat Switch
GETTING STARTED
33