tow DODGE GRAND CARAVAN 2015 5.G User Guide
[x] Cancel search | Manufacturer: DODGE, Model Year: 2015, Model line: GRAND CARAVAN, Model: DODGE GRAND CARAVAN 2015 5.GPages: 164, PDF Size: 22.27 MB
Page 3 of 164
INTRODUCTION/WELCOME
WELCOME FROM CHRYSLERGROUP LLC..................3
CONTROLS AT A GLANCE
DRIVER COCKPIT...............6INSTRUMENT CLUSTER...........8
GETTING STARTED
KEY FOB . . . . . . . . . . . . . . . . . . . 10REMOTE START . . . . . . . . . . . . . . . 11KEYLESS ENTER-N-GO™.........12VEHICLE SECURITY ALARM........16SEAT BELT SYSTEMS............17SUPPLEMENTAL RESTRAINT SYSTEM(SRS) — AIR BAGS.............18CHILD RESTRAINTS............21HEAD RESTRAINTS.............26FRONT SEATS................28REAR SEATS.................31HEATED SEATS . . . . . . . . . . . . . . . 36HEATED STEERING WHEEL........37TILT/TELESCOPING STEERINGCOLUMN...................38
OPERATING YOUR VEHICLE
ENGINE BREAK-INRECOMMENDATIONS............39TURN SIGNAL/WIPER/WASHER/HIGHBEAM LEVER.................40HEADLIGHT SWITCH AND HALO LIGHTSWITCH....................42ELECTRONIC SPEED CONTROL......43ELECTRONIC RANGE SELECTION (ERS) . . 45FUEL ECONOMY (ECON) MODE......46MANUAL CLIMATE CONTROLS.......47THREE ZONE MANUAL CLIMATECONTROLS..................48THREE ZONE AUTOMATIC TEMPERATURECONTROLS (ATC)...............50PA R K S E N S E®REAR PARK ASSIST....52PA R K V I E W®REAR BACK-UP CAMERA . . 52BLIND SPOT MONITORING WITH REARCROSS PATH.................52POWER SLIDING SIDE DOORS.......53POWER LIFTGATE..............53POWER SUNROOF..............54WIND BUFFETING..............55
ELECTRONICS
YOUR VEHICLE'S SOUND SYSTEM....56Uconnect®130 . . . . . . . . . . . . . . . . 58Uconnect®130 WITH SiriusXM SATELLITERADIO.....................60Uconnect®430/430N............63
SiriusXM SATELLITE RADIO/TRAVELLINK......................73STEERING WHEEL AUDIO CONTROLS . . 77iPod®/USB/MP3 CONTROL.........77Uconnect®PHONE..............78Uconnect®VOICE COMMAND........81Bluetooth®STREAMING AUDIO......84VIDEO ENTERTAINMENT SYSTEM(VES™)....................84ELECTRONIC VEHICLE INFORMATIONCENTER (EVIC)................86PROGRAMMABLE FEATURES.......87UNIVERSAL GARAGE DOOR OPENER(HomeLink®).................89POWER INVERTER.............91POWER OUTLETS..............92
UTILITY
IN-FLOOR STORAGE — STOW'N GO®...94ROOF LUGGAGE RACK...........94TRAILER TOWING WEIGHTS (MAXIMUMTRAILER WEIGHT RATINGS)........95RECREATIONAL TOWING (BEHINDMOTORHOME, ETC.)............96
WHAT TO DO IN EMERGENCIES
ROADSIDE ASSISTANCE..........97INSTRUMENT CLUSTER WARNINGLIGHTS....................97INSTRUMENT CLUSTER INDICATORLIGHTS...................101IF YOUR ENGINE OVERHEATS......103TIRE SERVICE KIT.............103JACKING AND TIRE CHANGING.....110JUMP-STARTING..............122SHIFT LEVER OVERRIDE.........124TOWING A DISABLED VEHICLE.....124FREEING A STUCK VEHICLE.......125EVENT DATA RECORDER (EDR).....126
MAINTAINING YOUR VEHICLE
OPENING THE HOOD...........127ENGINE COMPARTMENT.........128FLUID CAPACITIES............130FLUIDS, LUBRICANTS AND GENUINEPA RT S . . . . . . . . . . . . . . . . . . . . 1 3 0MAINTENANCE PROCEDURES......132MAINTENANCE SCHEDULE.......132MAINTENANCE RECORD.........136FUSES....................137TIRE PRESSURES.............141SPARE TIRES — IF EQUIPPED.....142ADDING FUEL................144WHEEL AND WHEEL TRIM CARE....145REPLACEMENT BULBS..........146
TABLE OF CONTENTS
Page 23 of 164

WARNING!
•SideAirBagsneedroomtoinflate.Donotleanagainstthedoororwindow.Sit
upright in the center of the seat.
•BeingtooclosetotheSideAirBagsduringdeploymentcouldcauseyoutobe
severely injured or killed.
•RelyingontheSideAirBagsalonecouldleadtomoresevereinjuriesinacollision.
The Side Air Bags work with your seat belt to restrain you properly. In some
collisions, Side Air Bags won’t deploy at all. Always wear your seat belt even though
you have Side Air Bags.
•ThisvehicleisequippedwithleftandrightSupplementalSideAirBagInflatable
Curtains (SABICs). Do not stack luggage or other cargo up high enough to block the
deployment of the SABICs. The trim covering above the side windows where the
SABIC and its deployment path are located should remain free from any obstruc-
tions.
•ThisvehicleisequippedwithSABICs.InorderfortheSABICstoworkasintended,
do not install any accessory items in your vehicle which could alter the roof. Do not
add an aftermarket sunroof to your vehicle. Do not add roof racks that require
permanent attachments (bolts or screws) for installation on the vehicle roof. Do not
drill into the roof of the vehicle for any reason.
•DonotuseaccessoryseatcoversorplaceobjectsbetweenyouandtheSideAir
Bags; the performance could be adversely affected and/or objects could be pushed
into you, causing serious injury.
CHILD RESTRAINTS
Children 12 years or younger should ride properly buckled up in a rear seat, if available.
According to crash statistics, children are safer when properly restrained in the rear seats
rather than in the front.
Every state in the United States and all Canadian provinces require that small children
ride in proper restraint systems. This is the law, and you can be prosecuted for ignoring it.
NOTE:
•Foradditionalinformation,refertowww.Seatcheck.orgorcall1-866-SEATCHECK.
•CanadianresidentsshouldrefertoTransportCanada’swebsiteforadditionalinforma-
tion: http://www.tc.gc.ca/eng/motorvehiclesafety/safedrivers-childsafety-index-53.htm
LATCH – Lower Anchors And Tethers For CHildren
•YourvehicleisequippedwiththechildrestraintanchoragesystemcalledLATCH,
which stands for Lower Anchors and Tethers for CHildren.
•Thesecondrowseatingpostionsandthethirdrowcenterpositionhaveloweranchors
and top tether anchors.
GETTING STARTED
21
Page 33 of 164
REAR SEATS
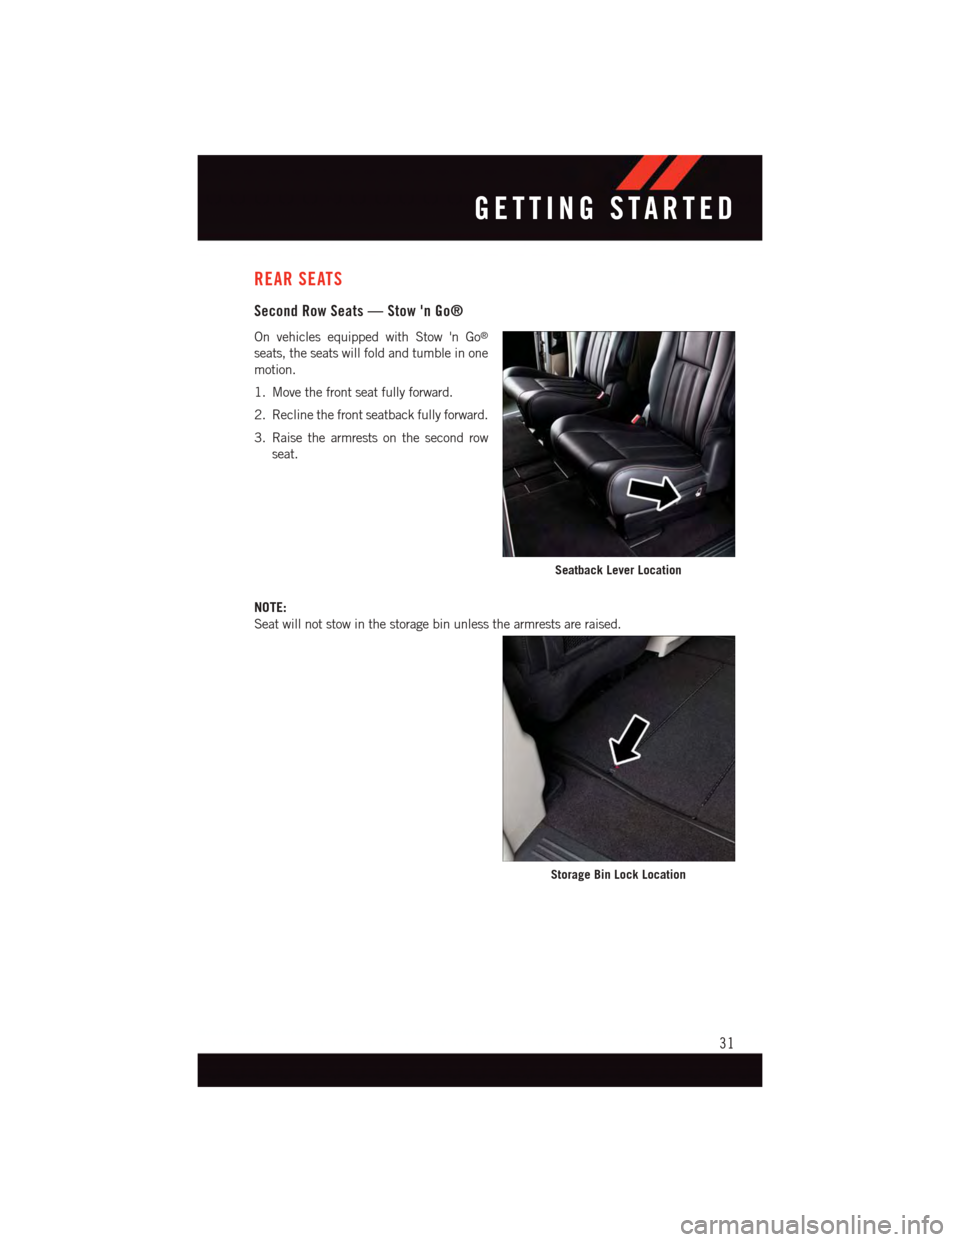
Second Row Seats — Stow 'n Go®
On vehicles equipped with Stow 'n Go®
seats, the seats will fold and tumble in one
motion.
1. Move the front seat fully forward.
2. Recline the front seatback fully forward.
3. Raise the armrests on the second row
seat.
NOTE:
Seat will not stow in the storage bin unless the armrests are raised.
Seatback Lever Location
Storage Bin Lock Location
GETTING STARTED
31
Page 34 of 164
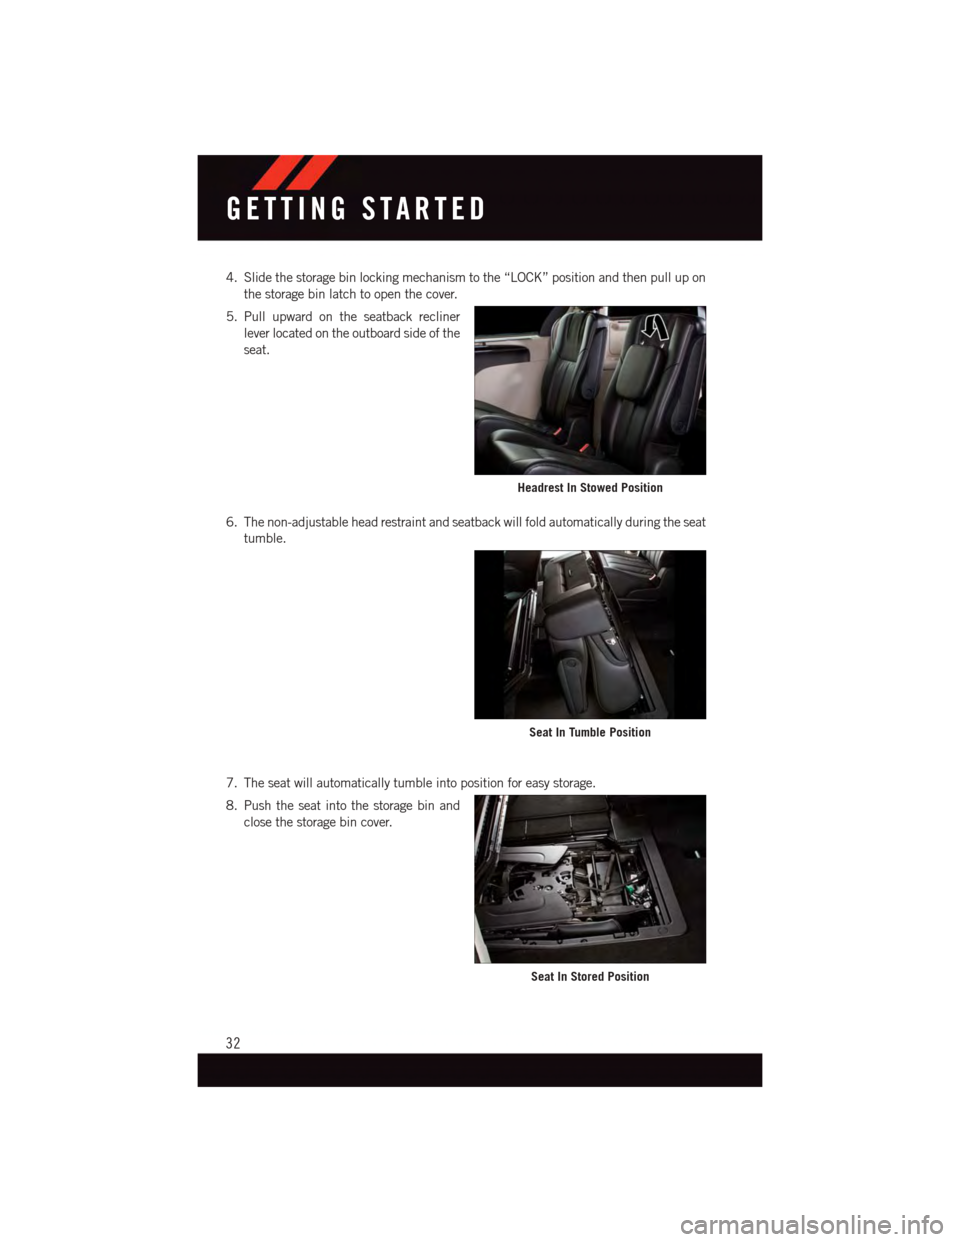
4. Slide the storage bin locking mechanism to the “LOCK” position and then pull up on
the storage bin latch to open the cover.
5. Pull upward on the seatback recliner
lever located on the outboard side of the
seat.
6. The non-adjustable head restraint and seatback will fold automatically during the seat
tumble.
7. The seat will automatically tumble into position for easy storage.
8. Push the seat into the storage bin and
close the storage bin cover.
Headrest In Stowed Position
Seat In Tumble Position
Seat In Stored Position
GETTING STARTED
32
Page 35 of 164
To Unstow Second Row Seats
1. Pull up on the storage bin latch to open the cover.
2. Pull up on the strap to lift the seat out of the storage bin and push the seat rearward
to latch the seat anchors.
3. Lift the seatback to the full upright position.
4. Return the head restraint to its upright position, close the storage bin cover and slide
the storage bin locking mechanism to the “UNLOCKED” position.
Third Row Seats
Third Row Power Recliner
The power recline feature, located on the side of the seat cushion, adjusts the seatback
angle forward/rearward for occupant comfort.
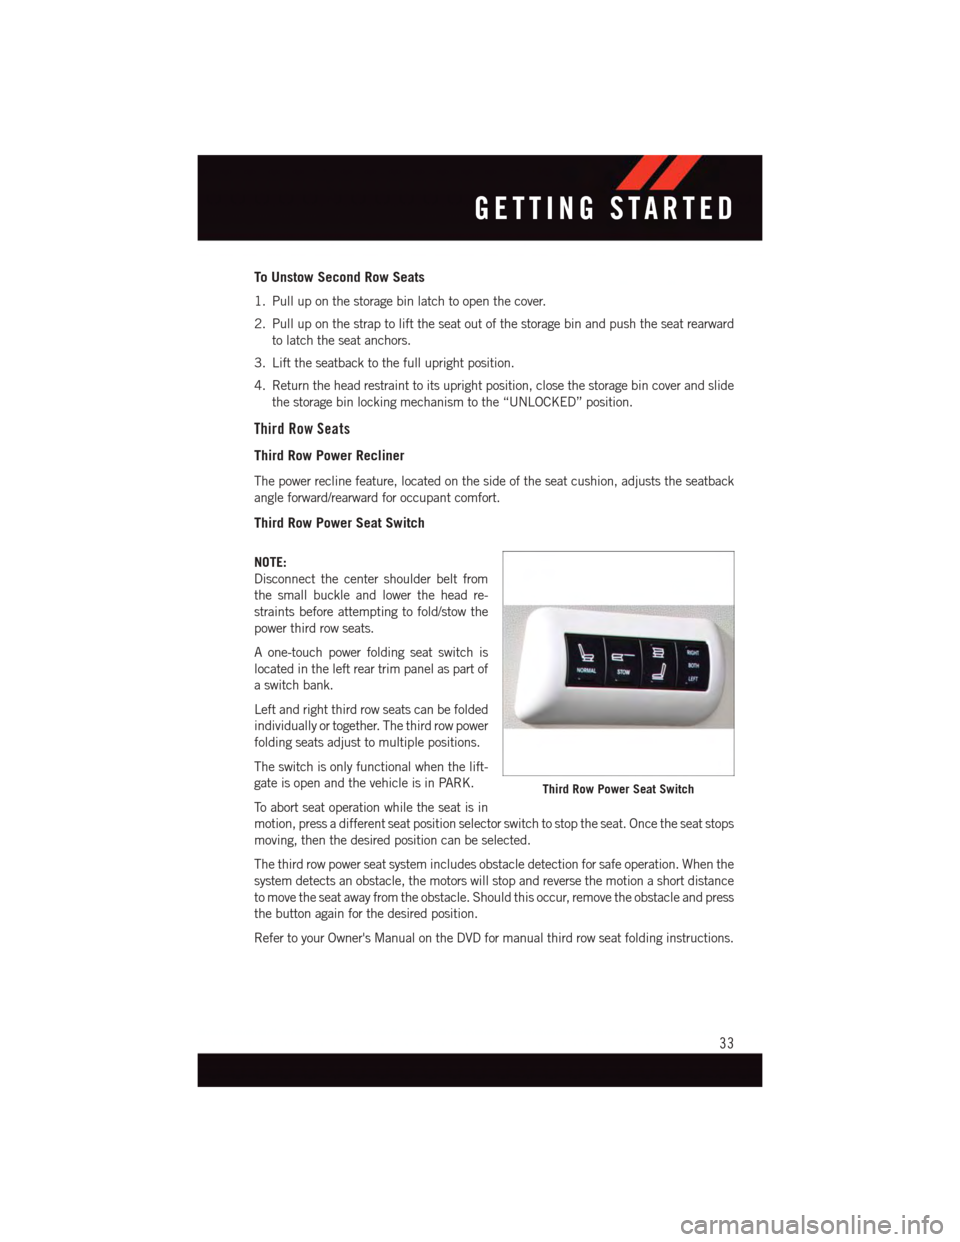
Third Row Power Seat Switch
NOTE:
Disconnect the center shoulder belt from
the small buckle and lower the head re-
straints before attempting to fold/stow the
power third row seats.
Aone-touchpowerfoldingseatswitchis
located in the left rear trim panel as part of
aswitchbank.
Left and right third row seats can be folded
individually or together. The third row power
folding seats adjust to multiple positions.
The switch is only functional when the lift-
gate is open and the vehicle is in PARK.
To a b o r t s e a t o p e r a t i o n w h i l e t h e s e a t i s i n
motion, press a different seat position selector switch to stop the seat. Once the seat stops
moving, then the desired position can be selected.
The third row power seat system includes obstacle detection for safe operation. When the
system detects an obstacle, the motors will stop and reverse the motion a short distance
to move the seat away from the obstacle. Should this occur, remove the obstacle and press
the button again for the desired position.
Refer to your Owner's Manual on the DVD for manual third row seat folding instructions.
Third Row Power Seat Switch
GETTING STARTED
33
Page 37 of 164

5. Pull release strap marked “4” and tumble the seat rearward into the storage bin.
To Unfold Third Row Seats
1. Pull up on the assist strap to lift the seat
out of the storage bin and push the seat
forward until the anchors latch.
2. Pull release strap marked “2” to unlock
the recliner.
3. Pulling strap “4” releases the seatback
to return to its full upright position.
4. Raise the head restraint to its upright
position.
CAUTION!
The storage bin cover must be locked and flat to avoid damage from contact with the
front seat tracks, which have minimal clearance to the cover.
WARNING!
•Inacollision,seriousinjurycouldresultiftheseatstoragebincoversarenot
properly latched.
•Donotdrivethevehiclewiththestoragebincoversopen.
•Keepthestoragebincoversclosedandlatchedwhilethevehicleisinmotion.
•Donotuseastoragebinlatchasatiedown.
•Inacollision,youorothersinthevehiclecouldbeinjurediftheseatsarenot
properly latched to their floor attachments. Always be sure the seats are fully
latched.
Seats In Stowed Position
GETTING STARTED
35
Page 43 of 164
Mist
•Pushtheendoftheleverinwardtothefirstdetentwhenasinglewipeisdesired.
NOTE:
The mist feature does not activate the washer pump; therefore, no washer fluid will be
sprayed on the windshield. The wash function must be activated in order to spray the
windshield with washer fluid.
Washer Operation
•Pushtheendoftheleverinwardtotheseconddetentandholdforaslongassprayis
desired.
Rear Wiper
•Rotatethecenterportionoftheleverforwardtothefirstdetentforrearwiperoperation.
Rear Washer
•Rotatethecenterportionoftheleverpastthefirstdetenttoactivatetherearwasher.
High Beams
•Pushtheleverawayfromyoutoactivatethehighbeams.
Ahighbeamsymbolwillilluminateintheclustertoindicatethehighbeamsareon.
NOTE:
For safe driving, turn off the high beams when oncoming traffic is present to prevent
headlight glare and as a courtesy to other motorists.
Flash To Pass
•Pullthelevertowardyoutoactivatethehighbeams.Thehighbeamswillremainon
until the lever is released.
OPERATING YOUR VEHICLE
41
Page 47 of 164
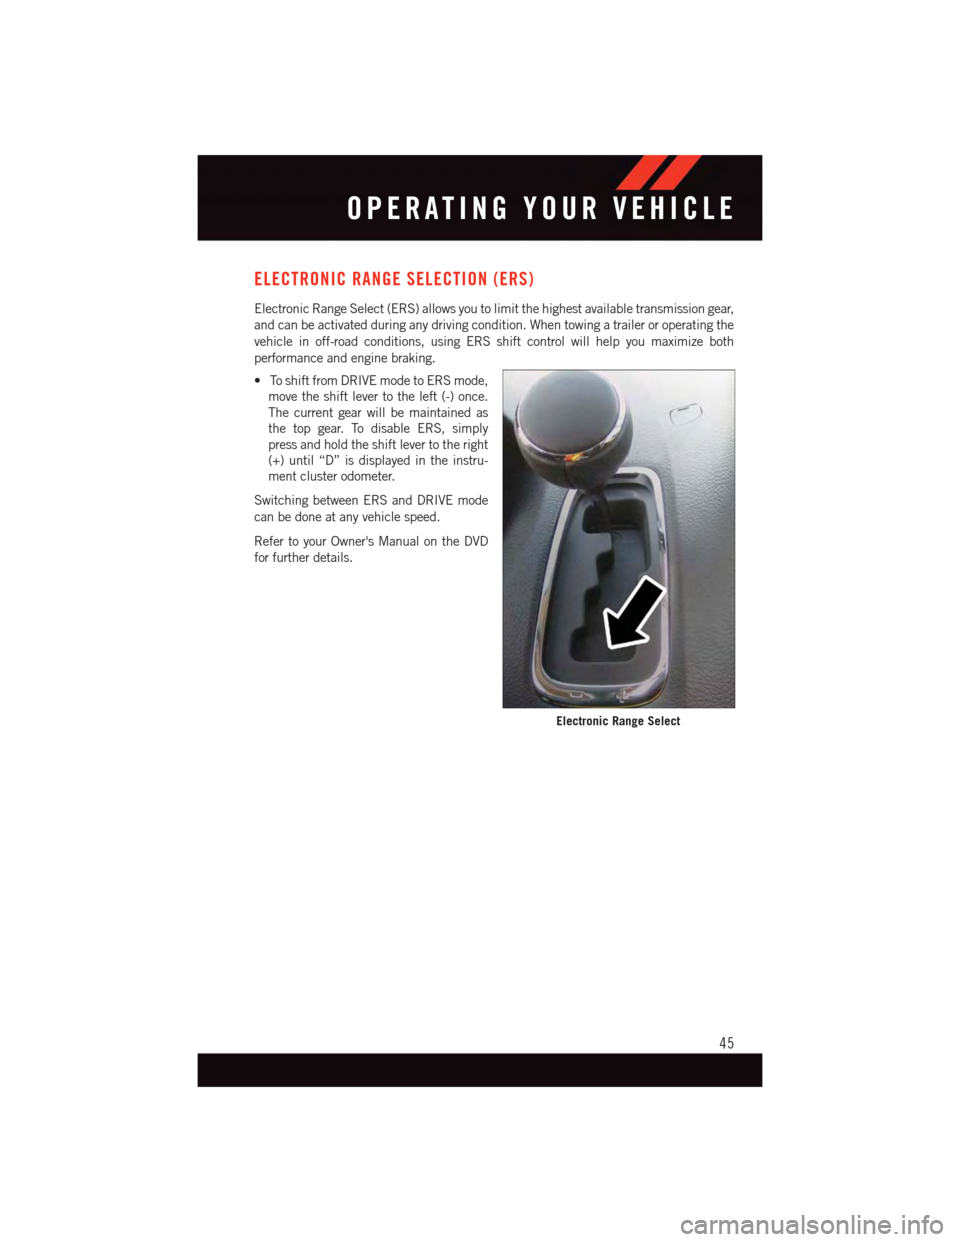
ELECTRONIC RANGE SELECTION (ERS)
Electronic Range Select (ERS) allows you to limit the highest available transmission gear,
and can be activated during any driving condition. When towing a trailer or operating the
vehicle in off-road conditions, using ERS shift control will help you maximize both
performance and engine braking.
•ToshiftfromDRIVEmodetoERSmode,
move the shift lever to the left (-) once.
The current gear will be maintained as
the top gear. To disable ERS, simply
press and hold the shift lever to the right
(+) until “D” is displayed in the instru-
ment cluster odometer.
Switching between ERS and DRIVE mode
can be done at any vehicle speed.
Refer to your Owner's Manual on the DVD
for further details.
Electronic Range Select
OPERATING YOUR VEHICLE
45
Page 55 of 164
POWER SLIDING SIDE DOORS
Automatic/Manual Operation
•Thepowerslidingdoormaybeopenedorclosedmanuallyorbyusingthebuttonson
the Key Fob, overhead console switch, or rear door switch.
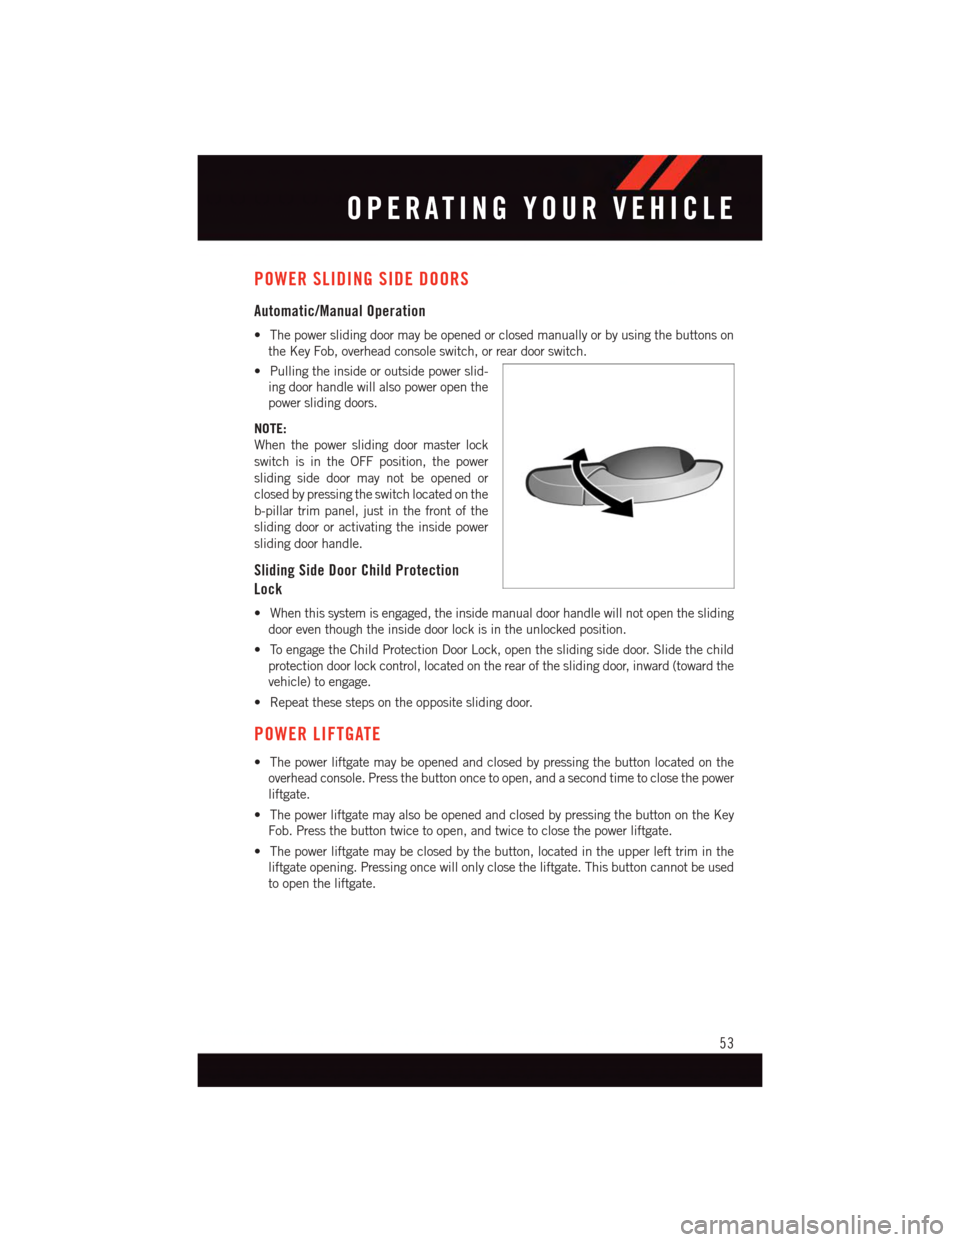
•Pullingtheinsideoroutsidepowerslid-
ing door handle will also power open the
power sliding doors.
NOTE:
When the power sliding door master lock
switch is in the OFF position, the power
sliding side door may not be opened or
closed by pressing the switch located on the
b-pillar trim panel, just in the front of the
sliding door or activating the inside power
sliding door handle.
Sliding Side Door Child Protection
Lock
•Whenthissystemisengaged,theinsidemanualdoorhandlewillnotopenthesliding
door even though the inside door lock is in the unlocked position.
•ToengagetheChildProtectionDoorLock,opentheslidingsidedoor.Slidethechild
protection door lock control, located on the rear of the sliding door, inward (toward the
vehicle) to engage.
•Repeatthesestepsontheoppositeslidingdoor.
POWER LIFTGATE
•Thepowerliftgatemaybeopenedandclosedbypressingthebuttonlocatedonthe
overhead console. Press the button once to open, and a second time to close the power
liftgate.
•ThepowerliftgatemayalsobeopenedandclosedbypressingthebuttonontheKey
Fob. Press the button twice to open, and twice to close the power liftgate.
•Thepowerliftgatemaybeclosedbythebutton,locatedintheupperlefttriminthe
liftgate opening. Pressing once will only close the liftgate. This button cannot be used
to open the liftgate.
OPERATING YOUR VEHICLE
53
Page 94 of 164
WARNING!
To A v o i d S e r i o u s I n j u r y o r D e a t h D O N O T:
•useathree-prongadaptor
•insertanyobjectsintothereceptacles
•touchwithwethands
Close the lid when not in use. If this outlet is mishandled, it may cause an electric
shock and failure.
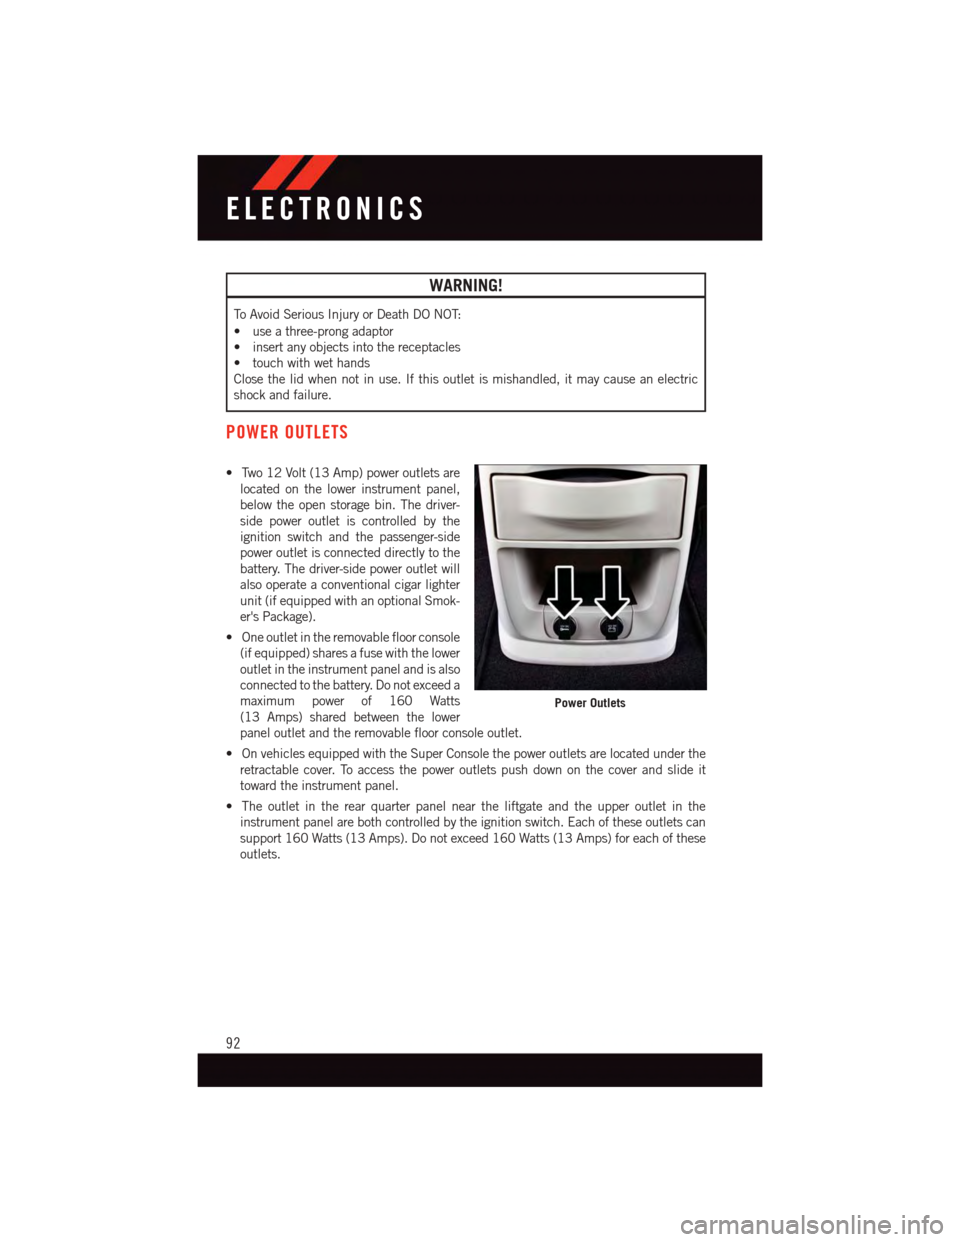
POWER OUTLETS
•Two12Volt(13Amp)poweroutletsare
located on the lower instrument panel,
below the open storage bin. The driver-
side power outlet is controlled by the
ignition switch and the passenger-side
power outlet is connected directly to the
battery. The driver-side power outlet will
also operate a conventional cigar lighter
unit (if equipped with an optional Smok-
er's Package).
•Oneoutletintheremovablefloorconsole
(if equipped) shares a fuse with the lower
outlet in the instrument panel and is also
connected to the battery. Do not exceed a
maximum power of 160 Watts
(13 Amps) shared between the lower
panel outlet and the removable floor console outlet.
•OnvehiclesequippedwiththeSuperConsolethepoweroutletsarelocatedunderthe
retractable cover. To access the power outlets push down on the cover and slide it
toward the instrument panel.
•Theoutletintherearquarterpanelneartheliftgateandtheupperoutletinthe
instrument panel are both controlled by the ignition switch. Each of these outlets can
support 160 Watts (13 Amps). Do not exceed 160 Watts (13 Amps) for each of these
outlets.
Power Outlets
ELECTRONICS
92