check engine light DODGE GRAND CARAVAN 2020 User Guide
[x] Cancel search | Manufacturer: DODGE, Model Year: 2020, Model line: GRAND CARAVAN, Model: DODGE GRAND CARAVAN 2020Pages: 380, PDF Size: 14.92 MB
Page 162 of 380

160SAFETY
(Continued)
The best protection against carbon monoxide
entry into the vehicle body is a properly
maintained engine exhaust system.
Whenever a change is noticed in the sound of
the exhaust system, when exhaust fumes can
be detected inside the vehicle, or when the
underside or rear of the vehicle is damaged,
have a competent mechanic inspect the
complete exhaust system and adjacent body
areas for broken, damaged, deteriorated, or
mispositioned parts. Open seams or loose
connections could permit exhaust fumes to
seep into the passenger compartment. In
addition, inspect the exhaust system each time
the vehicle is raised for lubrication or oil
change. Replace as required.
Safety Checks You Should Make Inside The
Vehicle
Seat Belts
Inspect the seat belt system periodically,
checking for cuts, frays, and loose parts.
Damaged parts must be replaced immediately.
Do not disassemble or modify the system.
Front seat belt assemblies must be replaced
after a collision. Rear seat belt assemblies must
be replaced after a collision if they have been damaged (i.e., bent retractor, torn webbing,
etc.). If there is any question regarding seat belt
or retractor condition, replace the seat belt.
Air Bag Warning Light
The Air Bag warning light will turn on for four
to eight seconds as a bulb check when the
ignition switch is first turned to ON/RUN. If the
light is either not on during starting, stays on, or
turns on while driving, have the system
inspected at an authorized dealer as soon as
possible. After the bulb check, this light will
illuminate with a single chime when a fault with
the Air Bag System has been detected. It will
stay on until the fault is removed. If the light
comes on intermittently or remains on while
driving, have an authorized dealer service the
vehicle immediately.
Refer to “Occupant Restraint Systems” in
“Safety” for further information.
Defroster
Check operation by selecting the defrost mode
and place the blower control on high speed. You
should be able to feel the air directed against
the windshield. See an authorized dealer for
service if your defroster is inoperable.
Floor Mat Safety Information
Always use floor mats designed to fit your
vehicle. Only use a floor mat that does not
interfere with the operation of the accelerator,
brake or clutch pedals. Only use a floor mat that
is securely attached using the floor mat
fasteners so it cannot slip out of position and
interfere with the accelerator, brake or clutch
pedals or impair safe operation of your vehicle
in other ways.
WARNING!
An improperly attached, damaged, folded, or
stacked floor mat, or damaged floor mat
fasteners may cause your floor mat to
interfere with the accelerator, brake, or clutch
pedals and cause a loss of vehicle control. To
prevent SERIOUS INJURY or DEATH:
ALWAYS securely attach your floor mat
using the floor mat fasteners. DO NOT
install your floor mat upside down or turn
your floor mat over. Lightly pull to confirm
mat is secured using the floor mat
fasteners on a regular basis.
20_RT_OM_EN_USC_t.book Page 160
Page 163 of 380
SAFETY161
(Continued)
Periodic Safety Checks You Should Make
Outside The Vehicle
Tires
Examine tires for excessive tread wear and
uneven wear patterns. Check for stones, nails,
glass, or other objects lodged in the tread or
sidewall. Inspect the tread for cuts and cracks.
Inspect sidewalls for cuts, cracks, and bulges.
Check the wheel nuts for tightness. Check the
tires (including spare) for proper cold inflation
pressure.
Lights
Have someone observe the operation of brake
lights and exterior lights while you work the
controls. Check turn signal and high beam
indicator lights on the instrument panel.
Door Latches
Check for proper closing, latching, and locking.
Fluid Leaks
Check area under the vehicle after overnight
parking for fuel, coolant, oil, or other fluid leaks.
Also, if gasoline fumes are detected or if fuel, or
brake fluid leaks are suspected, the cause
should be located and corrected immediately.
ALWAYS REMOVE THE EXISTING FLOOR
MAT FROM THE VEHICLE before
installing any other floor mat. NEVER install
or stack an additional floor mat on top of an
existing floor mat.
ONLY install floor mats designed to fit your
vehicle. NEVER install a floor mat that
cannot be properly attached and secured to
your vehicle. If a floor mat needs to be
replaced, only use a FCA approved floor
mat for the specific make, model, and year
of your vehicle.
ONLY use the driver’s side floor mat on the
driver’s side floor area. To check for inter -
ference, with the vehicle properly parked
with the engine off, fully depress the accel -
erator, the brake, and the clutch pedal (if
present) to check for interference. If your
floor mat interferes with the operation of
any pedal, or is not secure to the floor,
remove the floor mat from the vehicle and
place the floor mat in your trunk.
ONLY use the passenger’s side floor mat on
the passenger’s side floor area.
WARNING! (Continued)
ALWAYS make sure objects cannot fall or
slide into the driver’s side floor area when
the vehicle is moving. Objects can become
trapped under accelerator, brake, or clutch
pedals and could cause a loss of vehicle
control.
NEVER place any objects under the floor
mat (e.g., towels, keys, etc.). These objects
could change the position of the floor mat
and may cause interference with the accel -
erator, brake, or clutch pedals.
If the vehicle carpet has been removed and
re-installed, always properly attach carpet
to the floor and check the floor mat
fasteners are secure to the vehicle carpet.
Fully depress each pedal to check for inter -
ference with the accelerator, brake, or
clutch pedals then re-install the floor mats.
It is recommended to only use mild soap
and water to clean your floor mats. After
cleaning, always check your floor mat has
been properly installed and is secured to
your vehicle using the floor mat fasteners
by lightly pulling mat.
WARNING! (Continued)
4
20_RT_OM_EN_USC_t.book Page 161
Page 183 of 380
STARTING AND OPERATING181
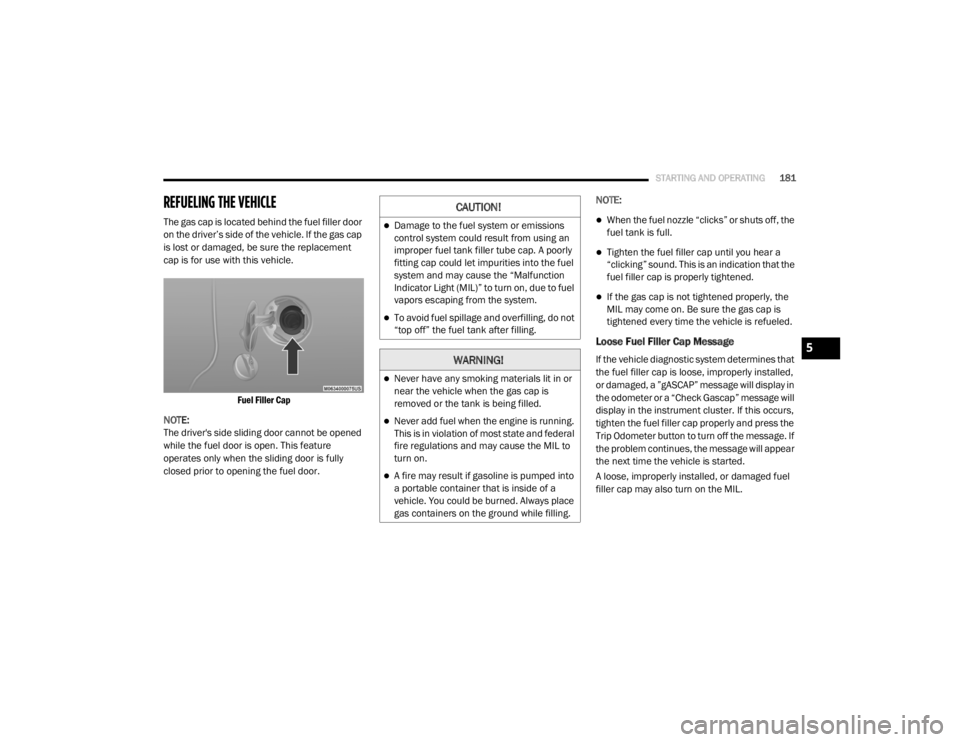
REFUELING THE VEHICLE
The gas cap is located behind the fuel filler door
on the driver’s side of the vehicle. If the gas cap
is lost or damaged, be sure the replacement
cap is for use with this vehicle.
Fuel Filler Cap
NOTE:
The driver's side sliding door cannot be opened
while the fuel door is open. This feature
operates only when the sliding door is fully
closed prior to opening the fuel door. NOTE:When the fuel nozzle “clicks” or shuts off, the
fuel tank is full.
Tighten the fuel filler cap until you hear a
“clicking” sound. This is an indication that the
fuel filler cap is properly tightened.
If the gas cap is not tightened properly, the
MIL may come on. Be sure the gas cap is
tightened every time the vehicle is refueled.
Loose Fuel Filler Cap Message
If the vehicle diagnostic system determines that
the fuel filler cap is loose, improperly installed,
or damaged, a ”gASCAP” message will display in
the odometer or a “Check Gascap” message will
display in the instrument cluster. If this occurs,
tighten the fuel filler cap properly and press the
Trip Odometer button to turn off the message. If
the problem continues, the message will appear
the next time the vehicle is started.
A loose, improperly installed, or damaged fuel
filler cap may also turn on the MIL.
CAUTION!
Damage to the fuel system or emissions
control system could result from using an
improper fuel tank filler tube cap. A poorly
fitting cap could let impurities into the fuel
system and may cause the “Malfunction
Indicator Light (MIL)” to turn on, due to fuel
vapors escaping from the system.
To avoid fuel spillage and overfilling, do not
“top off” the fuel tank after filling.
WARNING!
Never have any smoking materials lit in or
near the vehicle when the gas cap is
removed or the tank is being filled.
Never add fuel when the engine is running.
This is in violation of most state and federal
fire regulations and may cause the MIL to
turn on.
A fire may result if gasoline is pumped into
a portable container that is inside of a
vehicle. You could be burned. Always place
gas containers on the ground while filling.
5
20_RT_OM_EN_USC_t.book Page 181
Page 195 of 380
STARTING AND OPERATING193
(Continued)
Shallow Standing Water
Although your vehicle is capable of driving
through shallow standing water, consider the
following Warnings and Cautions before doing so.
WARNING!
Driving through standing water limits your
vehicle’s traction capabilities. Do not
exceed 5 mph (8 km/h) when driving
through standing water.
Driving through standing water limits your
vehicle’s braking capabilities, which
increases stopping distances. Therefore,
after driving through standing water, drive
slowly and lightly press on the brake pedal
several times to dry the brakes.
Failure to follow these warnings may result
in injuries that are serious or fatal to you,
your passengers, and others around you.
CAUTION!
Always check the depth of the standing
water before driving through it. Never drive
through standing water that is deeper than
the bottom of the tire rims mounted on the
vehicle.
Determine the condition of the road or the
path that is under water and if there are any
obstacles in the way before driving through
the standing water.
Do not exceed 5 mph (8 km/h) when
driving through standing water. This will
minimize wave effects.
Driving through standing water may cause
damage to your vehicle’s drivetrain compo -
nents. Always inspect your vehicle’s fluids
(i.e., engine oil, transmission, axle, etc.) for
signs of contamination (i.e., fluid that is
milky or foamy in appearance) after driving
through standing water. Do not continue to
operate the vehicle if any fluid appears
contaminated, as this may result in further
damage. Such damage is not covered by
the New Vehicle Limited Warranty.
Getting water inside your vehicle’s engine
can cause it to lock up and stall out, and
cause serious internal damage to the
engine. Such damage is not covered by the
New Vehicle Limited Warranty.
CAUTION! (Continued)
5
20_RT_OM_EN_USC_t.book Page 193
Page 228 of 380
226
SERVICING AND MAINTENANCE
SCHEDULED SERVICING
This vehicle is equipped with an automatic oil
change indicator system. The oil change
indicator system will remind you that it is time to
take your vehicle in for scheduled maintenance.
Based on engine operation conditions, the oil
change indicator message will illuminate. This
means that service is required for your vehicle.
Operating conditions such as frequent
short-trips, trailer tow, extremely hot or cold
ambient temperatures, and E85 fuel usage will
influence when the “Oil Change Required”
message is displayed. Severe Operating
Conditions can cause the change oil message
to illuminate as early as 3,500 miles
(5,600 km) since last reset. Have your vehicle
serviced as soon as possible, within the next
500 miles (805 km).An authorized dealer will reset the oil change
indicator message after completing the
scheduled oil change. If a scheduled oil change
is performed by someone other than an
authorized dealer, the message can be reset by
referring to the steps described under
“Instrument Cluster Display” in “Getting To
Know Your Instrument Panel” for further
information.
NOTE:
Under no circumstances should oil change
intervals exceed 10,000 miles (16,000 km),
12 months or 350 hours of engine run time,
whichever comes first. The 350 hours of engine
run or idle time is generally only a concern for
fleet customers.
Severe Duty All Models
Change engine oil at 4,000 miles (6,500 km) if
the vehicle is operated in a dusty and off road
environment or is operated predominately at
idle or only very low engine RPM. This type of
vehicle use is considered Severe Duty.Once A Month Or Before A Long Trip:Check engine oil level.
Check windshield washer fluid level.
Check tire pressure and look for unusual
wear or damage. Rotate tires at the first sign
of irregular wear, even if it occurs before the
oil indicator system turns on.
Check the fluid levels of the coolant reservoir,
brake master cylinder, and power steering
and fill as needed.
Check function of all interior and exterior
lights.
20_RT_OM_EN_USC_t.book Page 226
Page 234 of 380
232SERVICING AND MAINTENANCE
Checking Oil Level
To ensure proper engine lubrication, the engine
oil must be maintained at the correct level.
Check the oil level at regular intervals, such as
every fuel stop. The best time to check the
engine oil level is about five minutes after a fully
warmed engine is shut off.
Checking the oil while the vehicle is on level
ground will improve the accuracy of the oil level
readings. Maintain the oil level within the SAFE
crosshatch marking on the dipstick. Adding one
quart of oil when the reading is at the bottom of
the mark will result in reading the top of the
mark on these engines.
Adding Washer Fluid
The fluid reservoir for the windshield washers
and the rear window washer is shared. It is
located in the engine compartment and should
be checked at regular intervals. Fill the reservoir with windshield washer solvent
(not radiator antifreeze) and operate the system
for a few seconds to flush out any residual
water.
The washer fluid reservoir will hold a full gallon
of fluid when the Low Washer Fluid Light
illuminates.
After the engine has warmed, operate the
defroster for a few minutes to reduce the
possibility of smearing or freezing the fluid on
the cold windshield. Mopar All Weather
Windshield Washer Solution or equivalent, used
with water as directed on the container, aids
cleaning action, reduces the freezing point to
avoid line clogging, and is not harmful to paint
or trim.
Maintenance-Free Battery
Your vehicle is equipped with a
maintenance-free battery. You will never have
to add water, nor is periodic maintenance
required.
CAUTION!
Overfilling or underfilling will cause oil
aeration, or loss of oil pressure. This could
damage your engine.
WARNING!
Commercially available windshield washer
solvents are flammable. They could ignite and
burn you. Care must be exercised when filling
or working around the washer solution.
WARNING!
Battery fluid is a corrosive acid solution and
can burn or even blind you. Do not allow
battery fluid to contact your eyes, skin, or
clothing. Do not lean over a battery when
attaching clamps. If acid splashes in eyes
or on skin, flush the area immediately with
large amounts of water. Refer to “Jump
Starting Procedure” in “In Case Of Emer
-
gency” for further information.
Battery gas is flammable and explosive.
Keep flame or sparks away from the
battery. Do not use a booster battery or any
other booster source with an output greater
than 12 Volts. Do not allow cable clamps to
touch each other.
Battery posts, terminals, and related acces -
sories contain lead and lead compounds.
Wash hands after handling.
20_RT_OM_EN_USC_t.book Page 232
Page 245 of 380
SERVICING AND MAINTENANCE243
(Continued)
Master Cylinder — Brake Fluid Level Check
The fluid level in the master cylinder should be
checked when performing underhood services,
or immediately if the “Brake System Warning
Light” indicates system failure.
Clean the top of the master cylinder area before
removing the cap. Add fluid to bring the level up
to the top of the “FULL” mark on the side of the
master cylinder reservoir.
Overfilling of fluid is not recommended because
it may cause leaking in the system.
Add enough fluid to bring the level up to the
requirements described on the brake fluid
reservoir. With disc brakes, fluid level can be
expected to fall as the brake pads wear.
However, low fluid level may be caused by a
leak and a checkup may be needed.
Use only manufacturer's recommended brake
fluid. Refer to “Fluids And Lubricants” in
“Technical Specifications” for further
information.
Automatic Transmission
Selection Of Lubricant
It is important to use the proper transmission
fluid to ensure optimum transmission
performance and life. Use only the
manufacturer's specified transmission fluid.
Refer to “Fluids And Lubricants” in “Technical
Specifications” for fluid specifications. It is
important to maintain the transmission fluid at
the correct level using the recommended fluid.
No chemical flushes should be used in any
transmission; only the approved lubricant
should be used.
WARNING!
Use only manufacturer's recommended
brake fluid. Refer to “Fluids And Lubri -
cants” in “Technical Specifications” for
further information. Using the wrong type of
brake fluid can severely damage your brake
system and/or impair its performance. The
proper type of brake fluid for your vehicle is
also identified on the original factory
installed hydraulic master cylinder
reservoir.
To avoid contamination from foreign matter
or moisture, use only new brake fluid or
fluid that has been in a tightly closed
container. Keep the master cylinder reser -
voir cap secured at all times. Brake fluid in
a open container absorbs moisture from
the air resulting in a lower boiling point. This
may cause it to boil unexpectedly during
hard or prolonged braking, resulting in
sudden brake failure. This could result in a
collision.
Overfilling the brake fluid reservoir can
result in spilling brake fluid on hot engine
parts, causing the brake fluid to catch fire.
Brake fluid can also damage painted and
vinyl surfaces, care should be taken to
avoid its contact with these surfaces.
Do not allow petroleum based fluid to
contaminate the brake fluid. Brake seal
components could be damaged, causing
partial or complete brake failure. This could
result in a collision.
WARNING! (Continued)
7
20_RT_OM_EN_USC_t.book Page 243
Page 269 of 380
TECHNICAL SPECIFICATIONS267
Inspect the wheel mounting surface prior to
mounting the tire and remove any corrosion or
loose particles.
Wheel Mounting Surface
Tighten the lug nuts/bolts in a star pattern until
each nut/bolt has been tightened twice. Ensure
that the socket is fully engaged on the lug
nut/bolt (do not insert it halfway).
Torque Patterns
After 25 miles (40 km), check the lug nut/bolt torque to be sure that all the lug nuts/bolts are
properly seated against the wheel.FUEL REQUIREMENTS
3.6L Engine
This engine is designed to meet all
emissions regulations and provide
excellent fuel economy and
performance when using high-quality
unleaded “Regular” gasoline having an octane
rating of 87 as specified by the
(R+M)/2 method. The use of higher octane
“Premium” gasoline will not provide any benefit
over “Regular” gasoline in these engines.
While operating on gasoline with an octane
number of 87, hearing a light knocking sound
from the engine is not a cause for concern.
However, if the engine is heard making a heavy
knocking sound, see your dealer immediately.
Use of gasoline with an octane number lower
than 87 can cause engine failure and may void
or not be covered by the New Vehicle Limited
Warranty.
WARNING!
To avoid the risk of forcing the vehicle off the
jack, do not tighten the lug nuts/bolts fully
until the vehicle has been lowered. Failure to
follow this warning may result in personal
injury.
8
20_RT_OM_EN_USC_t.book Page 267
Page 370 of 380
368
INDEX
A
About Your Brakes......................................... 266Adding Engine Coolant (Antifreeze)............... 240Adding Fuel.................................................... 181Adding Washing Fluid.................................... 232Additives, Fuel............................................... 268AdjustDown........................................................... 28Forward....................................................... 28Rearward..................................................... 28Up................................................................ 28Air Bag........................................................... 132Air Bag Operation...................................... 133Air Bag Warning Light................................ 131Driver Knee Air Bag................................... 134Enhanced Accident Response......... 138, 225Event Data Recorder (EDR)....................... 225If Deployment Occurs................................ 138Knee Impact Bolsters................................ 134Maintaining Your Air Bag System.............. 139Maintenance............................................. 139Side Air Bags............................................. 134Transporting Pets...................................... 159Air Bag Light..................................94, 131, 160Air Cleaner, Engine
(Engine Air Cleaner Filter).............................. 235
Air Conditioner Maintenance........................ 235Air Conditioner Refrigerant........................... 235Air Conditioner System................................. 235Air Conditioning................................................ 56Automatic Rear............................................ 51Rear............................................................. 45Air Conditioning Filter..............................58, 235Air Conditioning, Operating Tips....................... 57Air Filter........................................................ 235Air PressureTires......................................................... 253AlarmArm The System.......................................... 15Disarm The System..................................... 15Security Alarm............................................. 97Alterations/ModificationsVehicle........................................................... 8Antifreeze (Engine Coolant)................. 240, 271Disposal................................................... 242Anti-Lock Brake System (ABS)...................... 103Anti-Lock Warning Light................................... 97Ashtray............................................................. 78Assist, Hill Start............................................. 108Assistance Towing........................................ 312Automatic Dimming Mirror............................... 34Automatic Door Locks............................... 17, 18
Automatic Headlights.......................................38Automatic Transmission....................... 165, 244Adding Fluid..................................... 244, 274Fluid And Filter Change............................. 244Fluid Change............................................. 244Fluid Level Check............................. 243, 244Fluid Type........................................ 243, 274Gear Ranges............................................. 168Special Additives...................................... 244Torque Converter...................................... 172Axle Fluid....................................................... 274Axle Lubrication............................................ 274
B
Battery................................................... 95, 232Charging System Light.................................95Jump Starting........................................... 219Keyless Key Fob Replacement....................10Battery Saver Feature......................................39Belts, Seat.................................................... 160Body Mechanism Lubrication........................ 237B-Pillar Location............................................ 249Brake Assist System..................................... 104Brake Control System, Electronic.................. 104Brake Fluid.................................................... 274
20_RT_OM_EN_USC_t.book Page 368
Page 371 of 380
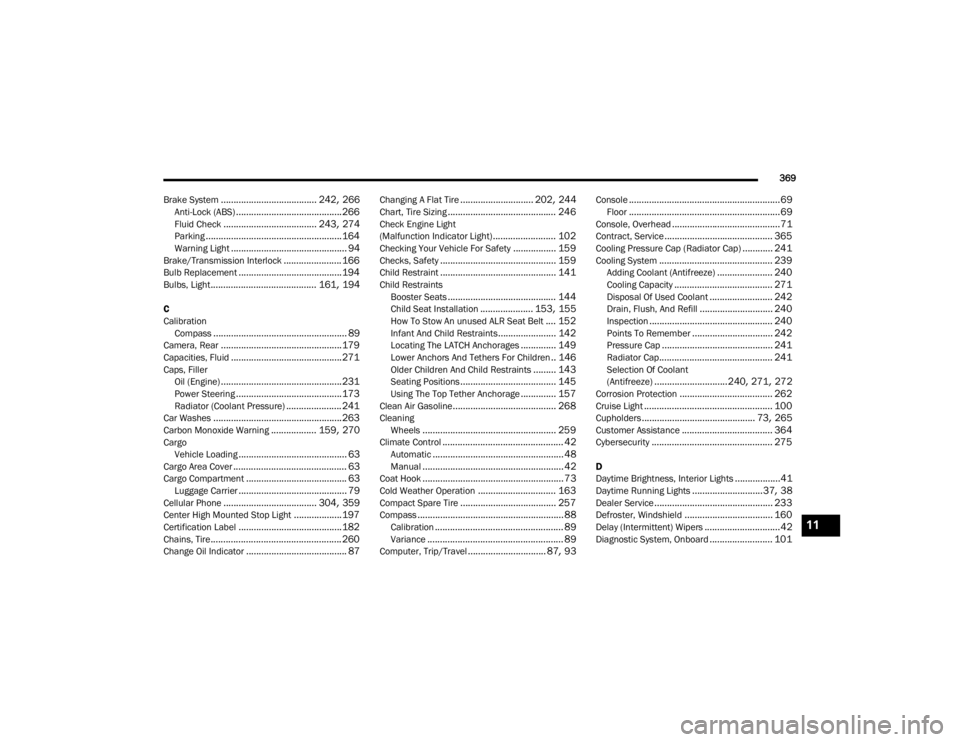
369
Brake System
...................................... 242, 266Anti-Lock (ABS).......................................... 266Fluid Check..................................... 243, 274Parking...................................................... 164Warning Light.............................................. 94Brake/Transmission Interlock....................... 166Bulb Replacement......................................... 194Bulbs, Light.......................................... 161, 194
C
Calibration Compass
..................................................... 89Camera, Rear................................................ 179Capacities, Fluid............................................ 271Caps, FillerOil (Engine)................................................ 231Power Steering.......................................... 173Radiator (Coolant Pressure)...................... 241Car Washes................................................... 263Carbon Monoxide Warning.................. 159, 270CargoVehicle Loading........................................... 63Cargo Area Cover............................................. 63Cargo Compartment........................................ 63Luggage Carrier........................................... 79Cellular Phone..................................... 304, 359Center High Mounted Stop Light...................197Certification Label......................................... 182Chains, Tire.................................................... 260Change Oil Indicator........................................ 87
Changing A Flat Tire............................. 202, 244Chart, Tire Sizing........................................... 246Check Engine Light
(Malfunction Indicator Light)......................... 102Checking Your Vehicle For Safety................. 159Checks, Safety.............................................. 159Child Restraint.............................................. 141Child RestraintsBooster Seats........................................... 144Child Seat Installation..................... 153, 155How To Stow An unused ALR Seat Belt.... 152Infant And Child Restraints....................... 142Locating The LATCH Anchorages.............. 149Lower Anchors And Tethers For Children.. 146Older Children And Child Restraints......... 143Seating Positions...................................... 145Using The Top Tether Anchorage.............. 157Clean Air Gasoline......................................... 268CleaningWheels..................................................... 259Climate Control................................................ 42Automatic.................................................... 48Manual........................................................ 42Coat Hook........................................................ 73Cold Weather Operation............................... 163Compact Spare Tire...................................... 257Compass.......................................................... 88Calibration................................................... 89Variance...................................................... 89Computer, Trip/Travel............................... 87, 93
Console............................................................69Floor............................................................69Console, Overhead...........................................71Contract, Service........................................... 365Cooling Pressure Cap (Radiator Cap)............ 241Cooling System............................................. 239Adding Coolant (Antifreeze)...................... 240Cooling Capacity....................................... 271Disposal Of Used Coolant......................... 242Drain, Flush, And Refill............................. 240Inspection................................................. 240Points To Remember................................ 242Pressure Cap............................................ 241Radiator Cap............................................. 241Selection Of Coolant
(Antifreeze).............................240, 271, 272Corrosion Protection..................................... 262Cruise Light................................................... 100Cupholders............................................. 73, 265Customer Assistance.................................... 364Cybersecurity................................................ 275
D
Daytime Brightness, Interior Lights..................41Daytime Running Lights............................37, 38Dealer Service............................................... 233Defroster, Windshield................................... 160Delay (Intermittent) Wipers..............................42Diagnostic System, Onboard......................... 101
11
20_RT_OM_EN_USC_t.book Page 369