stop start DODGE INTREPID 2004 2.G Owners Manual
[x] Cancel search | Manufacturer: DODGE, Model Year: 2004, Model line: INTREPID, Model: DODGE INTREPID 2004 2.GPages: 249, PDF Size: 4.87 MB
Page 11 of 249
At the time of purchase, the original owner is provided
with a four digit PIN number. This number is required
for dealer replacement of keys. Duplication of keys may
be performed at an authorized dealer or by using the
Customer Key Programming procedure. This procedure
consists of programming a blank key to the vehicle
electronics. A blank key is one which has never been
programmed.
NOTE:When having the Sentry Key System serviced,
bring all vehicle keys to the dealer.
Customer Key Programming
You can program new keys to the system if you have two
valid keys by doing the following:
1. Insert the first valid key into the ignition and turn the
ignition On for at least 3 seconds but no longer than 15
seconds.
Turn the ignition Off and remove the first key.
2. Insert the second valid key and switch the ignition On
within 15 seconds. After ten seconds a chime will sound
and the Theft Alarm Light will begin to flash.Turn the ignition Off and remove the second key.
3. Insert a blank Sentry Key into the ignition and switch
the ignition On within 60 seconds. After 10 seconds a
single chime will sound. The Theft Alarm Light will stop
flashing, and turn On for 3 seconds; then turn Off.
The new Sentry Key has been programmed. Repeat this
process to program up to a total of 8 keys.
CAUTION!
An unlocked car is an invitation to thieves. Always
remove the key from the ignition, lock the doors,
close the windows, and raise the top when leaving
the vehicle unattended.
General Information
The Sentry Key system complies with FCC rules part 15
and with RS-210 of Industry Canada. Operation is subject
to the following two conditions:
1. this device may not cause harmful interference
THINGS TO KNOW BEFORE STARTING YOUR VEHICLE 11
2
Page 23 of 249
SECURITY ALARM SYSTEM— IF EQUIPPED
The system monitors the doors, trunk key cylinder, and
ignition for unauthorized operation.
If something triggers the alarm, the system will signal for
up to 18 minutes. For the first 3 minutes the horn will
sound and the headlights, park and tail lights and the
SET light will flash. The horn will stop and if the source
of the trigger is still present, the lights will continue to
flash for another 15 minutes.
NOTE:The engine will not start until you disarm the
system.
To set the alarm:
1. Remove the keys from the ignition switch and get out
of the vehicle.
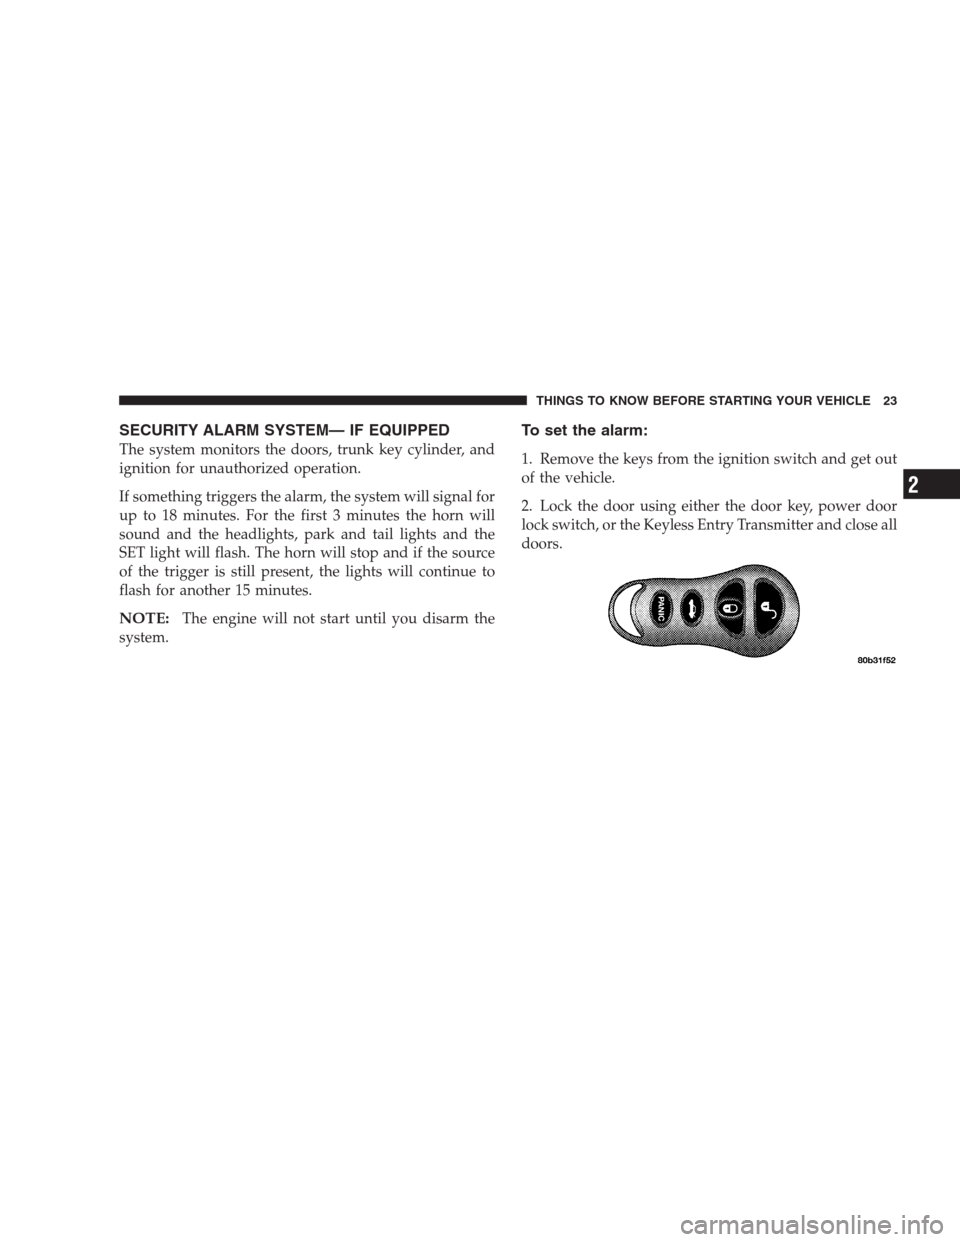
2. Lock the door using either the door key, power door
lock switch, or the Keyless Entry Transmitter and close all
doors.
THINGS TO KNOW BEFORE STARTING YOUR VEHICLE 23
2
Page 25 of 249
POWER WINDOWS
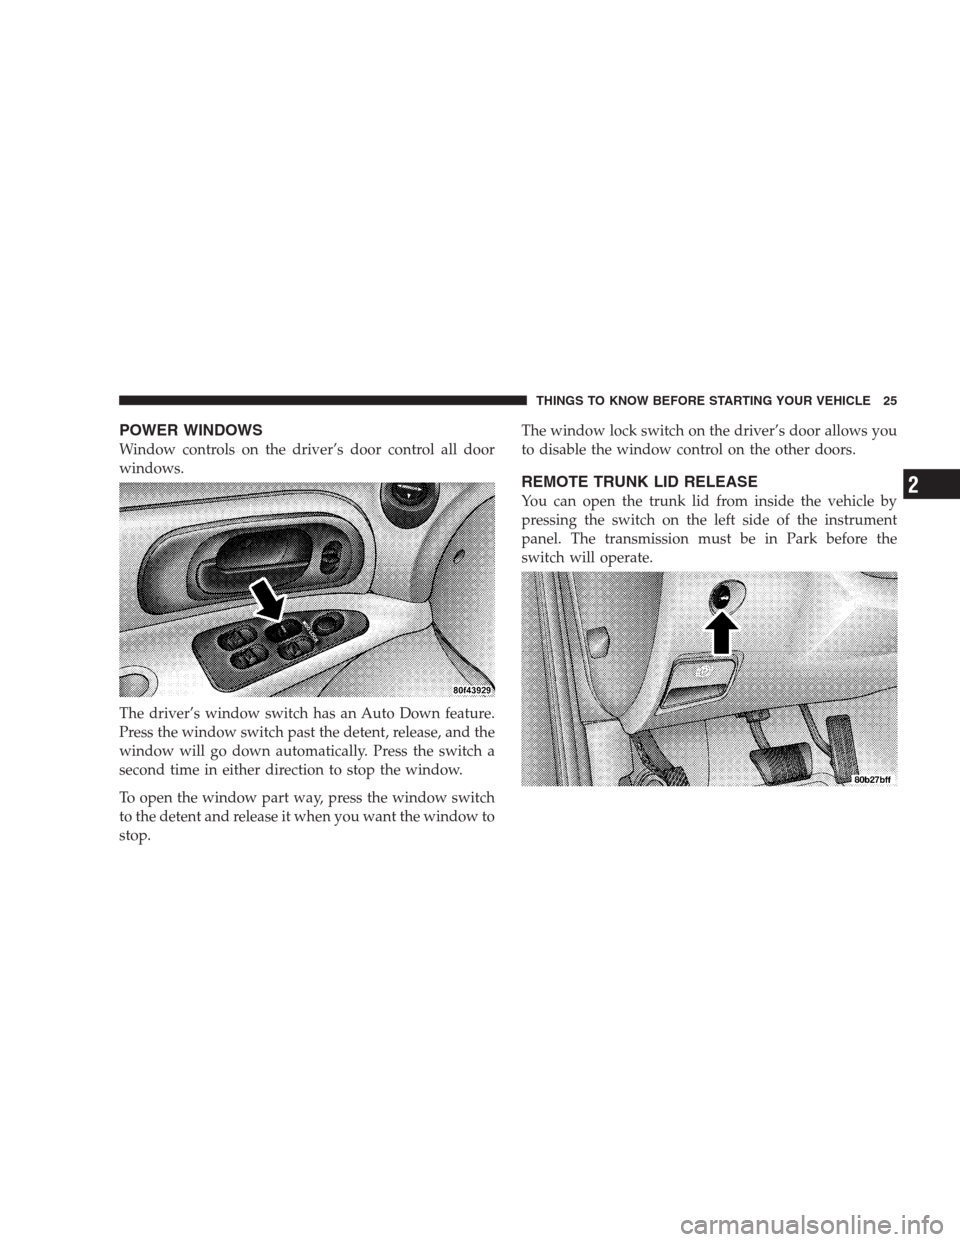
Window controls on the driver’s door control all door
windows.
The driver’s window switch has an Auto Down feature.
Press the window switch past the detent, release, and the
window will go down automatically. Press the switch a
second time in either direction to stop the window.
To open the window part way, press the window switch
to the detent and release it when you want the window to
stop.The window lock switch on the driver’s door allows you
to disable the window control on the other doors.
REMOTE TRUNK LID RELEASE
You can open the trunk lid from inside the vehicle by
pressing the switch on the left side of the instrument
panel. The transmission must be in Park before the
switch will operate.
THINGS TO KNOW BEFORE STARTING YOUR VEHICLE 25
2
Page 27 of 249
Please pay close attention to the information in this
section. It tells you how to use your restraint system
properly to keep you and your passengers as safe as
possible.
WARNING!
In a collision, you and your passengers can suffer
much greater injuries if you are not properly buck-
led up. You can strike the interior of your vehicle or
other passengers, or you can be thrown out of the
vehicle. Always be sure you and others in your
vehicle are buckled up properly.
Buckle up even though you are an excellent driver, even
on short trips. Someone on the road may be a poor driver
and cause a collision which includes you. This can
happen far away from home or on your own street.Research has shown that seat belts save lives. And they
can reduce the seriousness of injuries in a collision. Some
of the worst injuries happen when people are thrown
from the vehicle. Seat belts provide protection from that,
and they reduce the risk of injury caused by striking the
inside of the vehicle.Everyonein a motor vehicle needs
to be buckled up all the time.
Lap/Shoulder Belts
All seating positions in your vehicle are equipped with
Lap/Shoulder Belts.
The belt webbing retractor will lock only during very
sudden stops or collisions. This feature allows the shoul-
der part of the belt to move freely with you under normal
conditions. But in a collision, the belt will lock and reduce
your risk of striking the inside of the vehicle or being
thrown out.
THINGS TO KNOW BEFORE STARTING YOUR VEHICLE 27
2
Page 29 of 249
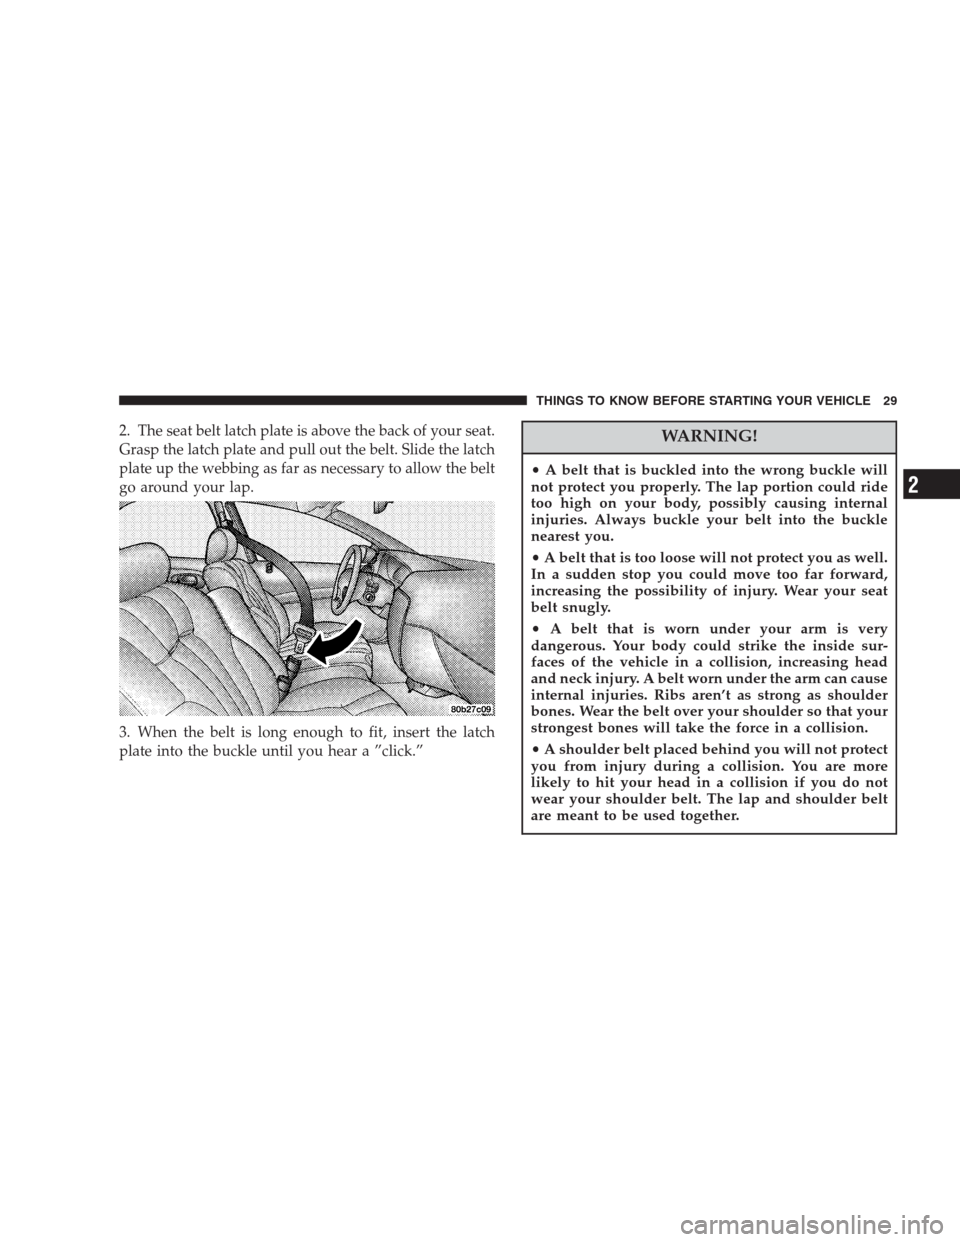
2. The seat belt latch plate is above the back of your seat.
Grasp the latch plate and pull out the belt. Slide the latch
plate up the webbing as far as necessary to allow the belt
go around your lap.
3. When the belt is long enough to fit, insert the latch
plate into the buckle until you hear a ”click.”WARNING!
•A belt that is buckled into the wrong buckle will
not protect you properly. The lap portion could ride
too high on your body, possibly causing internal
injuries. Always buckle your belt into the buckle
nearest you.
•A belt that is too loose will not protect you as well.
In a sudden stop you could move too far forward,
increasing the possibility of injury. Wear your seat
belt snugly.
•A belt that is worn under your arm is very
dangerous. Your body could strike the inside sur-
faces of the vehicle in a collision, increasing head
and neck injury. A belt worn under the arm can cause
internal injuries. Ribs aren’t as strong as shoulder
bones. Wear the belt over your shoulder so that your
strongest bones will take the force in a collision.
•A shoulder belt placed behind you will not protect
you from injury during a collision. You are more
likely to hit your head in a collision if you do not
wear your shoulder belt. The lap and shoulder belt
are meant to be used together.
THINGS TO KNOW BEFORE STARTING YOUR VEHICLE 29
2
Page 42 of 249
Standards. We also recommend that you try a child
restraint in the vehicle seats where you will use it
before you buy it.
•The restraint must be appropriate for your child’s
weight and height. Check the label on the restraint for
weight and height limits.
•Carefully follow the instructions that come with the
restraint. If you install the restraint improperly, it may
not work when you need it.
•Buckle the child into the seat according to the seat
manufacturer’s directions.
•When your child restraint is not in use, secure it in the
vehicle with the seat belt or remove it from the vehicle.
Do not leave it loose in the vehicle. In a sudden stop or
collision, it could strike the occupants or seat backs
and cause serious personal injury.
NOTE:For additional information, refer to
www.seatcheck.org or call 1–866–SEATCHECK.
Older Children and Child Restraints
Children who weigh more than 20 lbs (9 kg) and who are
older than one year can ride forward-facing in the
vehicle. Forward-facing child seats and convertible child
seats used in the forward-facing direction are for children
who weigh 20 to 40 lbs (9 to 18 kg) and who are older
than one year. These child seats are also held in the
vehicle by the lap/shoulder belt or the LATCH anchor-
age system. (See the LATCH — Child Seat Anchorage
System Section.)
The belt-positioning booster seat is for children weighing
more than 40 lbs (18 kg), but who are still too small to fit
the vehicle’s seat belts properly. If the child cannot sit
with knees bent over the vehicle’s seat cushion while the
child’s back is against the seat back, they should use a
belt-positioning booster seat. The child and belt-
positioning booster seat are held in the vehicle by the
lap/shoulder belt.
42 THINGS TO KNOW BEFORE STARTING YOUR VEHICLE
Page 88 of 249
INSTRUMENT CLUSTER DESCRIPTION
1. Fuel Gauge
When the ignition is in the ON position, the
pointer will show the level of fuel remaining in
the tank.
2. Low Fuel Warning Light
When the fuel level drops to about 2 gallons (8
liters), the Low Fuel symbol will light and re-
main lit until fuel is added. A warning chime will
sound when the light comes on.
3. Low Oil Pressure Light
This light indicates low engine oil pressure. The
light should come on briefly as a bulb check
when the engine is first started. If the light stays on or
comes on while driving, stop the vehicle and shut off
the engine. DO NOT operate the vehicle until the
cause is corrected.This light does not show how
much oil is in the engine.The engine oil level must be
checked under the hood.4. TRAC ON/OFF Lights
The Traction Control On light (TRAC ON) will come on
momentarily as a bulb check when the ignition switch is
first turned ON. If the light does not come on, have the
bulb replaced.
The TRAC ON light will also come on when the system
is controlling traction.
The Traction Control Off light (TRAC OFF) will come on
momentarily as a bulb check when the ignition switch is
first turned ON. If the light does not come on, have the
bulb checked.
The TRAC OFF light will also come on when the Traction
Control switch has been used to turn the system off.
5. Trunk Ajar Light
This light indicates that the trunk is not latched
6. Tachometer
Measures engine revolutions-per-minute (R.P.M.). The
red numbers at the end on the scale show the maximum
permissible R.P.M. Ease off on the accelerator before
reaching the red area.
88 UNDERSTANDING YOUR INSTRUMENT PANEL
Page 90 of 249
If the pointer rises to the “H” mark, stop the vehicle and
turn off the engine until the problem is corrected.
CAUTION!
Continuing to drive with an overheated engine cool-
ing system can cause damage to the engine or other
components.
There are steps that you can take to slow down an
impending overheat condition. If your air conditioning is
on, turn it off. The air conditioning system adds heat to
the engine cooling system and turning off the A/C
removes this heat. You can also turn the Temperature
control to maximum heat, the Mode control to Floor and
the Fan control to High. This allows the heater core to act
as a supplement to the radiator and aids in removing heat
from the engine cooling system.
16. Malfunction Indicator Light
This light is part of an onboard diagnostic
system called OBD that monitors engine and
automatic transmission control systems. Thelight will illuminate when the key is in the ON
position before engine start. If the bulb does not come
on when turning the key from OFF to ON, have the
condition checked promptly.
Certain conditions such as a loose or missing gas cap or
poor fuel quality may illuminate the light after engine
start. The vehicle should be serviced if the light stays on
through several of your typical driving cycles. In most
situations the vehicle will drive normally and will not
require towing.
The Malfunction Indicator Light flashes to alert to serious
conditions that could lead to immediate loss of power or
severe catalytic converter damage. The vehicle should be
serviced as soon as possible if this occurs.
17. Trip Odometer Reset Knob
To reset the trip odometer, push the reset knob for about
two seconds.
18. Airbag Light
The light will come on and remain on for 6 to 8
seconds as a bulb check when the ignition switch
is first turned ON. If the bulb is not lit during starting,
90 UNDERSTANDING YOUR INSTRUMENT PANEL
Page 92 of 249
If the ABS light is on, the brake system should be serviced
as soon as possible to restore the benefits of Anti-Lock
brakes.
23. Brake System Warning Light
The dual brake system provides a reserve
braking capability if a failure occurs in a
portion of the hydraulic system.
This light monitors both the brake fluid level and the
parking brake. If the light comes on, it indicates either
that the parking brake is on or there is a low fluid level in
the brake master cylinder. On vehicles equipped with
anti-lock brakes (ABS), the brake light may also indicate
reduced braking performance. If the parking brake is off
and the light remains on, have the brake system in-
spected as soon as possible.
The light will also come on when the parking brake is
applied with the ignition in the RUN position.The warning light should be checked frequently to assure
that it is operating properly. This can be done by turning
the ignition switch to START. The light should come on.
If the red brake light does not come on, have the system
checked by an authorized dealer.
WARNING!
Driving a vehicle with the brake light on is danger-
ous. Part of the brake system may have failed. It will
take longer to stop the vehicle. You could have an
accident. Have the vehicle checked immediately.
NOTE:This light shows only that the parking brake is
on. It does not show the degree of brake application.
In an ABS equipped vehicle, the Brake System Warning
light will come on if the ABS light is not functioning or if
the ABS system is not communicating.
92 UNDERSTANDING YOUR INSTRUMENT PANEL
Page 108 of 249
display will show the track number and index time in
minutes and seconds. Play will begin at the start of track
one.
Seek
Press the top of the SEEK button for the next selection on
the CD. Press the bottom of the button to return to the
beginning of the current selection, or return to the
beginning of the previous selection if the CD is within the
first second of the current selection.
EJT — Eject
Press the EJT button and the disc will unload and move
to the entrance for easy removal. The unit will switch to
the radio mode.
If you do not remove the disc within 15 seconds, it will be
reloaded. The unit will continue in radio mode.
The disc can be ejected with the radio and ignition OFF.
FF/TUNE/RW
Press FF (Fast Forward) and the CD player will begin to
fast forward until FF is released. The RW ( Reverse)
button works in a similar manner.
Random Play — RND/Program Button 4
Press the RND (button 4) button while the CD is playing
to activate Random Play. This feature plays the selections
on the compact disc in random order to provide an
interesting change of pace.
Press the SEEK button to move to the next randomly
selected track.
Press the RND (button 4) button a second time to stop
Random Play.
Mode
Press the MODE button repeatedly to select between the
CD player, the optional remote CD changer and the
Satellite Radio (if equipped). When Satellite Radio (if
equipped) is selected “SA” will appear in your radio
display.
A CD or tape may remain in the player while in the
Satellite mode.
Time
Press the TIME button to change the display from
elapsed CD playing time to time of day.
108 UNDERSTANDING YOUR INSTRUMENT PANEL