warning light DODGE INTREPID 2004 2.G Owners Manual
[x] Cancel search | Manufacturer: DODGE, Model Year: 2004, Model line: INTREPID, Model: DODGE INTREPID 2004 2.GPages: 249, PDF Size: 4.87 MB
Page 37 of 249
then turns the light off. If it detects a malfunction in
any part of the system, it turns on the light either
momentarily or continuously.
WARNING!
Ignoring the AIRBAG light in your instrument panel
could mean you won’t have the airbags to protect
you in a collision. If the light does not come on, stays
on after you start the vehicle, or if it comes on as you
drive, have the airbag system checked right away.
•When the airbag control module detects an impact
requiring the front airbags, it signals the inflator units.
A large quantity of nontoxic gas is generated to inflate
the airbags. The airbag covers separate and fold out of
the way as the airbags inflate to their full size. The
airbags fully inflate in about 60 milliseconds. This is
only about half of the time it takes you to blink your
eyes. The airbags then quickly deflate while helping to
restrain the driver and right front passenger. The
driver’s front airbag gas is vented towards the instru-
ment panel. The passenger’s front airbag gas is ventedthrough vent holes in the sides of the airbag. In this
way the airbags do not interfere with your control of
the vehicle.
•The Knee Impact Bolsters help protect the knees and
position you for the best interaction with the airbags.
If A Deployment Occurs
The airbag system is designed to deploy when the airbag
control module detects a moderate-to-severe frontal col-
lision, to help restrain the driver and right front passen-
ger, and then to immediately deflate.
NOTE:A frontal collision that is not severe enough to
need airbag protection will not activate the system. This
does not mean something is wrong with the airbag
system.
If you do have a collision which deploys the airbags, any
or all of the following may occur:
•The nylon airbag material may sometimes cause abra-
sions and/or skin reddening to the driver and right
front passenger as the airbags deploy and unfold. The
abrasions are similar to friction rope burns or those
you might get sliding along a carpet or gymnasium
THINGS TO KNOW BEFORE STARTING YOUR VEHICLE 37
2
Page 39 of 249
•The side impact airbag control module monitors the
readiness of the electronic parts of the system when-
ever the ignition switch is in the “START” or “RUN”
positions. These include all of the items listed above
except for the AIRBAG light (which is controlled by
the frontal airbag system).
•In moderate to severe side collisions, the side airbag
inflator on the crash side of the vehicle is triggered,
releasing a quantity of nontoxic gas. The inflating side
airbag exits through the seat seam into the space
between the occupant and the door. The side airbag
moves at a very high speed and with such a high force,
that it could injure you if you are not seated properly,
or if items are positioned in the area where the side
airbag inflates. This especially applies to children.
Maintaining Your Airbag System
WARNING!
•Modifications to any part of the airbag system
could cause it to fail when you need it. You could
be injured because the airbag is not there to
protect you. Do not modify the components or
wiring, including adding any kind of badges or
stickers to the airbag covers. Do not modify the
front bumper or vehicle body structure.
•You need proper knee impact protection in a
collision. Do not mount or locate any aftermarket
equipment on or behind the knee impact bolsters.
•It is dangerous to try to repair any part of the
airbag system yourself. Be sure to tell anyone who
works on your vehicle that it has airbags.
THINGS TO KNOW BEFORE STARTING YOUR VEHICLE 39
2
Page 40 of 249
Airbag Light
You will want to have the airbags ready for your
protection in an impact. While the airbag system
is designed to be maintenance free, if any of the
following occurs, have an authorized dealer service the
system immediately.
•The AIRBAG light does not come on or flickers during
the 6 to 8 seconds when the ignition switch is first
turned on.
•The light remains on or flickers after the 6 to 8 second
interval.
•The light flickers or comes on and remains on while
driving.
Child Restraint
Everyone in your vehicle needs to be buckled up all the
time– babies and children too. Every state in the United
States and all Canadian provinces require that small
children ride in proper restraint systems. This is the law,
and you can be prosecuted for ignoring it.Children 12 years and under should ride properly buck-
led up in a rear seat. According to crash statistics,
children are safer when properly restrained in the rear
seat rather than the front.
WARNING!
In a collision, an unrestrained child, even a tiny
baby, can become a missile inside the vehicle. The
force required to hold even an infant on your lap
could become so great that you could not hold the
child, no matter how strong you are. The child and
others could be badly injured. Any child riding in
your vehicle should be in a proper restraint for the
child’s size.
There are different sizes and types of restraints for
children from newborn size to the child almost large
enough for an adult safety belt. Always check the child
seat owner’s manual to ensure you have the right seat for
your child. Use the restraint that is correct for your child:
40 THINGS TO KNOW BEFORE STARTING YOUR VEHICLE
Page 54 of 249
Electric Remote Control Mirrors
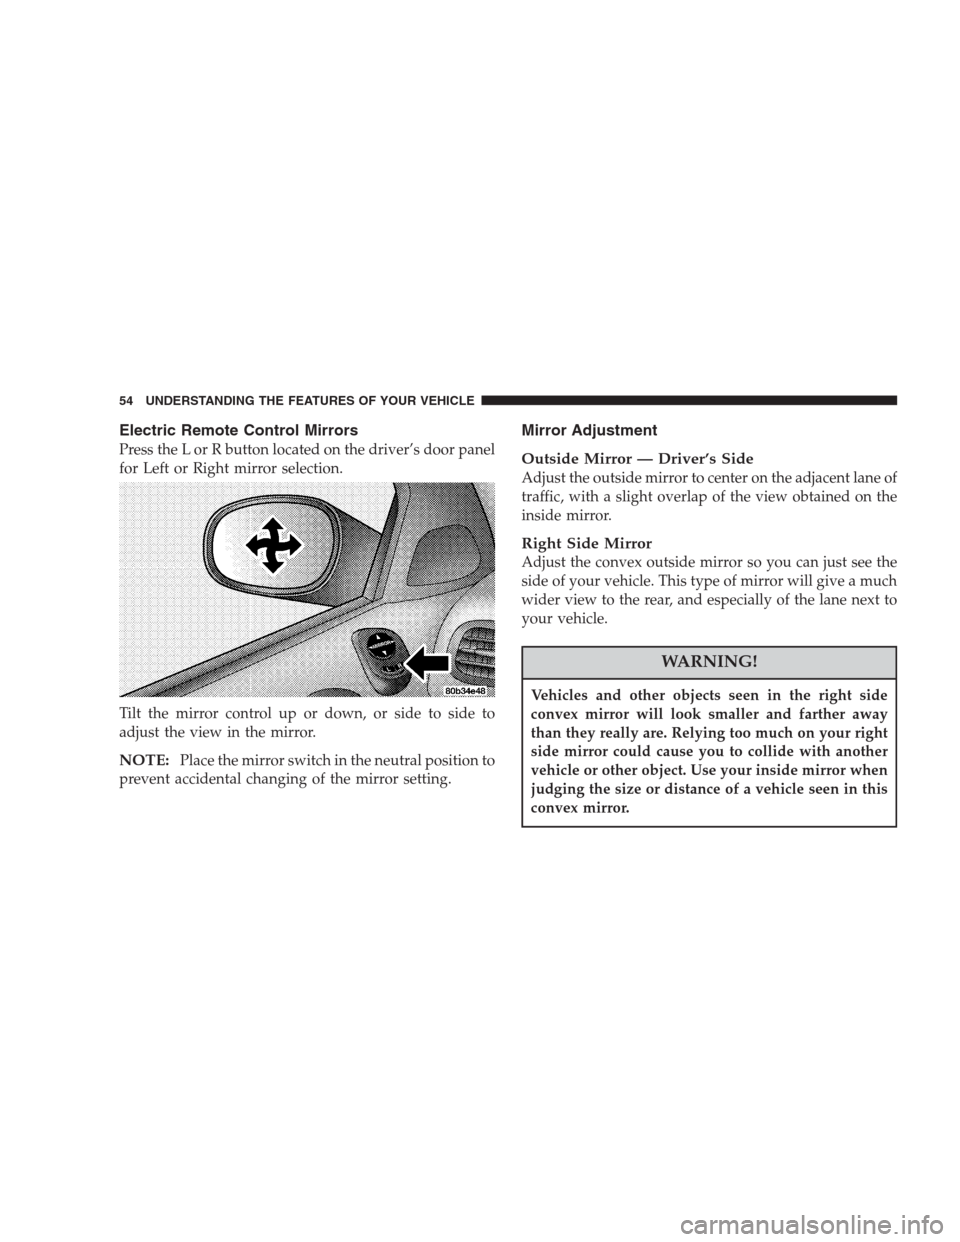
Press the L or R button located on the driver’s door panel
for Left or Right mirror selection.
Tilt the mirror control up or down, or side to side to
adjust the view in the mirror.
NOTE:Place the mirror switch in the neutral position to
prevent accidental changing of the mirror setting.
Mirror Adjustment
Outside Mirror — Driver’s Side
Adjust the outside mirror to center on the adjacent lane of
traffic, with a slight overlap of the view obtained on the
inside mirror.
Right Side Mirror
Adjust the convex outside mirror so you can just see the
side of your vehicle. This type of mirror will give a much
wider view to the rear, and especially of the lane next to
your vehicle.
WARNING!
Vehicles and other objects seen in the right side
convex mirror will look smaller and farther away
than they really are. Relying too much on your right
side mirror could cause you to collide with another
vehicle or other object. Use your inside mirror when
judging the size or distance of a vehicle seen in this
convex mirror.
54 UNDERSTANDING THE FEATURES OF YOUR VEHICLE
Page 60 of 249
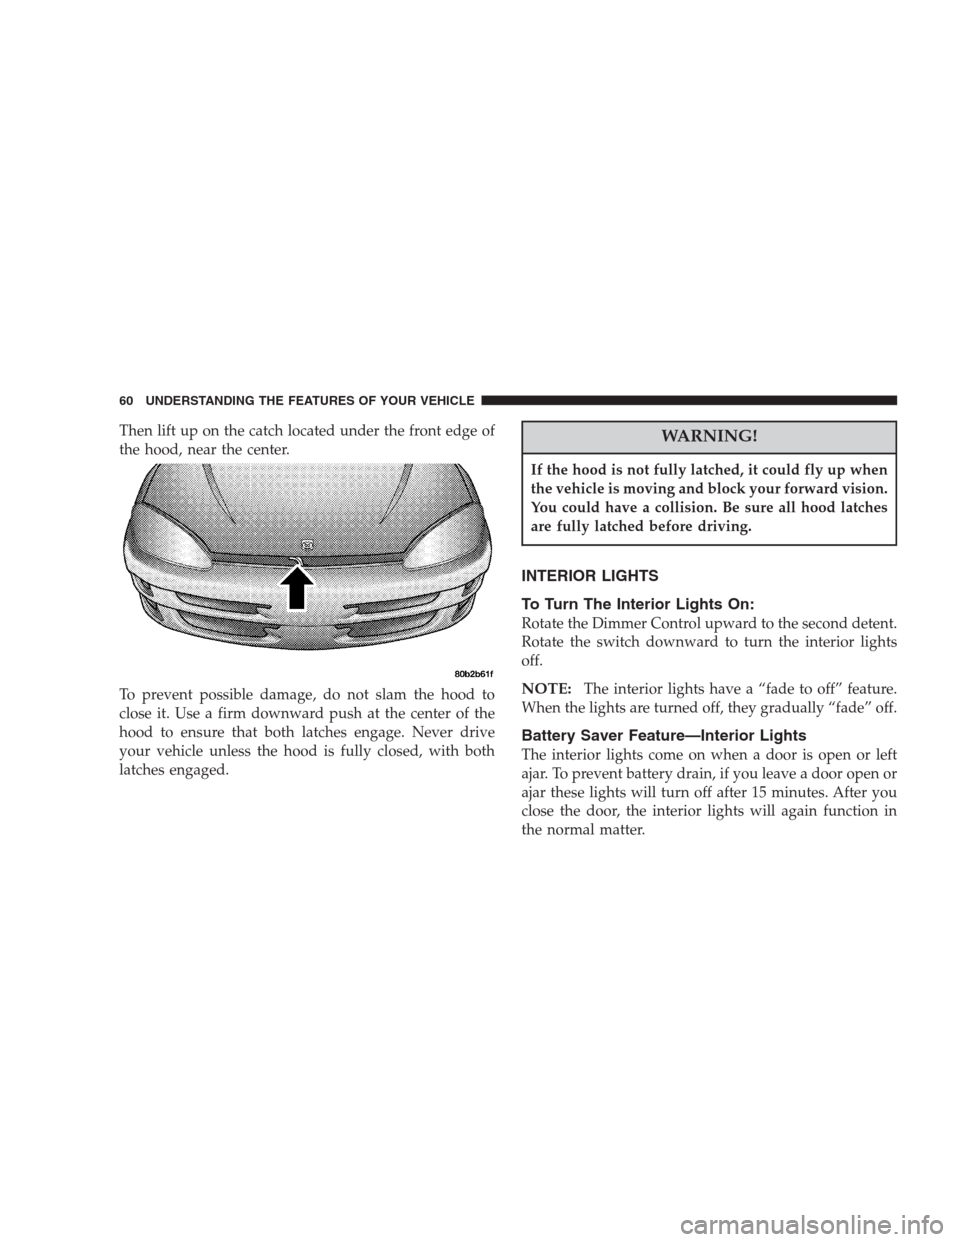
Then lift up on the catch located under the front edge of
the hood, near the center.
To prevent possible damage, do not slam the hood to
close it. Use a firm downward push at the center of the
hood to ensure that both latches engage. Never drive
your vehicle unless the hood is fully closed, with both
latches engaged.WARNING!
If the hood is not fully latched, it could fly up when
the vehicle is moving and block your forward vision.
You could have a collision. Be sure all hood latches
are fully latched before driving.
INTERIOR LIGHTS
To Turn The Interior Lights On:
Rotate the Dimmer Control upward to the second detent.
Rotate the switch downward to turn the interior lights
off.
NOTE:The interior lights have a “fade to off” feature.
When the lights are turned off, they gradually “fade” off.
Battery Saver Feature—Interior Lights
The interior lights come on when a door is open or left
ajar. To prevent battery drain, if you leave a door open or
ajar these lights will turn off after 15 minutes. After you
close the door, the interior lights will again function in
the normal matter.
60 UNDERSTANDING THE FEATURES OF YOUR VEHICLE
Page 66 of 249
WARNING!
Tilting the steering column while the vehicle is
moving is dangerous. Without a stable steering col-
umn, you could lose control of the vehicle and have
an accident. Adjust the column only while the ve-
hicle is stopped. Be sure it is locked before driving.
TRACTION CONTROL SWITCH — IF EQUIPPED
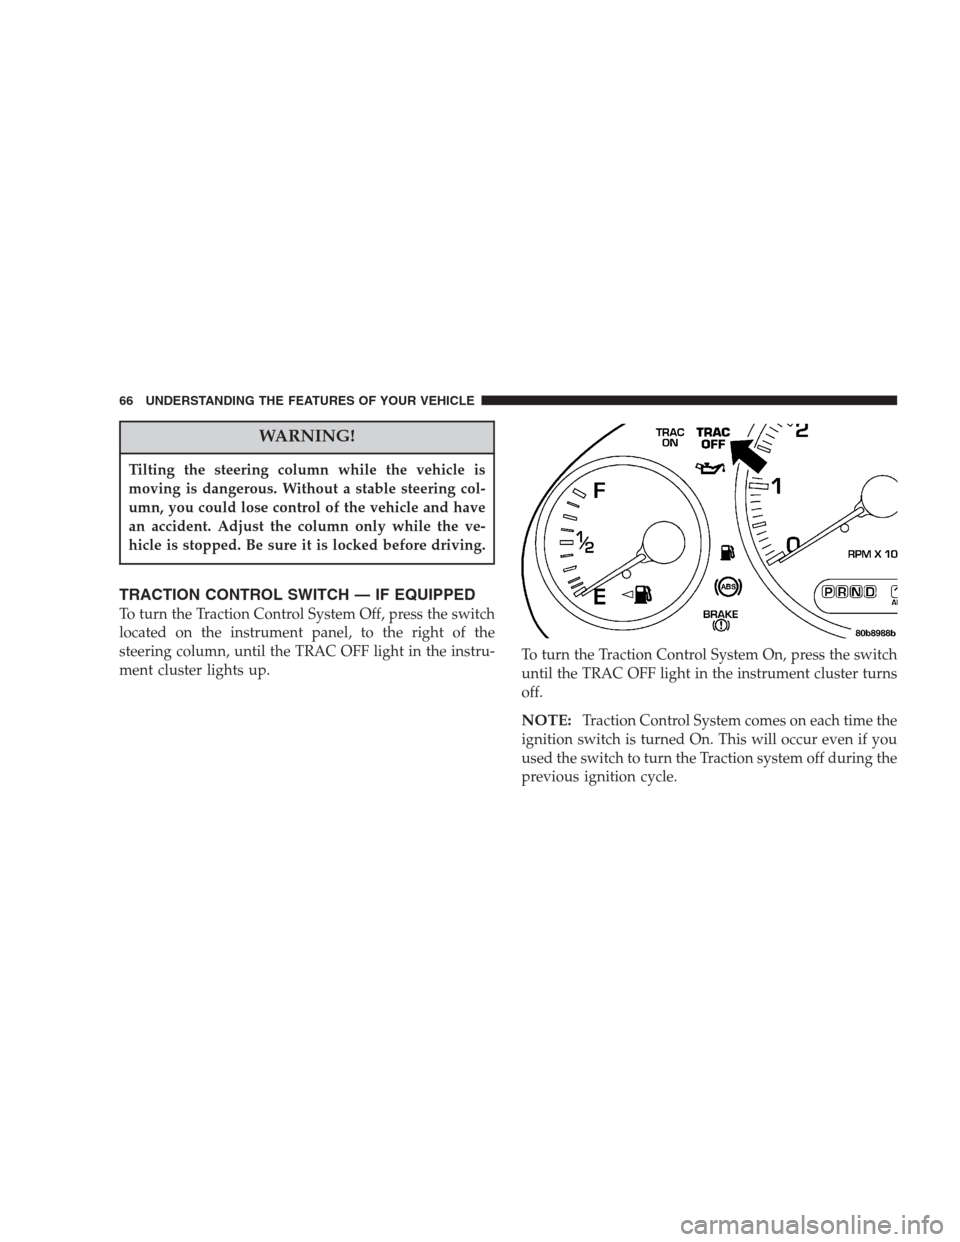
To turn the Traction Control System Off, press the switch
located on the instrument panel, to the right of the
steering column, until the TRAC OFF light in the instru-
ment cluster lights up.To turn the Traction Control System On, press the switch
until the TRAC OFF light in the instrument cluster turns
off.
NOTE:Traction Control System comes on each time the
ignition switch is turned On. This will occur even if you
used the switch to turn the Traction system off during the
previous ignition cycle.
66 UNDERSTANDING THE FEATURES OF YOUR VEHICLE
Page 67 of 249
ELECTRONIC SPEED CONTROL
This device can be engaged to take over the accelerator
operation at speeds between 30 mph (48 km/h) and 85
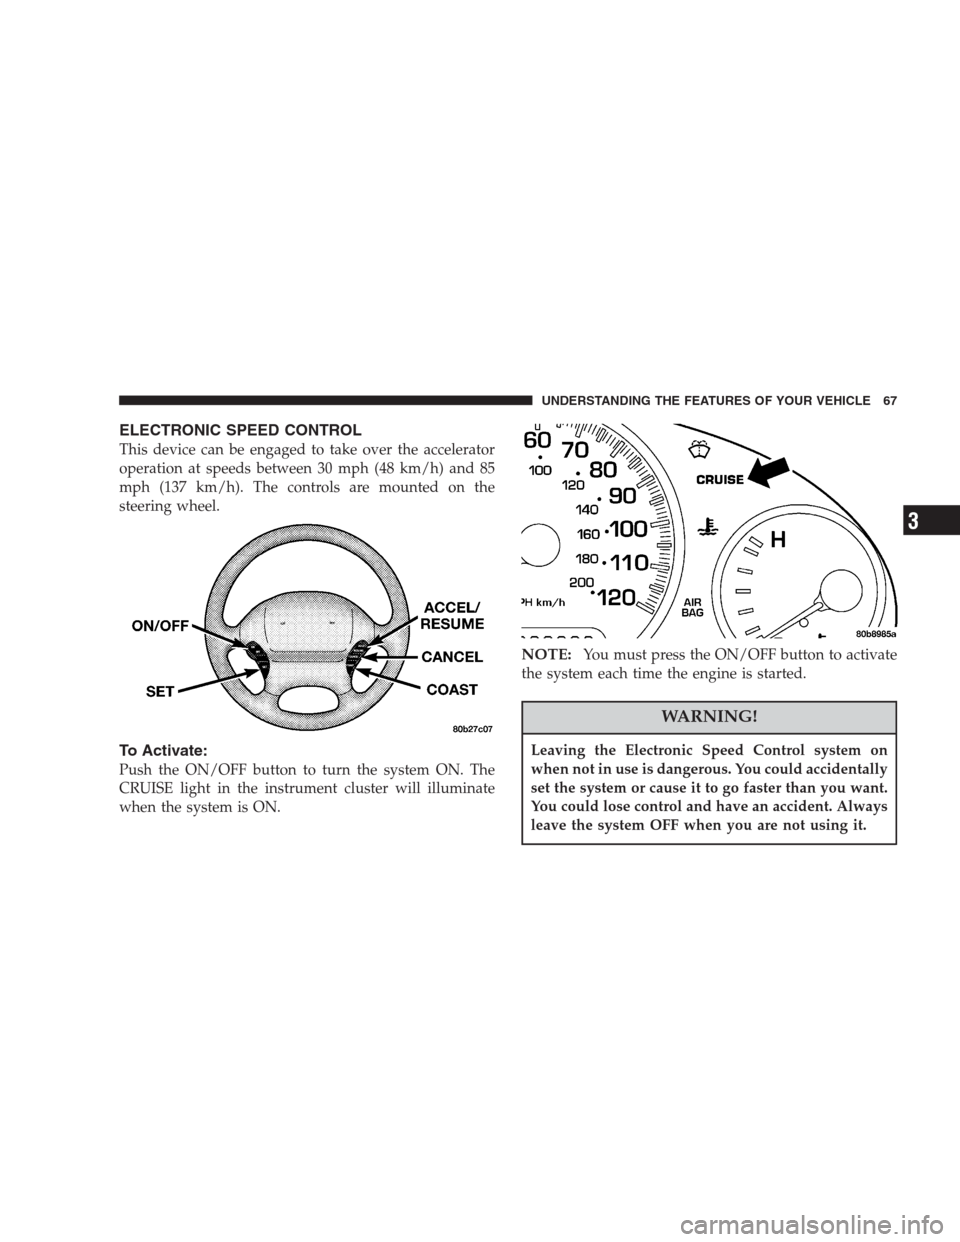
mph (137 km/h). The controls are mounted on the
steering wheel.
To Activate:
Push the ON/OFF button to turn the system ON. The
CRUISE light in the instrument cluster will illuminate
when the system is ON.
NOTE:You must press the ON/OFF button to activate
the system each time the engine is started.
WARNING!
Leaving the Electronic Speed Control system on
when not in use is dangerous. You could accidentally
set the system or cause it to go faster than you want.
You could lose control and have an accident. Always
leave the system OFF when you are not using it.
UNDERSTANDING THE FEATURES OF YOUR VEHICLE 67
3
Page 72 of 249
WARNING!
Vehicle exhaust contains carbon monoxide, a danger-
ous gas. Do not run the vehicle’s exhaust while
training the transceiver. Exhaust gas can cause seri-
ous injury or death.
WARNING!
Your motorized door or gate will open and close
while you are training the universal transceiver. Do
not train the transceiver if people or pets are in the
path of the door or gate. A moving door or gate can
cause serious injury or death to people and pets or
damage to objects.
2. Erase the factory test codes by pressing the two
outside buttons. Release the buttons when the light in the
overhead console display begins to flash (about 20 sec-
onds).
NOTE:Step 2 does not have to be followed to program
additional hand held transmitters.
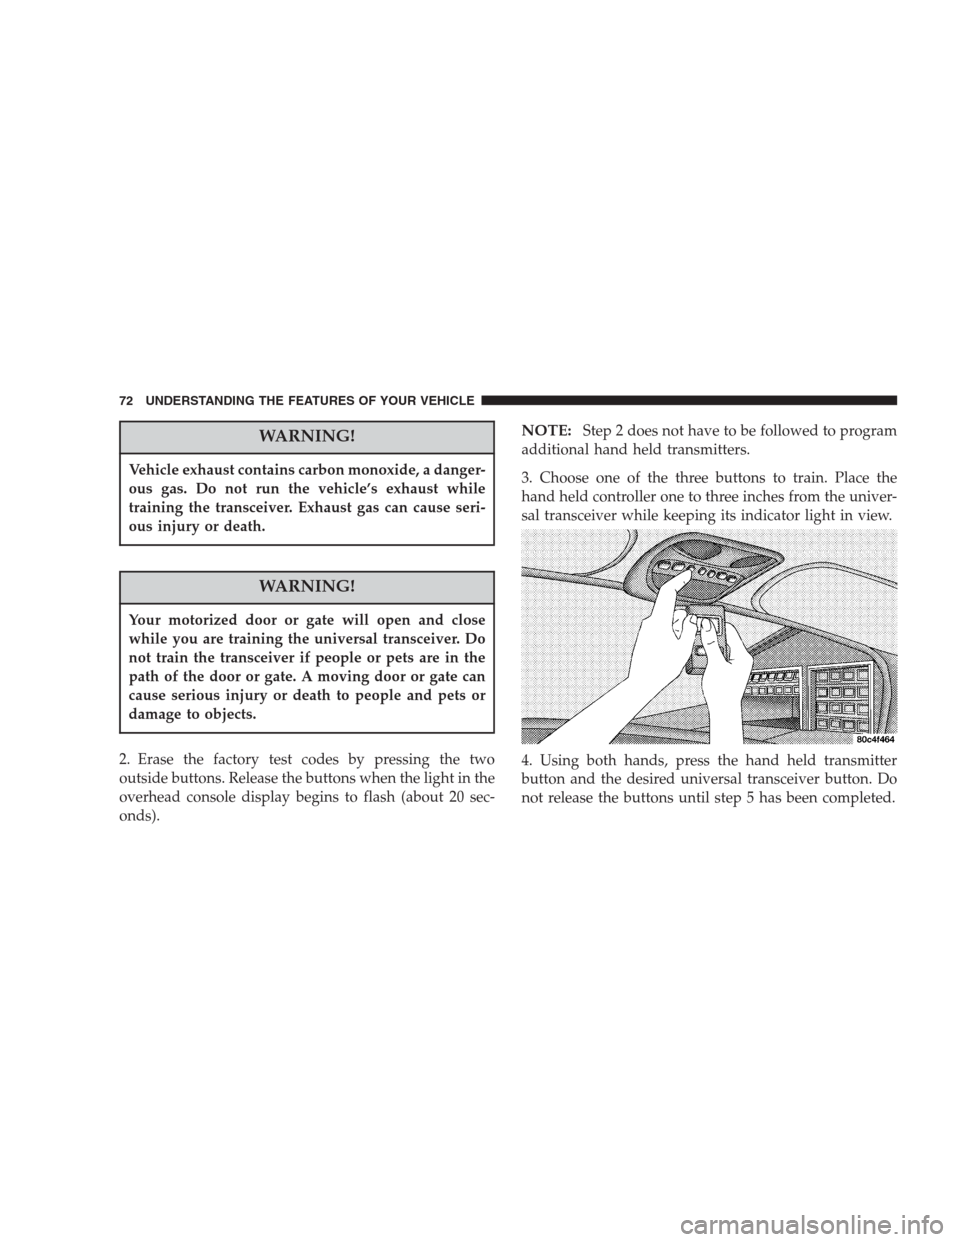
3. Choose one of the three buttons to train. Place the
hand held controller one to three inches from the univer-
sal transceiver while keeping its indicator light in view.
4. Using both hands, press the hand held transmitter
button and the desired universal transceiver button. Do
not release the buttons until step 5 has been completed.
72 UNDERSTANDING THE FEATURES OF YOUR VEHICLE
Page 88 of 249
INSTRUMENT CLUSTER DESCRIPTION
1. Fuel Gauge
When the ignition is in the ON position, the
pointer will show the level of fuel remaining in
the tank.
2. Low Fuel Warning Light
When the fuel level drops to about 2 gallons (8
liters), the Low Fuel symbol will light and re-
main lit until fuel is added. A warning chime will
sound when the light comes on.
3. Low Oil Pressure Light
This light indicates low engine oil pressure. The
light should come on briefly as a bulb check
when the engine is first started. If the light stays on or
comes on while driving, stop the vehicle and shut off
the engine. DO NOT operate the vehicle until the
cause is corrected.This light does not show how
much oil is in the engine.The engine oil level must be
checked under the hood.4. TRAC ON/OFF Lights
The Traction Control On light (TRAC ON) will come on
momentarily as a bulb check when the ignition switch is
first turned ON. If the light does not come on, have the
bulb replaced.
The TRAC ON light will also come on when the system
is controlling traction.
The Traction Control Off light (TRAC OFF) will come on
momentarily as a bulb check when the ignition switch is
first turned ON. If the light does not come on, have the
bulb checked.
The TRAC OFF light will also come on when the Traction
Control switch has been used to turn the system off.
5. Trunk Ajar Light
This light indicates that the trunk is not latched
6. Tachometer
Measures engine revolutions-per-minute (R.P.M.). The
red numbers at the end on the scale show the maximum
permissible R.P.M. Ease off on the accelerator before
reaching the red area.
88 UNDERSTANDING YOUR INSTRUMENT PANEL
Page 89 of 249
7. Turn Signal Indicators
The arrow will flash in unison with the exterior
turn signal, when using the turn signal lever.
8. High Beam Indicator
This light shows that the headlights are on high
beam. Pull the turn signal lever towards the
steering wheel to switch the headlights from high or
low beam.
9. Seat Belt Reminder Light
The light will come on after the ignition is
turned on. The light will remain lit until the
seatbelt is fastened.
10. Door Ajar Light
This light shows that a door is not completely
closed. A warning chime will sound if the vehicle
is moving with a door partially closed.
11. Speedometer
Shows vehicle speed in miles-per-hour or kilometers-per-
hour.
12. Low Washer Fluid Light
This symbol will light whenever the fluid reser-
voir is less than 1/4 filled. Adding washer fluid
will cause the light to go out the next time the
ignition is cycled. A warning chime will sound when
the light comes on.
13. Cruise (Speed Control) Light
This light shows that the Speed Control System is ON.
14. Temperature Light
This light warns of an overheated engine cool-
ant condition. A warning chime will sound
when the light comes on.
15. Engine Coolant Temperature Gauge
The temperature gauge shows engine coolant
temperature. Any reading within the 5 gauge
marks between Hot and Cold shows that the
engine cooling system is operating properly. The
gauge pointer may show a higher than normal tem-
perature when driving in hot weather, up mountain
grades, in heavy stop and go traffic, or when towing a
trailer.
UNDERSTANDING YOUR INSTRUMENT PANEL 89
4