spare wheel DODGE JOURNEY 2010 1.G User Guide
[x] Cancel search | Manufacturer: DODGE, Model Year: 2010, Model line: JOURNEY, Model: DODGE JOURNEY 2010 1.GPages: 88, PDF Size: 12.49 MB
Page 57 of 88

JACKING AND TIRE CHANGING
WARNING!
• Do not attempt to change a tire on the side of the vehicle close to moving traffic.Pull far enough off the road to avoid the danger of being hit when operating the jack
or changing the wheel.
• Getting under a jacked-up vehicle is dangerous. The vehicle could slip off the jack and fall on you. You could be crushed. Never get any part of your body under a
vehicle that is on a jack. If you need to get under a raised vehicle, take it to a
service center where it can be raised on a lift.
• The jack is designed to use as a tool for changing tires only. The jack should not be used to lift the vehicle for service purposes. The vehicle should be jacked on a firm,
level surface only. Avoid ice or slippery areas.
• If it is necessary to retrieve the spare tire from under the vehicle on the side of the vehicle close to moving traffic, pull far enough off the road to avoid the danger of
being hit.
WARNING!
• The compact spare tire is for emergency use only. Installation of this compact sparetire affects vehicle handling.
• Do not drive more than 50 mph (80 km/h) with a compact spare tire.
• Keep the compact spare tire inflated to the cold tire inflation pressure, listed on either your tire placard or limited use spare tire and wheel assembly.
• Replace (or repair) the original tire at the first opportunity and reinstall it on your vehicle. Failure to do so could result in loss of vehicle control.
55
WHAT TO DO IN EMERGENCIES
Page 58 of 88

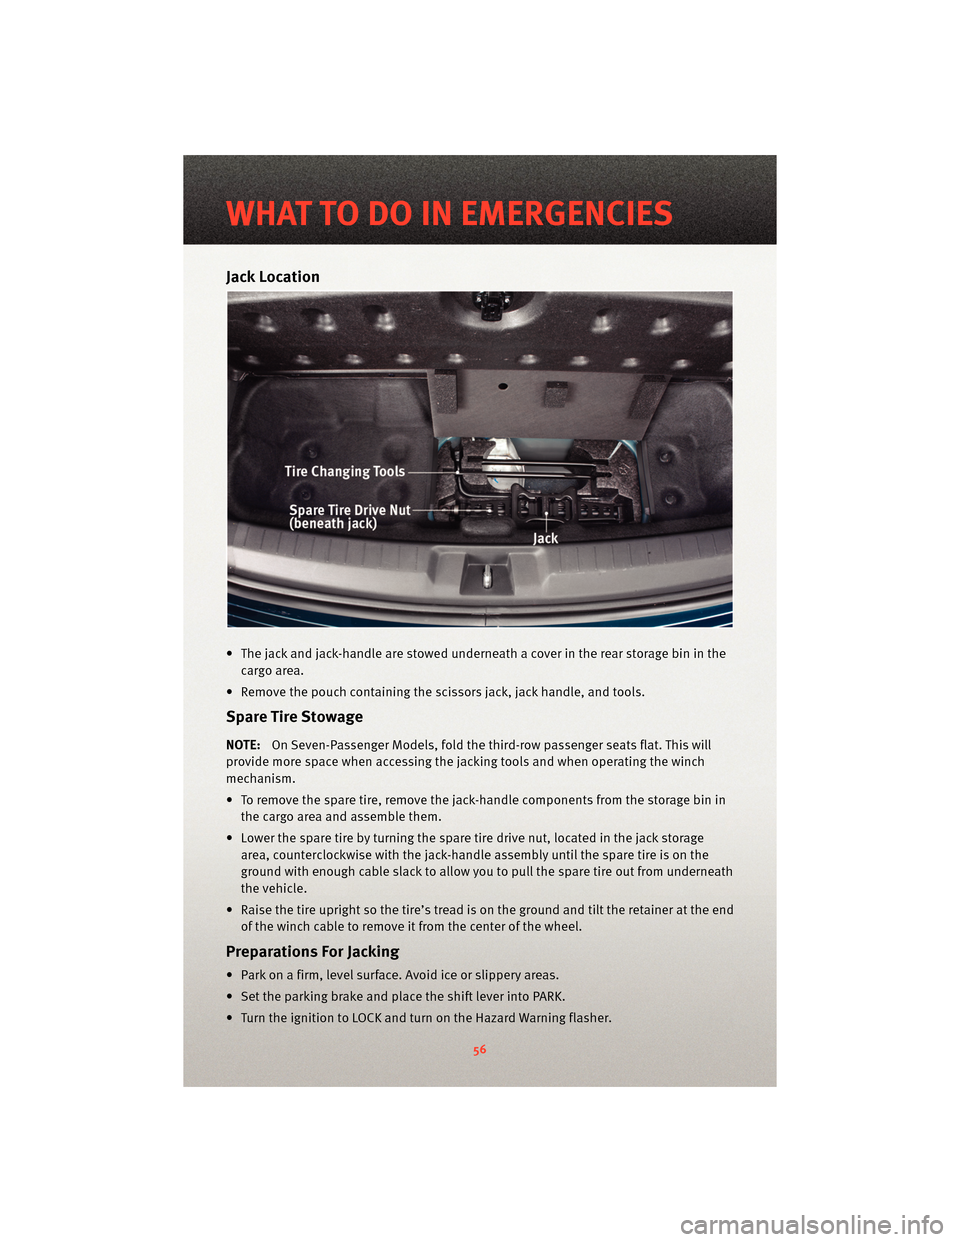
Jack Location
• The jack and jack-handle are stowed underneath a cover in the rear storage bin in thecargo area.
• Remove the pouch containing the scissors jack, jack handle, and tools.
Spare Tire Stowage
NOTE:On Seven-Passenger Models, fold the third-row passenger seats flat. This will
provide more space when accessing the jacking tools and when operating the winch
mechanism.
• To remove the spare tire, remove the jack-handle components from the storage bin in the cargo area and assemble them.
• Lower the spare tire by turning the spare tire drive nut, located in the jack storage area, counterclockwise with the jack-h andle assembly until the spare tire is on the
ground with enough cable slack to allow you to pull the spare tire out from underneath
the vehicle.
• Raise the tire upright so the tire’s tread is o n the ground and tilt the retainer at the end
of the winch cable to remove it from the center of the wheel.
Preparations For Jacking
• Park on a firm, level surface. Avoid ice or slippery areas.
• Set the parking brake and place the shift lever into PARK.
• Turn the ignition to LOCK and turn on the Hazard Warning flasher.
WHAT TO DO IN EMERGENCIES
56
Page 59 of 88

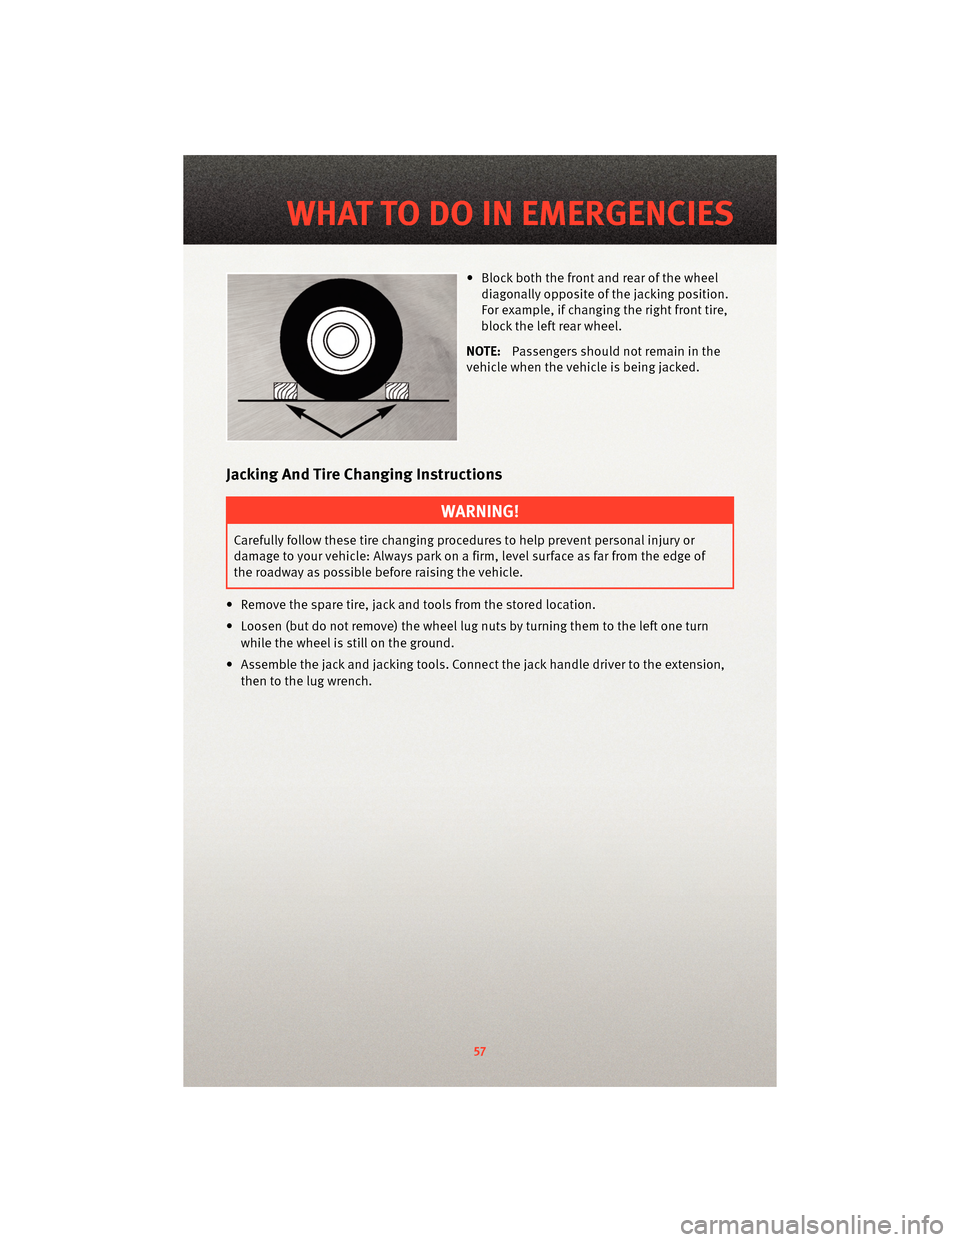
• Block both the front and rear of the wheeldiagonally opposite of the jacking position.
For example, if changing the right front tire,
block the left rear wheel.
NOTE: Passengers should not remain in the
vehicle when the vehicle is being jacked.
Jacking And Tire Changing Instructions
WARNING!
Carefully follow these tire changing p rocedures to help prevent personal injury or
damage to your vehicle: Always park on a firm, level surface as far from the edge of
the roadway as possible before raising the vehicle.
• Remove the spare tire, jack and tools from the stored location.
• Loosen (but do not remove) the wheel lug nuts by turning them to the left one turn while the wheel is still on the ground.
• Assemble the jack and jacking tools. Connect the jack handle driver to the extension, then to the lug wrench.
57
WHAT TO DO IN EMERGENCIES
Page 60 of 88

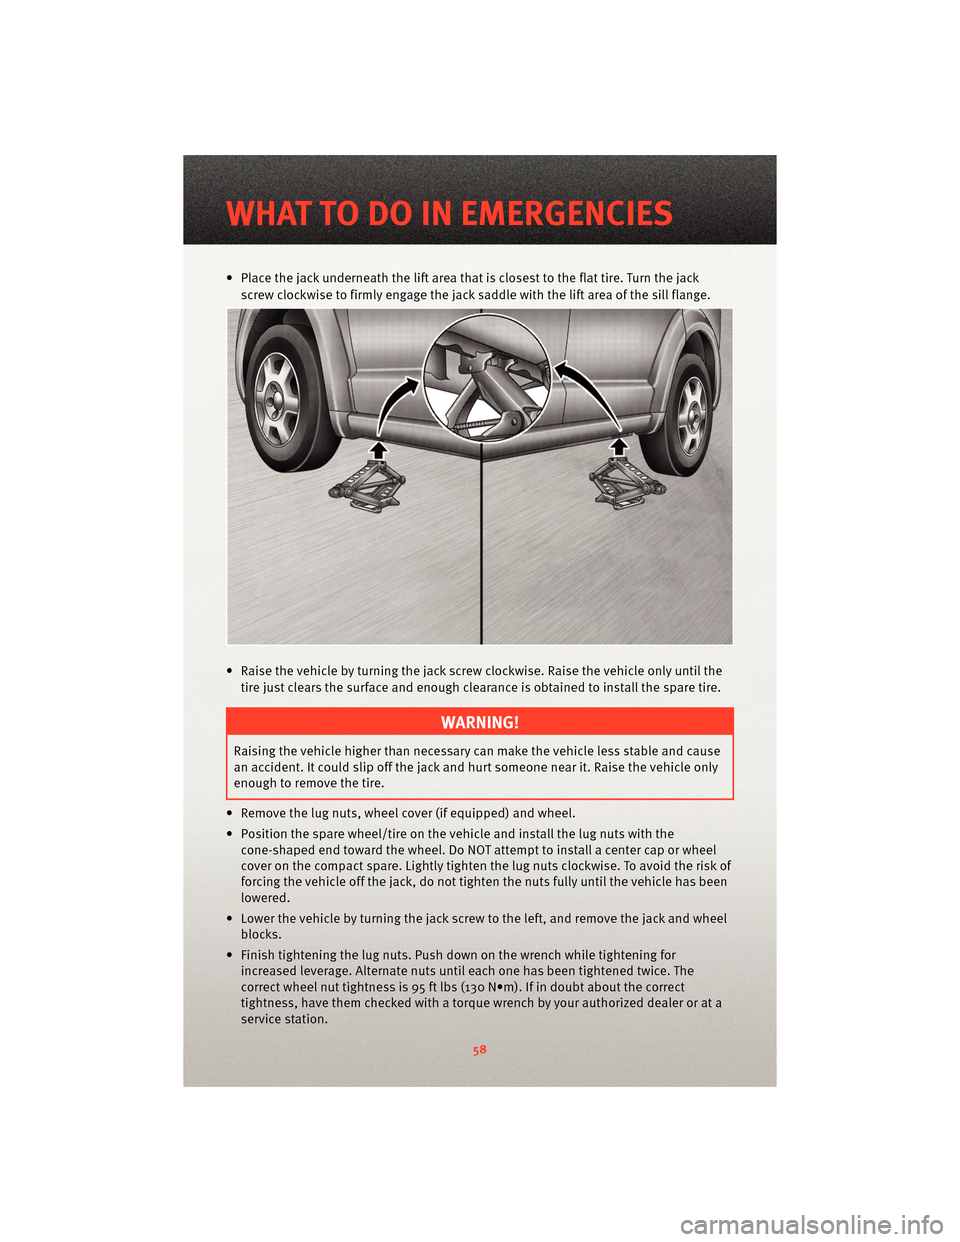
• Place the jack underneath the lift area that is closest to the flat tire. Turn the jackscrew clockwise to firmly engage the jack saddle with the lift area of the sill flange.
• Raise the vehicle by turning the jack screw clockwise. Raise the vehicle only until the tire just clears the surface and enough clearance is obtained to install the spare tire.
WARNING!
Raising the vehicle higher than necessary can make the vehicle less stable and cause
an accident. It could slip off the jack and hurt someone near it. Raise the vehicle only
enough to remove the tire.
• Remove the lug nuts, wheel cover (if equipped) and wheel.
• Position the spare wheel/tire on the vehicle and install the lug nuts with the cone-shaped end toward the wheel. Do NOT attempt to install a center cap or wheel
cover on the compact spare. Lightly tighten the lug nuts clockwise. To avoid the risk of
forcing the vehicle off the jack, do not tighten the nuts fully until the vehicle has been
lowered.
• Lower the vehicle by turning the jack screw to the left, and remove the jack and wheel blocks.
• Finish tightening the lug nuts. Push do wn on the wrench while tightening for
increased leverage. Alternate nuts until each one has been tightened twice. The
correct wheel nut tightness is 95 ft lbs (130 N•m). If in doubt about the correct
tightness, have them checked with a tor que wrench by your authorized dealer or at a
service station.
WHAT TO DO IN EMERGENCIES
58