sat nav DODGE JOURNEY 2011 1.G User Guide
[x] Cancel search | Manufacturer: DODGE, Model Year: 2011, Model line: JOURNEY, Model: DODGE JOURNEY 2011 1.GPages: 108, PDF Size: 4.41 MB
Page 3 of 108
INTRODUCTION/WELCOMEWelcome From Chrysler Group LLC....2
CONTROLS AT A GLANCEDriver Cockpit...............4
Instrument Cluster .............6
GETTING STARTEDKeyFob...................8
Remote Start................8
Keyless Enter-N-Go .............9
Theft Alarm ................11
Seat Belt .................12
Supplemental Restraint System (SRS) —
Air Bags ..................13
Child Restraints .............14
Front Seats ................17
Rear Seats ................19
Heated Seats ...............21
Tilt / Telescoping Steering Column ....23
OPERATING YOUR VEHICLETurn Signal/Wiper/Washer/High Beam
Lever...................24
Headlight Switch .............25
Speed Control ..............26
Climate Control ..............27
Parkview
®Rear Back-Up Camera ....30
Power Sunroof ..............30
Wind Buffeting ..............31
ELECTRONICSYour Vehicle's Sound System ......32
Identifying Your Radio ..........34
Uconnect Touch™ 4.3 & 4.3S At A
Glance ..................35
Uconnect Touch™ 8.4 & 8.4N At A
Glance ..................36
Radio ...................38
Sirius Satellite Radio ...........39
Player ...................42
Garmin
®Navigation (8.4N Only) ....43
Sirius Travel Link (8.4N Only) ......47
Playing iPod/USB/MP3 Devices .....48
Uconnect™ Phone (Bluetooth
®Hands
Free Calling) ...............49
Uconnect™ Voice Command
(8.4 & 8.4N Only) ............54
Video Entertainment System (VES)™ . . 55 Electronic Vehicle Information Center
(EVIC)
...................57
Programmable Features .........58
Universal Garage Door Opener
(HomeLink
®) ...............59
Power Inverter ..............61
Power Outlet ...............61
UTILITY
Trailer Towing Weights (Maximum
Trailer Weight Ratings) ..........63
Recreational Towing (Behind
Motorhome, Etc.) .............64
WHAT TO DO IN EMERGENCIES
24-Hour Towing Assistance .......65
Instrument Cluster Warning Lights . . . 65
If Your Engine Overheats .........69
Jacking And Tire Changing ........70
Jump-Starting ..............74
Shift Lever Override ...........76
Towing A Disabled Vehicle ........77
Freeing A Stuck Vehicle .........78
Event Data Recorder (EDR) .......79
MAINTAINING YOUR VEHICLEOpening The Hood............80
Engine Compartment ...........81
Fluids And Capacities ..........83
Maintenance Chart ............85
Fuses ...................87
Tire Pressures ...............90
Wheel And Wheel Trim Care .......91
Exterior Bulbs ..............91
CONSUMER ASSISTANCEChrysler Group LLC Customer Center . . 92
Chrysler Canada Inc. Customer
Center...................92
Assistance For The Hearing Impaired . . 92
Publications Ordering ..........92
Reporting Safety Defects In The
50 United States And
Washington, D.C. .............93
MOPAR ACCESSORIESAuthentic Accessories By MOPAR®...94
INDEX..................95
TABLE OF CONTENTS
Page 36 of 108
IDENTIFYING YOUR RADIO
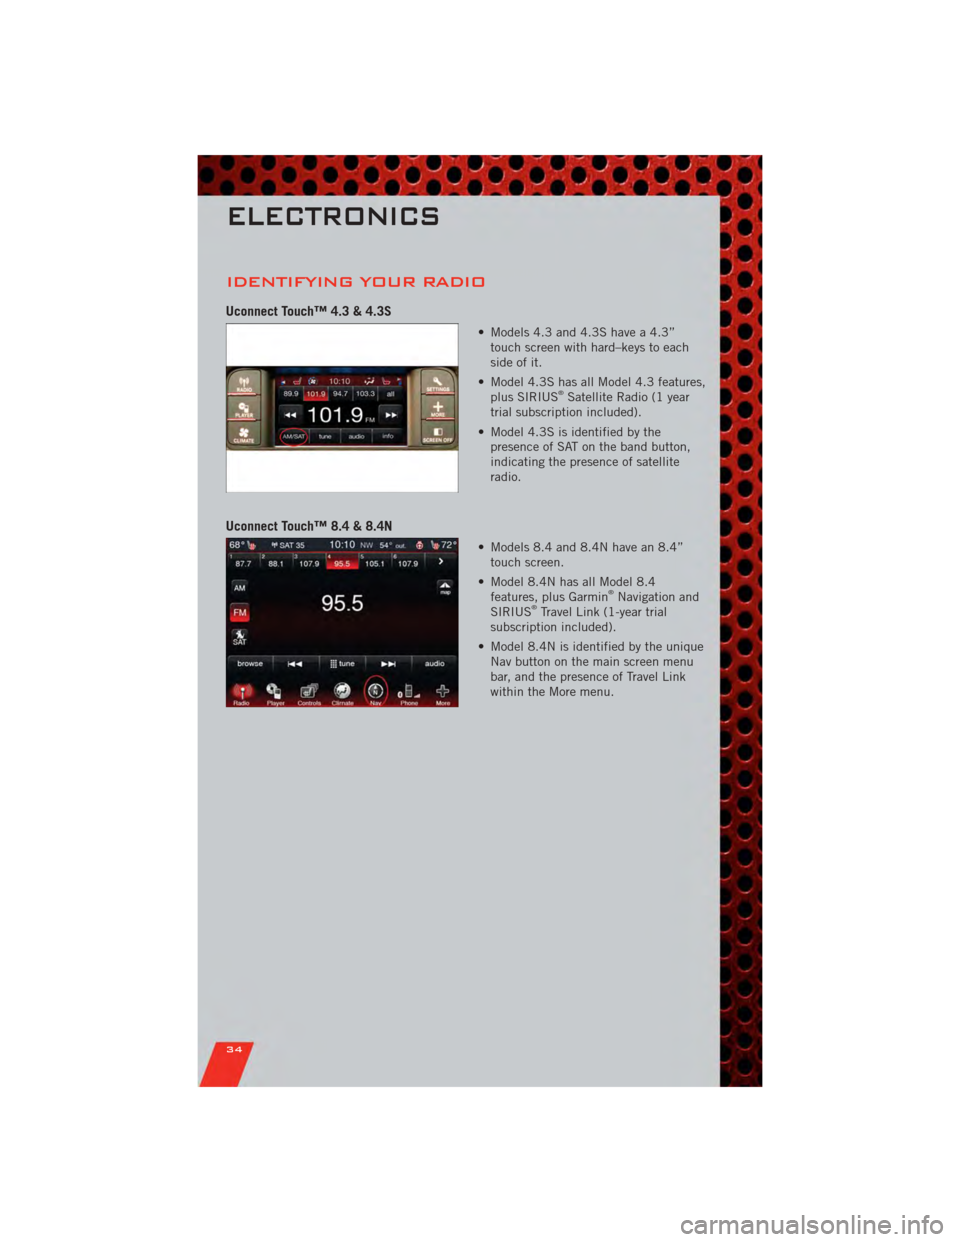
Uconnect Touch™ 4.3 & 4.3S
• Models 4.3 and 4.3S have a 4.3”touch screen with hard–keys to each
side of it.
• Model 4.3S has all Model 4.3 features, plus SIRIUS
®Satellite Radio (1 year
trial subscription included).
• Model 4.3S is identified by the presence of SAT on the band button,
indicating the presence of satellite
radio.
Uconnect Touch™ 8.4 & 8.4N
• Models 8.4 and 8.4N have an 8.4”touch screen.
• Model 8.4N has all Model 8.4 features, plus Garmin
®Navigation and
SIRIUS®Travel Link (1-year trial
subscription included).
• Model 8.4N is identified by the unique Nav button on the main screen menu
bar, and the presence of Travel Link
within the More menu.
ELECTRONICS
34
Page 46 of 108
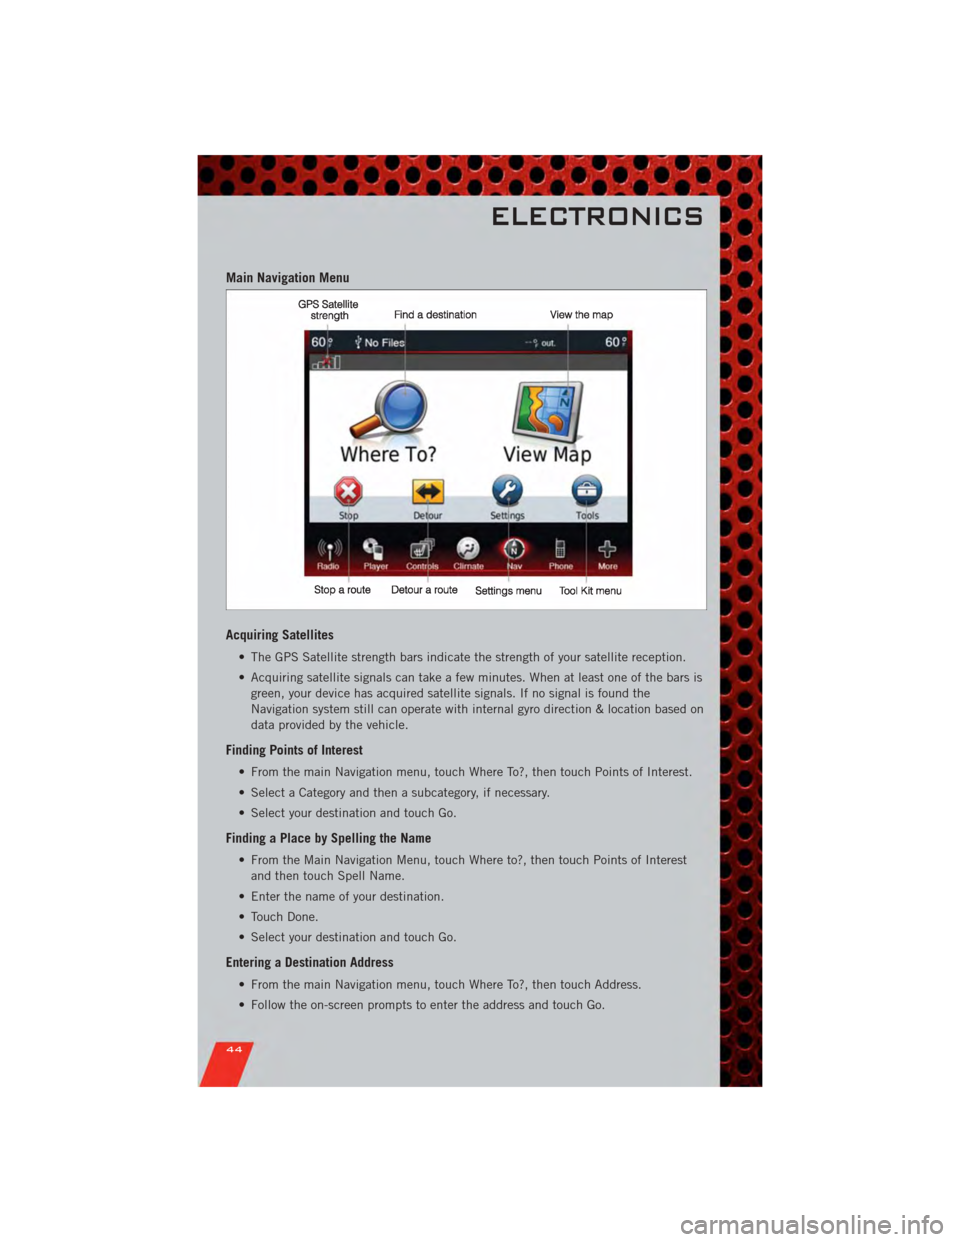
Main Navigation Menu
Acquiring Satellites
• The GPS Satellite strength bars indicate the strength of your satellite reception.
• Acquiring satellite signals can take a few minutes. When at least one of the bars isgreen, your device has acquired satellite signals. If no signal is found the
Navigation system still can operate with internal gyro direction & location based on
data provided by the vehicle.
Finding Points of Interest
• From the main Navigation menu, touch Where To?, then touch Points of Interest.
• Select a Category and then a subcategory, if necessary.
• Select your destination and touch Go.
Finding a Place by Spelling the Name
• From the Main Navigation Menu, touch Where to?, then touch Points of Interestand then touch Spell Name.
• Enter the name of your destination.
• Touch Done.
• Select your destination and touch Go.
Entering a Destination Address
• From the main Navigation menu, touch Where To?, then touch Address.
• Follow the on-screen prompts to enter the address and touch Go.
ELECTRONICS
44
Page 57 of 108
• Use the radio ON/OFF VOLUME rotary knob to adjust the volume to a comfortablelevel while the Voice Command system is speaking. The volume setting for Voice
Command is different than the audio system.
• Refer to the Understand The Features Of Your Vehicle section of your vehicle's Owner's Manual on the DVD for further details.
Common Voice Commands (Examples)
Switch Modes “AM”
“FM”
“Satellite”
Radio (FM, AM) “95.5”
“95.5 FM”
SIRIUS Satellite Radio “39”
“Tune to Satellite channel 39”
“Foxxhole”
SIRIUS Travel Link “Show fuel prices”
“Show movie listings”
“Show current weather”
“Show extended weather”
“Show Travel Link favorites”
“Show NFL headlines”
“Show NBA rankings”
“Show NFL schedules”
“Show NBA scores”
Navigation “Repeat guidance”
WARNING!
Any voice commanded system should be used only in safe driving conditions
following local laws and phone use. All attention should be kept on the roadway
ahead. Failure to do so may result in a collision causing you and others to be
severely injured or killed.
VIDEO ENTERTAINMENT SYSTEM (VES)™
System Operation
• The screen is located on the headliner behind the front seat. To lower the screen,
press the release button located in the rear of the overhead console.
• The system may be controlled by the front seat occupants using the touch-screen radio, or by the rear seat occupants using the remote control.
• The video screen displays information in a split-screen format. The left side of the screen is referred to as Channel 1 and the right side of the screen is referred to as
Channel 2. All modes except video modes are displayed in a split-screen format.
• To use the headphones, press the power button located on the right ear cup. Select the channel on the headphones (1 or 2) that corresponds to the channel selected
on the VES™ screen.
ELECTRONICS
55
Page 96 of 108
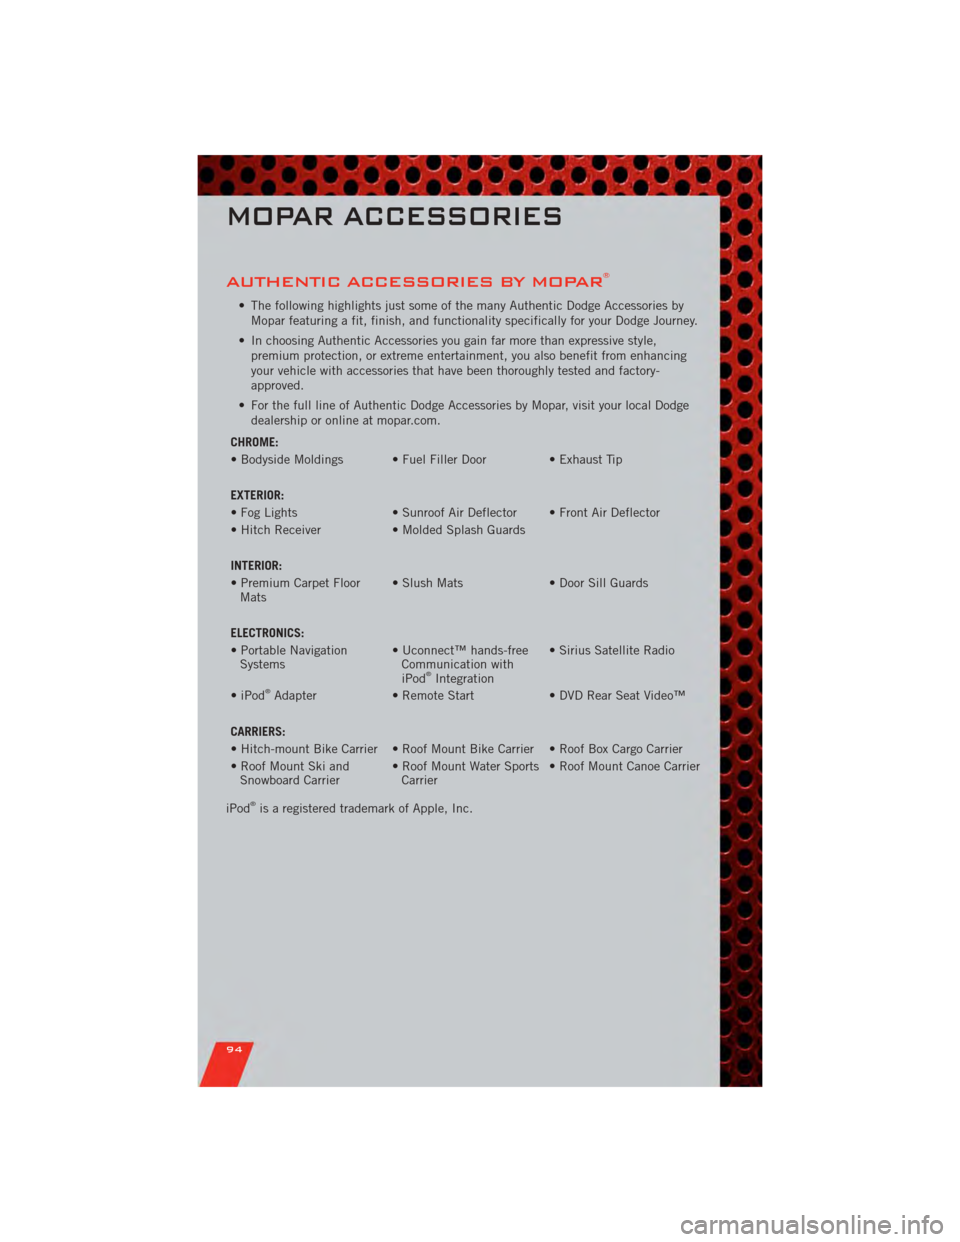
AUTHENTIC ACCESSORIES BY MOPAR®
• The following highlights just some of the many Authentic Dodge Accessories byMopar featuring a fit, finish, and functionality specifically for your Dodge Journey.
• In choosing Authentic Accessories you gain far more than expressive style, premium protection, or extreme entertainment, you also benefit from enhancing
your vehicle with accessories that have been thoroughly tested and factory-
approved.
• For the full line of Authentic Dodge Accessories by Mopar, visit your local Dodge dealership or online at mopar.com.
CHROME:
• Bodyside Moldings • Fuel Filler Door • Exhaust Tip
EXTERIOR:
• Fog Lights • Sunroof Air Deflector • Front Air Deflector
• Hitch Receiver • Molded Splash Guards
INTERIOR:
• Premium Carpet Floor Mats • Slush Mats
• Door Sill Guards
ELECTRONICS:
• Portable Navigation Systems • Uconnect™ hands-free
Communication with
iPod
®Integration • Sirius Satellite Radio
• iPod®Adapter • Remote Start • DVD Rear Seat Video™
CARRIERS:
• Hitch-mount Bike Carrier • Roof Mount Bike Carrier • Roof Box Cargo Carrier
• Roof Mount Ski and Snowboard Carrier • Roof Mount Water Sports
Carrier • Roof Mount Canoe Carrier
iPod
®is a registered trademark of Apple, Inc.
MOPAR ACCESSORIES
94