clock DODGE JOURNEY 2013 1.G User Guide
[x] Cancel search | Manufacturer: DODGE, Model Year: 2013, Model line: JOURNEY, Model: DODGE JOURNEY 2013 1.GPages: 630
Page 384 of 630
Rear Blower Control
The rear blower control knob can be manually set to off,
or any fixed blower speed, by rotating the knob from low
to high. This allows the rear seat occupants to control the
volume of air circulated in the rear of the vehicle.
CAUTION!
Interior air enters the Rear Automatic Temperature
Control System through an intake grille, located in
the right side trim panel behind the third row seats.
The rear outlets are located in the right side trim
panel of the 3rd Row seat. Do not block or place
objects directly in front of the inlet grille or heater
outlets. The electrical system could overload causing
damage to the blower motor.
Rear Temperature Control
To change the temperature in the rear of the vehicle,
rotate the temperature knob counterclockwise to lower
the temperature, and clockwise to increase the tempera-
ture. The rear temperature settings are displayed in the
Uconnect® system.
When rear controls are locked by the Uconnect® system
, the Rear Temperature Lock symbol on the temperature
knob is illuminated and any rear overhead adjustments
are ignored.
Rear Mode Control
Auto Mode
•The rear system automatically maintains the correct
mode and comfort level desired by the rear seat
occupants.
382 UNDERSTANDING YOUR INSTRUMENT PANEL
Page 505 of 630
NOTE:Assemble components 2 and 3 by seating the
small ball at the end of component 2 in the small hole at
the end of component 3. This will lock these components
together. Assemble components 1 and 2 so that the wheel
nut socket at the end of component 1 faces upward when
seated on component 2. This will make it easier to rotate
the assembly when operating the winch mechanism.
2. Fit the assembled jack-handle over the winch drive
nut located in the jack storage area. Rotate the jack-
handle assembly counterclockwise until the spare tire
is on the ground with enough cable slack to allow you
to pull the spare tire out from underneath the vehicle.
CAUTION!
The winch mechanism is designed for use with the
jack-handle only. Use of an air wrench or other power
tools is not recommended and it can damage the winch.
3. Pull the spare tire out from underneath the vehicle and
raise it upright so the tire’s tread is on the ground.
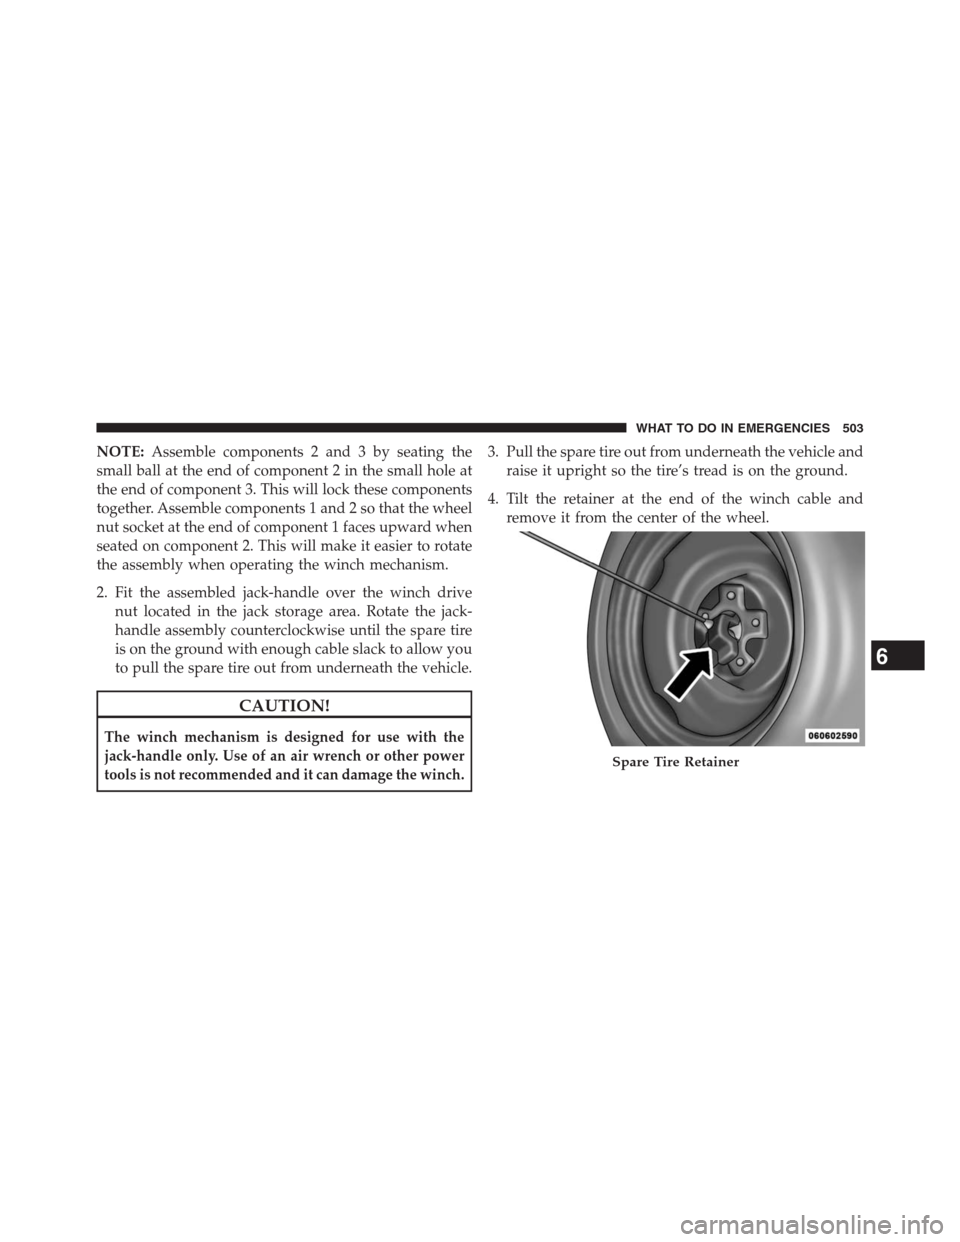
4. Tilt the retainer at the end of the winch cable and
remove it from the center of the wheel.
Spare Tire Retainer
6
WHAT TO DO IN EMERGENCIES 503
Page 506 of 630
Spare Tire Stowage
NOTE:Refer to “Spare Tire Removal” for information on
assembling the winch tools.
1. Place the spare tire near to the winch cable. Hold the
spare upright so that the tire’s tread is on the ground
and the valve stem is at the top of the wheel facing
away from the rear of the vehicle.
2. Tilt the retainer at the end of the winch cable and drop
it through the center of the wheel. Then place the spare
tire with the cable and retainer underneath the vehicle.
3. Fit the assembled jack-handle over the winch drive
nut. Rotate the jack-handle assembly clockwise to
raise the spare tire into the storage area. Continue to
rotate the jack-handle assembly until you hear the
winch mechanism click three times. It cannot be over
tightened. Push against the tire several times to be
sure it is held securely in place.
Jacking Instructions
WARNING!
Carefully follow these tire changing warnings to help
prevent personal injury or damage to your vehicle:
•Always park on a firm, level surface as far from the
edge of the roadway as possible before raising the
vehicle.
•Turn on the Hazard Warning flasher.
•Block the wheel diagonally opposite the wheel to
be raised.
•Set the parking brake firmly and set an automatic
transmission in PARK.
•
Never start or run the engine with the vehicle on a
jack.
•Do not let anyone sit in the vehicle when it is on a
jack.
(Continued)
504 WHAT TO DO IN EMERGENCIES
Page 508 of 630
1. Remove the spare tire, jack, and jack-handle from
stowage.
2. Loosen, but do not remove, the wheel nuts on the
wheel with the flat tire. Turn the wheel nuts counter-
clockwise one turn while the wheel is still on the
ground.
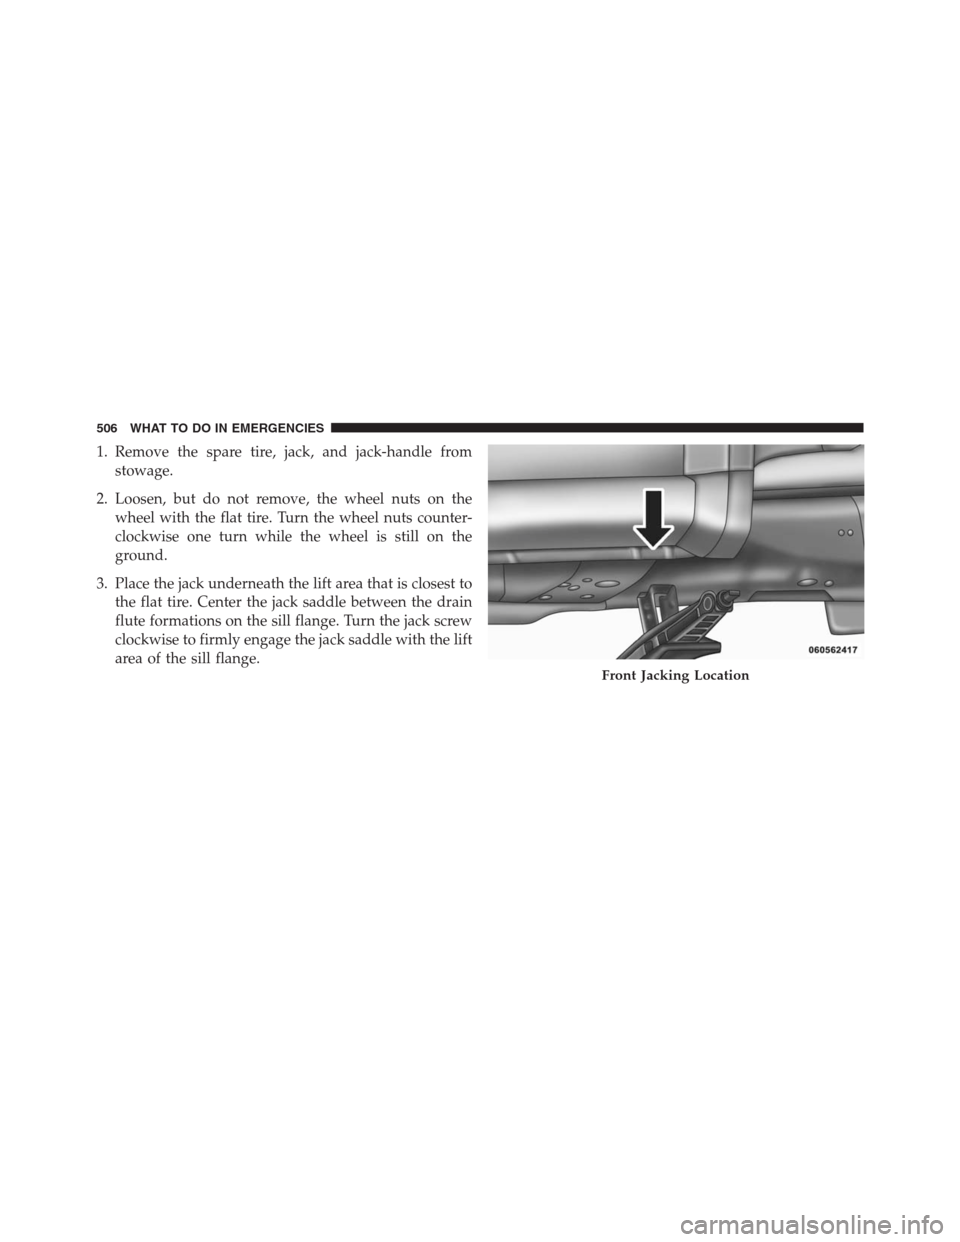
3. Place the jack underneath the lift area that is closest to
the flat tire. Center the jack saddle between the drain
flute formations on the sill flange. Turn the jack screw
clockwise to firmly engage the jack saddle with the lift
area of the sill flange.
Front Jacking Location
506 WHAT TO DO IN EMERGENCIES
Page 509 of 630
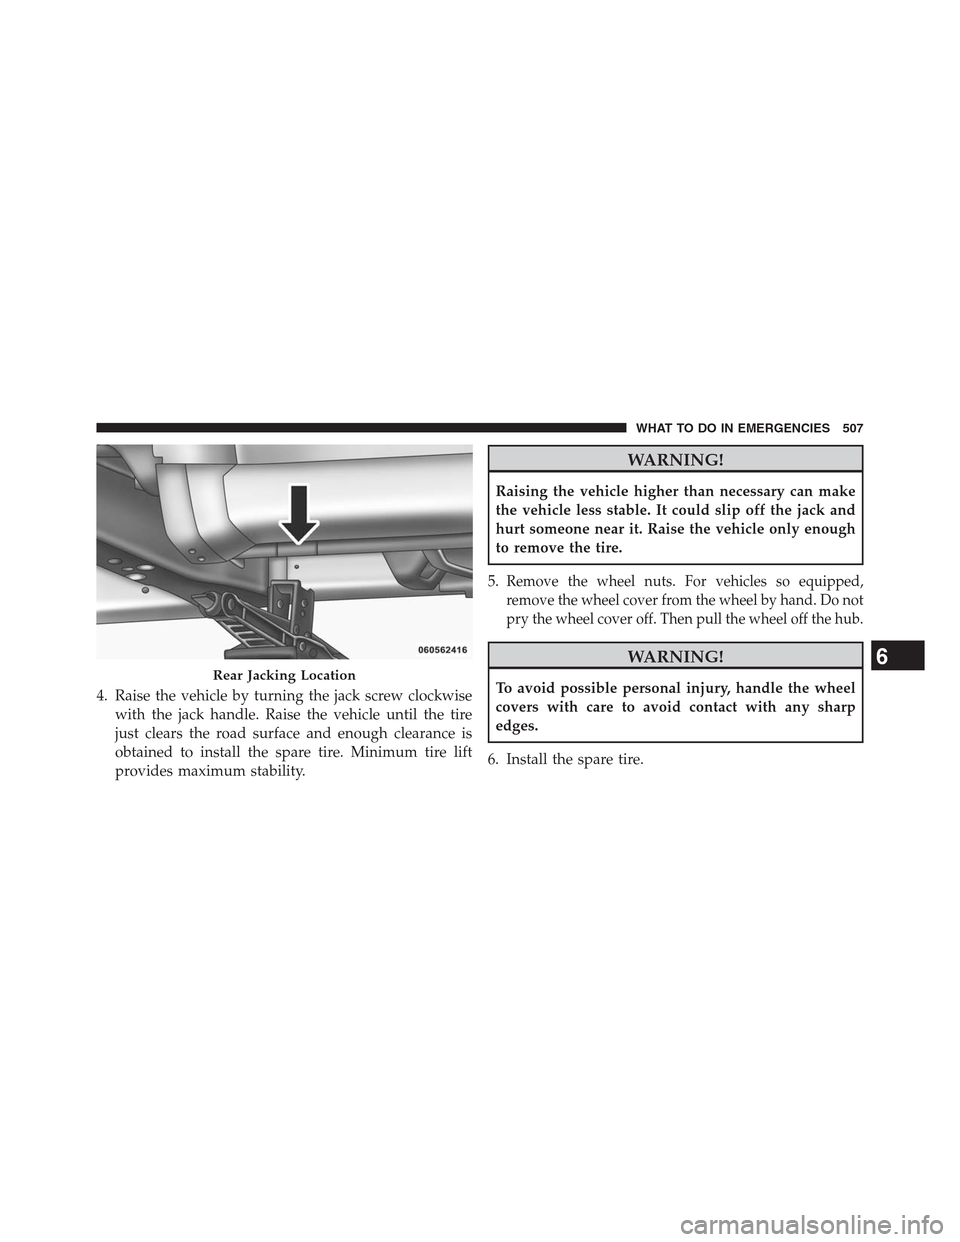
4. Raise the vehicle by turning the jack screw clockwise
with the jack handle. Raise the vehicle until the tire
just clears the road surface and enough clearance is
obtained to install the spare tire. Minimum tire lift
provides maximum stability.
WARNING!
Raising the vehicle higher than necessary can make
the vehicle less stable. It could slip off the jack and
hurt someone near it. Raise the vehicle only enough
to remove the tire.
5.
Remove the wheel nuts. For vehicles so equipped,
remove the wheel cover from the wheel by hand. Do not
pry the wheel cover off. Then pull the wheel off the hub.
WARNING!
To avoid possible personal injury, handle the wheel
covers with care to avoid contact with any sharp
edges.
6. Install the spare tire.Rear Jacking Location6
WHAT TO DO IN EMERGENCIES 507
Page 511 of 630
8. Lower the vehicle by turning the jack screw counter-
clockwise with the jack handle.
9. Finish tightening the lug nuts. Push down on the
wrench while at the end of the handle for increased
leverage. Tighten the lug nuts in a star pattern until
each nut has been tightened twice. The correct tight-
ness of each lug nut is 95 ft/lbs (130 N·m). If in doubt
about the correct tightness, have them checked with a
torque wrench by you authorized dealer or service
station.
10. Lower the jack to its fully closed position.11. Place the deflated (flat) tire in the cargo area.Do not
stow the deflated tire in the spare tire stowage
location.Have the deflated (flat) tire repaired or
replaced as soon as possible.
12. To stow the winch cable and retainer, fit the as-
sembled jack-handle over the winch drive nut. Rotate
the jack-handle assembly clockwise until you hear
the winch mechanism click three times. It cannot be
over tightened.
13. Stow the jack-handle and jack. Remove the wheel
blocks from the vehicle and release the park brake.
14. Check the tire pressure as soon as possible. Adjust the
tire pressure as required.
6
WHAT TO DO IN EMERGENCIES 509
Page 513 of 630
3. Align the valve notch in the wheel cover with the
valve stem on the wheel. Install the cover by hand,
snapping the cover over the two lug nuts. Do not use
a hammer or excessive force to install the cover.
4. Install the remaining lug nuts with the cone shaped
end of the nut toward the wheel. Lightly tighten the
lug nuts.
WARNING!
To avoid the risk of forcing the vehicle off the jack,
do not tighten the lug nuts fully until the vehicle has
been lowered. Failure to follow this warning may
result in personal injury.
5. Lower the vehicle to the ground by turning the jack
handle counterclockwise.6.
Finish tightening the lug nuts. Push down on the
wrench while at the end of the handle for increased
leverage. Tighten the lug nuts in a star pattern until each
nut has been tightened twice. The correct tightness of
each lug nut is 95 ft/lbs (130 N·m). If in doubt about the
correct tightness, have them checked with a torque
wrench by your authorized dealer or service station.
7. After 25 miles (40 km) check the lug nut torque with a
torque wrench to ensure that all lug nuts are properly
seated against the wheel.
Vehicles Without Wheel Covers
1. Mount the road tire on the axle.
2. Install the remaining lug nuts with the cone shaped
end of the nut toward the wheel. Lightly tighten the
lug nuts.
6
WHAT TO DO IN EMERGENCIES 511
Page 514 of 630
WARNING!
To avoid the risk of forcing the vehicle off the jack,
do not tighten the lug nuts fully until the vehicle has
been lowered. Failure to follow this warning may
result in personal injury.
3. Lower the vehicle to the ground by turning the jack
handle counterclockwise.
4.
Finish tightening the lug nuts. Push down on the wrench
while at the end of the handle for increased leverage.
Tighten the lug nuts in a star pattern until each nut has
been tightened twice. The correct tightness of each lug
nut is 95 ft/lbs (130 N·m). If in doubt about the correct
tightness, have them checked with a torque wrench by
your authorized dealer or service station.
5. After 25 miles (40 km) check the lug nut torque with a
torque wrench to ensure that all lug nuts are properly
seated against the wheel.
JUMP-STARTING
If your vehicle has a discharged battery it can be jump-
started using a set of jumper cables and a battery in
another vehicle or by using a portable battery booster
pack. Jump-starting can be dangerous if done improperly
so please follow the procedures in this section carefully.
NOTE:When using a portable battery booster pack
follow the manufacturer’s operating instructions and
precautions.
CAUTION!
Do not use a portable battery booster pack or any
other booster source with a system voltage greater
than 12 Volts or damage to the battery, starter motor,
alternator or electrical system may occur.
512 WHAT TO DO IN EMERGENCIES
Page 576 of 630
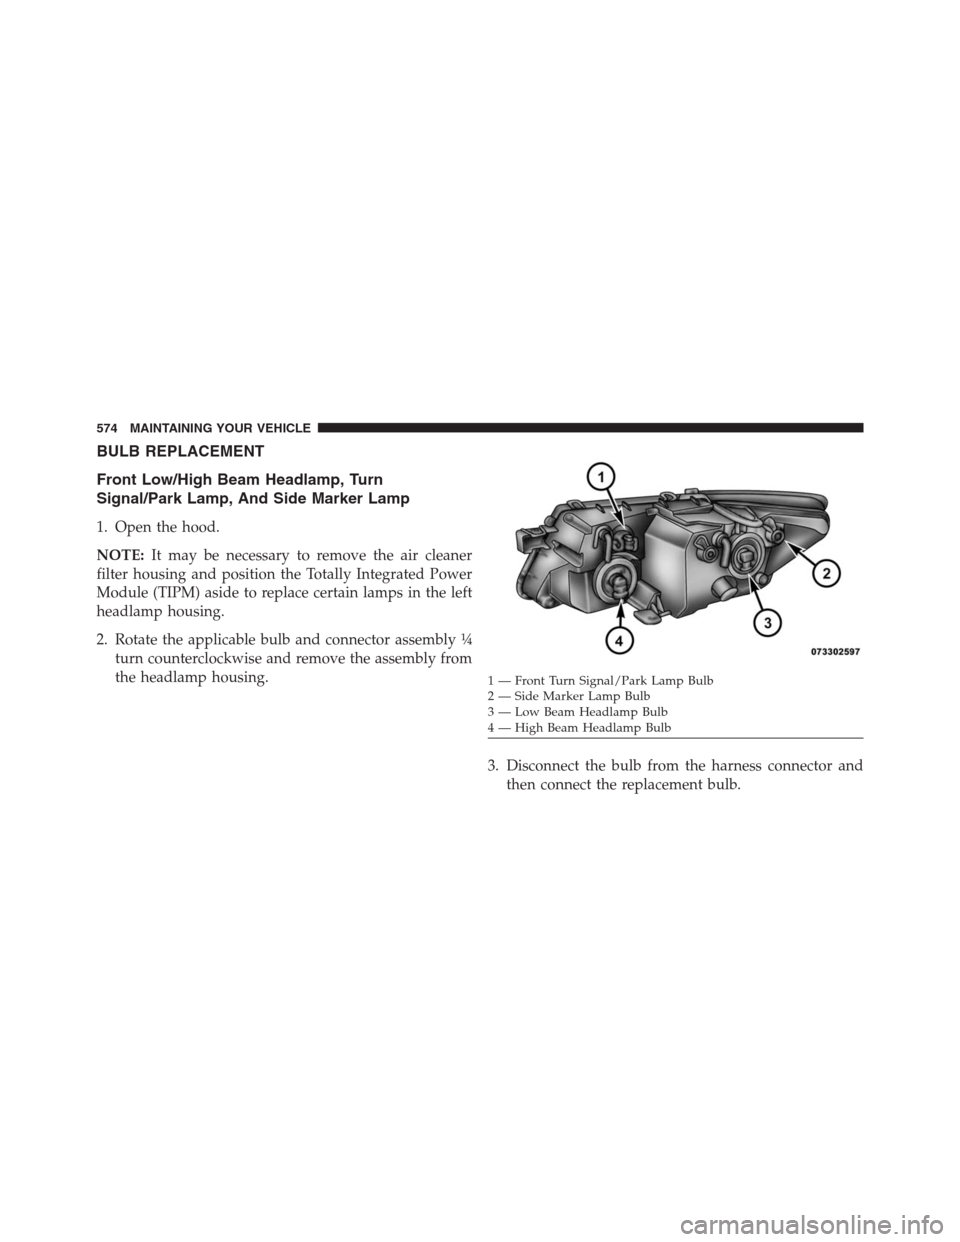
BULB REPLACEMENT
Front Low/High Beam Headlamp, Turn
Signal/Park Lamp, And Side Marker Lamp
1. Open the hood.
NOTE:It may be necessary to remove the air cleaner
filter housing and position the Totally Integrated Power
Module (TIPM) aside to replace certain lamps in the left
headlamp housing.
2. Rotate the applicable bulb and connector assembly ¼
turn counterclockwise and remove the assembly from
the headlamp housing.
3. Disconnect the bulb from the harness connector and
then connect the replacement bulb.
1 — Front Turn Signal/Park Lamp Bulb
2 — Side Marker Lamp Bulb
3 — Low Beam Headlamp Bulb
4 — High Beam Headlamp Bulb 574 MAINTAINING YOUR VEHICLE
Page 577 of 630

CAUTION!
Do not touch the new bulb with your fingers. Oil
contamination will severely shorten bulb life. If the
bulb comes in contact with any oily surface, clean the
bulb with rubbing alcohol.
4. Install the bulb and connector assembly into the
headlamp housing and rotate it ¼ turn clockwise to
lock it in place.
Front Fog Lamp
NOTE:Turn the steering wheel to the right if replacing
the left front fog lamp or to the left if replacing the right
front fog lamp to allow for easier access to the front of the
wheel well.
1. Remove the fasteners retaining the front lower wheel
well access panel and remove the access panel.2. Remove the electrical connector from the fog lamp
housing.
3. Squeeze the two tabs on the side of the bulb socket and
pull straight out from the fog lamp.
7
MAINTAINING YOUR VEHICLE 575