Instrument panel DODGE JOURNEY 2014 1.G User Guide
[x] Cancel search | Manufacturer: DODGE, Model Year: 2014, Model line: JOURNEY, Model: DODGE JOURNEY 2014 1.GPages: 651
Page 67 of 651
WARNING!
Using a seat belt extender when not needed can increase
the risk of injury in a collision. Only use when the seat
belt is not long enough when it is worn low and snug
and in the recommended seating positions. Remove and
store the extender when not needed.
Supplemental Restraint System (SRS) — Air Bags
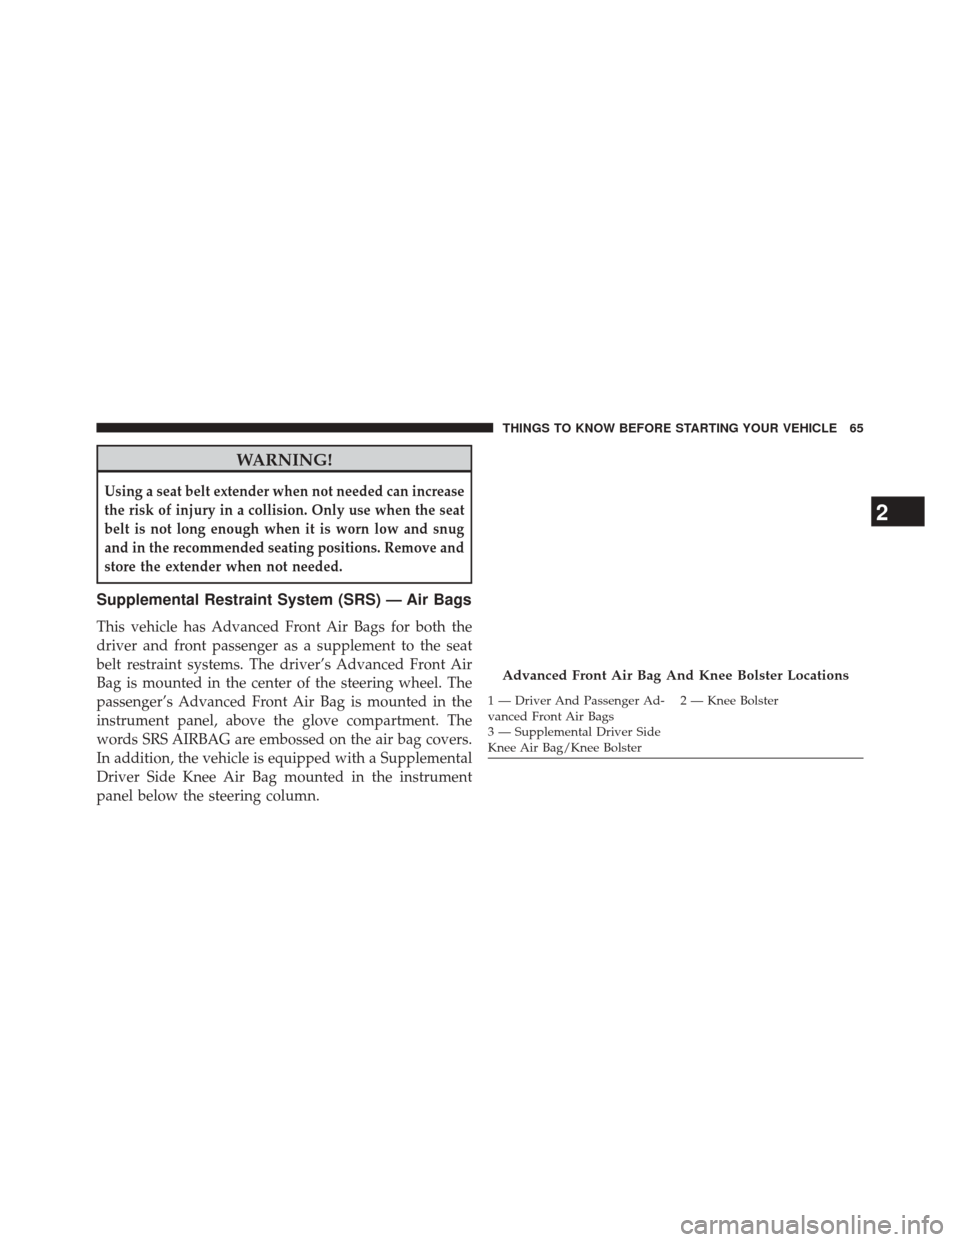
This vehicle has Advanced Front Air Bags for both the
driver and front passenger as a supplement to the seat
belt restraint systems. The driver’s Advanced Front Air
Bag is mounted in the center of the steering wheel. The
passenger’s Advanced Front Air Bag is mounted in the
instrument panel, above the glove compartment. The
words SRS AIRBAG are embossed on the air bag covers.
In addition, the vehicle is equipped with a Supplemental
Driver Side Knee Air Bag mounted in the instrument
panel below the steering column.
Advanced Front Air Bag And Knee Bolster Locations
1 — Driver And Passenger Ad-
vanced Front Air Bags2 — Knee Bolster
3 — Supplemental Driver Side
Knee Air Bag/Knee Bolster
2
THINGS TO KNOW BEFORE STARTING YOUR VEHICLE 65
Page 69 of 651
Air Bag System Components
Your vehicle may be equipped with the following air bag
system components:
•Occupant Restraint Controller (ORC)
• Air Bag Warning Light
• Steering Wheel and Column
• Instrument Panel
• Supplemental Driver Side Knee Air Bag
• Knee Impact Bolsters
• Driver Advanced Front Air Bag
• Passenger Advanced Front Air Bag
• Supplemental Seat-Mounted Side Air Bags (SAB)
• Supplemental Side Air Bag Inflatable Curtains (SABIC) •
Front and Side Impact Sensors
• Front Seat Belt Pretensioners, Seat Belt Buckle Switch,
Seat Track Position Sensors
Advanced Front Air Bag Features
The Advanced Front Air Bag system has multistage
driver and front passenger air bags. This system provides
output appropriate to the severity and type of collision as
determined by the Occupant Restraint Controller (ORC),
which may receive information from the front impact
sensors.
The first stage inflator is triggered immediately during an
impact that requires air bag deployment. This low output
is used in less severe collisions. A higher energy output is
used for more severe collisions.
2
THINGS TO KNOW BEFORE STARTING YOUR VEHICLE 67
Page 70 of 651
WARNING!
•No objects should be placed over or near the air bag
on the instrument panel, because any such objects
could cause harm if the vehicle is in a collision
severe enough to cause the air bag to inflate.
•Do not put anything on or around the air bag
covers or attempt to open them manually. You may
damage the air bags and you could be injured
because the air bags may no longer be functional.
The protective covers for the air bag cushions are
designed to open only when the air bags are
inflating.
• Do not drill, cut or tamper with the knee bolster in
any way.
• Do not mount any accessories to the knee bolster
such as alarm lights, stereos, citizen band radios,
etc.
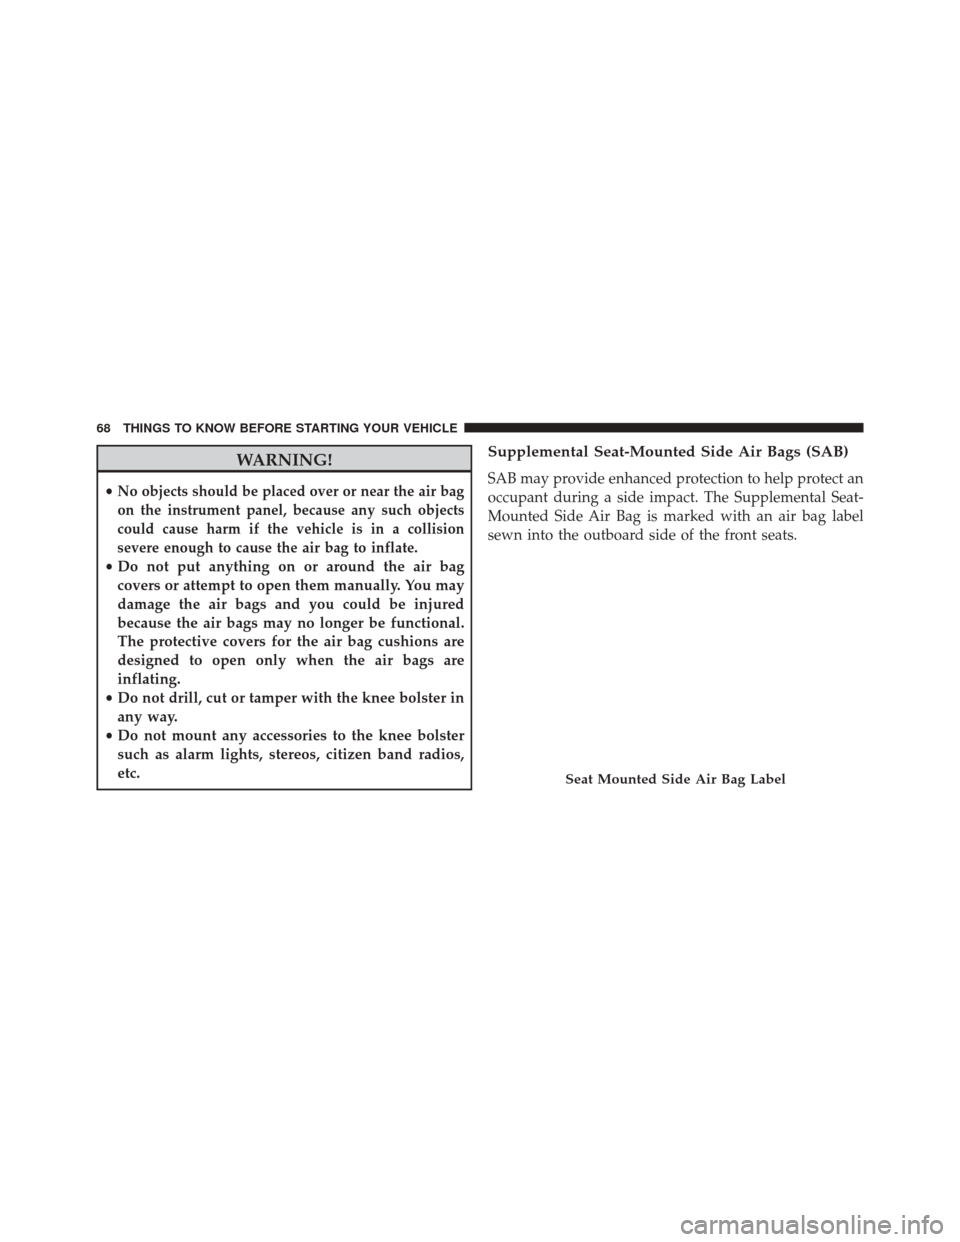
Supplemental Seat-Mounted Side Air Bags (SAB)
SAB may provide enhanced protection to help protect an
occupant during a side impact. The Supplemental Seat-
Mounted Side Air Bag is marked with an air bag label
sewn into the outboard side of the front seats.
Seat Mounted Side Air Bag Label
68 THINGS TO KNOW BEFORE STARTING YOUR VEHICLE
Page 75 of 651
The ORC contains a backup power supply system that
may deploy the air bags even if the battery loses power or
it becomes disconnected prior to deployment.Also, the ORC turns on the Air Bag Warning
Light in the instrument panel for approxi-
mately four to eight seconds for a self-check
when the ignition is first turned on. After the
self-check, the Air Bag Warning Light will turn off. If the
ORC detects a malfunction in any part of the system, it
turns on the Air Bag Warning Light, either momentarily
or continuously. A single chime will sound if the light
comes on again after initial startup.
It also includes diagnostics that will illuminate the instru-
ment cluster Air Bag Warning Light if a malfunction is
noted that could affect the air bag system. The diagnos-
tics also record the nature of the malfunction.WARNING!
Ignoring the Air Bag Warning Light in your instru-
ment panel could mean you won’t have the air bags
to protect you in a collision. If the light does not come
on as a bulb check when the ignition is first turned
on, stays on after you start the vehicle, or if it comes
on as you drive, have an authorized dealer service the
air bag system immediately.
Driver And Passenger Advanced Front Air Bag
Inflator Units
The Driver and Passenger Advanced Front Air Bag
Inflator Units are located in the center of the steering
wheel and on the right side of the instrument panel.
When the ORC detects a collision requiring the
Advanced Front Air Bags, it signals the inflator units.
2
THINGS TO KNOW BEFORE STARTING YOUR VEHICLE 73
Page 76 of 651
A large quantity of non-toxic gas is generated to inflate
the Advanced Front Air Bags. Different air bag inflation
rates are possible, based on several factors, including the
collision type and severity. The steering wheel hub trim
cover and the upper right side of the instrument panel
separate and fold out of the way as the air bags inflate to
their full size. The air bags fully inflate in about 50 to 70
milliseconds. This is about half of the time it takes to
blink your eyes. The air bags then quickly deflate while
helping to restrain the driver and front passenger.
The Advanced Front Air Bag gas is vented through the
vent holes in the sides of the air bag. In this way, the air
bags do not interfere with your control of the vehicle.Supplemental Driver Side Knee Air Bag Inflator Unit
The Supplemental Driver Side Knee Air Bag unit is
located in the instrument panel trim beneath the steering
column. When the ORC detects a collision requiring the
air bag, it signals the inflator units. A large quantity of
non-toxic gas is generated to inflate the Supplemental
Driver Side Knee Air Bag. The trim cover separates and
folds out of the way allowing the air bag to inflate to the
full size. The air bag fully inflates in about 15 to 20
milliseconds.
Supplemental Seat-Mounted Side Air Bag (SAB)
Inflator Units
The Supplemental Seat-Mounted Side Air Bags (SAB) are
designed to activate only in certain side collisions.
The ORC determines if a side collision requires the side
air bags to inflate, based on the severity and type of
collision.
74 THINGS TO KNOW BEFORE STARTING YOUR VEHICLE
Page 80 of 651
Maintaining Your Air Bag System
WARNING!
•Modifications to any part of the air bag system
could cause it to fail when you need it. You could
be injured if the air bag system is not there to
protect you. Do not modify the components or
wiring, including adding any kind of badges or
stickers to the steering wheel hub trim cover or the
upper right side of the instrument panel. Do not
modify the front bumper, vehicle body structure, or
add aftermarket side steps or running boards.
• It is dangerous to try to repair any part of the air
bag system yourself. Be sure to tell anyone who
works on your vehicle that it has an air bag system.
(Continued)
WARNING! (Continued)
•Do not attempt to modify any part of your air bag
system. The air bag may inflate accidentally or may
not function properly if modifications are made.
Take your vehicle to an authorized dealer for any
air bag system service. If your seat, including your
trim cover and cushion, needs to be serviced in any
way (including removal or loosening/tightening of
seat attachment bolts), take the vehicle to your
authorized dealer. Only manufacturer approved
seat accessories may be used. If it is necessary to
modify the air bag system for persons with dis-
abilities, contact your authorized dealer.
78 THINGS TO KNOW BEFORE STARTING YOUR VEHICLE
Page 113 of 651
Periodic Safety Checks You Should Make Outside
The Vehicle
Tires
Examine tires for excessive tread wear and uneven wear
patterns. Check for stones, nails, glass, or other objects
lodged in the tread or sidewall. Inspect the tread for cuts
and cracks. Inspect sidewalls for cuts, cracks and bulges.
Check the wheel nuts for tightness. Check the tires
(including spare) for proper cold inflation pressure.
Lights
Have someone observe the operation of brake lights and
exterior lights while you work the controls. Check turn
signal and high beam indicator lights on the instrument
panel.
Door Latches
Check for positive closing, latching, and locking.
Fluid Leaks
Check area under vehicle after overnight parking for fuel,
engine coolant, oil, or other fluid leaks. Also, if gasoline
fumes are detected or if fuel, power steering fluid (if
equipped), or brake fluid leaks are suspected, the cause
should be located and corrected immediately.
2
THINGS TO KNOW BEFORE STARTING YOUR VEHICLE 111
Page 210 of 651
Fold-Flat Front Passenger Seat — If Equipped
This feature allows for extended cargo space. When the
seat is folded flat, it is an extension of the load floor
surface (allowing long cargo to fit from the rear hatch up
to the instrument panel). The fold-flat seatback also has a
hardback surface that you can use as a work surface
when the seat is folded flat and the vehicle is not in
motion.Pull upward on the recline lever to fold or unfold the
seat.
Fold-Flat Seat
208 UNDERSTANDING THE FEATURES OF YOUR VEHICLE
Page 225 of 651
WARNING!(Continued)
•Do not allow a passenger to sit in a third row seat
with the second row seatback(s) folded flat. In a
collision, the passenger could slide underneath the
seat belt and be seriously or even fatally injured.
TO OPEN AND CLOSE THE HOOD
Two latches must be released to open the hood.
1. Pull the hood release lever located under the left side
of the instrument panel.
Hood Release
3
UNDERSTANDING THE FEATURES OF YOUR VEHICLE 223
Page 227 of 651
CAUTION!
To prevent possible damage:
•Before closing hood, make sure the hood prop rod
is fully seated into its storage retaining clips.
• Do not slam the hood to close it. Use a firm
downward push at the center front edge of the
hood to ensure that both latches engage. Never
drive your vehicle unless the hood is fully closed,
with both latches engaged.
WARNING!
Be sure the hood is fully latched before driving your
vehicle. If the hood is not fully latched, it could open
when the vehicle is in motion and block your vision.
Failure to follow this warning could result in serious
injury or death.
LIGHTS
Headlight Switch
The headlight switch is located on the left side of the
instrument panel. This switch controls the operation of the
headlights, parking lights, instrument panel lights, instru-
ment panel light dimming, interior lights and fog lights.
Headlight Switch
3
UNDERSTANDING THE FEATURES OF YOUR VEHICLE 225