check engine light DODGE JOURNEY 2014 1.G Owners Manual
[x] Cancel search | Manufacturer: DODGE, Model Year: 2014, Model line: JOURNEY, Model: DODGE JOURNEY 2014 1.GPages: 651
Page 18 of 651
SENTRY KEY®
The Sentry Key® Immobilizer system prevents unauthor-
ized vehicle operation by disabling the engine. The
system does not need to be armed or activated. Operation
is automatic, regardless of whether the vehicle is locked
or unlocked.
The system uses a Key Fob with a factory-mated Remote
Keyless Entry (RKE) transmitter, a Keyless Ignition Node
(KIN) and a RF receiver to prevent unauthorized vehicle
operation. Therefore, only Key Fobs that are pro-
grammed to the vehicle can be used to start and operate
the vehicle. The system will not allow the engine to crank
if an invalid Key Fob is used to start and operate the
vehicle. The system will shut the engine off in two
seconds if an invalid Key Fob is used to start the engine.After placing the ignition to the ON/RUN position, the
Vehicle Security Light will turn on for three seconds for a
bulb check. If the light remains on after the bulb check, it
indicates that there is a problem with the electronics. In
addition, if the light begins to flash after the bulb check,
it indicates that someone used an invalid Key Fob to start
the engine. Either of these conditions will result in the
engine being shut off after two seconds.
If the Vehicle Security Light turns on during normal
vehicle operation (vehicle running for longer than 10
seconds), it indicates that there is a fault in the electron-
ics. Should this occur, have the vehicle serviced as soon
as possible by an authorized dealer.
16 THINGS TO KNOW BEFORE STARTING YOUR VEHICLE
Page 81 of 651
Air Bag Warning Light
You will want to have the air bags ready to
inflate for your protection in a collision. The
Air Bag Warning Light monitors the internal
circuits and interconnecting wiring associated
with air bag system electrical components. While the air
bag system is designed to be maintenance free, if any of
the following occurs, have an authorized dealer service
the air bag system immediately.
• The Air Bag Warning Light does not come on during
the four to eight seconds when the ignition switch is
first turned to the ON/RUN position.
• The Air Bag Warning Light remains on after the four to
eight second interval.
• The Air Bag Warning Light comes on intermittently or
remains on while driving. NOTE:
If the speedometer, tachometer, or any engine
related gauges are not working, the Occupant Restraint
Controller (ORC) may also be disabled. The air bags may
not be ready to inflate for your protection. Promptly
check the fuse block for blown fuses. Refer to the label
located on the inside of the fuse block cover for the
proper air bag fuses. See your authorized dealer if the
fuse is good.
Event Data Recorder (EDR)
This vehicle is equipped with an event data recorder
(EDR). The main purpose of an EDR is to record, in
certain crash or near crash-like situations, such as an air
bag deployment or hitting a road obstacle, data that will
assist in understanding how a vehicle’s systems per-
formed. The EDR is designed to record data related to
2
THINGS TO KNOW BEFORE STARTING YOUR VEHICLE 79
Page 113 of 651
Periodic Safety Checks You Should Make Outside
The Vehicle
Tires
Examine tires for excessive tread wear and uneven wear
patterns. Check for stones, nails, glass, or other objects
lodged in the tread or sidewall. Inspect the tread for cuts
and cracks. Inspect sidewalls for cuts, cracks and bulges.
Check the wheel nuts for tightness. Check the tires
(including spare) for proper cold inflation pressure.
Lights
Have someone observe the operation of brake lights and
exterior lights while you work the controls. Check turn
signal and high beam indicator lights on the instrument
panel.
Door Latches
Check for positive closing, latching, and locking.
Fluid Leaks
Check area under vehicle after overnight parking for fuel,
engine coolant, oil, or other fluid leaks. Also, if gasoline
fumes are detected or if fuel, power steering fluid (if
equipped), or brake fluid leaks are suspected, the cause
should be located and corrected immediately.
2
THINGS TO KNOW BEFORE STARTING YOUR VEHICLE 111
Page 304 of 651
INSTRUMENT CLUSTER DESCRIPTIONS
1. Tachometer
This gauge measures engine revolutions per minute
(RPM x 1000). Before the pointer reaches the red area,
ease up on the accelerator to prevent engine damage.
2. Air Bag Warning LightThis light will turn on for four to eight seconds
as a bulb check when the ignition switch is first
turned to ON/RUN. If the light is either not on
during starting, stays on, or turns on while
driving, have the system inspected at an authorized
dealer as soon as possible. Refer to “Occupant Restraints”
in “Things To Know Before Starting Your Vehicle” for
further information. 3. Malfunction Indicator Light (MIL)
The Malfunction Indicator Light (MIL) is part of
an onboard diagnostic system, called OBD II, that
monitors engine and automatic transmission con-
trol systems. The light will illuminate when the key is in
the ON/RUN position, before engine start. If the bulb
does not come on when turning the key from OFF to
ON/RUN, have the condition checked promptly.
Certain conditions, such as a loose or missing gas cap,
poor fuel quality, etc., may illuminate the MIL after
engine start. The vehicle should be serviced if the light
stays on through several of your typical driving cycles. In
most situations, the vehicle will drive normally and will
not require towing.
302 UNDERSTANDING YOUR INSTRUMENT PANEL
Page 320 of 651
•Oil Pressure Warning Light
This light indicates low engine oil pressure. If the
light turns on while driving, stop the vehicle and shut off
the engine as soon as possible. A chime will sound for
four minutes when this light turns on.
Do not operate the vehicle until the cause is corrected.
This light does not show how much oil is in the engine.
The engine oil level must be checked under the hood.
• Charging System Light
This light shows the status of the electrical charg-
ing system. The light should come on when the
ignition switch is first turned ON/RUN and remain on
briefly as a bulb check. If the light stays on or comes on
while driving, turn off some of the vehicle’s non-essential
electrical devices or increase engine speed (if at idle). If
the charging system light remains on, it means that the vehicle is experiencing a problem with the charging
system. Obtain SERVICE IMMEDIATELY. See an autho-
rized dealer.
If jump starting is required, refer to “Jump Starting
Procedures” in “What To Do In Emergencies”.
•
Electronic Throttle Control (ETC) Light
This light informs you of a problem with the
Electronic Throttle Control (ETC) system. The
light will come on when the ignition is first
turned to ON/RUN and remain on briefly as a
bulb check. If the light does not come on during starting,
have the system checked by an authorized dealer.
If a problem is detected, the light will come on while the
engine is running. Cycle the ignition key when the
vehicle has completely stopped and the shift lever is
placed in the PARK position. The light should turn off.
318 UNDERSTANDING YOUR INSTRUMENT PANEL
Page 339 of 651
•Subscription Info
New vehicle purchasers or lessees will receive a free
limited time subscription to SIRIUS Satellite Radio with
your radio. Following the expiration of the free services,
it will be necessary to access the information on the
Subscription Information screen to re-subscribe.
Touch the Subscription Info soft-key to access the Sub-
scription Information screen.
Write down the SIRIUS ID numbers for your receiver. To
reactivate your service, either call the number listed on
the screen or visit the provider online.
NOTE: SIRIUS Travel Link is a separate subscription.Customer Programmable Features — Uconnect®
System 8.4 Settings
Touch the “More” soft-key, then touch the “Settings”
soft-key to display the menu setting screen. In this mode
the Uconnect® system allows you to access program-
mable features that may be equipped such as Display,
Clock, Safety/Assistance, Lights, Doors & Locks,
Auto-On Comfort & Remote Start, Engine Off Operation,
Compass Settings, Audio, Phone/Bluetooth® and
SIRIUS Setup.
NOTE: Only one touchscreen area may be selected at a
time.
When making a selection, touch the soft-key to enter the
desired mode. Once in the desired mode, touch and
release the preferred setting until a check-mark appears
next to the setting, showing that setting has been se-
lected.
4
UNDERSTANDING YOUR INSTRUMENT PANEL 337
Page 345 of 651
•Headlights With Wipers — If Equipped
When this feature is selected, and the headlight switch is
in the AUTO position, the headlights will turn on ap-
proximately 10 seconds after the wipers are turned on.
The headlights will also turn off when the wipers are
turned off if they were turned on by this feature. To make
your selection, touch the “Headlights With Wipers” soft-
key, until a check-mark appears next to setting, showing
that setting has been selected. Touch the back arrow
soft-key to return to the previous menu.
• Auto Dim High Beams “SmartBeam™” — If
Equipped
When this feature is selected, the high beam headlights
will deactivate automatically under certain conditions. To
make your selection, touch the “Auto High Beams”
soft-key, until a check-mark appears next to setting,
showing that setting has been selected. Touch the back
arrow soft-key to return to the previous menu. Refer to “Lights/SmartBeam™ — If Equipped” in “Understand-
ing The Features Of Your Vehicle” for further informa-
tion.
•
Daytime Running Lights — If Available
When this feature is selected, the headlights will turn on
whenever the engine is running. To make your selection,
touch the “Daytime Running Lights” soft-key, until a
check-mark appears next to setting, showing that setting
has been selected. Touch the back arrow soft-key to
return to the previous menu.
• Steering Directed Lights — If Equipped
When this feature is selected, the headlights turn relative
to a change in direction of the steering wheel. To make
your selection, touch the “Steering Directed Lights”
soft-key, until a check-mark appears next to setting,
showing that setting has been selected. Touch the back
arrow soft-key to return to the previous menu.
4
UNDERSTANDING YOUR INSTRUMENT PANEL 343
Page 550 of 651
occurs, tighten the fuel filler cap until a “clicking” sound
is heard and press the TRIP ODOMETER button to turn
off the message. If the problem persists, the message will
appear the next time the vehicle is started.
A loose, improperly installed, or damaged fuel filler cap
may also turn on the MIL.
EMISSIONS INSPECTION AND MAINTENANCE
PROGRAMS
In some localities, it may be a legal requirement to pass
an inspection of your vehicle’s emissions control system.
Failure to pass could prevent vehicle registration.For states that require an Inspection and Mainte-
nance (I/M), this check verifies the “Malfunction
Indicator Light (MIL)” is functioning and is not
on when the engine is running, and that the OBD II
system is ready for testing. Normally, the OBD II system will be ready. The OBD II
system may
notbe ready if your vehicle was recently
serviced, recently had a dead battery or a battery replace-
ment. If the OBD II system should be determined not
ready for the I/M test, your vehicle may fail the test.
Your vehicle has a simple ignition key-actuated test,
which you can use prior to going to the test station. To
check if your vehicle’s OBD II system is ready, you must
do the following:
1. Cycle the ignition switch to the ON position, but do not crank or start the engine.
NOTE: If you crank or start the engine, you will have to
start this test over.
2. As soon as you cycle the ignition switch to the ON position, you will see the MIL symbol come on as part
of a normal bulb check.
548 MAINTAINING YOUR VEHICLE
Page 611 of 651
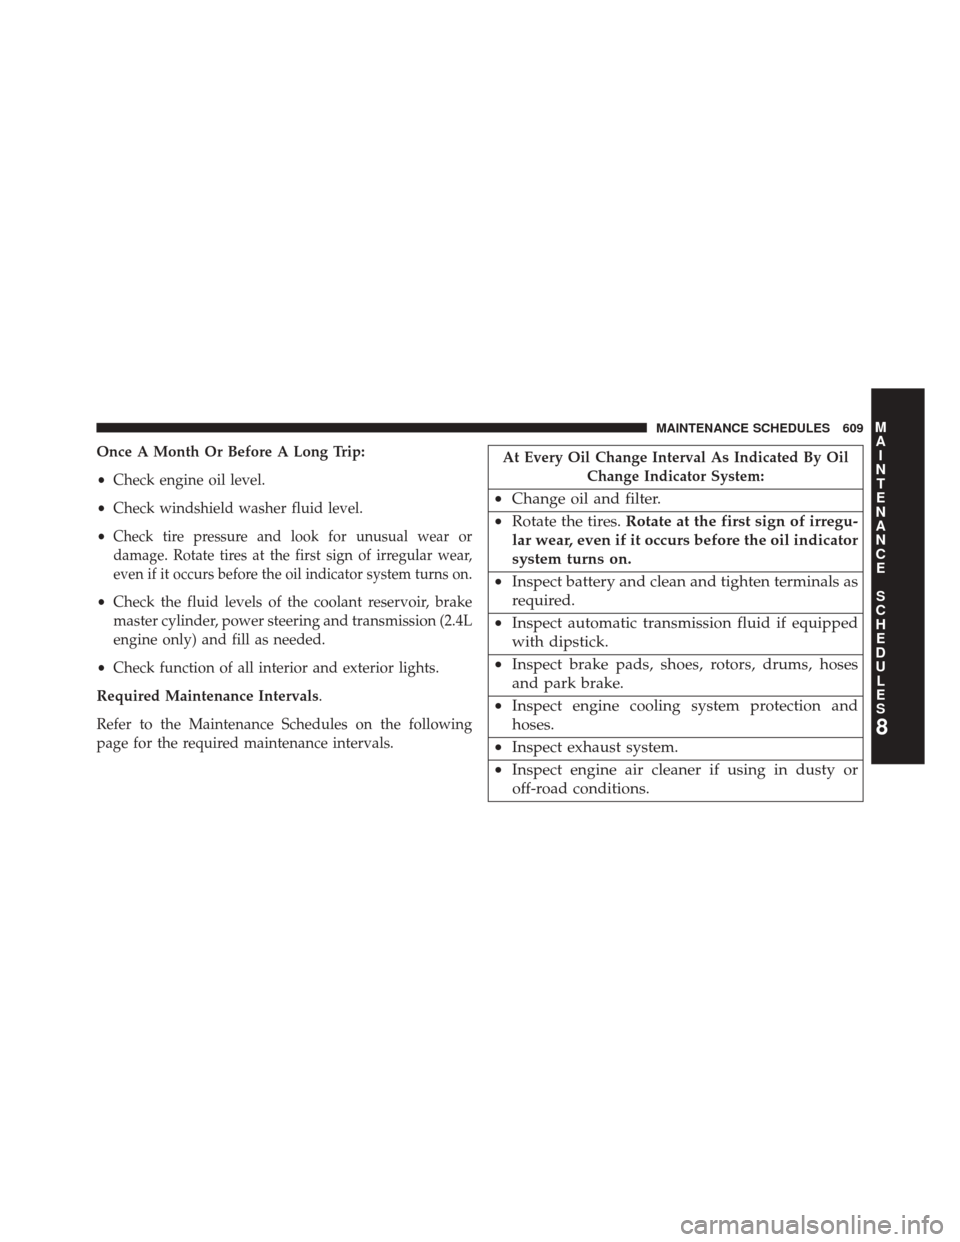
Once A Month Or Before A Long Trip:
•Check engine oil level.
• Check windshield washer fluid level.
•
Check tire pressure and look for unusual wear or
damage. Rotate tires at the first sign of irregular wear,
even if it occurs before the oil indicator system turns on.
• Check the fluid levels of the coolant reservoir, brake
master cylinder, power steering and transmission (2.4L
engine only) and fill as needed.
• Check function of all interior and exterior lights.
Required Maintenance Intervals.
Refer to the Maintenance Schedules on the following
page for the required maintenance intervals.
At Every Oil Change Interval As Indicated By Oil Change Indicator System:
•Change oil and filter.
• Rotate the tires. Rotate at the first sign of irregu-
lar wear, even if it occurs before the oil indicator
system turns on.
• Inspect battery and clean and tighten terminals as
required.
• Inspect automatic transmission fluid if equipped
with dipstick.
• Inspect brake pads, shoes, rotors, drums, hoses
and park brake.
• Inspect engine cooling system protection and
hoses.
• Inspect exhaust system.
• Inspect engine air cleaner if using in dusty or
off-road conditions.
8
M
A I
N T
E
N
A
N
C E
S
C
H E
D
U L
E
SMAINTENANCE SCHEDULES 609
Page 630 of 651
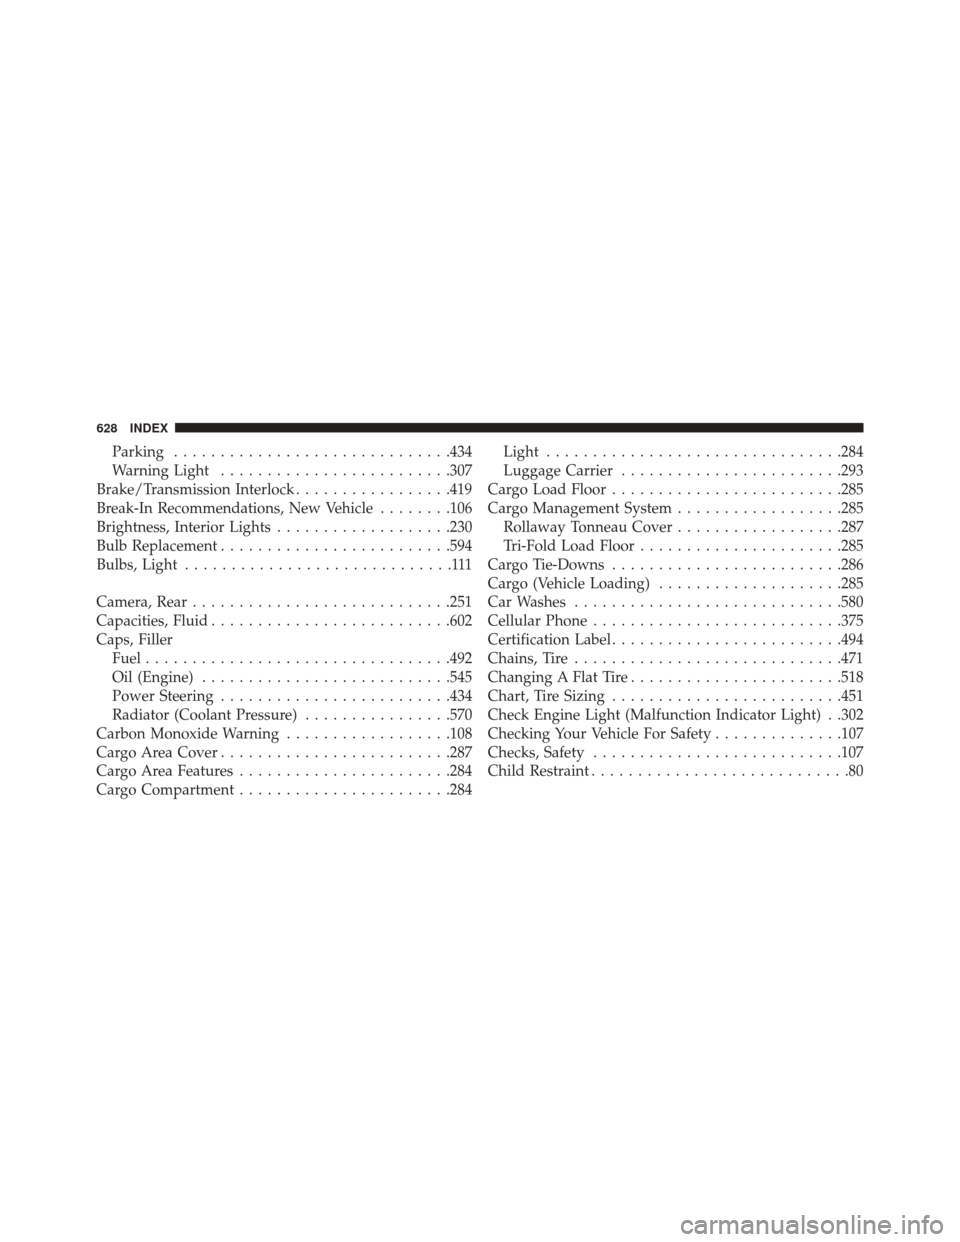
Parking............................. .434
Warning Light ........................ .307
Brake/Transmission Interlock .................419
Break-In Recommendations, New Vehicle ........106
Brightness, Interior Lights ...................230
Bulb Replacement ........................ .594
Bulbs, Light .............................111
Camera, Rear ............................251
Capacities, Fluid ..........................602
Caps, Filler Fuel .................................492
Oil (Engine) .......................... .545
Power Steering ........................ .434
Radiator (Coolant Pressure) ................570
Carbon Monoxide Warning ..................108
Cargo Area Cover ........................ .287
Cargo Area Features .......................284
Cargo Compartment .......................284 Light
............................... .284
Luggage Carrier ........................293
Cargo Load Floor ........................ .285
Cargo Management System ..................285
Rollaway Tonneau Cover ..................287
Tri-Fold Load Floor ..................... .285
Cargo Tie-Downs ........................ .286
Cargo (Vehicle Loading) ....................285
Car Washes ............................ .580
Cellular Phone .......................... .375
Certification Label ........................ .494
Chains, Tire ............................ .471
Changing A Flat Tire .......................518
Chart, Tire Sizing ........................ .451
Check Engine Light (Malfunction Indicator Light) . .302
Checking Your Vehicle For Safety ..............107
Checks, Safety .......................... .107
Child Restraint ............................80
628 INDEX