seat adjustment DODGE JOURNEY 2015 1.G Owners Manual
[x] Cancel search | Manufacturer: DODGE, Model Year: 2015, Model line: JOURNEY, Model: DODGE JOURNEY 2015 1.GPages: 648
Page 112 of 648
!Uconnect® PHONE (8.4/8.4N).............146
▫Uconnect® 8.4/8.4Nav..................146
▫Operation..........................149
▫Phone Call Features...................161
▫Uconnect® Phone Features..............165
▫Advanced Phone Connectivity............170
▫Things You Should Know About Your Uconnect®
Phone.............................171
▫General Information...................183
!VOICE COMMAND....................183
▫Uconnect® 8.4/8.4 Nav.................183
▫Uconnect® Voice Commands.............186
!SEATS . . . . . . . . . . . . . . . . . . . . . . . . . . . . ..197
▫Driver’s Power Seat — If Equipped........198
▫Power Lumbar — If Equipped............200
▫Front Heated Seats — If Equipped.........201
▫Manual Front Seat Adjustments...........202
▫Recliner Adjustment...................203
▫Driver’s Seat Height Adjustment —
If Equipped.........................204
▫Fold-Flat Front Passenger Seat —
If Equipped.........................205
▫Head Restraints......................206
▫Third Row Passenger Seats — Seven Passenger
Models.............................211
▫60/40 Split Second-Row Passenger Seats.....211
11 0 U N D E R S TA N D I N G T H E F E AT U R E S O F Y O U R V E H I C L E
Page 204 of 648
WARNING!
•Persons who are unable to feel pain to the skin
because of advanced age, chronic illness, diabetes,
spinal cord injury, medication, alcohol use, exhaus-
tion or other physical condition must exercise care
when using the seat heater. It may cause burns
even at low temperatures, especially if used for
long periods of time.
•Do not place anything on the seat or seatback that
insulates against heat, such as a blanket or cushion.
This may cause the seat heater to overheat. Sitting
in a seat that has been overheated could cause
serious burns due to the increased surface tempera-
ture of the seat.
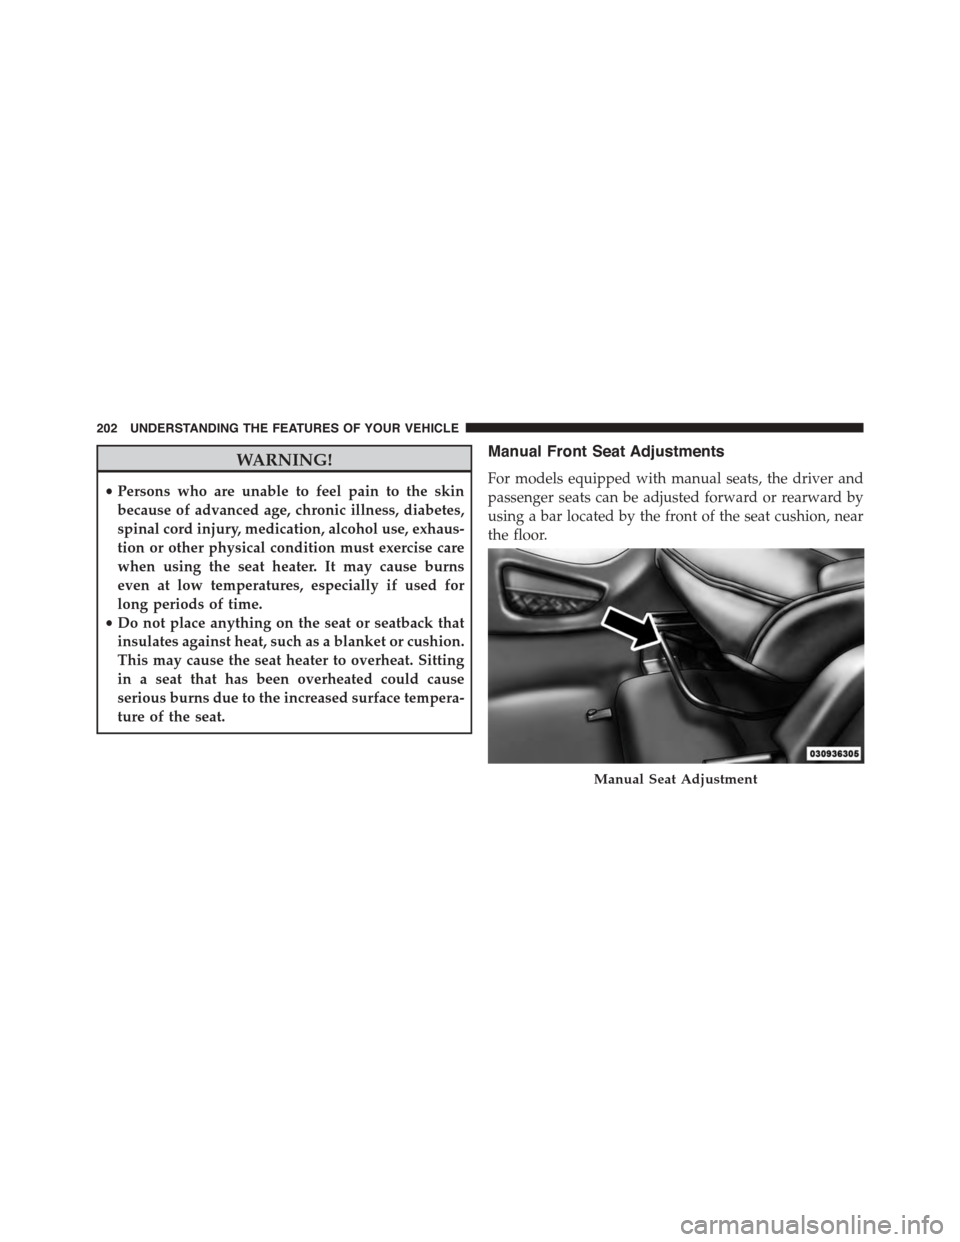
Manual Front Seat Adjustments
For models equipped with manual seats, the driver and
passenger seats can be adjusted forward or rearward by
using a bar located by the front of the seat cushion, near
the floor.
Manual Seat Adjustment
202 UNDERSTANDING THE FEATURES OF YOUR VEHICLE
Page 205 of 648
While sitting in the seat, lift up on the bar located and
move the seat forward or rearward. Release the bar once
the desired position has been reached. Then, using body
pressure, move forward and rearward on the seat to be
sure that the seat adjusters have latched.
WARNING!
•Adjusting a seat while driving may be dangerous.
Moving a seat while driving could result in loss of
control which could cause a collision and serious
injury or death.
•Seats should be adjusted before fastening the seat
belts and while the vehicle is parked. Serious
injury or death could result from a poorly adjusted
seat belt.
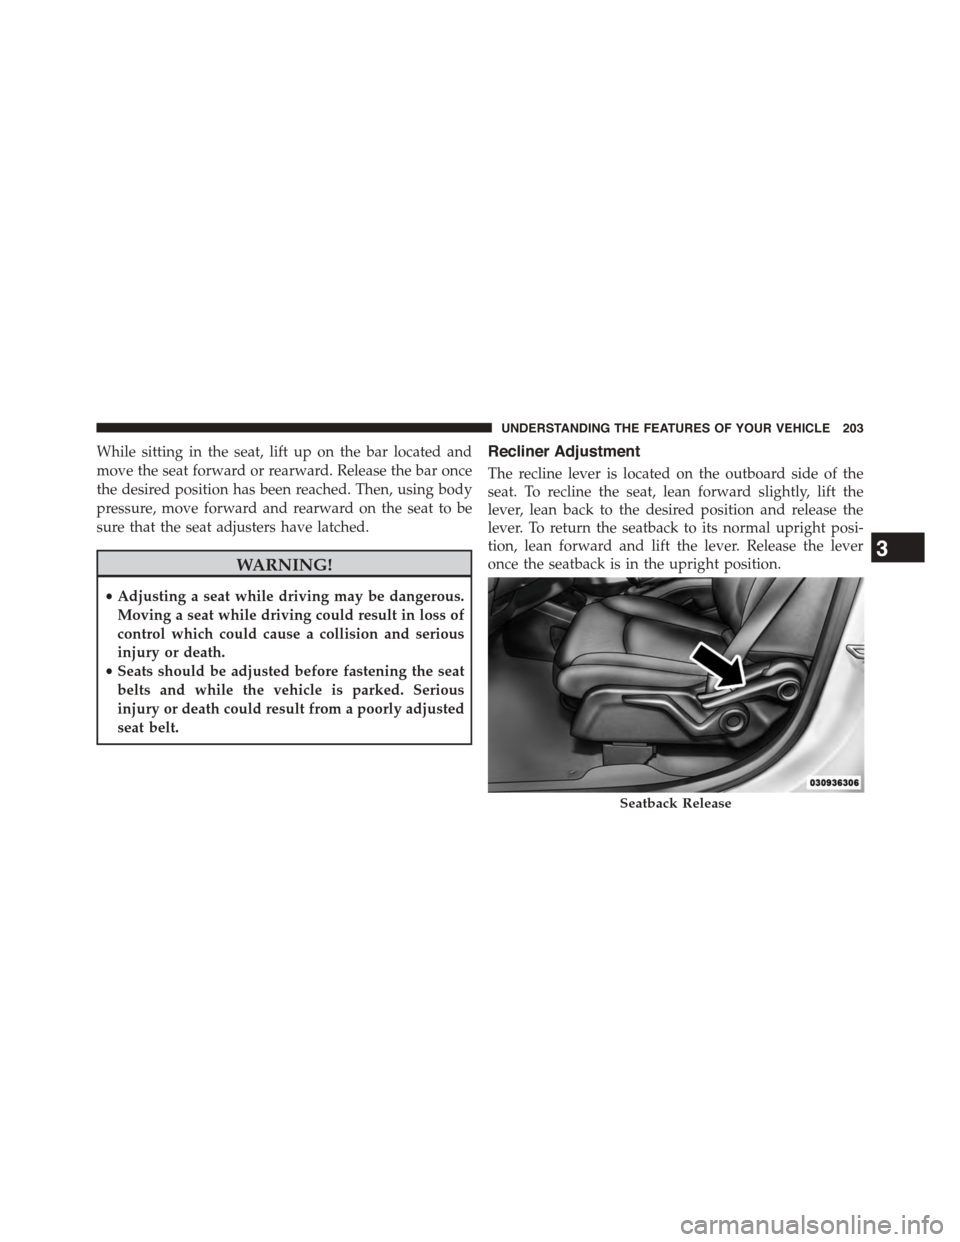
Recliner Adjustment
The recline lever is located on the outboard side of the
seat. To recline the seat, lean forward slightly, lift the
lever, lean back to the desired position and release the
lever. To return the seatback to its normal upright posi-
tion, lean forward and lift the lever. Release the lever
once the seatback is in the upright position.
Seatback Release
3
UNDERSTANDING THE FEATURES OF YOUR VEHICLE 203
Page 206 of 648
WARNING!
•Adjusting a seat while the vehicle is moving is
dangerous. The sudden movement of the seat could
cause you to lose control. The seat belt might not be
adjusted properly and you could be injured. Adjust
the seat only while the vehicle is parked.
•Do not ride with the seatback reclined so that the
shoulder belt is no longer resting against your
chest. In a collision you could slide under the seat
belt and be seriously or even fatally injured. Use
the recliner only when the vehicle is parked.
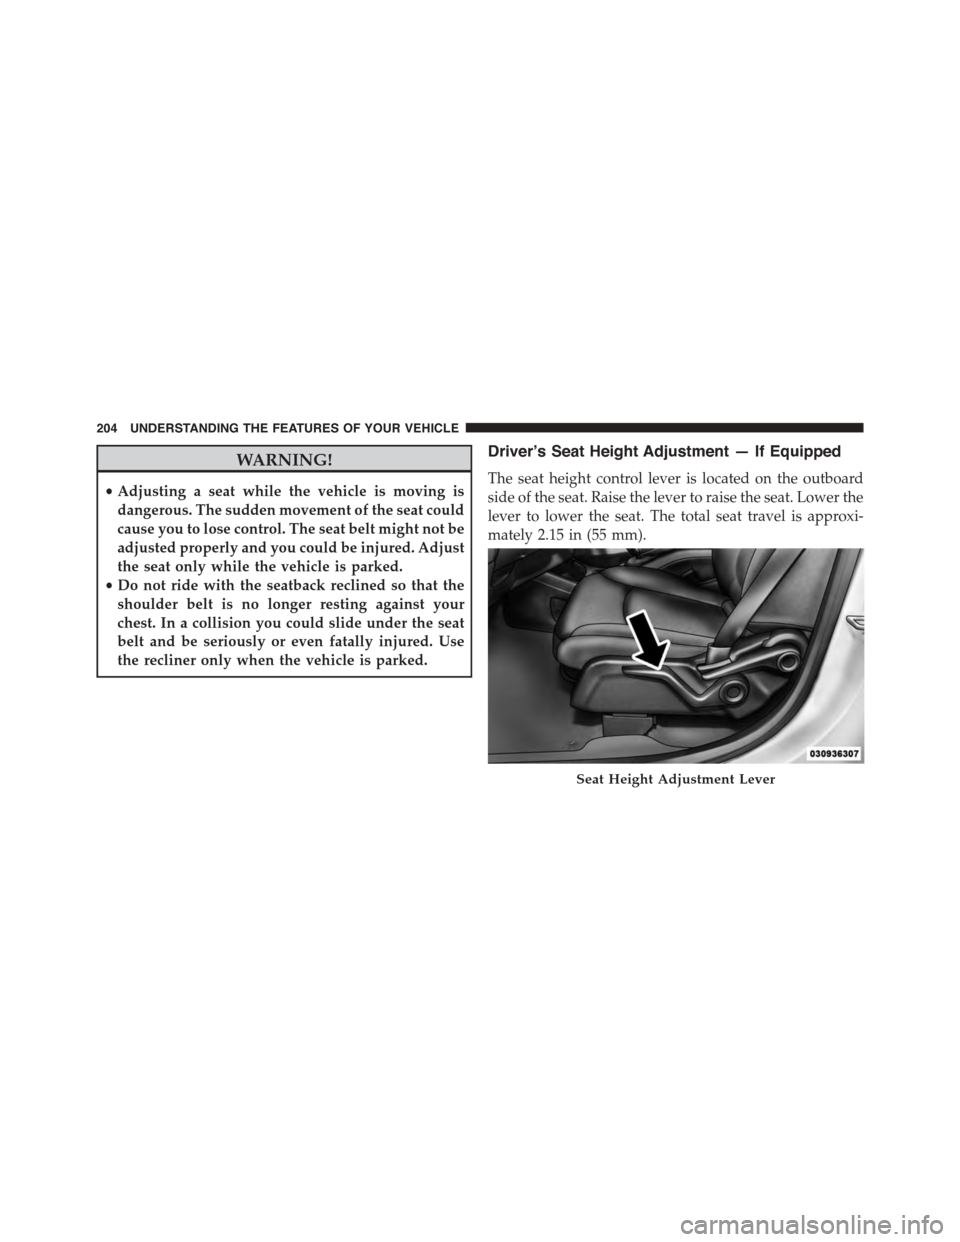
Driver’s Seat Height Adjustment — If Equipped
The seat height control lever is located on the outboard
side of the seat. Raise the lever to raise the seat. Lower the
lever to lower the seat. The total seat travel is approxi-
mately 2.15 in (55 mm).
Seat Height Adjustment Lever
204 UNDERSTANDING THE FEATURES OF YOUR VEHICLE
Page 212 of 648
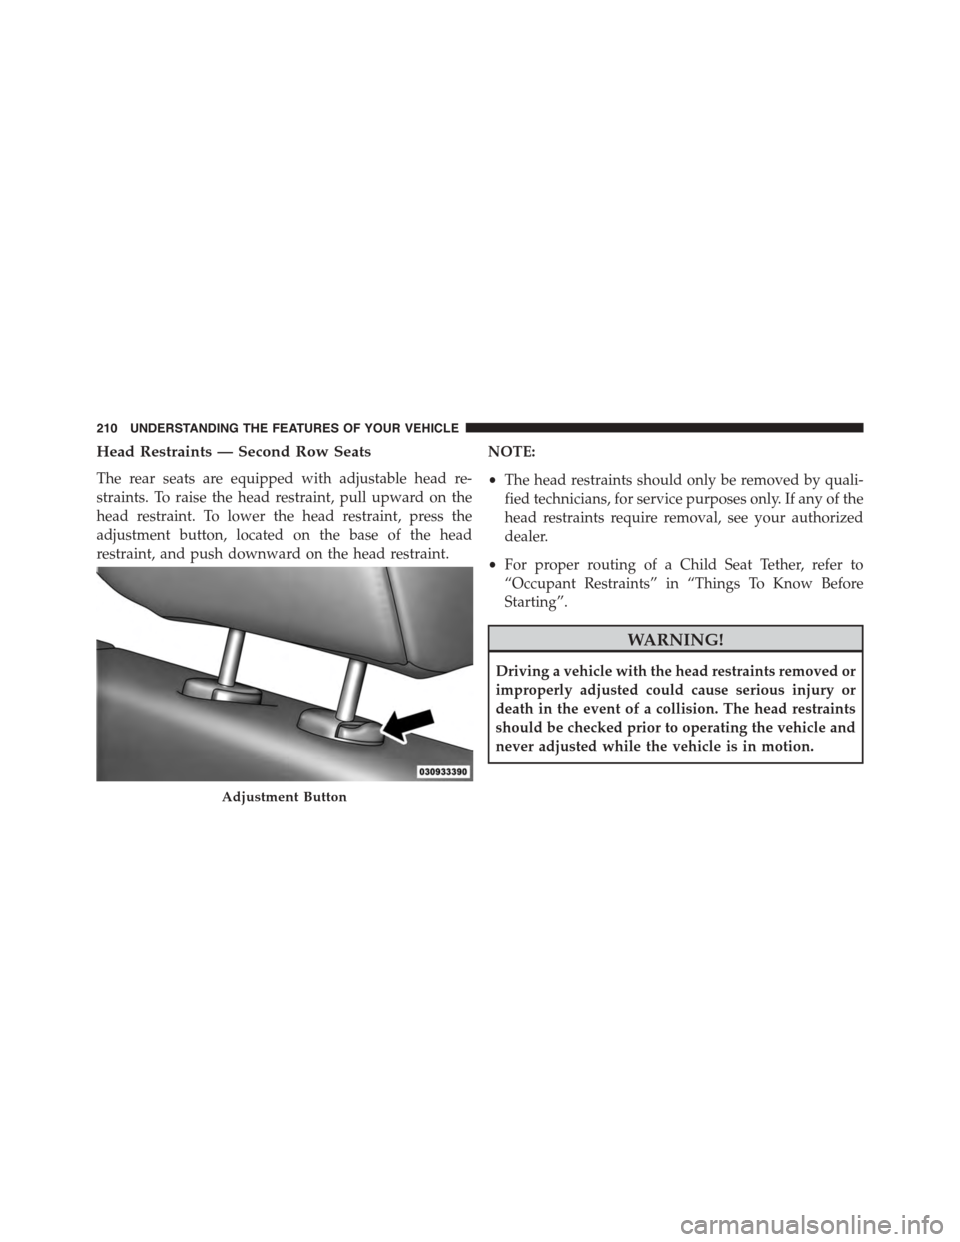
Head Restraints — Second Row Seats
The rear seats are equipped with adjustable head re-
straints. To raise the head restraint, pull upward on the
head restraint. To lower the head restraint, press the
adjustment button, located on the base of the head
restraint, and push downward on the head restraint.
NOTE:
•The head restraints should only be removed by quali-
fied technicians, for service purposes only. If any of the
head restraints require removal, see your authorized
dealer.
•For proper routing of a Child Seat Tether, refer to
“Occupant Restraints” in “Things To Know Before
Starting”.
WARNING!
Driving a vehicle with the head restraints removed or
improperly adjusted could cause serious injury or
death in the event of a collision. The head restraints
should be checked prior to operating the vehicle and
never adjusted while the vehicle is in motion.
Adjustment Button
210 UNDERSTANDING THE FEATURES OF YOUR VEHICLE
Page 215 of 648
WARNING!
To prevent personal injury or damage to objects,
keep your head, arms, and objects out of the folding
path of the seatback.
4. Gently guide the seatback into the folded position.
To Unfold The Seat
Raise the seatback and lock it in place.
WARNING!
Be certain that the seatback is locked securely into
position. Otherwise, the seat will not provide the
proper stability for child seats and/or passengers. An
improperly latched seat could cause serious injury.
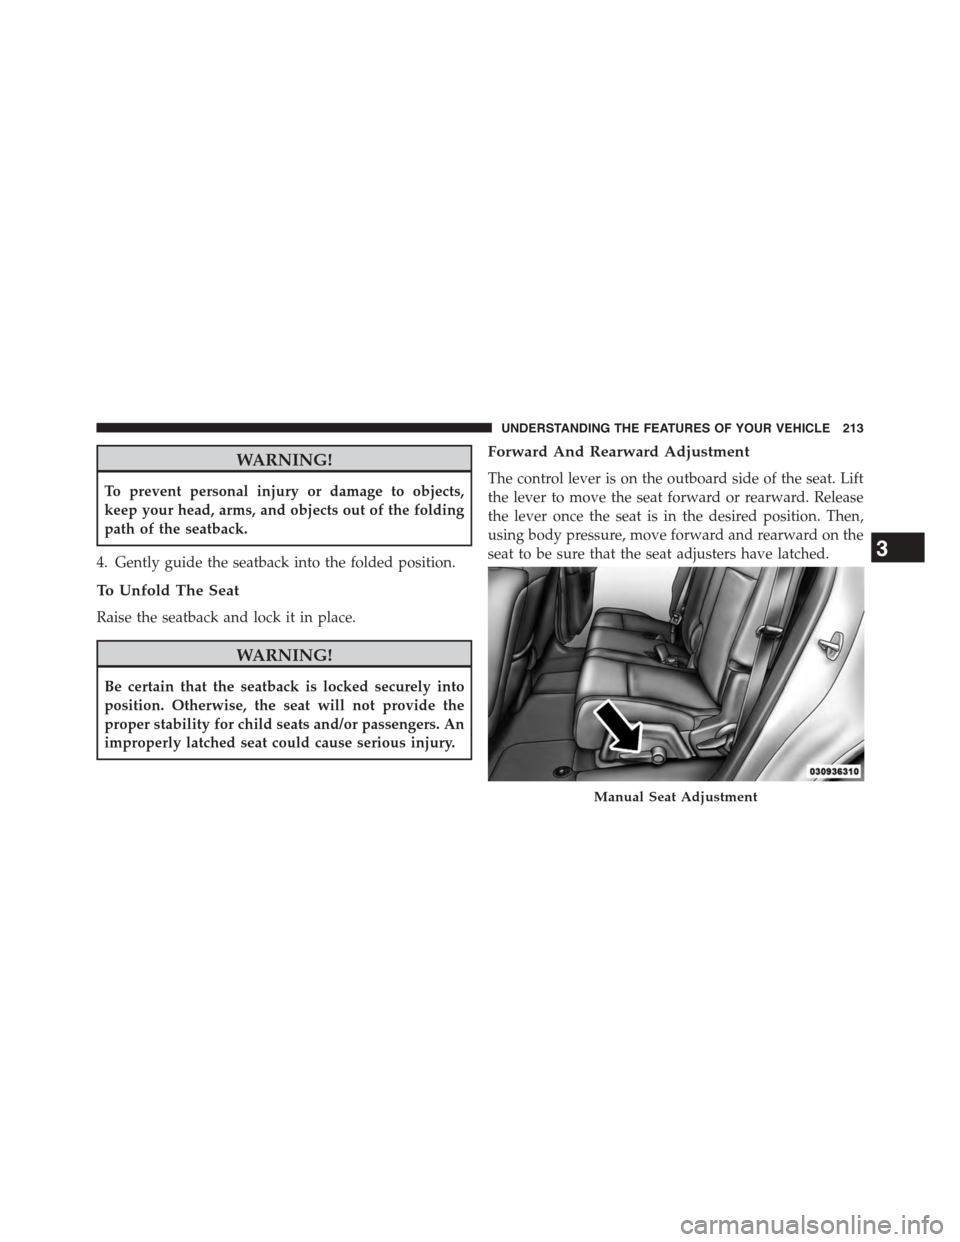
Forward And Rearward Adjustment
The control lever is on the outboard side of the seat. Lift
the lever to move the seat forward or rearward. Release
the lever once the seat is in the desired position. Then,
using body pressure, move forward and rearward on the
seat to be sure that the seat adjusters have latched.
Manual Seat Adjustment
3
UNDERSTANDING THE FEATURES OF YOUR VEHICLE 213
Page 216 of 648
WARNING!
Adjusting a seat while the vehicle is moving is
dangerous. The sudden movement of the seat could
cause you to lose control. The seat belt might not be
adjusted properly and you could be injured. Adjust
any seat only while the vehicle is parked.
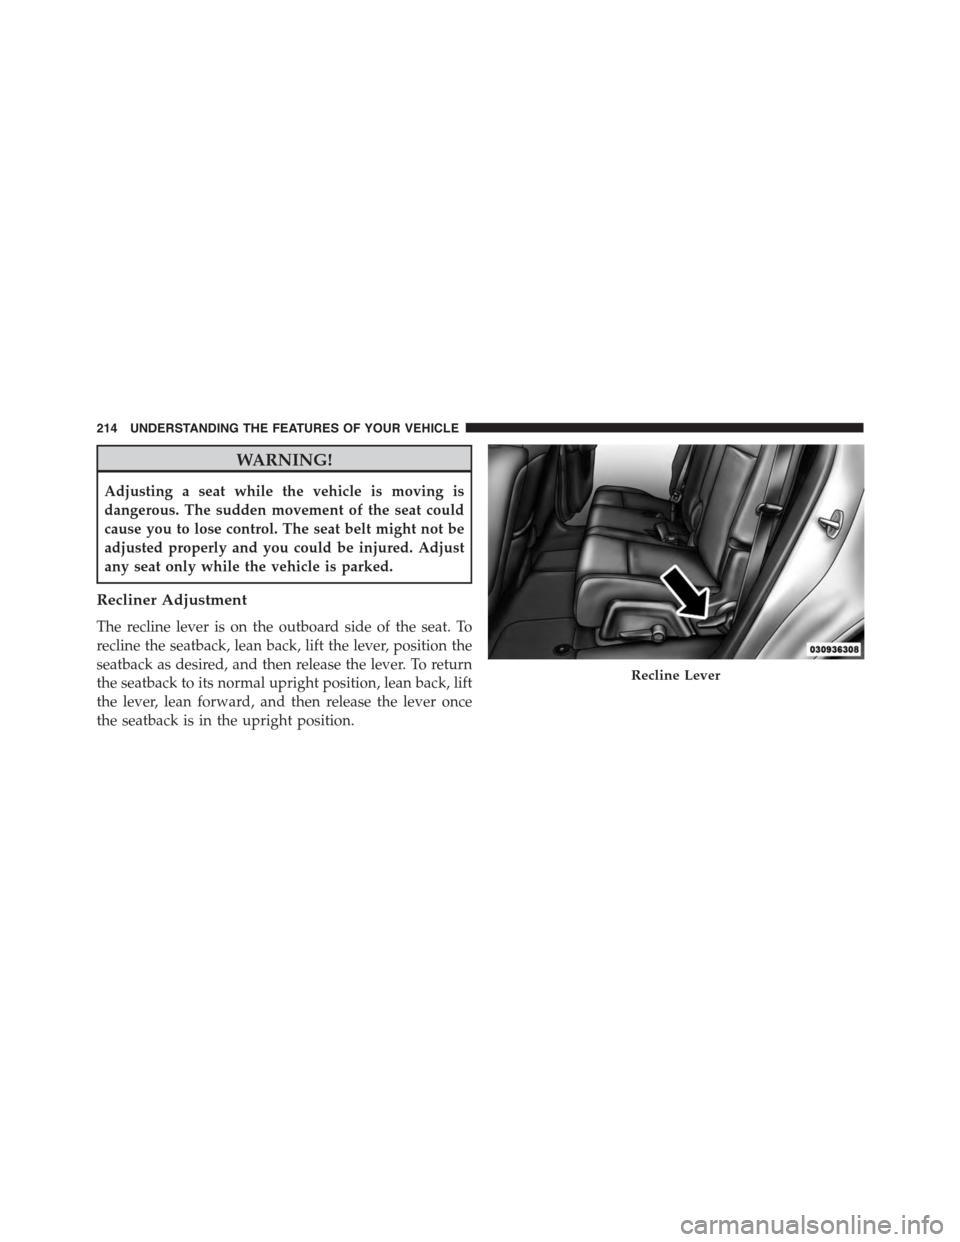
Recliner Adjustment
The recline lever is on the outboard side of the seat. To
recline the seatback, lean back, lift the lever, position the
seatback as desired, and then release the lever. To return
the seatback to its normal upright position, lean back, lift
the lever, lean forward, and then release the lever once
the seatback is in the upright position.
Recline Lever
214 UNDERSTANDING THE FEATURES OF YOUR VEHICLE
Page 401 of 648
to high. This allows the rear seat occupants to control the
volume of air circulated in the rear of the vehicle.
CAUTION!
Interior air enters the Rear Automatic Temperature
Control System through an intake grille, located in
the right side trim panel behind the third row seats.
The rear outlets are located in the right side trim
panel of the 3rd Row seat. Do not block or place
objects directly in front of the inlet grille or heater
outlets. The electrical system could overload causing
damage to the blower motor.
Rear Temperature Control
To change the temperature in the rear of the vehicle,
rotate the temperature knob counterclockwise to lower
the temperature, and clockwise to increase the tempera-
ture. The rear temperature settings are displayed in the
Uconnect® system.
When rear controls are locked by the Uconnect® system,
the Rear Temperature Lock symbol on the temperature
knob is illuminated and any rear overhead adjustments
are ignored.
Rear Mode Control
Auto Mode
•The rear system automatically maintains the correct
mode and comfort level desired by the rear seat
occupants.
Headliner Mode
Air comes from the outlets in the headliner. Each
of these outlets can be individually adjusted to
direct the flow of air. Moving the air vanes of the outlets
to one side will shut off the airflow.
4
UNDERSTANDING YOUR INSTRUMENT PANEL 399
Page 575 of 648
CAUTION!
•Using a transmission fluid other than the manufac-
turer’s recommended fluid may cause deterioration
in transmission shift quality and/or torque con-
verter shudder, and will require more frequent
fluid and filter changes. Refer to “Fluids, Lubri-
cants, and Genuine Parts” in this section for fluid
specifications.
•Dirt and water in the transmission can cause seri-
ous damage. To prevent dirt and water from enter-
ing the transmission after checking or replenishing
fluid, make sure that the dipstick cap is re-seated
properly.
Fluid Level Check — Six-Speed Automatic
Transmission
The fluid level is preset at the factory and does not
require adjustment under normal operating conditions.
Routine fluid level checks are not required, therefore the
transmission filler tube is capped and no dipstick is
provided. Your authorized dealer can check your trans-
mission fluid level using a special service dipstick. If you
notice fluid leakage or transmission malfunction, visit
your authorized dealer immediately to have the trans-
mission fluid level checked. Operating the vehicle with
an improper fluid level can cause severe transmission
damage.
CAUTION!
If a transmission fluid leak occurs, visit your autho-
rized dealer immediately. Severe transmission dam-
age may occur. Your authorized dealer has the proper
tools to adjust the fluid level accurately.
Fluid And Filter Changes
Refer to the “Maintenance Schedule” for the proper
maintenance intervals.
7
MAINTAINING YOUR VEHICLE 573
Page 641 of 648
Rear Seat..............................47
Untwisting Procedure.....................52
Seats..................................197
Adjustment...........................197
Easy Entry............................216
Height Adjustment......................198
Power...............................198
Rear Folding...........................211
Reclining.............................203
Reclining Rear.........................214
Seatback Release........................205
Tilting...............................198
Security Alarm............................17
Selection of Coolant (Antifreeze)...............598
SENTRY KEY®
FCC General Information..................16
Key Programming.......................16
Sentry Key (Immobilizer)....................15
Sentry Key Replacement.....................16
Service Assistance.........................613
Service Contract..........................615
Service Engine Soon Light (Malfunction Indicator). . .298
Service Manuals..........................618
Shift Lever Override.......................533
Shoulder Belts............................47
Side View Mirror Adjustment.................116
Signals, Turn............................107
Snow Chains (Tire Chains)...................468
Snow Tires..............................462
Spare Tire...............................462
Spark Plugs.............................598
Specifications
Fuel (Gasoline).........................598
Oil . . . . . . . . . . . . . . . . . . . . . . . . . . . . . . . . ..598
Speed Control (Cruise Control)................236
Speedometer.............................305
Starting.................................25
Automatic Transmission..................40810
INDEX 639