Brake DODGE JOURNEY 2015 1.G User Guide
[x] Cancel search | Manufacturer: DODGE, Model Year: 2015, Model line: JOURNEY, Model: DODGE JOURNEY 2015 1.GPages: 140, PDF Size: 23.09 MB
Page 5 of 140
WARNING!
•Pedalsthatcannotmovefreelycancauselossofvehiclecontrolandincreasethe
risk of serious personal injury.
•Alwaysmakesurethatobjectscannotfallintothedriverfootwellwhilethevehicle
is moving. Objects can become trapped under the brake pedal and accelerator
pedal causing a loss of vehicle control.
•Failuretoproperlyfollowfloormatinstallationormountingcancauseinterference
with the brake pedal and accelerator pedal operation causing loss of control of the
vehicle.
•Neverleavechildrenaloneinavehicle,orwithaccesstoanunlockedvehicle.
Allowing children to be in a vehicle unattended is dangerous for a number of
reasons. A child or others could be seriously or fatally injured. Children should be
warned not to touch the parking brake, brake pedal or the shift lever/transmission
gear selector.
•Donotleavethekeyfobinornearthevehicle,orinalocationaccessibleto
children, and do not leave the ignition of a vehicle equipped with Keyless
Enter-N-Go in the ACC or ON/RUN mode. A child could operate power windows,
other controls, or move the vehicle.
•Neverusethe“PARK”positionasasubstitutefortheparkingbrake.Alwaysapply
the parking brake fully when parked to guard against vehicle movement and
possible injury or damage.
•RefertoyourOwner'sManualontheDVDforfurtherdetails.
USE OF AFTERMARKET PRODUCTS (ELECTRONICS)
The use of aftermarket devices including cell phones, MP3 players, GPS systems, or
chargers may affect the performance of on-board wireless features including Keyless
Enter-N-Go™ and Remote Start range. If you are experiencing difficulties with any of your
wireless features, try disconnecting your aftermarket devices to see if the situation
improves. If your symptoms persist, please see an authorized dealer.
CHRYSLER, DODGE, JEEP, RAM, SRT, MOPAR and Uconnect are registered trademarks
of Chrysler Group LLC.
COPYRIGHT ©2014 CHRYSLER GROUP LLC
INTRODUCTION/WELCOME
3
Page 7 of 140
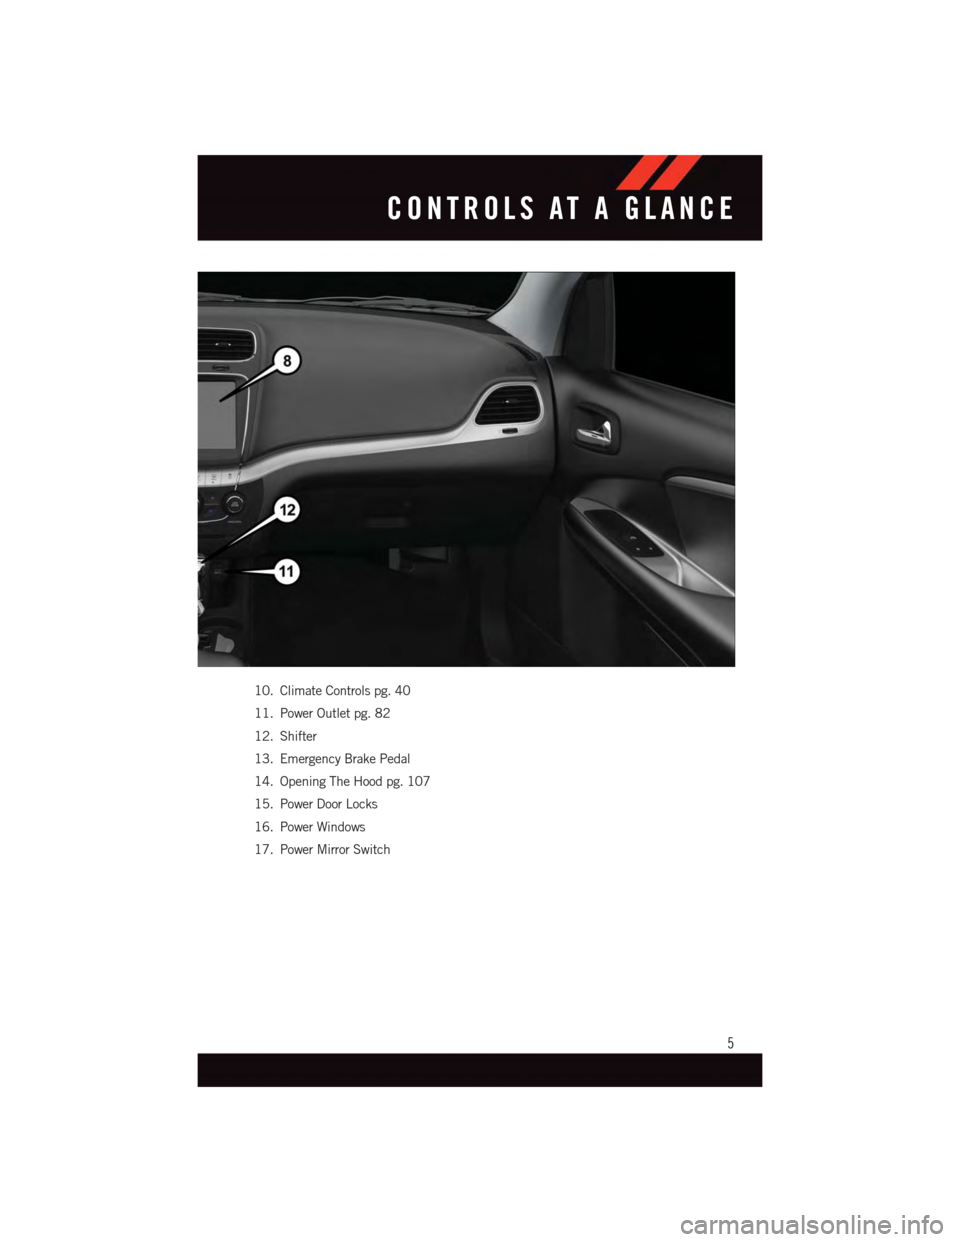
10. Climate Controls pg. 40
11. Power Outlet pg. 82
12. Shifter
13. Emergency Brake Pedal
14. Opening The Hood pg. 107
15. Power Door Locks
16. Power Windows
17. Power Mirror Switch
CONTROLS AT A GLANCE
5
Page 11 of 140
WARNING!
•Whenleavingthevehicle,alwaysremovetheKeyFobfromtheignitionandlock
your vehicle.
•Neverleavechildrenaloneinavehicle,orwithaccesstoanunlockedvehicle.
Allowing children to be in a vehicle unattended is dangerous for a number of
reasons. A child or others could be seriously or fatally injured. Children should be
warned not to touch the parking brake, brake pedal or the transmission gear
selector.
•DonotleavetheKeyFobinornearthevehicle(orinalocationaccessibleto
children), and do not leave the ignition of a vehicle equipped with Keyless
Enter-N-Go™ in the ACC or ON/RUN mode. A child could operate power windows,
other controls, or move the vehicle.
REMOTE START
•PushtheREMOTESTARTbuttonx2on the Key Fob twice within five seconds.
Pushing the REMOTE START button a third time shuts the engine off.
•Todrivethevehicle,pushtheUNLOCKbuttonandcycletheignitiontotheON/RUN
position.
•Withremotestart,theenginewillonlyrunfor15minutes(timeout)unlesstheignition
is cycled to the ON/RUN position.
•ThevehiclemustbecycledtotheON/RUNpositionaftertwoconsecutivetimeouts.
WARNING!
•Donotstartorrunanengineinaclosedgarageorconfinedarea.Exhaustgas
contains Carbon Monoxide (CO) which is odorless and colorless. Carbon Monoxide
is poisonous and can cause you or others to be severely injured or killed when
inhaled.
•KeepKeyFobtransmittersawayfromchildren.OperationoftheRemoteStart
System, windows, door locks or other controls could cause you and others to be
severely injured or killed.
GETTING STARTED
9
Page 14 of 140
ENGINE STARTING/STOPPING
Starting
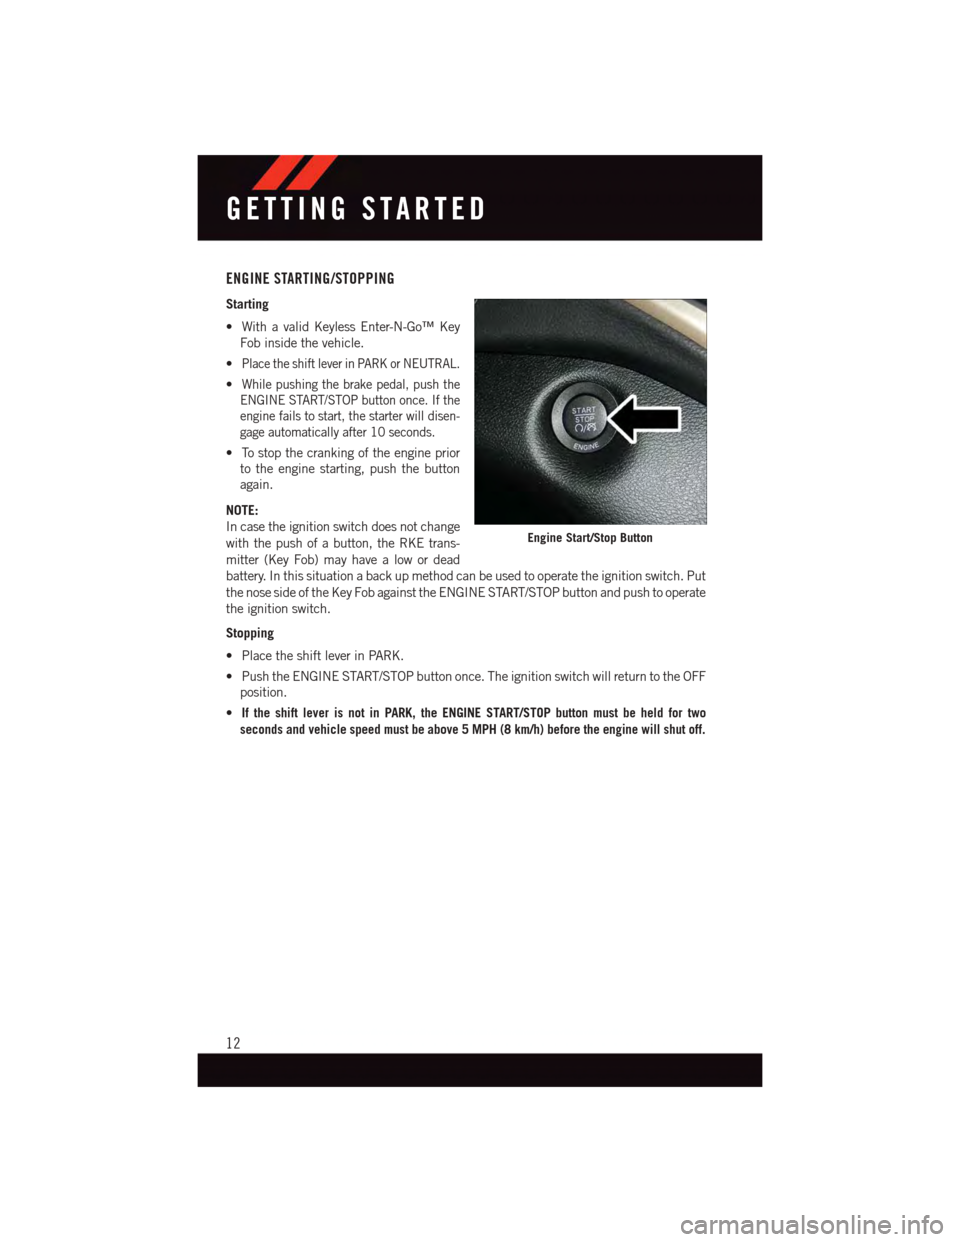
•WithavalidKeylessEnter-N-Go™Key
Fob inside the vehicle.
•Place the shift lever in PARK or NEUTRAL.
•While pushing the brake pedal, push the
ENGINE START/STOP button once. If the
engine fails to start, the starter will disen-
gage automatically after 10 seconds.
•Tostopthecrankingoftheengineprior
to the engine starting, push the button
again.
NOTE:
In case the ignition switch does not change
with the push of a button, the RKE trans-
mitter (Key Fob) may have a low or dead
battery. In this situation a back up method can be used to operate the ignition switch. Put
the nose side of the Key Fob against the ENGINE START/STOP button and push to operate
the ignition switch.
Stopping
•PlacetheshiftleverinPARK.
•PushtheENGINESTART/STOPbuttononce.TheignitionswitchwillreturntotheOFF
position.
•If the shift lever is not in PARK, the ENGINE START/STOP button must be held for two
seconds and vehicle speed must be above 5 MPH (8 km/h) before the engine will shut off.
Engine Start/Stop Button
GETTING STARTED
12
Page 15 of 140
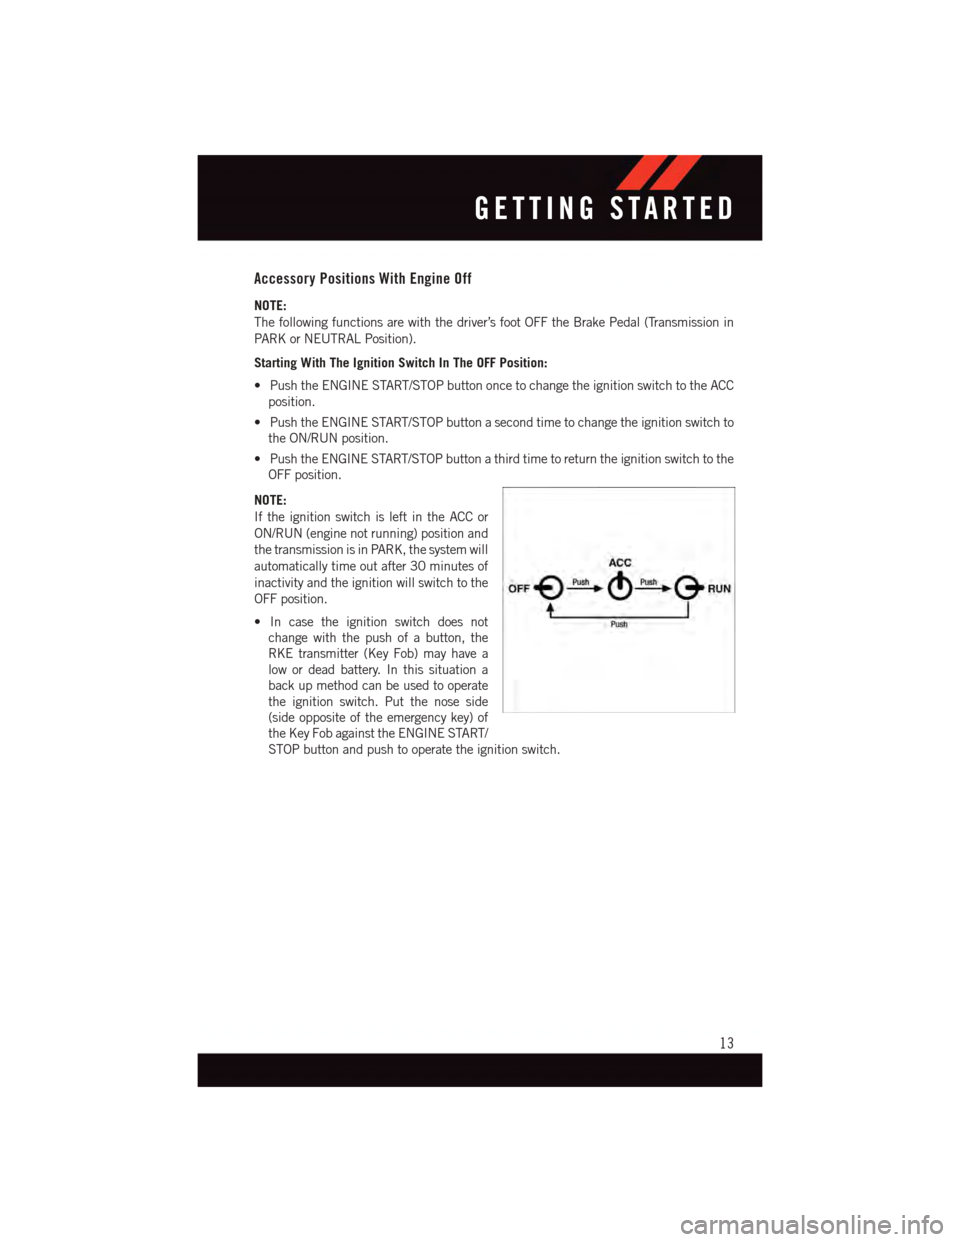
Accessory Positions With Engine Off
NOTE:
The following functions are with the driver’s foot OFF the Brake Pedal (Transmission in
PA R K o r N E U T R A L P o s i t i o n ) .
Starting With The Ignition Switch In The OFF Position:
•PushtheENGINESTART/STOPbuttononcetochangetheignitionswitchtotheACC
position.
•PushtheENGINESTART/STOPbuttonasecondtimetochangetheignitionswitchto
the ON/RUN position.
•PushtheENGINESTART/STOPbuttonathirdtimetoreturntheignitionswitchtothe
OFF position.
NOTE:
If the ignition switch is left in the ACC or
ON/RUN (engine not running) position and
the transmission is in PARK, the system will
automatically time out after 30 minutes of
inactivity and the ignition will switch to the
OFF position.
•Incasetheignitionswitchdoesnot
change with the push of a button, the
RKE transmitter (Key Fob) may have a
low or dead battery. In this situation a
back up method can be used to operate
the ignition switch. Put the nose side
(side opposite of the emergency key) of
the Key Fob against the ENGINE START/
STOP button and push to operate the ignition switch.
GETTING STARTED
13
Page 41 of 140

To Decrease Speed
When the Electronic Speed Control is set, you can decrease speed by pushing the SET-
button.
The speed decrement shown is dependant on the chosen speed unit of U.S. (MPH) or
Metric (km/h):
U.S. Speed (MPH)
•PushingtheSET-button once will result in a 1 MPH decrease in set speed. Each
subsequent tap of the button results in a decrease of 1 MPH.
•Ifthebuttoniscontinuallypushed,thesetspeedwillcontinuetodecreaseuntilthe
button is released, then the new set speed will be established.
Metric Speed (km/h)
•PushingtheSET-button once will result in a 2 km/h decrease in set speed. Each
subsequent tap of the button results in a decrease of 2 km/h.
•Ifthebuttoniscontinuallypushed,thesetspeedwillcontinuetodecreaseuntilthe
button is released, then the new set speed will be established.
Resume
To r e s u m e a p r e v i o u s l y s e l e c t e d s e t s p e e d i n m e m o r y, p u s h t h e R E S + b u t t o n a n d r e l e a s e .
Cancel
Push the CANCEL button, or apply the brakes to cancel the set speed and maintain the set
speed memory.
Push the ON/OFF button to turn the system off and erase the set speed memory.
WARNING!
•LeavingtheElectronicSpeedControlsystemonwhennotinuseisdangerous.You
could accidentally set the system or cause it to go faster than you want. You could
lose control and have a collision. Always leave the Electronic Speed Control system
off when you are not using it.
•ElectronicSpeedControlcanbedangerouswherethesystemcannotmaintaina
constant speed. Your vehicle could go too fast for the conditions, and you could lose
control. A collision could be the result. Do not use Electronic Speed Control in
heavy traffic or on roads that are winding, icy, snow-covered or slippery.
OPERATING YOUR VEHICLE
39
Page 87 of 140
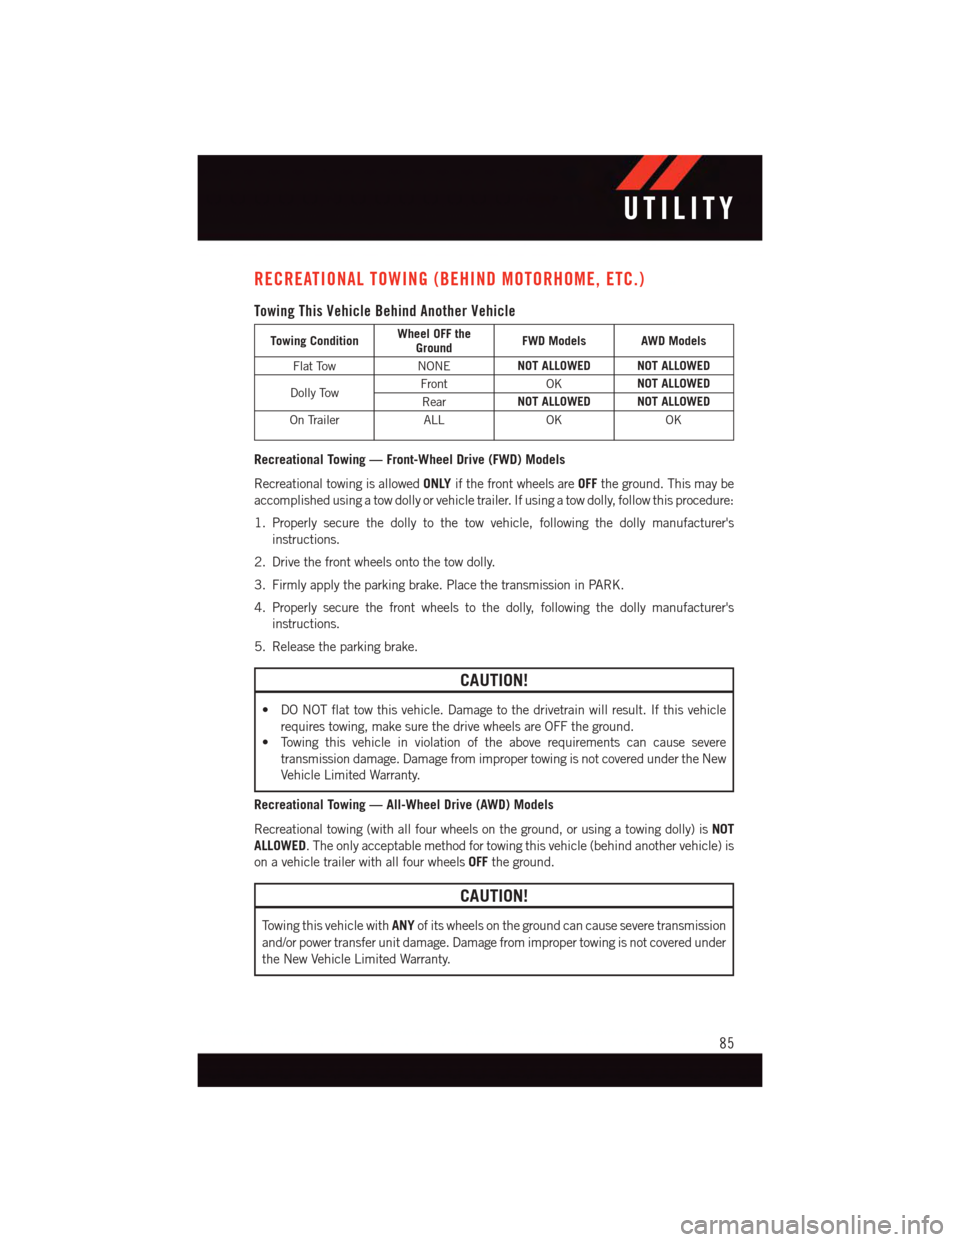
RECREATIONAL TOWING (BEHIND MOTORHOME, ETC.)
Towing This Vehicle Behind Another Vehicle
Towing ConditionWheel OFF theGroundFWD Models AWD Models
Flat TowNONENOT ALLOWED NOT ALLOWED
Dolly TowFrontOKNOT ALLOWED
RearNOT ALLOWED NOT ALLOWED
On TrailerALLOKOK
Recreational Towing — Front-Wheel Drive (FWD) Models
Recreational towing is allowedONLYif the front wheels areOFFthe ground. This may be
accomplished using a tow dolly or vehicle trailer. If using a tow dolly, follow this procedure:
1. Properly secure the dolly to the tow vehicle, following the dolly manufacturer's
instructions.
2. Drive the front wheels onto the tow dolly.
3. Firmly apply the parking brake. Place the transmission in PARK.
4. Properly secure the front wheels to the dolly, following the dolly manufacturer's
instructions.
5. Release the parking brake.
CAUTION!
•DONOTflattowthisvehicle.Damagetothedrivetrainwillresult.Ifthisvehicle
requires towing, make sure the drive wheels are OFF the ground.
•Towingthisvehicleinviolationoftheaboverequirementscancausesevere
transmission damage. Damage from improper towing is not covered under the New
Vehicle Limited Warranty.
Recreational Towing — All-Wheel Drive (AWD) Models
Recreational towing (with all four wheels on the ground, or using a towing dolly) isNOT
ALLOWED.Theonlyacceptablemethodfortowingthisvehicle(behindanothervehicle)is
on a vehicle trailer with all four wheelsOFFthe ground.
CAUTION!
To w i n g t h i s v e h i c l e w i t hANYof its wheels on the ground can cause severe transmission
and/or power transfer unit damage. Damage from improper towing is not covered under
the New Vehicle Limited Warranty.
UTILITY
85
Page 88 of 140
ROADSIDE ASSISTANCE
Dial toll-free 1-800-521-2779 for U.S. Residents or 1-800-363-4869 for Canadian
Residents.
•Provideyourname,vehicleidentificationnumber,licenseplatenumber,andyour
location, including the telephone number from which you are calling.
•Brieflydescribethenatureoftheproblemandanswerafewsimplequestions.
•Youwillbegiventhenameoftheserviceproviderandanestimatedtimeofarrival.If
you feel you are in an “unsafe situation”, please let us know. With your consent, we will
contact local police or safety authorities.
INSTRUMENT CLUSTER WARNING LIGHTS
-LowFuelWarningLight
This warning light indicates when the fuel level reaches approximately 2.0 gal (7.8 L), this
light will turn on and a single chime will sound.
-ChargingSystemLight
This light shows the status of the electrical charging system. If the charging system light
remains on, it means that the vehicle is experiencing a problem with the charging system.
We recommend you do not continue driving if the charging system light is on. Have the
vehicle serviced immediately.
-OilPressureWarningLight
This light indicates low engine oil pressure. If the light turns on while driving, stop the
vehicle and shut off the engine as soon as possible. A chime will sound for four minutes
when this light turns on.
We recommend you do not operate the vehicle or engine damage will occur. Have the
vehicle serviced immediately.
-Anti-LockBrake(ABS)Light
This light monitors the Anti-Lock Brake System (ABS). The light will turn on when the
ignition switch is turned to the ON/RUN position and may stay on for as long as four
seconds.
If the ABS light remains on or turns on while driving, it indicates that the Anti-Lock portion
of the brake system is not functioning and that service is required. However, the
conventional brake system will continue to operate normally if the BRAKE warning light is
not on.
If the ABS light is on, the brake system should be serviced as soon as possible to restore
the benefits of Anti-Lock brakes. If the ABS light does not turn on when the ignition switch
is turned to the ON/RUN position, have the light inspected by an authorized dealer.
WHAT TO DO IN EMERGENCIES
86
Page 91 of 140
WARNING!
Ahotenginecoolingsystemisdangerous.Youorotherscouldbebadlyburnedby
steam or boiling coolant.
-SeatBeltReminderLight
When the ignition switch is first turned to the ON/RUN position, this light will turn on for
four to eight seconds as a bulb check. During the bulb check, if the driver's seat belt is
unbuckled, a chime will sound. After the bulb check or when driving, if the driver or front
passenger seat belt remains unbuckled, the Seat Belt Indicator Light will flash or remain
on continuously. Refer to “Seat Belt Systems” in “Things To Know Before Starting” in the
OM on your DVD for further information.
-BrakeWarningLight
This light monitors various brake functions, including brake fluid level and parking brake
application. If the brake light turns on it may indicate that the parking brake is applied,
that the brake fluid level is low, or that there is a problem with the anti-lock brake system
reservoir.
If the light remains on when the parking brake has been disengaged, and the fluid level is
at the full mark on the master cylinder reservoir, it indicates a possible brake hydraulic
system malfunction or that a problem with the Brake Booster has been detected by the
Anti-Lock Brake System (ABS)/Electronic Stability Control (ESC) system. In this case, the
light will remain on until the condition has been corrected. If the problem is related to the
brake booster, the ABS pump will run when applying the brake and a brake pedal
pulsation may be felt during each stop.
The dual brake system provides a reserve braking capacity in the event of a failure to a
portion of the hydraulic system. A leak in either half of the dual brake system is indicated
by the Brake Warning Light, which will turn on when the brake fluid level in the master
cylinder has dropped below a specified level. The light will remain on until the cause is
corrected.
Vehicles equipped with the Anti-Lock Brake System (ABS), are also equipped with
Electronic Brake Force Distribution (EBD). In the event of an EBD failure, the Brake
Warning Light will turn on along with the ABS Light. Immediate repair to the ABS system
is required.
Operation of the Brake Warning Light can be checked by turning the ignition switch from
the OFF position to the ON/RUN position. The light should illuminate for approximately
two seconds. The light should then turn off unless the parking brake is applied or a brake
fault is detected. If the light does not illuminate, have the light inspected by an authorized
dealer.
The light also will turn on when the parking brake is applied with the ignition switch in the
ON/RUN position.
WHAT TO DO IN EMERGENCIES
89
Page 92 of 140
NOTE:
This light shows only that the parking brake is applied. It does not show the degree of
brake application.
WARNING!
Driving a vehicle with the red brake light on is dangerous. Part of the brake system may
have failed. It will take longer to stop the vehicle. You could have a collision. Have the
vehicle checked immediately.
-MalfunctionIndicatorLight(MIL)
The Malfunction Indicator Light (MIL) is part of an onboard diagnostic system called OBD
II that monitors engine and automatic transmission control systems. The light will
illuminate when the key is in the ON/RUN position before engine start. If the bulb does not
come on when turning the key from OFF to ON/RUN, have the condition checked
promptly.
Certain conditions, poor fuel quality, etc., may illuminate the light after engine start. The
vehicle should be serviced if the light stays on through several of your typical driving
cycles. In most situations, the vehicle will drive normally and will not require towing.
CAUTION!
Prolonged driving with the Malfunction Indicator Light (MIL) on could cause damage to
the engine control system. It also could affect fuel economy and driveability. If the MIL
is flashing, severe catalytic converter damage and power loss will soon occur. Imme-
diate service is required.
WARNING!
Amalfunctioningcatalyticconverter,asreferencedabove,canreachhighertempera-
tures than in normal operating conditions. This can cause a fire if you drive slowly or
park over flammable substances such as dry plants, wood, cardboard, etc. This could
result in death or serious injury to the driver, occupants or others.
-ElectronicStabilityControl(ESC)Activation/MalfunctionIndicatorLight
•Ifthisindicatorlightflashesduringacceleration,applyaslittlethrottleaspossible.
While driving, ease up on the accelerator. Adapt your speed and driving to the prevailing
road conditions. To improve the vehicle's traction when starting off in deep snow, sand
or gravel, it may be desirable to switch the ESC system off.
WHAT TO DO IN EMERGENCIES
90