warning light DODGE JOURNEY 2016 1.G Repair Manual
[x] Cancel search | Manufacturer: DODGE, Model Year: 2016, Model line: JOURNEY, Model: DODGE JOURNEY 2016 1.GPages: 664
Page 545 of 664
12. To stow the winch cable and retainer, fit the as-sembled jack-handle over the winch drive nut. Rotate
the jack-handle assembly clockwise until you hear
the winch mechanism click three times. It cannot be
over tightened.
13. Stow the jack-handle and jack. Remove the wheel blocks from the vehicle and release the park brake.
14. Check the tire pressure as soon as possible. Adjust the tire pressure as required.
Road Tire Installation
Vehicles Equipped With Wheel Covers
1. Mount the road tire on the axle.
2. To ease the installation process for steel wheels withwheel covers, install two lug nuts on the mounting
studs which are on each side of the valve stem. Install the lug nuts with the cone shaped end of the nut
toward the wheel. Lightly tighten the lug nuts.
WARNING!
To avoid the risk of forcing the vehicle off the jack,
do not tighten the lug nuts fully until the vehicle has
been lowered. Failure to follow this warning may
result in serious injury.
6
WHAT TO DO IN EMERGENCIES 543
Page 546 of 664
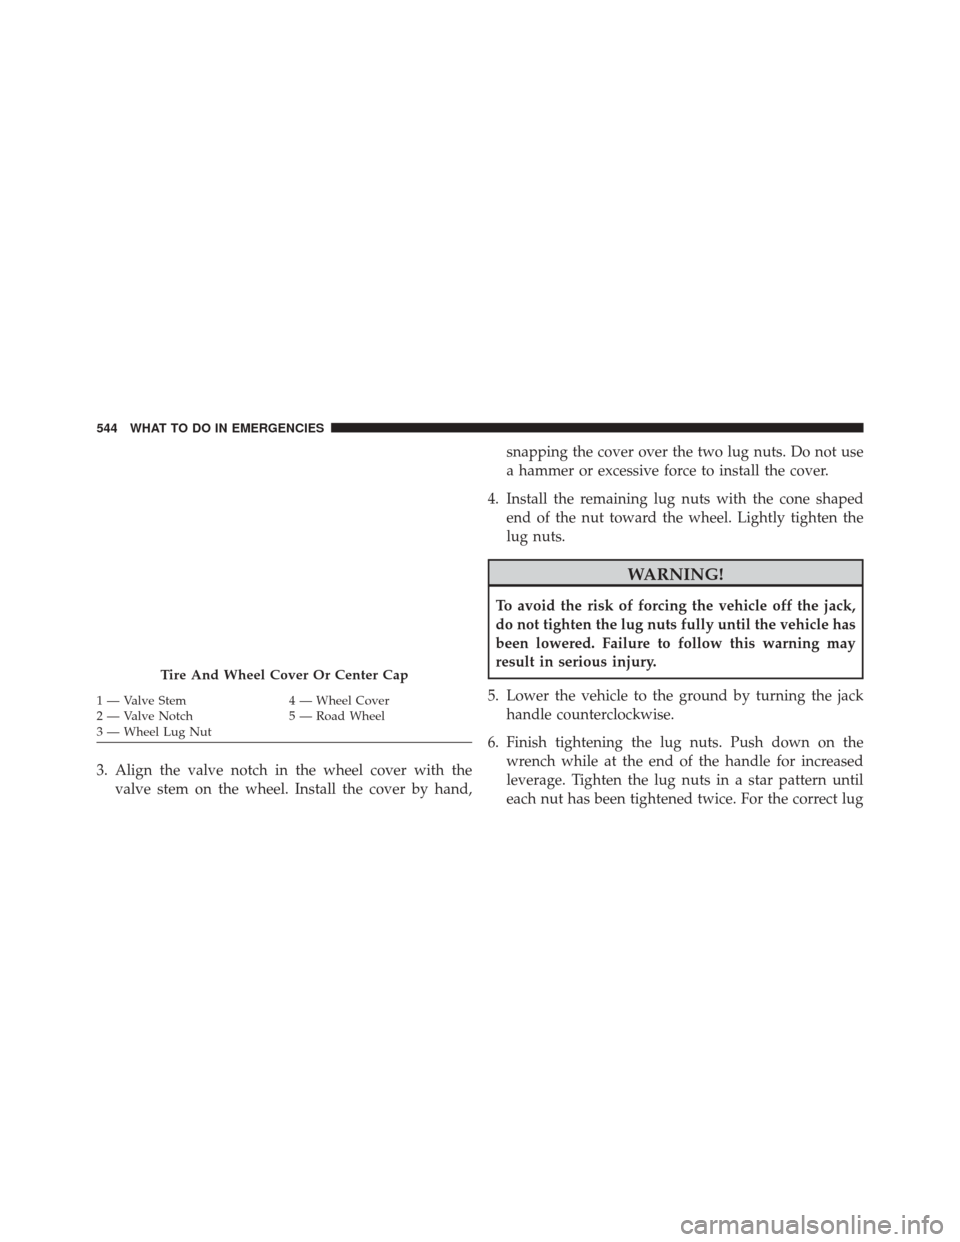
3. Align the valve notch in the wheel cover with thevalve stem on the wheel. Install the cover by hand, snapping the cover over the two lug nuts. Do not use
a hammer or excessive force to install the cover.
4. Install the remaining lug nuts with the cone shaped end of the nut toward the wheel. Lightly tighten the
lug nuts.
WARNING!
To avoid the risk of forcing the vehicle off the jack,
do not tighten the lug nuts fully until the vehicle has
been lowered. Failure to follow this warning may
result in serious injury.
5. Lower the vehicle to the ground by turning the jack handle counterclockwise.
6. Finish tightening the lug nuts. Push down on the wrench while at the end of the handle for increased
leverage. Tighten the lug nuts in a star pattern until
each nut has been tightened twice. For the correct lug
Tire And Wheel Cover Or Center Cap
1 — Valve Stem 4 — Wheel Cover
2 — Valve Notch 5 — Road Wheel
3 — Wheel Lug Nut 544 WHAT TO DO IN EMERGENCIES
Page 547 of 664
nut torque refer to Torque Specifications in this sec-
tion. If in doubt about the correct tightness, have them
checked with a torque wrench by your authorized
dealer or service station.
7. After 25 miles (40 km) check the lug nut torque with a torque wrench to ensure that all lug nuts are properly
seated against the wheel.
Vehicles Without Wheel Covers
1. Mount the road tire on the axle.
2. Install the remaining lug nuts with the cone shapedend of the nut toward the wheel. Lightly tighten the
lug nuts.
WARNING!
To avoid the risk of forcing the vehicle off the jack,
do not tighten the lug nuts fully until the vehicle has
been lowered. Failure to follow this warning may
result in serious injury.
3. Lower the vehicle to the ground by turning the jack handle counterclockwise.
4. Finish tightening the lug nuts. Push down on the wrench while at the end of the handle for increased
leverage. Tighten the lug nuts in a star pattern until
each nut has been tightened twice. For proper lug nut
torque refer to Torque Specifications in this secton. If
in doubt about the correct tightness, have them
checked with a torque wrench by your authorized
dealer or service station.
6
WHAT TO DO IN EMERGENCIES 545
Page 548 of 664
5. After 25 miles (40 km) check the lug nut torque with atorque wrench to ensure that all lug nuts are properly
seated against the wheel.
JUMP-STARTING
If your vehicle has a discharged battery it can be jump-
started using a set of jumper cables and a battery in
another vehicle or by using a portable battery booster
pack. Jump-starting can be dangerous if done improperly
so please follow the procedures in this section carefully.
WARNING!
Do not attempt jump-starting if the battery is frozen.
It could rupture or explode and cause personal injury.
CAUTION!
Do not use a portable battery booster pack or any
other booster source with a system voltage greater
than 12 Volts or damage to the battery, starter motor,
alternator or electrical system may occur.
NOTE: When using a portable battery booster pack
follow the manufacturer’s operating instructions and
precautions.
Preparations For Jump-Start
The battery in your vehicle is located between the left
front headlight assembly and the left front wheel splash
shield. To allow jump-starting, there are remote battery
posts located on the left side of the engine compartment.
546 WHAT TO DO IN EMERGENCIES
Page 588 of 664
WARNING!(Continued)
high brake temperatures, excessive lining wear, and
possible brake damage. You would not have your full
braking capacity in an emergency.
Master Cylinder — Brake Fluid Level Check
Check the fluid level in the master cylinder immediately
if the “Brake Warning Light” indicates system failure.
Check the fluid level in the master cylinder when per-
forming underhood services.
Clean the top of the master cylinder area before removing
the cap. If necessary, add fluid to bring the fluid level up
to the requirements described on the brake fluid reser-
voir.
Overfilling of fluid is not recommended because it may
cause leaking in the system. Fluid level can be expected to fall as the brake pads wear.
Brake fluid level should be checked when pads are
replaced. However, low fluid level may be caused by a
leak and a checkup may be needed.
Use only manufacturer’s recommended brake fluid. Re-
fer to “Fluids, Lubricants, And Genuine Parts” in “Main-
taining Your Vehicle” for further information.
WARNING!
•Use only manufacturer’s recommended brake fluid.
Refer to “Fluids, Lubricants, And Genuine Parts” in
“Maintaining Your Vehicle” for further information.
Using the wrong type of brake fluid can severely
damage your brake system and/or impair its perfor-
mance. The proper type of brake fluid for your
vehicle is also identified on the original factory
installed hydraulic master cylinder reservoir.
(Continued)
586 MAINTAINING YOUR VEHICLE
Page 634 of 664
Warranty expires. The manufacturer stands behind only
the manufacturer’s service contracts. If you purchased a
manufacturer’s service contract, you will receive Plan
Provisions and an Owner Identification Card in the mail
within three weeks of the vehicle delivery date. If you
have any questions about the service contract, call the
manufacturer’s Service Contract National Customer
Hotline at 1-800-521-9922 (Canadian residents, call (800)
465-2001 English / (800) 387-9983 French).
The manufacturer will not stand behind any service
contract that is not the manufacturer’s service contract. It
is not responsible for any service contract other than the
manufacturer’s service contract. If you purchased a ser-
vice contract that is not a manufacturer’s service contract,
and you require service after the manufacturer’s New
Vehicle Limited Warranty expires, please refer to the
contract documents, and contact the person listed in
those documents.We appreciate that you have made a major investment
when you purchased the vehicle. An authorized dealer
has also made a major investment in facilities, tools, and
training to assure that you are absolutely delighted with
the ownership experience. You will be pleased with their
sincere efforts to resolve any warranty issues or related
concerns.
WARNING!
Engine exhaust (internal combustion engines only),
some of its constituents, and certain vehicle compo-
nents contain, or emit, chemicals known to the State
of California to cause cancer and birth defects, or
other reproductive harm. In addition, certain fluids
contained in vehicles and certain products of compo-
nent wear contain, or emit, chemicals known to the
State of California to cause cancer and birth defects,
or other reproductive harm.
632 IF YOU NEED CONSUMER ASSISTANCE
Page 640 of 664
About Your Brakes.....................446, 449
Adding Engine Coolant (Antifreeze) ............581
Adding Fuel ............................ .505
Adding Washer Fluid ..................... .576
Additives, Fuel .......................... .500
Adjust Down .............................. .200
Forward ............................. .200
Rearward ............................ .200
Up ................................ .200
AirBag.............................. .63, 64
Advance Front Air Bag .................64, 65
Air Bag Operation .......................66
Air Bag Warning Light ....................75
Driver Knee Air Bag ......................67
Enhanced Accident Response ................74
Event Data Recorder (EDR) .................77
FrontAirBag ........................63, 64
If A Deployment Occurs ...................73 Knee Impact Bolsters
.....................67
Maintaining Your Air Bag System ............76
Side Air Bags ...........................68
Transporting Pets ...................... .106
Air Bag Deployment ........................63
Air Bag Light ..................... .75, 109, 303
Air Bag Maintenance .......................76
Air Cleaner, Engine (Engine Air Cleaner Filter) . . . .569
Air Conditioner Maintenance .................571
Air Conditioning Filter ..................417, 572
Air Conditioning, Operating Tips ...........416, 418
Air Conditioning, Rear Zone ..............397, 411
Air Conditioning Refrigerant .................571
Air Conditioning System ....................571
Air Pressure, Tires ........................ .476
Alarm, Panic .............................23
Alarm (Security Alarm) ..................18, 306
Alarm System (Security Alarm) ................18
All Wheel Drive (AWD) .....................441
638 INDEX
Page 641 of 664
Alterations/Modifications, Vehicle...............7
Antifreeze (Engine Coolant) ...............580, 614
Disposal ............................. .583
Anti-Lock Brake System (ABS) ................450
Anti-Lock Warning Light ....................321
Appearance Care ........................ .592
Arming System (Security Alarm) ...............18
Assist, Hill Start ......................... .453
Auto Down Power Windows ..................42
Automatic Dimming Mirror ..................119
Automatic Door Locks ....................32, 33
Automatic Headlights ..................... .225
Automatic Oil Change Indicator ...............331
Automatic Transmission .................429, 587
Adding Fluid ...................588, 590, 618
Fluid And Filter Changes ..................591
Fluid Level Check ...................588, 590
Fluid Type ........................... .618
Gear Ranges .......................... .433Special Additives
...................... .588
Autostick .............................. .439
Auto Unlock, Doors ........................33
Auxiliary Electrical Outlet (Power Outlet) ........268
Auxiliary Power Outlet .....................268
Back-Up Lights .......................... .610
Battery ............................ .309, 569
Charging System Light ...................309
Keyless Transmitter Replacement (RKE) ........24
Location ............................. .569
Belts, Seat .............................. .109
Bluetooth Connecting To A Particular Mobile Phone Or
Audio Device After Pairing ................157
Connect Or Disconnect Link Between the Uconnect
Phone And Mobile Phone ..............143, 173
Pair (Link) Uconnect Phone To A Mobile
Phone ........................... .129, 153
10
INDEX 639
Page 642 of 664
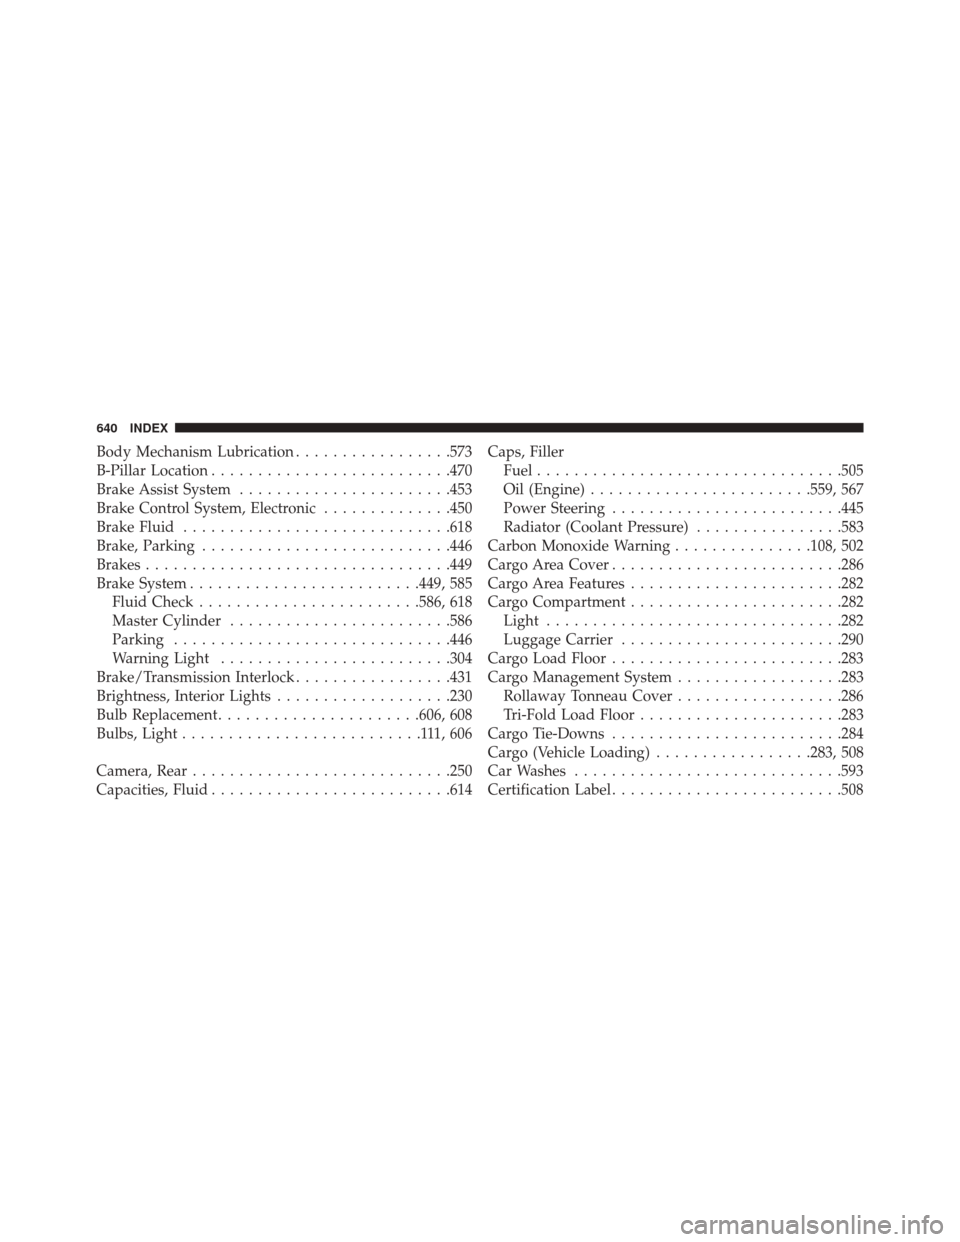
Body Mechanism Lubrication.................573
B-Pillar Location ......................... .470
Brake Assist System ...................... .453
Brake Control System, Electronic ..............450
Brake Fluid ............................ .618
Brake, Parking .......................... .446
Brakes ................................ .449
Brake System ........................ .449, 585
Fluid Check ....................... .586, 618
Master Cylinder ....................... .586
Parking ............................. .446
Warning Light ........................ .304
Brake/Transmission Interlock .................431
Brightness, Interior Lights ...................230
Bulb Replacement ..................... .606, 608
Bulbs, Light ..........................111,606
Camera, Rear ........................... .250
Capacities, Fluid ......................... .614Caps, Filler
Fuel ................................ .505
Oil (Engine) ....................... .559, 567
Power Steering ........................ .445
Radiator (Coolant Pressure) ................583
Carbon Monoxide Warning ...............108, 502
Cargo Area Cover ........................ .286
Cargo Area Features ...................... .282
Cargo Compartment ...................... .282
Light ............................... .282
Luggage Carrier ....................... .290
Cargo Load Floor ........................ .283
Cargo Management System ..................283
Rollaway Tonneau Cover ..................286
Tri-Fold Load Floor ..................... .283
Cargo Tie-Downs ........................ .284
Cargo (Vehicle Loading) .................283, 508
Car
Washes ............................ .593
Certification Label ........................ .508
640 INDEX
Page 645 of 664
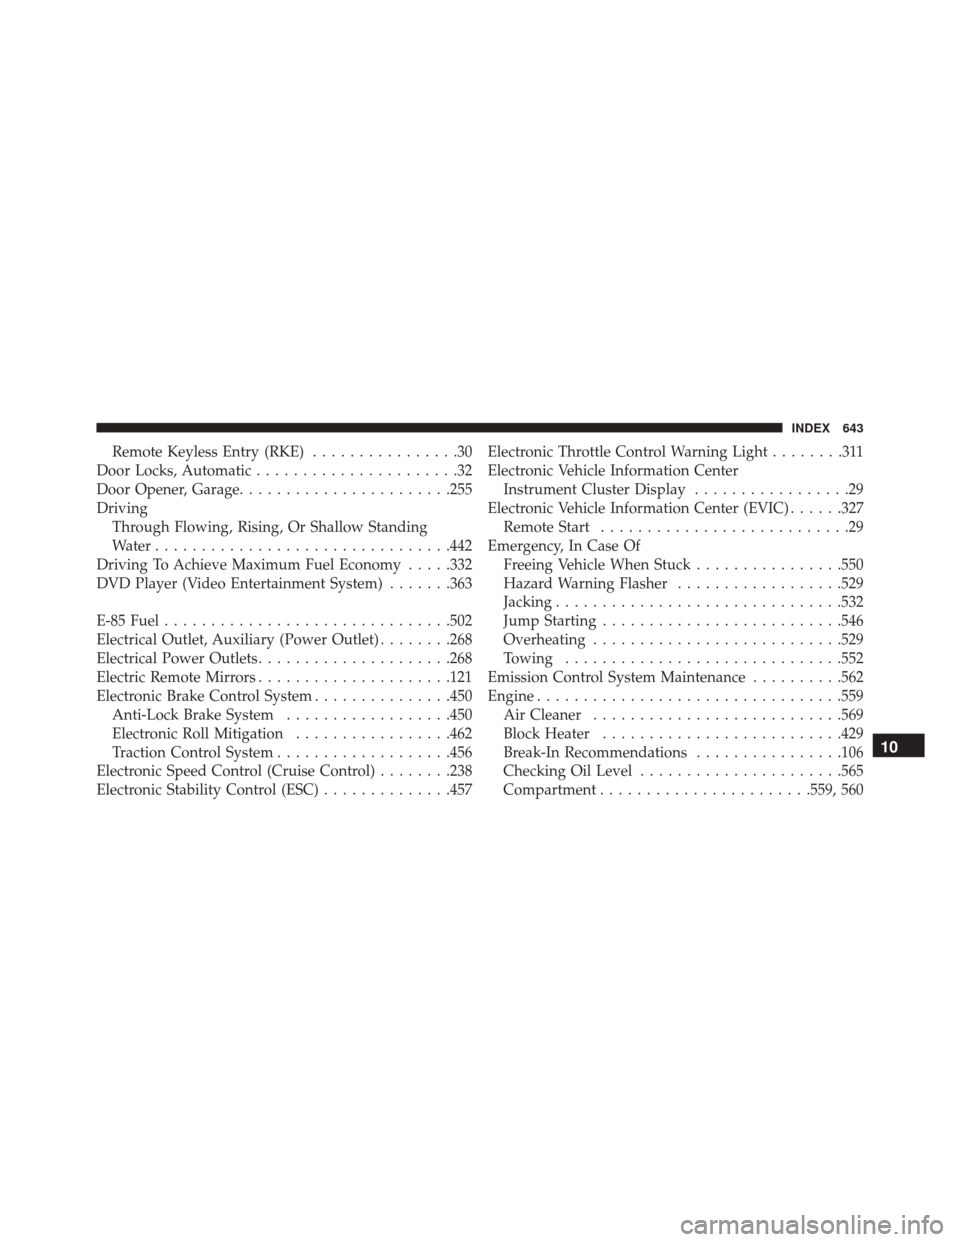
Remote Keyless Entry (RKE)................30
Door Locks, Automatic ......................32
Door Opener, Garage ...................... .255
Driving Through Flowing, Rising, Or Shallow Standing
Water ............................... .442
Driving To Achieve Maximum Fuel Economy .....332
DVD Player (Video Entertainment System) .......363
E-85 Fuel .............................. .502
Electrical Outlet, Auxiliary (Power Outlet) ........268
Electrical Power Outlets .....................268
Electric Remote Mirrors .....................121
Electronic Brake Control System ...............450
Anti-Lock Brake System ..................450
Electronic Roll Mitigation .................462
Traction Control System ...................456
Electronic Speed Control (Cruise Control) ........238
Electronic Stability Control (ESC) ..............457Electronic Throttle Control Warning Light
........311
Electronic Vehicle Information Center Instrument Cluster Display .................29
Electronic Vehicle Information Center (EVIC) ......327
Remote Start ...........................29
Emergency, In Case Of Freeing Vehicle When Stuck ................550
Hazard Warning Flasher ..................529
Jacking .............................. .532
Jump Starting ......................... .546
Overheating .......................... .529
Towing ............................. .552
Emission Control System Maintenance ..........562
Engine ................................ .559
Air Cleaner .......................... .569
Block Heater ......................... .429
Break-In Recommendations ................106
Checking Oil Level ..................... .565
Compartment ...................... .559, 560
10
INDEX 643