ECU DODGE JOURNEY 2019 User Guide
[x] Cancel search | Manufacturer: DODGE, Model Year: 2019, Model line: JOURNEY, Model: DODGE JOURNEY 2019Pages: 524, PDF Size: 5.29 MB
Page 47 of 524
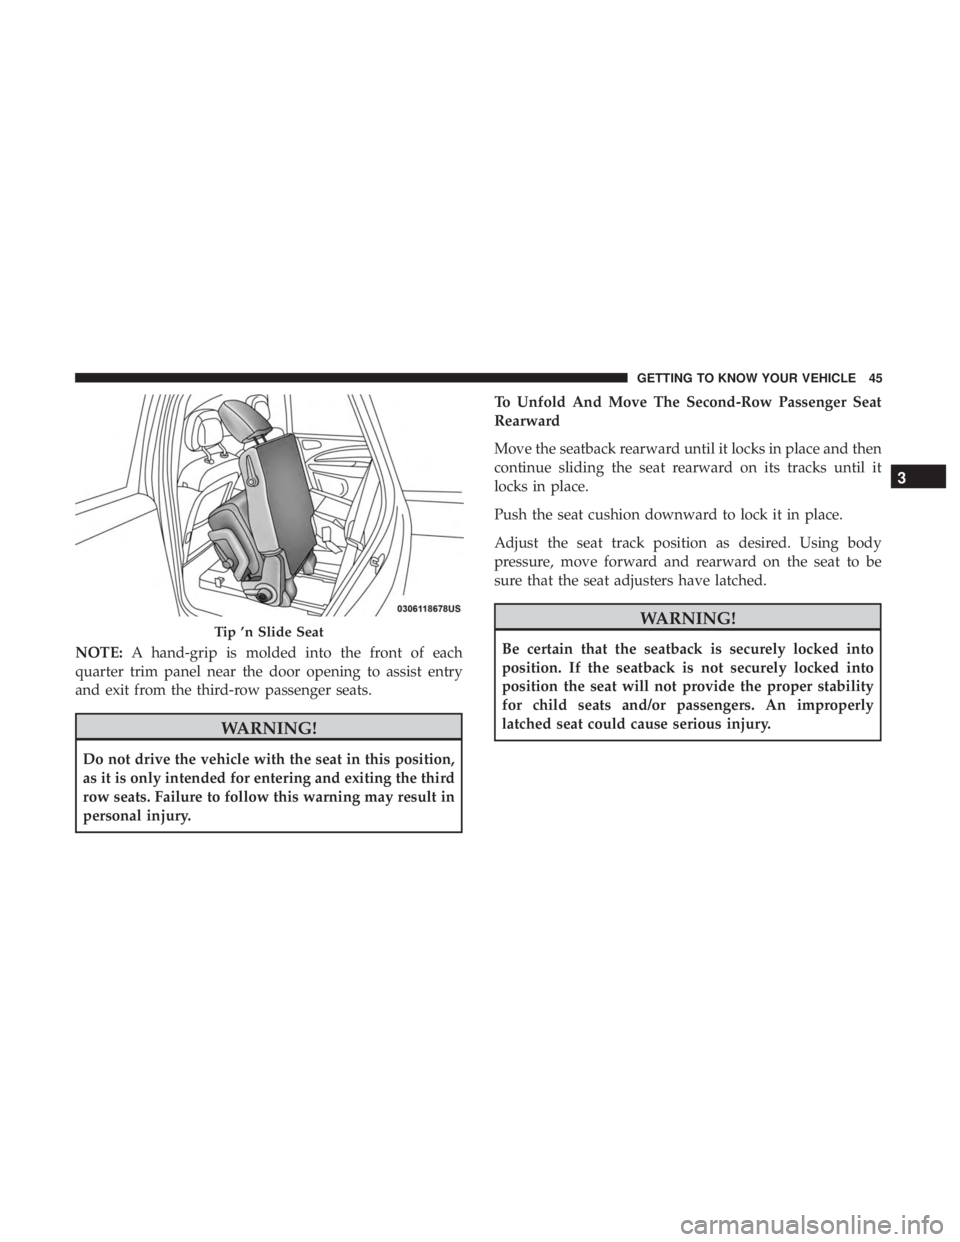
NOTE:A hand-grip is molded into the front of each
quarter trim panel near the door opening to assist entry
and exit from the third-row passenger seats.
WARNING!
Do not drive the vehicle with the seat in this position,
as it is only intended for entering and exiting the third
row seats. Failure to follow this warning may result in
personal injury. To Unfold And Move The Second-Row Passenger Seat
Rearward
Move the seatback rearward until it locks in place and then
continue sliding the seat rearward on its tracks until it
locks in place.
Push the seat cushion downward to lock it in place.
Adjust the seat track position as desired. Using body
pressure, move forward and rearward on the seat to be
sure that the seat adjusters have latched.
WARNING!
Be certain that the seatback is securely locked into
position. If the seatback is not securely locked into
position the seat will not provide the proper stability
for child seats and/or passengers. An improperly
latched seat could cause serious injury.
Tip ’n Slide Seat
3
GETTING TO KNOW YOUR VEHICLE 45
Page 48 of 524
Manual Folding Second Row Seat
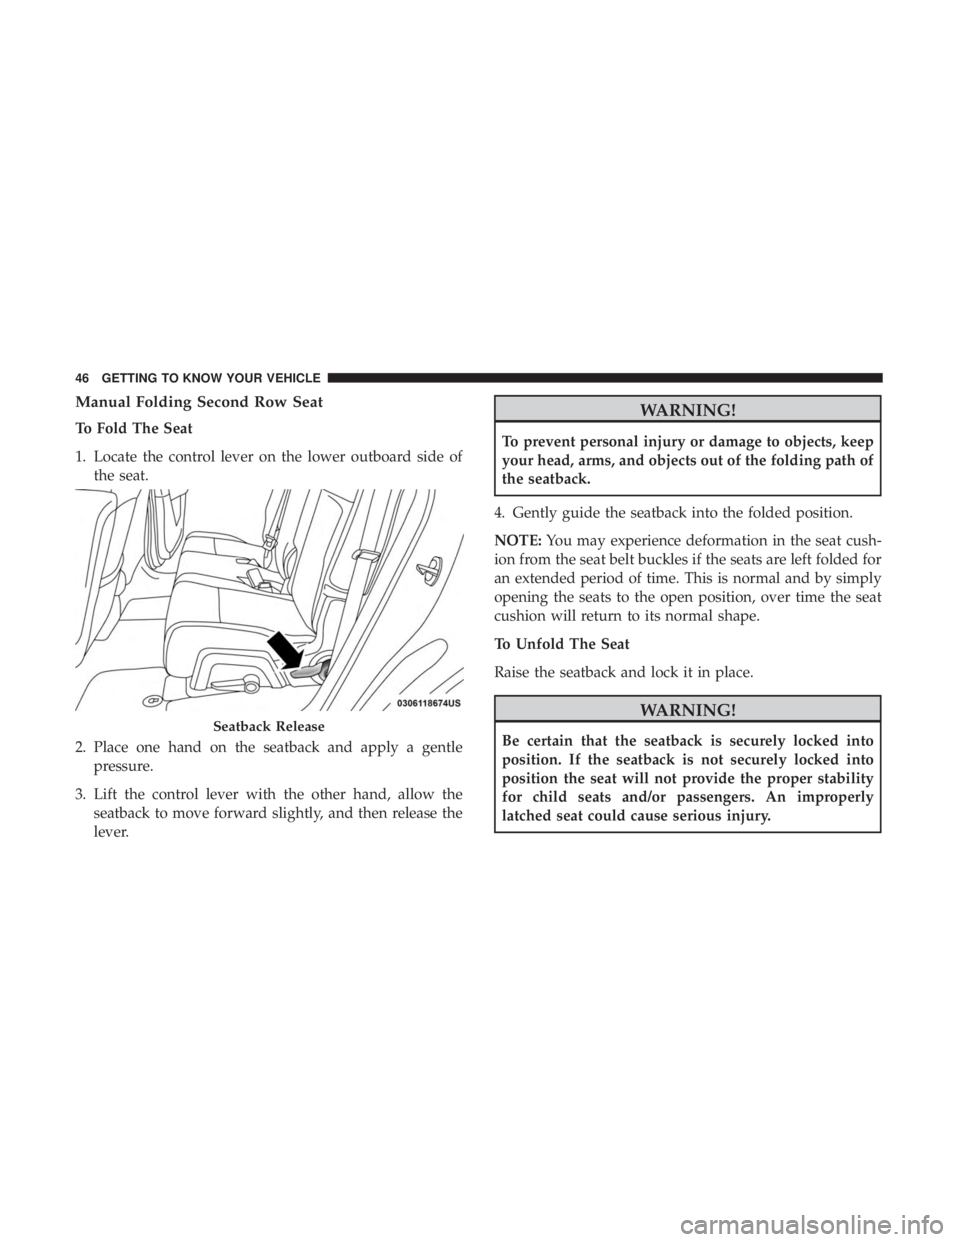
To Fold The Seat
1. Locate the control lever on the lower outboard side ofthe seat.
2. Place one hand on the seatback and apply a gentle pressure.
3. Lift the control lever with the other hand, allow the seatback to move forward slightly, and then release the
lever.
WARNING!
To prevent personal injury or damage to objects, keep
your head, arms, and objects out of the folding path of
the seatback.
4. Gently guide the seatback into the folded position.
NOTE: You may experience deformation in the seat cush-
ion from the seat belt buckles if the seats are left folded for
an extended period of time. This is normal and by simply
opening the seats to the open position, over time the seat
cushion will return to its normal shape.
To Unfold The Seat
Raise the seatback and lock it in place.
WARNING!
Be certain that the seatback is securely locked into
position. If the seatback is not securely locked into
position the seat will not provide the proper stability
for child seats and/or passengers. An improperly
latched seat could cause serious injury.Seatback Release
46 GETTING TO KNOW YOUR VEHICLE
Page 50 of 524
To Unfold The Seatback
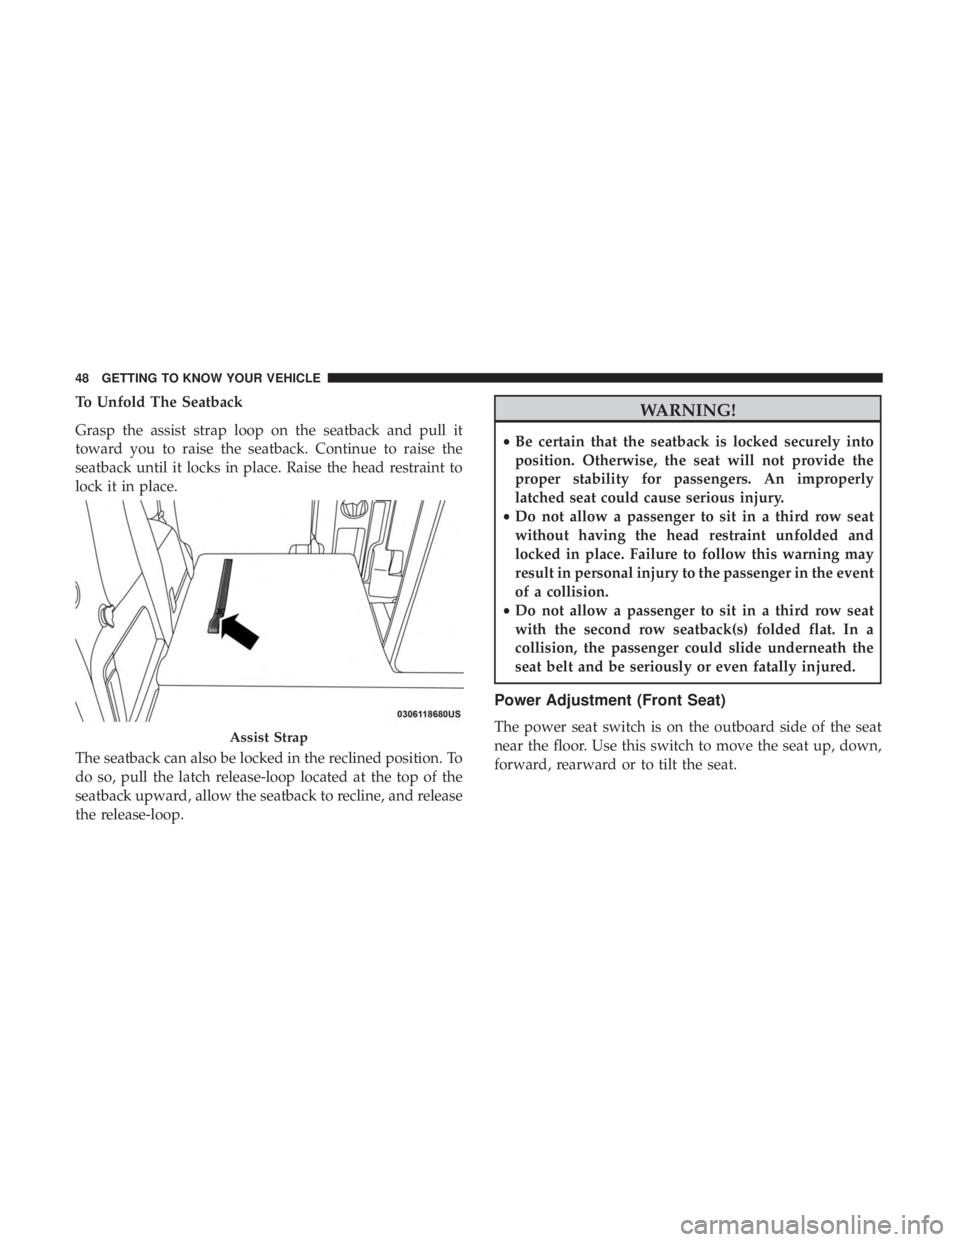
Grasp the assist strap loop on the seatback and pull it
toward you to raise the seatback. Continue to raise the
seatback until it locks in place. Raise the head restraint to
lock it in place.
The seatback can also be locked in the reclined position. To
do so, pull the latch release-loop located at the top of the
seatback upward, allow the seatback to recline, and release
the release-loop.WARNING!
•Be certain that the seatback is locked securely into
position. Otherwise, the seat will not provide the
proper stability for passengers. An improperly
latched seat could cause serious injury.
• Do not allow a passenger to sit in a third row seat
without having the head restraint unfolded and
locked in place. Failure to follow this warning may
result in personal injury to the passenger in the event
of a collision.
• Do not allow a passenger to sit in a third row seat
with the second row seatback(s) folded flat. In a
collision, the passenger could slide underneath the
seat belt and be seriously or even fatally injured.
Power Adjustment (Front Seat)
The power seat switch is on the outboard side of the seat
near the floor. Use this switch to move the seat up, down,
forward, rearward or to tilt the seat.Assist Strap
48 GETTING TO KNOW YOUR VEHICLE
Page 54 of 524
Raise the seatback/armrest and lock it in place when not in
use, or when additional seating area is required.
WARNING!
Keep the latch clean and free of objects and be certain
that the seatback/armrest is locked securely into posi-
tion. Otherwise, the seat will not provide the proper
stability for child seats and/or passengers. An improp-
erly latched seat could cause serious injury.
HEAD RESTRAINTS
Head restraints are designed to reduce the risk of injury by
restricting head movement in the event of a rear impact.
Head restraints should be adjusted so that the top of the
head restraint is located above the top of your ear.
WARNING!
•All occupants, including the driver, should not oper-
ate a vehicle or sit in a vehicle’s seat until the head
restraints are placed in their proper positions in
order to minimize the risk of neck injury in the event
of a crash.
(Continued)
WARNING! (Continued)
•Head restraints should never be adjusted while the
vehicle is in motion. Driving a vehicle with the head
restraints improperly adjusted or removed could
cause serious injury or death in the event of a
collision.
Supplemental Active Head Restraints (AHR) —
Front Seats
Supplemental Active Head Restraints are passive, deploy-
able components, and vehicles with this equipment can not
be readily identified by any markings, only through visual
inspection of the head restraint. The head restraint will be
split in two halves, with the front half being soft foam and
trim, the back half being decorative plastic.
When AHRs deploy during a rear impact, the front half of
the head restraint extends forward to minimize the gap
between the back of the occupant’s head and the AHR. This
system is designed to help prevent or reduce the extent of
injuries to the driver and front passenger in certain types of
rear impacts. Refer to “Occupant Restraint Systems” in
“Safety” for further information.
52 GETTING TO KNOW YOUR VEHICLE
Page 56 of 524

NOTE:
•The head restraints should only be removed by qualified
technicians, for service purposes only. If either of the
head restraints require removal, see your authorized
dealer.
• In the event of deployment of an Active Head Restraint,
refer to “Occupant Restraints/Supplemental Active
Head Restraints (AHR)/Resetting Active Head Re-
straints (AHR)” in “Safety” for further information.
WARNING!
• All occupants, including the driver, should not oper-
ate a vehicle or sit in a vehicle’s seat until the head
restraints are placed in their proper positions in
order to minimize the risk of neck injury in the event
of a collision.
• Do not place items over the top of the Active Head
Restraint, such as coats, seat covers or portable DVD
players. These items may interfere with the opera-
tion of the Active Head Restraint in the event of a
collision and could result in serious injury or death.
• Active Head Restraints may be deployed if they are
struck by an object such as a hand, foot or loose
cargo. To avoid accidental deployment of the Active
Head Restraint ensure that all cargo is secured, as
loose cargo could contact the Active Head Restraint
during sudden stops. Failure to follow this warning
could cause personal injury if the Active Head Re-
straint is deployed.
Active Head Restraint (Tilted)
54 GETTING TO KNOW YOUR VEHICLE
Page 57 of 524
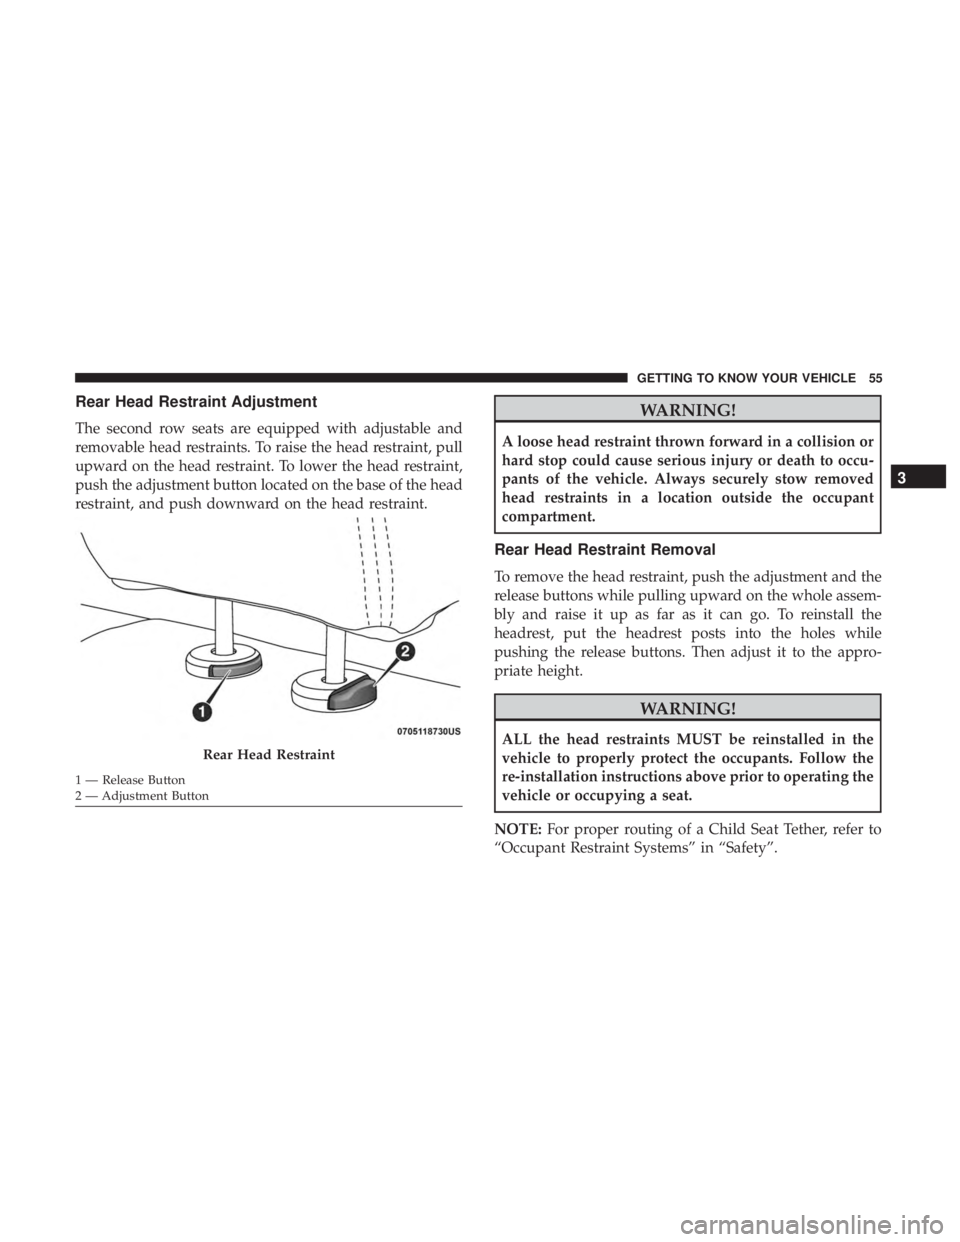
Rear Head Restraint Adjustment
The second row seats are equipped with adjustable and
removable head restraints. To raise the head restraint, pull
upward on the head restraint. To lower the head restraint,
push the adjustment button located on the base of the head
restraint, and push downward on the head restraint.
WARNING!
A loose head restraint thrown forward in a collision or
hard stop could cause serious injury or death to occu-
pants of the vehicle. Always securely stow removed
head restraints in a location outside the occupant
compartment.
Rear Head Restraint Removal
To remove the head restraint, push the adjustment and the
release buttons while pulling upward on the whole assem-
bly and raise it up as far as it can go. To reinstall the
headrest, put the headrest posts into the holes while
pushing the release buttons. Then adjust it to the appro-
priate height.
WARNING!
ALL the head restraints MUST be reinstalled in the
vehicle to properly protect the occupants. Follow the
re-installation instructions above prior to operating the
vehicle or occupying a seat.
NOTE: For proper routing of a Child Seat Tether, refer to
“Occupant Restraint Systems” in “Safety”.Rear Head Restraint
1 — Release Button
2 — Adjustment Button
3
GETTING TO KNOW YOUR VEHICLE 55
Page 107 of 524
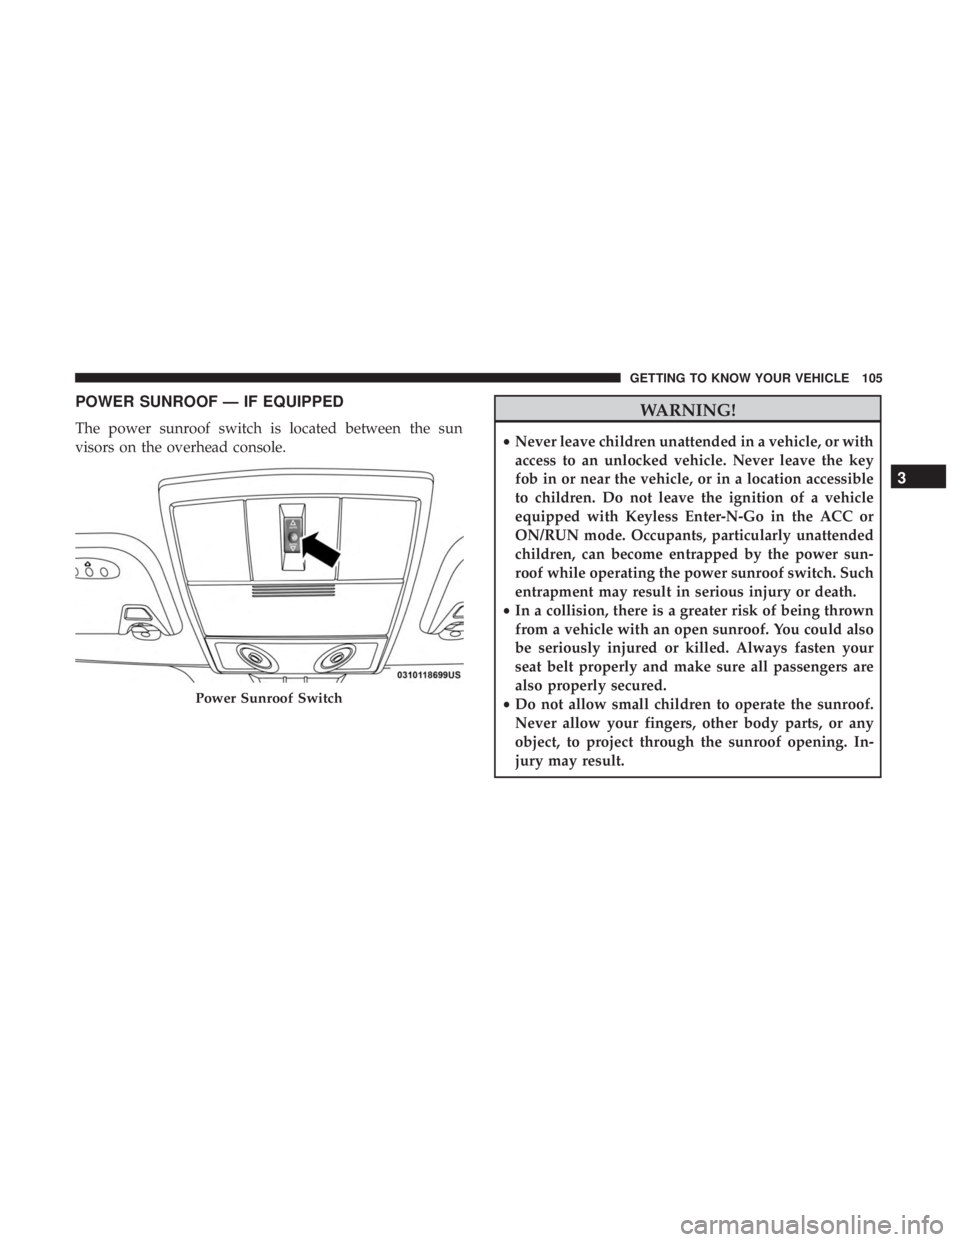
POWER SUNROOF — IF EQUIPPED
The power sunroof switch is located between the sun
visors on the overhead console.
WARNING!
•Never leave children unattended in a vehicle, or with
access to an unlocked vehicle. Never leave the key
fob in or near the vehicle, or in a location accessible
to children. Do not leave the ignition of a vehicle
equipped with Keyless Enter-N-Go in the ACC or
ON/RUN mode. Occupants, particularly unattended
children, can become entrapped by the power sun-
roof while operating the power sunroof switch. Such
entrapment may result in serious injury or death.
• In a collision, there is a greater risk of being thrown
from a vehicle with an open sunroof. You could also
be seriously injured or killed. Always fasten your
seat belt properly and make sure all passengers are
also properly secured.
• Do not allow small children to operate the sunroof.
Never allow your fingers, other body parts, or any
object, to project through the sunroof opening. In-
jury may result.
Power Sunroof Switch
3
GETTING TO KNOW YOUR VEHICLE 105
Page 110 of 524
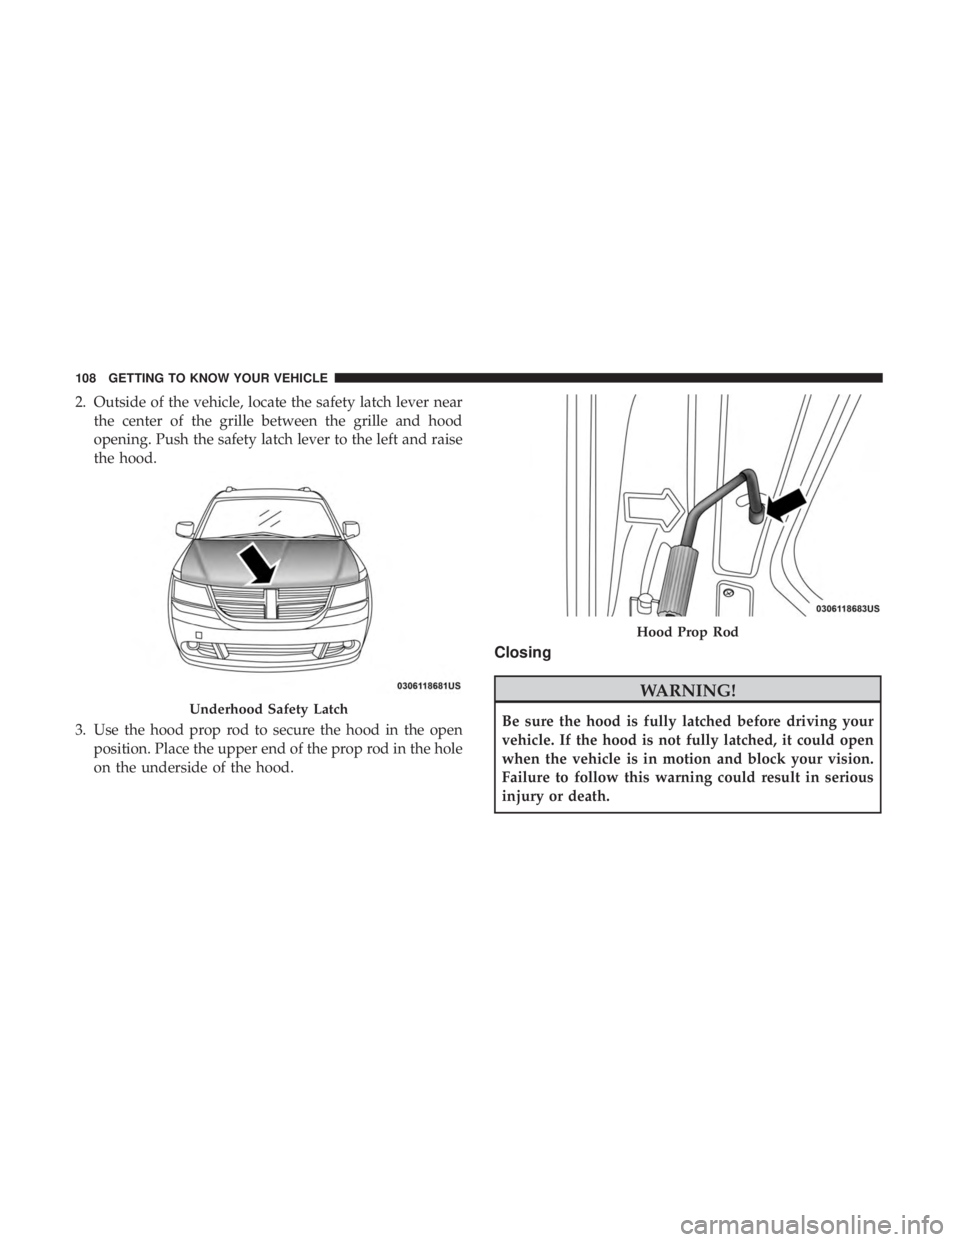
2. Outside of the vehicle, locate the safety latch lever nearthe center of the grille between the grille and hood
opening. Push the safety latch lever to the left and raise
the hood.
3. Use the hood prop rod to secure the hood in the open position. Place the upper end of the prop rod in the hole
on the underside of the hood.
Closing
WARNING!
Be sure the hood is fully latched before driving your
vehicle. If the hood is not fully latched, it could open
when the vehicle is in motion and block your vision.
Failure to follow this warning could result in serious
injury or death.Underhood Safety Latch
Hood Prop Rod
108 GETTING TO KNOW YOUR VEHICLE
Page 113 of 524
Retractable Cargo Area Cover (If Equipped) — Five
Passenger Models
NOTE:The purpose of this cover is for privacy, not to
secure loads. It will not prevent cargo from shifting or
protect passengers from loose cargo.
The removable retractable cargo area cover mounts in the
cargo area behind the top of the rear seats.
The cover, when extended, covers the cargo area to keep
items out of sight. Notches in the trim panels near the
liftgate opening secure the extended cover in place.
The cover rolls away neatly inside its housing when not in
use. You can also remove the cover from the vehicle to
make more room in the cargo area.
To Install The Cover:
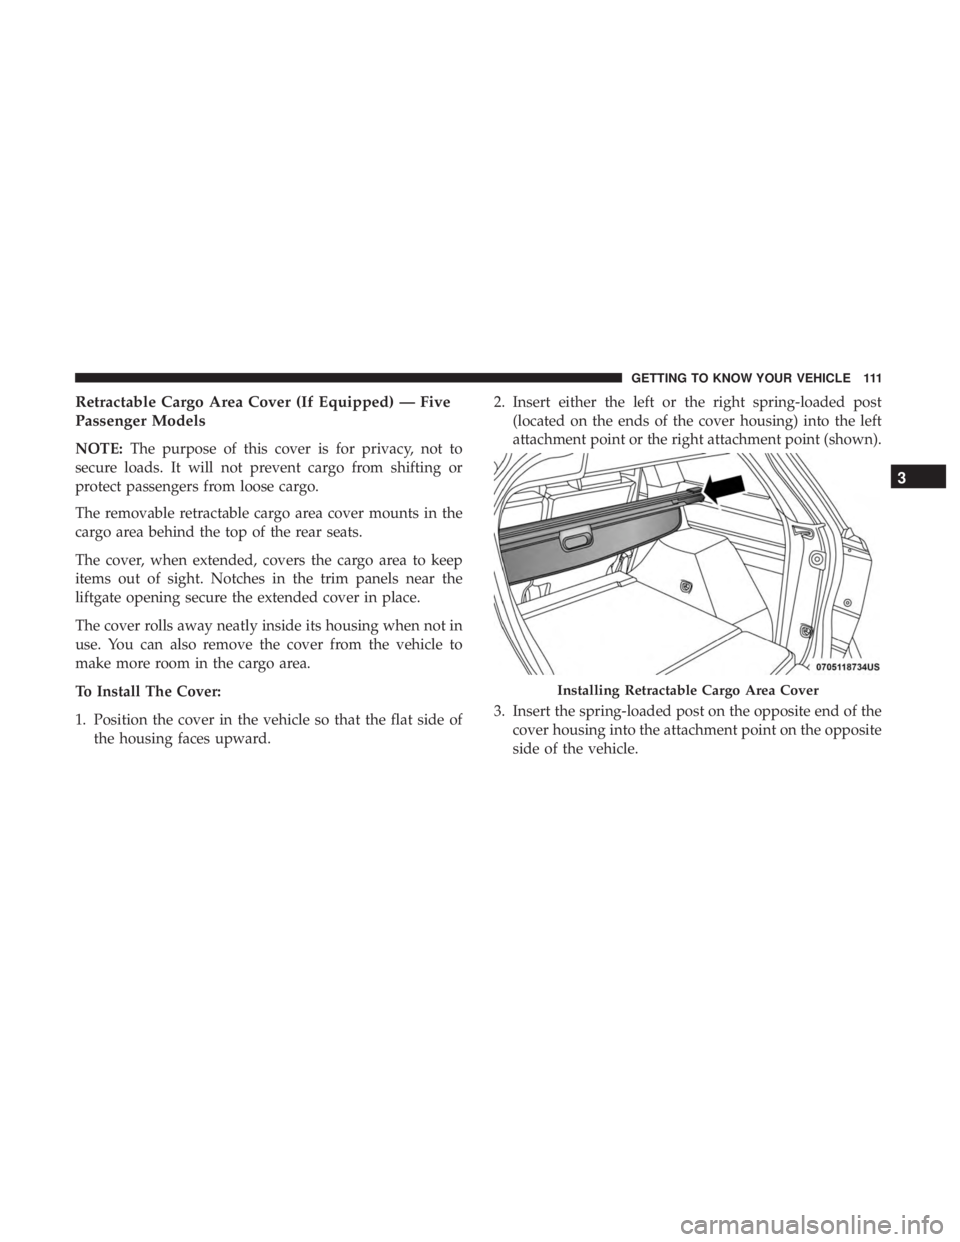
1. Position the cover in the vehicle so that the flat side of the housing faces upward. 2. Insert either the left or the right spring-loaded post
(located on the ends of the cover housing) into the left
attachment point or the right attachment point (shown).
3. Insert the spring-loaded post on the opposite end of the cover housing into the attachment point on the opposite
side of the vehicle.
Installing Retractable Cargo Area Cover
3
GETTING TO KNOW YOUR VEHICLE 111
Page 114 of 524
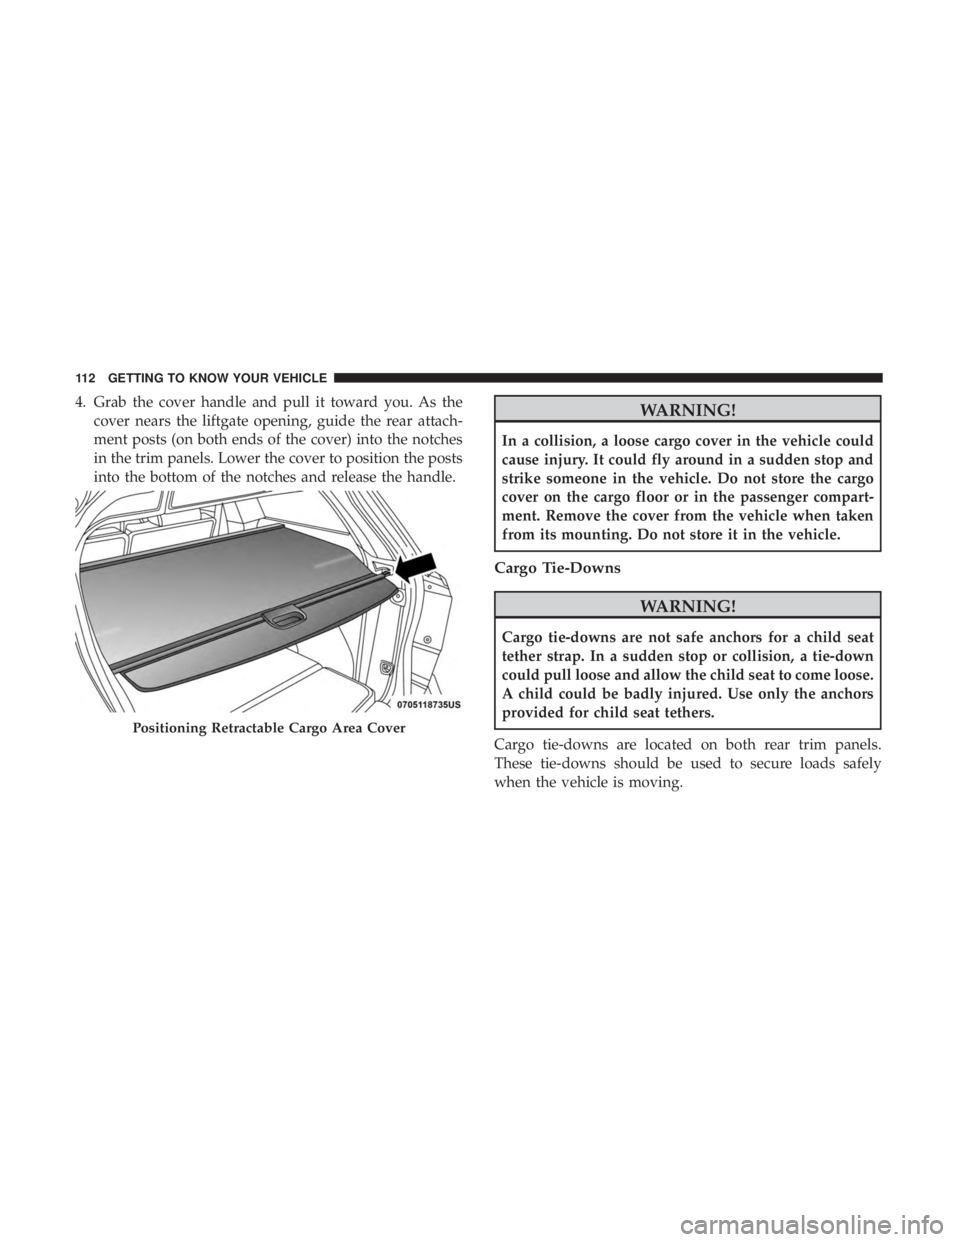
4. Grab the cover handle and pull it toward you. As thecover nears the liftgate opening, guide the rear attach-
ment posts (on both ends of the cover) into the notches
in the trim panels. Lower the cover to position the posts
into the bottom of the notches and release the handle.WARNING!
In a collision, a loose cargo cover in the vehicle could
cause injury. It could fly around in a sudden stop and
strike someone in the vehicle. Do not store the cargo
cover on the cargo floor or in the passenger compart-
ment. Remove the cover from the vehicle when taken
from its mounting. Do not store it in the vehicle.
Cargo Tie-Downs
WARNING!
Cargo tie-downs are not safe anchors for a child seat
tether strap. In a sudden stop or collision, a tie-down
could pull loose and allow the child seat to come loose.
A child could be badly injured. Use only the anchors
provided for child seat tethers.
Cargo tie-downs are located on both rear trim panels.
These tie-downs should be used to secure loads safely
when the vehicle is moving.
Positioning Retractable Cargo Area Cover
112 GETTING TO KNOW YOUR VEHICLE